 Genshin Impact Teams — Patch 6.7
Patch 6.7 — 229 proven team comps with the core carry and the exact reason each pick fits. Auto-updated the moment a new patch lands.
Each comp revolves around one core carry (tap to see their build). A "flex" slot means you swap in a same-role character you own. Comps are ordered by their carry's meta tier.
No matching name.
Alhaitham and Nahida apply Dendro, Furina applies Hydro to create Bloom seeds, and Kuki Shinobu triggers Hyperbloom while keeping the team's HP up.
Core carry: 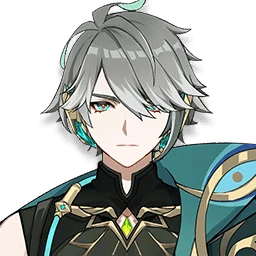 Alhaitham
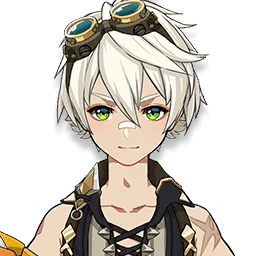
Yelan triggers continuous Vaporize, Bennett buffs ATK, and Kazuha groups enemies and shreds Pyro RES so she can dump damage.
Core carry: 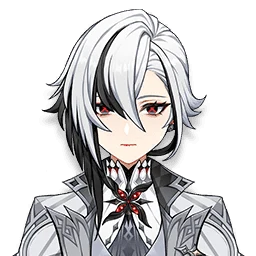 Arlecchino
Bennett and Pyro Resonance push her ATK sky-high, while Zhongli's shield lets her stay on-field and Normal Attack freely.
Core carry: Arlecchino

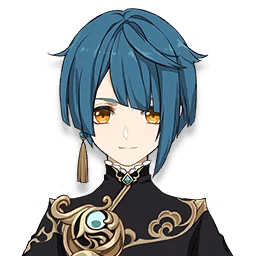
Nahida applies Dendro to enable Aggravate, Fischl continuously applies Electro, and Raiden Shogun with Kazuha buff damage and energy.
Core carry:  Fischl

Furina pushes Neuvillette's damage to new heights, Kazuha groups enemies and shreds RES, and the last slot holds down the sustain role.
Core carry:  Furina
Xingqiu and Yelan keep applying Hydro to trigger Vaporize non-stop, Kazuha groups enemies and shreds Pyro resistance, and the Hydro resonance boosts max HP.
Core carry: 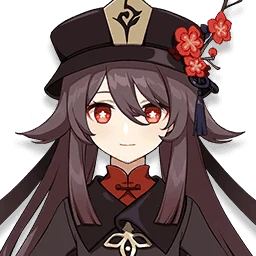 Hu Tao

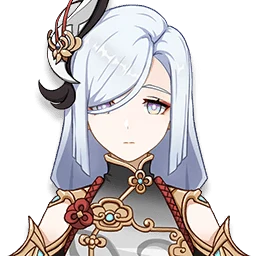
Kazuha groups enemies and shreds Cryo resistance so Ayaka can concentrate her damage, Kokomi keeps enemies frozen, and Shenhe provides a huge Cryo buff.
Core carry: 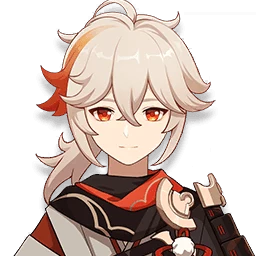 Kaedehara Kazuha
Kazuha groups enemies and shreds Pyro resistance to spike Vaporize damage, Xingqiu applies Hydro, and Zhongli provides a shield.
Core carry: Kaedehara Kazuha
Furina and Yelan push Hydro damage to the max, an Anemo unit groups enemies and shreds resistance, and Ayato maximizes his Normal Attack output.
Core carry: 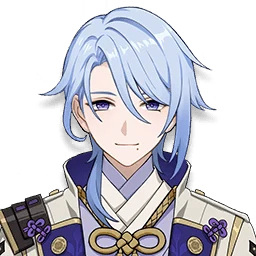 Kamisato Ayato
Ayaka and Ayato both help lock the Freeze, Kazuha shreds resistance, and Kokomi keeps applying Hydro non-stop to keep the team safe.
Core carry: Kamisato Ayato
Lauma buffs Elemental Mastery and shreds RES, Nefer carries the Lunar-Bloom damage, and Kokomi plus Nahida keep steady Hydro and Dendro application.
Core carry:  Lauma
Lauma
Nilou pushes Bloom damage to the max, Lauma and the Dendro Traveler keep applying Dendro, and Kokomi maintains Hydro and healing.
Core carry: Lauma
Lauma buffs EM for the Bloom seeds, Kuki and Fischl trigger Hyperbloom, and Xingqiu keeps thick Hydro application going.
Core carry: Lauma
Nahida and Xingqiu generate Bloom cores rapidly, and Kuki triggers Hyperbloom to dump Electro damage onto enemies.
Core carry:  Nahida

Xiangling and Bennett both buff ATK and create Pyro Crystallize shards, while Kazuha groups enemies and shreds RES for the burst shot.
Core carry:  Navia
Navia
Playable even without Lauma: Nahida supplies Dendro and EM, Aino maintains Hydro, and Kuki clears the Bloom cores.
Core carry: 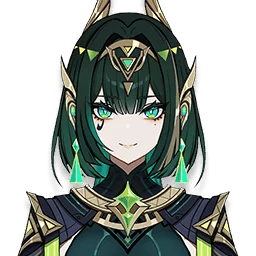 Nefer
Nefer
Furina massively buffs HP and damage, Kazuha groups enemies and shreds RES, and Xilonen also shreds RES while providing a shield.
Core carry: 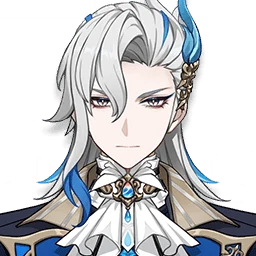 Neuvillette
Furina and Yelan maximize Hydro application and buff damage, and Zhongli's shield prevents interruptions while he channels the water beam.
Core carry: Neuvillette
The classic National team: Raiden batteries energy for the whole team, Xiangling and Xingqiu stack up the damage, and Bennett buffs ATK and heals.
Core carry: 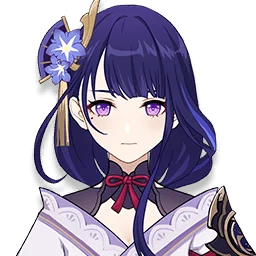 Raiden Shogun
Raiden's Electro Normal Attacks keep triggering Hyperbloom, while Nahida and a Hydro unit create Dendro Cores for it to detonate.
Core carry: Raiden Shogun
Neuvillette carries extra Hydro damage, Skirk throws her Burst as a finisher and swaps out, optimized for quickswap play.
Core carry: 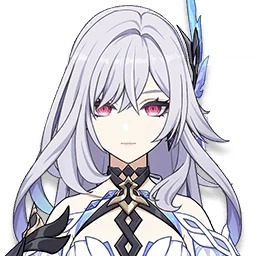 Skirk
Skirk
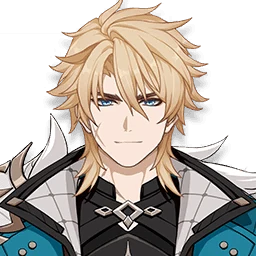

Yelan and Xiangling deal off-field damage, Bennett buffs ATK, and Raiden Shogun recharges Energy for the whole team.
Core carry:  Yelan
Yelan
Zhongli swaps in for Bennett when a hard shield is needed, letting the team stand still and deal damage safely.
Core carry: 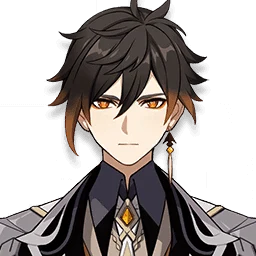 Zhongli

Gorou buffs DEF and Geo damage, Albedo contributes off-field Geo, and Zhongli's shield lets Itto keep swinging uninterrupted.
Core carry:  Arataki Itto
Three Geo characters trigger Geo Resonance, Diona provides both shield and healing, making this a safe comp for newer players to grind deep content.
Core carry: Arataki Itto

Raiden and Xiangling keep triggering Overload nonstop, Bennett buffs ATK, and Chevreuse shreds RES and heals to keep the team standing.
Core carry:  Chevreuse
Citlali and Furina lock in Freeze and shred Hydro RES, while Kazuha groups enemies and shreds RES so Neuvillette can unleash his Hydro damage.
Core carry: 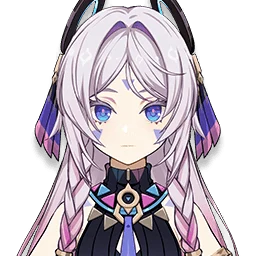 Citlali
Nahida applies Dendro, Fischl feeds Electro, and Kazuha groups enemies while shredding RES so Clorinde can spam Aggravate nonstop.
Core carry: 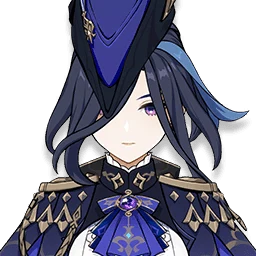 Clorinde
Chevreuse buffs Electro/Pyro damage and shreds RES, while Bennett and Sara push ATK for an explosive Overload team.
Core carry: Clorinde
Chevreuse buffs Pyro and Electro DMG while shredding RES, Raiden Shogun and Fischl keep triggering Overloaded, and Durin spreads Pyro application plus buffs from off-field.
Core carry: 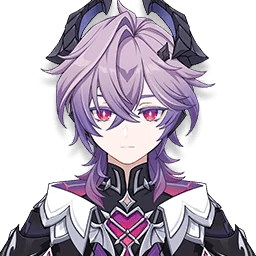 Durin
Durin
Escoffier applies Cryo and shreds RES for Ayaka, Furina amplifies damage, and Shenhe delivers a huge Cryo DMG buff.
Core carry: 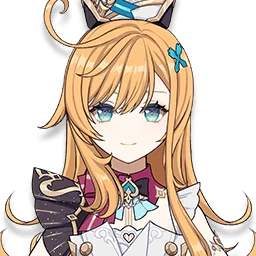 Escoffier
Bennett and Xiangling sustain his Pyro damage, Kazuha groups enemies and shreds RES, and the whole team is simple and easy to play.
Core carry: 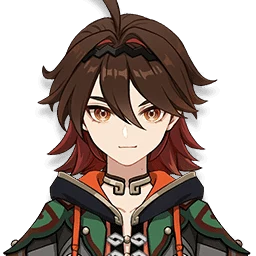 Gaming
Kazuha groups enemies and shreds RES, Kokomi keeps up steady Hydro to hold Freeze, and Shenhe delivers a huge Cryo DMG buff, making for a safe, easy team.
Core carry:  Ganyu
Ganyu
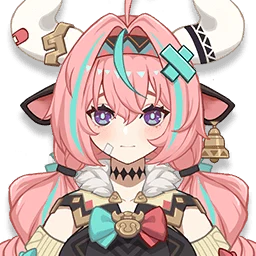
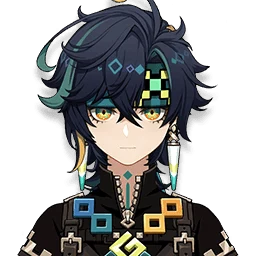
Neuvillette and Furina keep applying Hydro so Ineffa can constantly trigger Lunar-Charged, while Kazuha groups enemies and shreds resistance.
Core carry: 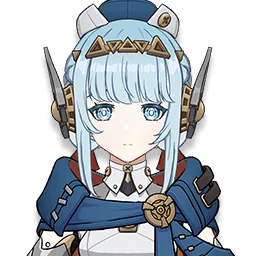 Ineffa
Standing next to Bennett, Jean constantly triggers Vaporize/Melt while healing, Raiden carries the damage, and Xingqiu applies Hydro.
Core carry: 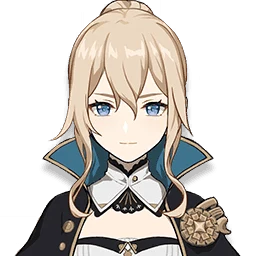 Jean
Jean
Nahida applies thick Dendro, Xingqiu and Yelan keep triggering Bloom, and Kuki detonates rapid Hyperbloom hits.
Core carry: 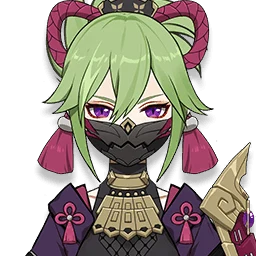 Kuki Shinobu
Alhaitham and Nahida keep Aggravate running, while Kuki adds extra off-field Electro-Charged damage and safe healing.
Core carry: Kuki Shinobu



An all-free-character team: the Dendro Traveler and Yaoyao handle Dendro, while Barbara applies Hydro and heals.
Core carry: 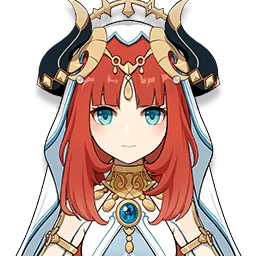 Nilou
Nilou
Neuvillette and Furina keep applying Hydro so Electro-Charged triggers steadily, while Kazuha groups enemies and shreds RES for the whole team.
Core carry:  Ororon
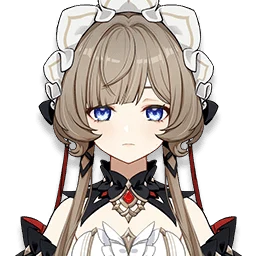
Kokomi generates Dendro Cores steadily, Raiden triggers Hyperbloom fast and hard, and her constant healing keeps everything very safe.
Core carry: 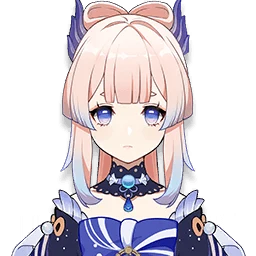 Sangonomiya Kokomi
Xiangling and Bennett pour on Pyro damage for Vaporize, Kazuha groups enemies and shreds RES, and Childe smears Riptide so the whole team detonates it together.
Core carry:  Tartaglia
Fischl and Beidou spread Electro, combining with Childe's Hydro for constant Electro-Charged, while Kazuha groups enemies for maximum Swirl.
Core carry: Tartaglia
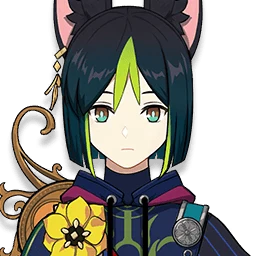

Bennett and Xiangling apply Pyro to trigger Melt and amplify Cryo damage, while Zhongli shields against interruptions.
Core carry:  Wriothesley
Nahida continuously spreads Dendro so Yae triggers Aggravate, Fischl adds off-field Electro damage, and Kazuha groups enemies while shredding RES.
Core carry:  Yae Miko
Raiden Shogun and Kujou Sara charge energy for Yae's Burst, Bennett buffs ATK, and the whole Electro lineup piles on damage.
Core carry: Yae Miko
Aino supplies Hydro and an EM buff for Bloom seeds, Nefer carries the damage, Lauma stacks deep buffs, and Kuki cleans up the Bloom seeds.
Core carry:  Aino
Aino
Aino and Yelan keep Hydro application thick, Nahida feeds Dendro, and Kuki triggers Hyperbloom to clear the seeds.
Core carry: Aino
Geo Resonance boosts damage, Gorou's DEF buff suits both Albedo and Itto perfectly, and the last slot is flexible.
Core carry:  Albedo
Albedo deals damage off-field for free, Bennett and Kazuha handle the buffs, and the main DPS slot is free to swap.
Core carry: Albedo
Baizhu heals while applying Dendro and holding Deepwood Memories, keeping the Hyperbloom team safe while still maxing Dendro RES shred.
Core carry: 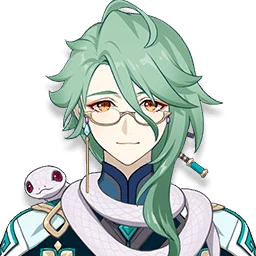 Baizhu
Baizhu supplies Dendro and keeps the team's HP up so Nilou's Bountiful Bloom chain never breaks.
Core carry: Baizhu
Fischl and Beidou apply Electro, Xingqiu applies Hydro to keep Electro-Charged rolling and trigger Beidou's Burst, and Kazuha groups enemies and breaks RES.
Core carry: 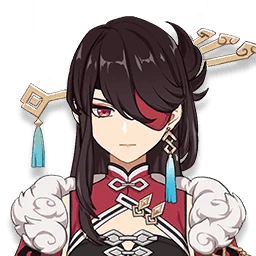 Beidou
Charlotte heals while applying continuous Cryo to sustain Freeze, Xingqiu applies Hydro, and Kazuha groups enemies and shreds RES.
Core carry: 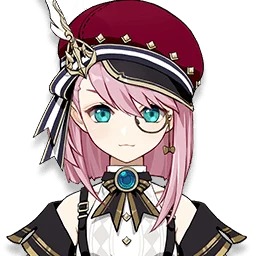 Charlotte
Charlotte heals for the HP-consuming team and applies Cryo for Cryo Resonance, keeping Wriothesley and Furina safe.
Core carry: Charlotte
Gorou and Zhongli sustain the Geo resonance, while Chiori and Itto take turns piling on damage in an extremely sturdy team.
Core carry: 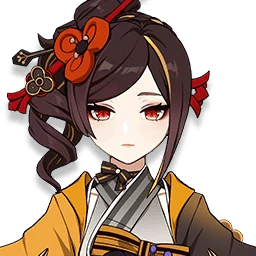 Chiori
Collei keeps Dendro applied and shreds RES, while Fischl and Raiden pour in Electro to keep triggering Aggravate nonstop.
Core carry: 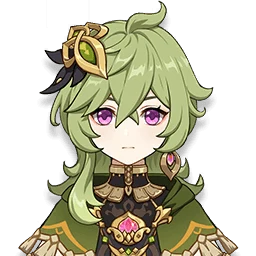 Collei
Collei and Xingqiu seed Bloom, Kuki triggers Hyperbloom, and Collei's Deepwood set boosts the whole team's damage.
Core carry: Collei
Nahida spreads Dendro to sustain Aggravate, Fischl carries extra Electro damage, and Kuki both heals and adds Electro application.
Core carry: 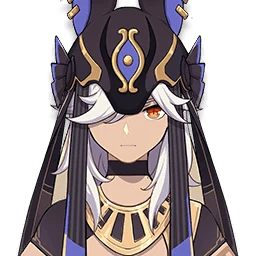 Cyno
Cyno
Xingqiu spreads Hydro to seed Bloom cores, and Kuki triggers Hyperbloom to slam enemies with extra damage.
Core carry: Cyno
Xingqiu applies Hydro so Diluc can trigger Vaporize, Bennett buffs ATK and seeds Pyro, and Kazuha groups enemies while shredding RES.
Core carry: 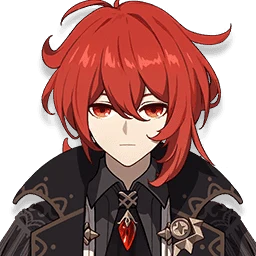 Diluc
Diluc
Diona shields, heals, and applies off-field Cryo all at once, keeping the Freeze team safe and beginner-friendly.
Core carry:  Diona
Diona
Arlecchino keeps triggering Burning, Emilie handles the Dendro cores and piles on off-field damage, Kazuha groups enemies, and Bennett buffs attack.
Core carry: 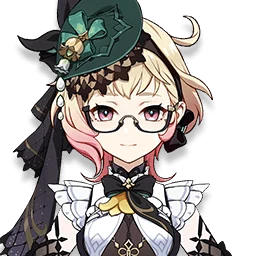 Emilie
Raiden Shogun recharges energy and triggers Superconduct, Rosaria acts as a Cryo battery while buffing crit rate, and Bennett boosts attack.
Core carry:  Eula
Eula

Itto also benefits from the Crystallize EM buff with Illuga and Columbina around, while Gorou adds extra Geo DMG% and RES.
Core carry: 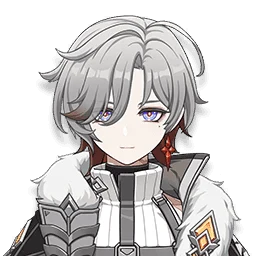 Illuga
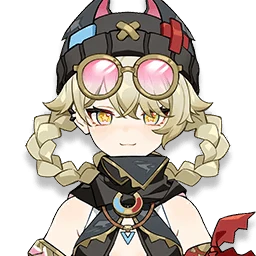
Kirara maintains Dendro application and shields for Nilou's Bloom team, while Kokomi and Baizhu spread Hydro and healing.
Core carry: 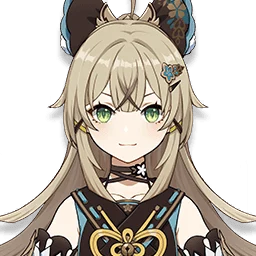 Kirara
Xingqiu applies Hydro so Klee triggers Vaporize, Bennett buffs ATK and heals, and Kazuha groups enemies while shredding Pyro RES.
Core carry:  Klee
Klee
Furina delivers a massive damage buff and activates the Marechaussee Hunter set effect, while Bennett and Kazuha handle attack buffing and enemy grouping.
Core carry: Klee
Sara buffs ATK and helps battery energy for Raiden, Kazuha groups enemies for RES shred, Bennett raises ATK, giving Sara the cleanest rotation to Burst.
Core carry: 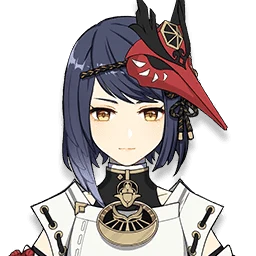 Kujou Sara
Sara boosts ATK for the whole Electro lineup, Yae Miko deals off-field damage, and a flex Dendro unit is added to trigger Aggravate.
Core carry: Kujou Sara
Lan Yan shields and swirls to shred RES so Neuvillette can unload Hydro damage, while Furina multiplies the whole team's damage.
Core carry: 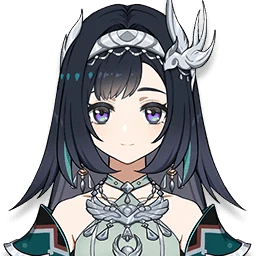 Lan Yan
Lan Yan holds the shield and shreds Anemo RES, Xingqiu spreads Hydro for Arlecchino to trigger Vaporize, and Bennett buffs ATK.
Core carry: Lan Yan
Layla shields while applying Cryo to feed reactions, Shenhe buffs Cryo damage, and Kazuha groups enemies and shreds RES for Ganyu to unload damage.
Core carry: 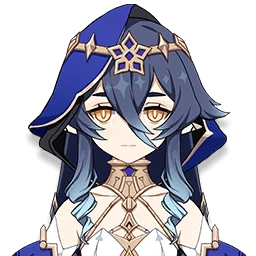 Layla
Layla
Nahida applies Dendro to feed the Aggravate reaction, Fischl adds off-field Electro, and Kazuha groups enemies while shredding RES.
Core carry:  Lisa
Lisa
Xingqiu and Nahida create Bloom, Lisa's Electro plus Kuki keep triggering rapid Hyperbloom, and Lisa also shreds enemy DEF.
Core carry: Lisa
Mona applies Hydro and stamps the Omen debuff to amplify Vaporize damage for the Pyro DPS, while Bennett and Kazuha buff further.
Core carry:  Mona
Mona
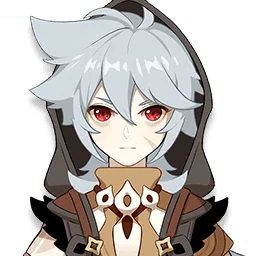
Fischl and Beidou apply Electro off-field, Xingqiu spreads Hydro, and Heizou keeps Swirling to trigger Electro-Charged nonstop.
Core carry: 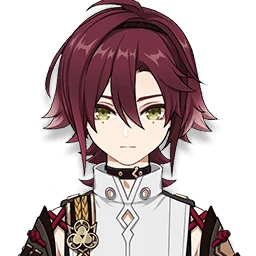 Shikanoin Heizou
Bennett buffs ATK and applies Pyro, Xiangling spreads Pyro off-field, and Heizou groups enemies while Swirling for Overloaded/Vaporize.
Core carry: Shikanoin Heizou
Sigewinne keeps the team's HP topped up so Furina can unleash her buff, while Xiangling and Kazuha handle Vaporize and enemy grouping.
Core carry:  Sigewinne
She heals and buffs the Skill damage for Fischl attacking off-field, keeping the team safely stunlocking foes with Electro-Charged.
Core carry: Sigewinne
The Traveler darts in and out to shred Anemo RES for Xiao to plant and grind out damage, Zhongli provides survivability, and Bennett buffs ATK and heals.
Core carry:  Traveler (Anemo)
The Traveler shreds elemental RES, Xiangling and Xingqiu keep triggering Vaporize, and Bennett heals and buffs the whole team's ATK.
Core carry: Traveler (Anemo)
The Traveler lays down base Dendro and shreds RES, Raiden triggers Quicken to pour on Hyperbloom damage, while Xingqiu and Baizhu both apply Hydro and heal.
Core carry:  Traveler (Dendro)
Nahida strengthens the Bountiful Cores, Kokomi keeps applying Hydro nonstop, and the Traveler joins Nilou to turn Bloom into safe AoE damage.
Core carry: Traveler (Dendro)
The Traveler feeds energy steadily so Childe always has his Burst ready, while Xiangling and Bennett keep triggering Vaporize and buffing ATK.
Core carry:  Traveler (Electro)
The Traveler supplies energy so Yoimiya can keep firing without her Burst running dry, Xingqiu triggers Vaporize and provides a water shield, and Bennett heals and buffs ATK.
Core carry: Traveler (Electro)
The Traveler lands a quick Geo hit then swaps out, Zhongli provides maximum survivability, and Xiangling with Bennett keep the microwave burning nonstop.
Core carry:  Traveler (Geo)
Geo Resonance boosts the whole team's RES and damage, Gorou converts DEF buffs into damage, and Albedo keeps generating Crystallize flowers.
Core carry: Traveler (Geo)
The Traveler stands alongside Mavuika to add extra Pyro damage and Nightsoul support, Kachina clears the terrain, and the last slot is left free for a healer.
Core carry:  Traveler (Pyro)
Kokomi keeps applying Hydro to trigger Vaporize, Kazuha groups enemies and shreds RES, and Bennett both heals and buffs ATK.
Core carry: Traveler (Pyro)
Yaoyao applies Dendro and heals, Fischl supplies Electro, Keqing goes on-field to trigger Aggravate, and Kazuha groups enemies while shredding RES.
Core carry:  Yaoyao
Nahida and double Electro keep triggering Aggravate, while Mizuki Swirls and shreds RES to multiply the damage.
Core carry:  Yumemizuki Mizuki
Furina provides Hydro, double Electro sets off Electro-charged, and Mizuki groups enemies while buffing EM for the whole team.
Core carry: Yumemizuki Mizuki
Ayato chains multi-hit Normal Attacks, while Yun Jin and Furina together push his damage very high.
Core carry:  Yun Jin
Kazuha groups enemies and shreds RES, Kokomi keeps Cryo applied continuously, Shenhe buffs Cryo damage, and Aloy just stands and shoots.
Core carry:  Aloy
Aloy

Candace applies Hydro to spawn Bloom seeds, Nahida provides the Dendro base, and Kuki triggers Hyperbloom to dump damage.
Core carry:  Candace
Chongyun converts Eula's melee hits into Cryo damage and shreds RES, Raiden supplies energy, and the last slot flexibly covers a shield or healing.
Core carry:  Chongyun
Chongyun seeds Cryo for the resonance and shreds RES for the Freeze team, Kokomi keeps Hydro applied to lock in Freeze, and Kazuha groups enemies.
Core carry: Chongyun
Nahida and Fischl keep triggering Burgeon, Kokomi supplies Hydro to feed the seeds, and Dehya both boosts the explosion damage and tanks hits for the team.
Core carry:  Dehya
Dehya
Dehya holds the field and soaks hits so Neuvillette can fire freely, while Furina and Kazuha handle the damage buffs.
Core carry: Dehya
A Mono Electro team burns through energy fast, so Dori refuels Raiden Shogun's energy and keeps the team alive.
Core carry:  Dori
Dori
Xingqiu applies Hydro to lock enemies into Freeze, Charlotte refreshes Cryo while healing, and Kazuha groups enemies and shreds RES.
Core carry:  Freminet
Furina delivers a big damage buff, Charlotte heals to keep the team safe through HP swings, and Kazuha groups enemies and shreds RES.
Core carry: Freminet
A Mono Geo team: Gorou and Albedo buff Geo damage, Itto serves as the main DPS, and Kachina contributes energy particles plus cheap baseline damage.
Core carry:  Kachina
Ayaka acts as the main Cryo DPS, Kaeya and Shenhe apply Cryo and buffs, and Kokomi keeps enemies wet to sustain the Freeze.
Core carry:  Kaeya
Kaeya
Bennett lays down a Pyro base, Kaeya applies Cryo to trigger big Reverse Melt damage, and Rosaria and Kazuha add extra buffs.
Core carry: Kaeya
Kaveh detonates his own Dendro Cores, while the other three keep applying Hydro and Dendro non-stop to keep the Bloom chain going.
Core carry:  Kaveh
Kaveh
Lynette groups enemies and shreds Cryo RES with Viridescent Venerer, significantly amplifying damage for Kamisato Ayaka's Freeze team.
Core carry:  Lynette


Mika heals and boosts Eula's Normal Attack speed and Physical DMG, Raiden Shogun supplies Energy, and Bennett buffs ATK.
Core carry:  Mika
Mika
Wriothesley's rapid Normal Attacks benefit greatly from Mika's Attack Speed buff, while Furina and Kazuha handle extra buffs and healing.
Core carry: Mika
Qiqi both heals and provides the Cryo Resonance, Kazuha groups enemies and shreds RES, and the last slot takes a Hydro unit to lock in Freeze.
Core carry:  Qiqi
Qiqi
Bennett provides the Pyro infusion for Reverse-Melt and buffs ATK, Kazuha groups enemies and shreds RES, and Shenhe strongly boosts Cryo damage.
Core carry: 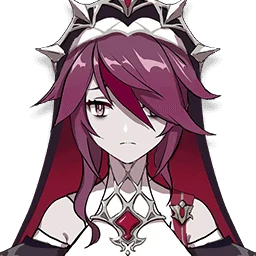 Rosaria
Rosaria applies Cryo off-field and buffs CRIT Rate for Ayaka, Kokomi keeps reapplying Hydro to sustain Freeze, and Kazuha groups enemies.
Core carry: Rosaria
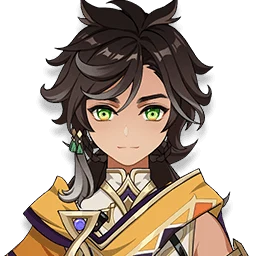
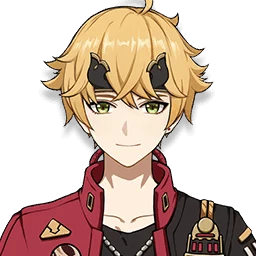
The Traveler keeps applying Hydro to trigger Bloom with Nilou, Nahida strengthens the Bountiful Cores, and Baizhu heals without interrupting the flow.
Core carry: 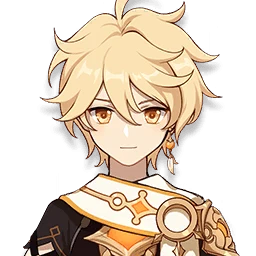 Traveler (Hydro)
The Traveler applies Hydro so Xiangling keeps triggering Vaporize, Furina stacks up Salon Solitaire fervor, and Bennett heals and buffs ATK.
Core carry: Traveler (Hydro)
Reflects patch 6.7 (2026-07-06) — the meta store re-ranks every patch, never edited by hand.
Teams by reaction — 207 comps across 19 reactions
Other sites hand-write each comp, so they only manage a few dozen — and every new character means rewriting hundreds of lines by hand. We compute all of it: which resonance each comp turns on (using the developer's own numbers), who you can swap into each slot, and whether a free-to-play player can actually build it.
Albedo
Three Geo characters trigger Geo Resonance, Diona provides both shield and healing, making this a safe comp for newer players to grind deep content.
Bennett and Pyro Resonance push her ATK sky-high, while Zhongli's shield lets her stay on-field and Normal Attack freely.
Fischl and Beidou apply Electro, Xingqiu applies Hydro to keep Electro-Charged rolling and trigger Beidou's Burst, and Kazuha groups enemies and breaks RES.
Candace boosts Normal Attack DMG for Wanderer, Faruzan shreds Anemo RES, and Bennett buffs ATK and heals.
Charlotte heals for the HP-consuming team and applies Cryo for Cryo Resonance, keeping Wriothesley and Furina safe.
Dahlia covers the shield and speeds up Yoimiya's Normal Attacks, while Bennett and Yelan handle damage and healing.
Dehya holds the field and soaks hits so Neuvillette can fire freely, while Furina and Kazuha handle the damage buffs.
Xianyun massively buffs plunge attacks, while Bennett and Furina stack ATK and damage so each plunge hits explosively.
Escoffier shreds Cryo and Hydro RES while healing, and Furina with Yelan supply Hydro and boost damage for Skirk to carry as main DPS.
Faruzan shreds Anemo RES for Xiao, Xianyun boosts plunge damage, and Furina buffs damage while healing to keep Xiao alive.
Furina delivers a big damage buff, Charlotte heals to keep the team safe through HP swings, and Kazuha groups enemies and shreds RES.
Xingqiu and Yelan keep applying Hydro to trigger Vaporize non-stop, Kazuha groups enemies and shreds Pyro resistance, and the Hydro resonance boosts max HP.
 Iansan
Xianyun and Iansan give Varesa's plunge attacks a huge buff, while Furina applies Hydro and amplifies overall damage.
Iansan
Iansan and Furina heavily buff Skill damage, Ineffa carries the damage output, and Ifa heals while shredding resistance.
Itto also benefits from the Crystallize EM buff with Illuga and Columbina around, while Gorou adds extra Geo DMG% and RES.
Standing next to Bennett, Jean constantly triggers Vaporize/Melt while healing, Raiden carries the damage, and Xingqiu applies Hydro.
Kachina provides energy and resistance shred, Navia deals concentrated Geo damage, Xilonen shreds even more resistance, and Furina heals while boosting damage.
Wriothesley's rapid Normal Attacks benefit greatly from Mika's Attack Speed buff, while Furina and Kazuha handle extra buffs and healing.
Playable even without Lauma: Nahida supplies Dendro and EM, Aino maintains Hydro, and Kuki clears the Bloom cores.
Furina massively buffs HP and damage, Kazuha groups enemies and shreds RES, and Xilonen also shreds RES while providing a shield.
Furina and Yelan maximize Hydro application and buff damage, and Zhongli's shield prevents interruptions while he channels the water beam.
Varka pours out extremely strong Pyro damage, Prune shreds RES with wind swirls, and Durin adds further buffs and elemental RES shred for the team.
Yun Jin and Gorou each buff Geo damage in their own way, while Zhongli shreds RES and holds a shield so the team can attack safely.
Razor deals steady Physical damage, Fischl keeps applying Electro persistently, Chevreuse raises Electro-Charged CRIT Rate, and Prune groups enemies and shreds RES for free.
An all-4-star team: Sucrose groups enemies and raises Elemental Mastery, Kirara provides a Dendro shield, keeping things budget-friendly for beginners.
Fischl and Beidou apply Electro off-field, Xingqiu spreads Hydro, and Heizou keeps Swirling to trigger Electro-Charged nonstop.
She heals and buffs the Skill damage for Fischl attacking off-field, keeping the team safely stunlocking foes with Electro-Charged.
Neuvillette carries extra Hydro damage, Skirk throws her Burst as a finisher and swaps out, optimized for quickswap play.
Fischl and Beidou spread Electro, combining with Childe's Hydro for constant Electro-Charged, while Kazuha groups enemies for maximum Swirl.
Traveler (Geo)
The Traveler lands a quick Geo hit then swaps out, Zhongli provides maximum survivability, and Xiangling with Bennett keep the microwave burning nonstop.
Venti groups enemies and adds Anemo, while Bennett and Durin share Pyro so Varka infuses Pyro for massive burst damage.
Swap Furina for Zhongli to get a rock-solid shield plus RES shred, playing more safely while forcing melee attacks.
Furina delivers a massive damage boost, Kazuha groups enemies and shreds RES, and Charlotte heals to keep the HP-swap playstyle safe.
Faruzan shreds Anemo RES and buffs damage, Jean groups enemies while healing, and Bennett delivers a massive ATK boost.
Zhongli sets up a shield so Xiao can plunge freely without fear of interruption, while Faruzan and Bennett handle the buffs.
Xilonen shreds Hydro RES and heals, Citlali adds another buff, and Bennett lays down a Pyro base for Mualani's Vaporize.
Xilonen shreds Dendro RES and heals, Xiangling maintains the Pyro base, and Furina boosts damage to help Kinich unload.
Xinyan only needs her Skill leveled to shield Hu Tao so she can attack without interruption, while Xingqiu and Zhongli handle Vaporize and survivability.
Kujou Sara
Raiden Shogun and Kujou Sara charge energy for Yae's Burst, Bennett buffs ATK, and the whole Electro lineup piles on damage.
Yoimiya machine-guns Normal Attacks to fully benefit from Yun Jin's buff, Yelan adds damage, and Zhongli shields against interruption.
Zhongli shields and shreds RES, Illuga grants a massive EM buff, and Columbina applies Hydro to unlock Lunar-Crystallize for Zibai.
Gorou adds Geo DMG% and RES shred, and together with Illuga pushes Zibai's Crystallize damage to its peak.
Gorou buffs DEF and Geo damage, Albedo contributes off-field Geo, and Zhongli's shield lets Itto keep swinging uninterrupted.
Gorou and Zhongli sustain the Geo resonance, while Chiori and Itto take turns piling on damage in an extremely sturdy team.
A Mono Electro team burns through energy fast, so Dori refuels Raiden Shogun's energy and keeps the team alive.
Faruzan and Yun Jin stack buffs together, Bennett boosts attack and heals, and everything is funneled into Wanderer's normal attacks.
Bennett and Xiangling sustain his Pyro damage, Kazuha groups enemies and shreds RES, and the whole team is simple and easy to play.
Gorou buffs DEF and Geo DMG to power up Itto, Albedo adds off-field Geo damage, and Zhongli's shield keeps the combo uninterrupted.
A Mono Geo team: Gorou and Albedo buff Geo damage, Itto serves as the main DPS, and Kachina contributes energy particles plus cheap baseline damage.
Mona locks enemies in Freeze and boosts damage, Diona provides both a shield and energy regen, making this a safe team for newer players.
Sara buffs ATK and helps battery energy for Raiden, Kazuha groups enemies for RES shred, Bennett raises ATK, giving Sara the cleanest rotation to Burst.
Layla shields while applying Cryo to feed reactions, Shenhe buffs Cryo damage, and Kazuha groups enemies and shreds RES for Ganyu to unload damage.
Illuga and Linnea stack maximum Geo buffs for Zibai, while Columbina stands in the middle to keep triggering the Lunar reaction.
Bennett buffs ATK, Xiangling keeps Pyro application going off-field, and Zhongli's shield keeps Lyney alive so he can fire freely.
Mika heals and boosts Eula's Normal Attack speed and Physical DMG, Raiden Shogun supplies Energy, and Bennett buffs ATK.
Venti groups enemies over a huge range, Faruzan adds extra Anemo damage, Durin buffs Pyro, and Nicole shields the team while boosting its ATK.
The Geo Resonance boosts damage and shreds RES, Albedo and Zhongli add off-field Geo damage, and Bennett buffs ATK.
Gorou and Albedo stack Geo Resonance to raise DEF and damage, Zhongli shreds RES, and Noelle stays on-field carrying the team alone.
The classic National team: Raiden batteries energy for the whole team, Xiangling and Xingqiu stack up the damage, and Bennett buffs ATK and heals.
Xiangling and Bennett pour on Pyro damage for Vaporize, Kazuha groups enemies and shreds RES, and Childe smears Riptide so the whole team detonates it together.
The Traveler darts in and out to shred Anemo RES for Xiao to plant and grind out damage, Zhongli provides survivability, and Bennett buffs ATK and heals.
The Traveler feeds energy steadily so Childe always has his Burst ready, while Xiangling and Bennett keep triggering Vaporize and buffing ATK.
Geo Resonance boosts the whole team's RES and damage, Gorou converts DEF buffs into damage, and Albedo keeps generating Crystallize flowers.
Xianyun and Iansan massively buff plunging attacks, while Furina applies Hydro and amplifies the whole team's damage.
Faruzan shreds Anemo RES and buffs damage, Bennett raises ATK, and Furina adds another damage buff plus healing — everything funnels into Wanderer.
Childe applies Hydro across the field, Xiangling and Bennett stack Vaporize damage, and Kazuha groups enemies while boosting Pyro DMG.
Raiden Shogun charges energy for Xiangling to burst nonstop, Xingqiu applies Hydro for Vaporize, and Bennett boosts ATK plus healing.
Xingqiu applies Hydro for Xiangling's Vaporize, Raiden Shogun handles the energy, and Bennett buffs ATK plus healing.
Yelan and Xiangling deal off-field damage, Bennett buffs ATK, and Raiden Shogun recharges Energy for the whole team.
Zhongli swaps in for Bennett when a hard shield is needed, letting the team stand still and deal damage safely.
Yelan triggers continuous Vaporize, Bennett buffs ATK, and Kazuha groups enemies and shreds Pyro RES so she can dump damage.
Barbara plays Hydro DPS, triggering Vaporize with Bennett and Xiangling's fire, while Zhongli shields and shreds RES.
Furina and Bennett both buff damage and heal, while Ororon applies Electro so Chasca can trigger Vaporize and Overload back to back.
Xingqiu applies Hydro so Diluc can trigger Vaporize, Bennett buffs ATK and seeds Pyro, and Kazuha groups enemies while shredding RES.
Furina and Bennett provide massive damage buffs, Xilonen shreds RES and groups enemies, and Durin's Dark form piles on Vaporize damage.
Furina buffs damage and heals, Xianyun boosts plunge damage, and Yelan triggers Vaporize for Hu Tao.
Furina and Bennett provide heavy buffs, Xianyun boosts plunge damage while healing, and Furina's Hydro triggers Vaporize with Gaming/Bennett's Pyro.
Kazuha groups enemies and shreds Pyro resistance to spike Vaporize damage, Xingqiu applies Hydro, and Zhongli provides a shield.
Xingqiu applies Hydro so Klee triggers Vaporize, Bennett buffs ATK and heals, and Kazuha groups enemies while shredding Pyro RES.
Furina delivers a massive damage buff and activates the Marechaussee Hunter set effect, while Bennett and Kazuha handle attack buffing and enemy grouping.
Lan Yan holds the shield and shreds Anemo RES, Xingqiu spreads Hydro for Arlecchino to trigger Vaporize, and Bennett buffs ATK.
Layla's shield keeps Hu Tao safely on-field, her Cryo triggers Melt when needed, and Yelan and Xingqiu handle the Hydro side.
Yelan applies Hydro to trigger Vaporize for bonus damage, Bennett buffs ATK, and Zhongli's shield prevents interruptions.
Xingqiu continuously applies Hydro to trigger Vaporize, Bennett heals and buffs ATK, and Sucrose groups enemies while boosting Elemental Mastery.
Xingqiu continuously applies Hydro to trigger Vaporize, Bennett heals and buffs ATK, and Sucrose groups enemies while boosting Elemental Mastery.
Furina spreads Hydro and amplifies Vaporize damage, Xilonen shreds RES, and Bennett buffs ATK while healing.
Xiangling and Bennett lay down the Pyro base for Vaporize, Bennett also buffs ATK, and Xilonen shreds Hydro RES while healing.
Citlali shreds RES and buffs Hydro damage, Bennett provides the Pyro base for Vaporize, and Furina boosts damage while healing the whole team.
Bennett grants Pyro infusion and ATK, Chasca serves as the main Vaporize DPS, and Ororon adds off-field Electro damage as a base.
Varka carries the main damage, Durin shreds Pyro RES, Nicole shields and buffs ATK, while Prune stands in the middle shredding RES through Swirl.
Sigewinne keeps the team's HP topped up so Furina can unleash her buff, while Xiangling and Kazuha handle Vaporize and enemy grouping.
The Traveler shreds elemental RES, Xiangling and Xingqiu keep triggering Vaporize, and Bennett heals and buffs the whole team's ATK.
The Traveler supplies energy so Yoimiya can keep firing without her Burst running dry, Xingqiu triggers Vaporize and provides a water shield, and Bennett heals and buffs ATK.
The Traveler applies Hydro so Xiangling keeps triggering Vaporize, Furina stacks up Salon Solitaire fervor, and Bennett heals and buffs ATK.
Kokomi keeps applying Hydro to trigger Vaporize, Kazuha groups enemies and shreds RES, and Bennett both heals and buffs ATK.
Xianyun boosts plunging attacks and heals, Furina brings a massive buff, Bennett feeds ATK, and Gaming stacks Vaporize damage.
Xingqiu and Yelan blanket the field with Hydro so Hu Tao keeps triggering Vaporize, while Zhongli's shield protects her HP.
Xingqiu applies Hydro for Vaporize, Bennett buffs ATK and provides a Pyro base, and Fischl adds off-field Electro damage.
Kazuha groups enemies and shreds RES, Kokomi keeps Cryo applied continuously, Shenhe buffs Cryo damage, and Aloy just stands and shoots.
Charlotte heals while applying continuous Cryo to sustain Freeze, Xingqiu applies Hydro, and Kazuha groups enemies and shreds RES.
Chiori just needs a quick on-field Skill press before handing the field to Ganyu, while Zhongli shields and shreds Geo RES.
Chongyun seeds Cryo for the resonance and shreds RES for the Freeze team, Kokomi keeps Hydro applied to lock in Freeze, and Kazuha groups enemies.
Citlali and Furina lock in Freeze and shred Hydro RES, while Kazuha groups enemies and shreds RES so Neuvillette can unleash his Hydro damage.
 Dahlia
The Cryo-Hydro team fully stacks Dahlia's Grace, giving the party a durable shield and an ATK buff.
Diona shields, heals, and applies off-field Cryo all at once, keeping the Freeze team safe and beginner-friendly.
Escoffier applies Cryo and shreds RES for Ayaka, Furina amplifies damage, and Shenhe delivers a huge Cryo DMG buff.
Xingqiu applies Hydro to lock enemies into Freeze, Charlotte refreshes Cryo while healing, and Kazuha groups enemies and shreds RES.
Kazuha groups enemies and shreds RES, Kokomi keeps up steady Hydro to hold Freeze, and Shenhe delivers a huge Cryo DMG buff, making for a safe, easy team.
Kazuha groups enemies and shreds Cryo resistance so Ayaka can concentrate her damage, Kokomi keeps enemies frozen, and Shenhe provides a huge Cryo buff.
Ayaka acts as the main Cryo DPS, Kaeya and Shenhe apply Cryo and buffs, and Kokomi keeps enemies wet to sustain the Freeze.
Ayaka and Ayato both help lock the Freeze, Kazuha shreds resistance, and Kokomi keeps applying Hydro non-stop to keep the team safe.
Escoffier and Mona keep applying Cryo continuously, and Furina adds DMG%, making for a safer playstyle for newer players.
Lynette groups enemies and shreds Cryo RES with Viridescent Venerer, significantly amplifying damage for Kamisato Ayaka's Freeze team.
Rosaria applies Cryo off-field and buffs CRIT Rate for Ayaka, Kokomi keeps reapplying Hydro to sustain Freeze, and Kazuha groups enemies.
Kokomi endlessly applies Hydro to keep Freeze going, Kazuha groups enemies, and Shenhe buffs Cryo damage for Ayaka.
Shenhe stamps Icy Quill and shreds RES for Ganyu's Cryo arrows, Kazuha groups enemies, and Kokomi sustains Freeze.
Shenhe directly buffs Cryo damage for Ayaka, while Kokomi and Kazuha keep locking in Freeze very safely.
Furina and Escoffier both apply Hydro and buff, Shenhe amplifies Cryo damage, keeping enemies frozen so Skirk can open Void Rifts.
Nahida pumps Dendro and Elemental Mastery, Yae Miko applies Electro to trigger Aggravate, and Zhongli shields while shredding RES so Alhaitham can dump damage.
Nahida and Fischl lay down the elemental base, Beidou's lightning strikes trigger Electro-Charged for extra damage, and Bennett raises ATK and heals.
Nahida applies Dendro, Fischl feeds Electro, and Kazuha groups enemies while shredding RES so Clorinde can spam Aggravate nonstop.
Nahida spreads Dendro to sustain Aggravate, Fischl carries extra Electro damage, and Kuki both heals and adds Electro application.
Nahida applies Dendro to enable Aggravate, Fischl continuously applies Electro, and Raiden Shogun with Kazuha buff damage and energy.
Kirara shields while keeping off-field Dendro application for a Spread/Aggravate Electro-Dendro team.
Nahida applies Dendro to feed the Aggravate reaction, Fischl adds off-field Electro, and Kazuha groups enemies while shredding RES.
Nahida sustains the Dendro base, Keqing and Fischl carry the Aggravate damage, and Zhongli's shield keeps things safe.
Nahida and Fischl spread Dendro application, Razor triggers Aggravate to boost Electro damage, and Zhongli's shield lets him attack safely.
Nahida applies Dendro over a wide area, Fischl sustains off-field Electro, Sethos bursts to fire off repeated Aggravate shots, and Zhongli shields the team.
Sucrose groups enemies and shreds RES, pushing Keqing's Aggravate damage higher while still sharing her Elemental Mastery.
Nahida keeps applying Dendro, Fischl provides Electro for Spread, and Zhongli's shield lets Tighnari fire charged shots worry-free.
Nahida and Fischl apply Quicken, Venti swirls Electro to shred RES and group enemies, while Keqing piles on Aggravate damage.
Nahida continuously spreads Dendro so Yae triggers Aggravate, Fischl adds off-field Electro damage, and Kazuha groups enemies while shredding RES.
Yaoyao applies Dendro and heals, Fischl supplies Electro, Keqing goes on-field to trigger Aggravate, and Kazuha groups enemies while shredding RES.
Nahida and double Electro keep triggering Aggravate, while Mizuki Swirls and shreds RES to multiply the damage.
Baizhu supplies Dendro and keeps the team's HP up so Nilou's Bountiful Bloom chain never breaks.
Nilou boosts Bloom damage, Nahida applies Dendro, and Barbara and Xingqiu keep the team constantly wet to spawn seeds and heal.
Xingqiu spreads Hydro to seed Bloom cores, and Kuki triggers Hyperbloom to slam enemies with extra damage.
Nilou turns regular Dendro Cores into huge Bountiful Bloom damage, Nahida and Xingqiu spread Dendro and Hydro to feed the cores, while Kaveh detonates them.
Kaveh detonates his own Dendro Cores, while the other three keep applying Hydro and Dendro non-stop to keep the Bloom chain going.
Kirara maintains Dendro application and shields for Nilou's Bloom team, while Kokomi and Baizhu spread Hydro and healing.
Nilou pushes Bloom damage to the max, Lauma and the Dendro Traveler keep applying Dendro, and Kokomi maintains Hydro and healing.
Kokomi spreads Hydro and heals through Bloom's self-damage, Nahida sustains the Dendro, and Lauma buffs Nefer to her ceiling.
Nahida provides a thick Dendro base, Kokomi both applies Hydro and heals, and Baizhu shields and heals to absorb Bloom's self-inflicted damage.
An all-free-character team: the Dendro Traveler and Yaoyao handle Dendro, while Barbara applies Hydro and heals.
Nahida strengthens the Bountiful Cores, Kokomi keeps applying Hydro nonstop, and the Traveler joins Nilou to turn Bloom into safe AoE damage.
The Traveler keeps applying Hydro to trigger Bloom with Nilou, Nahida strengthens the Bountiful Cores, and Baizhu heals without interrupting the flow.
 Sucrose
Xiangling and Bennett lay down the Pyro base, Sucrose groups enemies and buffs EM, and Aloy shoots Cryo for reverse Melt.
Rosaria applies Cryo so Amber can trigger Melt, Bennett raises ATK, and Zhongli's shield keeps her charged-shot rhythm safe.
Citlali applies Cryo so Mavuika can trigger Melt, shreds Pyro RES and buffs damage, while Bennett and Xilonen handle ATK, healing and extra RES shred.
Rosaria applies Cryo to trigger Melt, Bennett buffs ATK and keeps Pyro up, and Sucrose groups enemies while shredding RES.
Xiangling and Bennett supply Pyro so every arrow triggers Melt, and Zhongli's shield lets Ganyu stand still and fire charged shots safely.
Bennett lays down a Pyro base, Kaeya applies Cryo to trigger big Reverse Melt damage, and Rosaria and Kazuha add extra buffs.
Durin and Citlali keep applying Pyro so Lohen triggers Melt on every hit, while Nicole helps shield and buffs the whole team.
Citlali spreads Cryo off-field so Mavuika can trigger Melt, Xilonen shreds RES and heals, and Bennett buffs ATK while sustaining Pyro.
Bennett provides the Pyro infusion for Reverse-Melt and buffs ATK, Kazuha groups enemies and shreds RES, and Shenhe strongly boosts Cryo damage.
Aino and Yelan keep Hydro application thick, Nahida feeds Dendro, and Kuki triggers Hyperbloom to clear the seeds.
Alhaitham and Nahida apply Dendro, Furina applies Hydro to create Bloom seeds, and Kuki Shinobu triggers Hyperbloom while keeping the team's HP up.
Baizhu heals while applying Dendro and holding Deepwood Memories, keeping the Hyperbloom team safe while still maxing Dendro RES shred.
Columbina/Flins seed Dendro-Hydro to create Dendro Cores, while Ineffa and Sucrose pump Electro and group enemies so the cores detonate into huge Hyperbloom damage.
Nahida applies thick Dendro, Xingqiu and Yelan keep triggering Bloom, and Kuki detonates rapid Hyperbloom hits.
Lauma buffs EM for the Bloom seeds, Kuki and Fischl trigger Hyperbloom, and Xingqiu keeps thick Hydro application going.
Xingqiu and Nahida create Bloom, Lisa's Electro plus Kuki keep triggering rapid Hyperbloom, and Lisa also shreds enemy DEF.
The Traveler lays down base Dendro and shreds RES, Raiden triggers Quicken to pour on Hyperbloom damage, while Xingqiu and Baizhu both apply Hydro and heal.
Yaoyao and Yelan seed Bloom cores, Fischl triggers Hyperbloom for concentrated Electro damage, and Sucrose groups enemies while boosting Elemental Mastery.
Aino lays down the Hydro base, Flins carries the Electro damage, Fischl keeps Electro applied off-field, and Sucrose buffs EM while shredding RES.
Ineffa and Columbina maintain Hydro and Electro application to keep triggering Lunar-Charged, and Sucrose groups enemies while shredding RES.
Fischl applies Electro from off-field, Columbina keeps up Hydro, and Sucrose buffs Elemental Mastery while pulling enemies into range.
Aino applies Hydro and buffs Elemental Mastery, Iansan restores energy and boosts damage, and Sucrose groups enemies.
Neuvillette and Furina keep applying Hydro so Ineffa can constantly trigger Lunar-Charged, while Kazuha groups enemies and shreds resistance.
Flins/Aino continuously apply Hydro-Cryo, while Ineffa and Jahoda maintain Electro application and healing to keep the Lunar-Charged loop running smoothly.
Raiden and Xiangling keep triggering Overload nonstop, Bennett buffs ATK, and Chevreuse shreds RES and heals to keep the team standing.
Chevreuse buffs Electro/Pyro damage and shreds RES, while Bennett and Sara push ATK for an explosive Overload team.
Chevreuse buffs Pyro and Electro DMG while shredding RES, Raiden Shogun and Fischl keep triggering Overloaded, and Durin spreads Pyro application plus buffs from off-field.
Chevreuse buffs the Electro-Pyro team and shreds RES via Overload, Mavuika adds extra damage, and Iansan carries the ATK buff.
Fischl and Beidou repeatedly trigger Overload, Zhongli's shield keeps the rotation safe, and Yanfei freely unloads charged attacks.
Aino supplies Hydro and an EM buff for Bloom seeds, Nefer carries the damage, Lauma stacks deep buffs, and Kuki cleans up the Bloom seeds.
Nahida amplifies the reaction, while Lauma and Nefer provide elemental support so Lunar-Bloom keeps exploding around Columbina.
Nefer/Lauma create the Lunar-Bloom reaction, Jahoda both heals and raises the Moonsign level, and Nilou multiplies Bloom damage.
Lauma buffs Elemental Mastery and shreds RES, Nefer carries the Lunar-Bloom damage, and Kokomi plus Nahida keep steady Hydro and Dendro application.
Aino and Kuki maintain the Hydro base, Lauma deeply buffs EM and shreds RES, and Nefer pours out all the Lunar-Bloom damage.
Tartaglia and Xingqiu keep up Hydro application, Yae Miko piles on Electro damage, and Dori both heals and recharges energy for the whole energy-hungry team.
Furina applies Hydro, Ororon applies Electro to trigger Electro-Charged, Ifa swirls elements to shred resistance and heal, and Sayu adds extra Anemo application.
Fischl and Beidou battery Electro from off-field, Bennett buffs ATK, and Keqing is free to dash and slash on-field.
Neuvillette
Neuvillette and Furina keep applying Hydro so Electro-Charged triggers steadily, while Kazuha groups enemies and shreds RES for the whole team.
Furina provides Hydro, double Electro sets off Electro-charged, and Mizuki groups enemies while buffing EM for the whole team.
Arlecchino keeps triggering Burning, Emilie handles the Dendro cores and piles on off-field damage, Kazuha groups enemies, and Bennett buffs attack.
Hu Tao serves as the main Pyro DPS, Emilie maintains the Burning field, Yelan boosts damage, and Xilonen shreds RES while healing.
Xiangling holds down the Pyro base to trigger Burning, Furina boosts damage and heals, and Xilonen shreds Dendro RES while healing the whole team.
Emilie keeps an extremely stable Burning base going, Bennett buffs ATK while igniting Pyro, and Xilonen's RES shred lets Kinich pierce through armor.
Raiden Shogun recharges energy and triggers Superconduct, Rosaria acts as a Cryo battery while buffing crit rate, and Bennett boosts attack.
Rosaria and Fischl trigger Superconduct to shred Physical RES, Bennett raises ATK and heals, letting Razor attack freely.
Fischl summons her bird for steady off-field Electro without staying on-field, Diona both shields and heals, and Nicole further buffs Sandrone's ATK.
Switch the Traveler to Anemo so Manekin can Swirl Electro, Hydro, and Pyro into chained reactions; a cheap, easy-to-build team.
Switch the Traveler to Anemo so Manekina can Swirl Electro, Hydro, and Pyro into chained reactions; a cheap, easy-to-build team.
Sayu swirls Pyro and Hydro to spread reactions and shred RES, while her healing keeps Klee safe and alive.
Bennett buffs ATK and applies Pyro, Xiangling spreads Pyro off-field, and Heizou groups enemies while Swirling for Overloaded/Vaporize.
Columbina applies Hydro, Illuga buffs Elemental Mastery for Zibai, and Zhongli shields and shreds RES so the Lunar-Crystallize combo hits maximum damage.
Navia unloads massive Geo damage, Columbina unlocks the Lunar reaction, and Furina helps shield and boosts damage for the whole team.
Nahida and Fischl keep triggering Burgeon, Kokomi supplies Hydro to feed the seeds, and Dehya both boosts the explosion damage and tanks hits for the team.
Illuga pumps Elemental Mastery into Zibai's Crystallize combo, Columbina applies Hydro to unlock the reaction, and Zhongli provides survivability and resistance shred.
Xiangling and Bennett both buff ATK and create Pyro Crystallize shards, while Kazuha groups enemies and shreds RES for the burst shot.
Resonance numbers come from the developer's own "Elemental Resonance" article. Swap suggestions are not guesses: we only list characters of the same element and role who already appear in another comp of the same reaction.

Standard team structure: 4 slots & 3 core roles (Main DPS/Sub-DPS/Support)
Every Genshin Impact combat team is always made up of exactly 4 characters: 1 On-field (actively controlled) and 3 Off-field, waiting to swap in for an Elemental Skill/Burst and swap back out. Within this 4-slot frame, the community splits roles into 3 core types: Main DPS — stays on-field longest and deals most of the final damage; Sub-DPS — swaps in briefly to trigger a reaction or add extra damage, then swaps right back out; and Support — provides buffs/debuffs/shields/healing, rarely dealing damage directly. Many tier lists further split out a 4th slot for the Healer role when a team needs to survive more than it needs pure damage buffs.
Framed around these 3-4 roles, a balanced team almost always looks like 1 Main DPS + 1-2 Sub-DPS + 1-2 Support — there's no "more DPS = stronger" shortcut, since missing the right elemental Support means the Main DPS loses its damage-amplifying reaction entirely.

Elemental Resonance chart by element
Elemental Resonance triggers automatically once a team has 2 or more characters sharing the same element, granting a free team-wide buff — this is always the first thing worth checking when building a team, even before picking specific characters. The table below covers each element's resonance:
| Element | Resonance name | Effect |
|---|---|---|
| Pyro | Fervent Flames | Team ATK +25% |
| Cryo | Shattering Ice | CRIT Rate +15% against Frozen or Cryo-affected targets |
| Geo | Enduring Rock | Shield absorption +15%, DMG dealt while shielded +15%, enemy Geo RES -20% |
| Hydro | Soothing Water | Team Max HP +25% (currently only 1 source, not yet cross-checked) |
| Dendro | Sprawling Greenery | Base Elemental Mastery +50, plus +30/+20 depending on the reaction just triggered (1 source, conditions not fully verified) |
| Anemo | Impetuous Winds | Stamina consumption -15%, Move SPD +10%, Skill CD -5% (1 source, not yet verified) |
| Electro | High Voltage | Party members are affected by Hydro for 40% less time; additionally, Overload, Superconduct, Electro-Charged, Lunar-Charged, Quicken, Aggravate and Hyperbloom have a 100% chance to generate an Electro Elemental Particle that regenerates Energy for the team (once every 5s) |
Of these, the Pyro resonance (+25% ATK) is generally considered the strongest overall, since it applies directly to every member's final damage without needing a secondary condition like Frozen or an active shield.
Core elemental reactions: Vaporize/Melt multipliers & team archetypes
Beyond resonance, what actually decides real damage is the Elemental Reaction triggered when two different elements hit the same target. The two most common amplifying reactions are Vaporize and Melt, and both multipliers shift depending on WHICH element is applied first vs. triggers it, rather than being one fixed number:
| Reaction | Order | Multiplier |
|---|---|---|
| Vaporize | Hydro applied first, Pyro triggers | 1.5x |
| Vaporize | Pyro applied first, Hydro triggers | 2x |
| Melt | Cryo applied first, Pyro triggers | 2x |
| Melt | Pyro applied first, Cryo triggers | 1.5x |
Beyond these two amplifying reactions, teams can also be built around several other reaction archetypes, each defining its own playstyle: Hyperbloom/Bloom/Burgeon (Dendro+Hydro+Electro or a variant), Freeze (Hydro+Cryo locking enemies down), Aggravate/Spread (Electro/Dendro scaling off Elemental Mastery), Overload (Pyro+Electro AoE burst), Superconduct (Cryo+Electro lowering Physical RES), Swirl/Crystallize (Anemo/Geo spreading an element or granting a shield), Quicken (the base for Aggravate/Spread), plus patch 6.7's new trio: Lunar-Bloom, Lunar-Charged and Lunar-Crystallize — stronger variants of the base Bloom/Electro-Charged/Crystallize reactions that only trigger with at least 1 character carrying a Lunar mechanic on the team.
How to build your own team from scratch + the strongest F2P team: the National Team
To build a team from scratch instead of copying a ready-made comp, follow this order: (1) pick 1 Main DPS as the core — this decides whether the team leans Physical or a specific element; (2) add 1-2 Sub-DPS carrying the right element to trigger an amplifying reaction (Vaporize/Melt) or a damage-adding reaction (Aggravate/Overload...) alongside the Main DPS; (3) fill the remaining 1-2 slots with Support — ideally at least 1 shield/damage-buff provider OR 1 Anemo grouper, so the team isn't hitting scattered enemies; (4) double-check the team's overall Energy Recharge is enough to fire every Elemental Burst each rotation — if it's short,
swap in an Energy Recharge piece rather than rebuilding the whole team.
If you don't have enough 5-star characters yet, the strongest and cheapest F2P team is still the National Team — exactly 4 four-star characters: Xiangling, Bennett, Xingqiu and Chongyun (or Sucrose as the Anemo slot) — dealing continuous damage through a Vaporize loop all fight, needing no rare weapons/Artifacts and almost no Constellation requirement. It's also the clearest example of a Flex slot: the team's 4th slot can swap between Chongyun or Sucrose (or any other Anemo Support) depending on which characters a player actually owns, rather than forcing one fixed roster.

Skill rotation & Energy Recharge: what makes or breaks a team's smoothness
A team that looks strong on paper can still play weak with the wrong rotation order. The most common rule: use Sub-DPS/Support Elemental Skills first to spread elements onto enemies, group them with Anemo if available, then fire the Main DPS's Elemental Burst LAST, so it both deals damage and triggers the reaction that's already set up — firing Burst too early, before elements are spread, wastes most of its amplifying potential.
Keeping that rotation smooth every cycle depends on having enough Energy Recharge for every Elemental Burst to refill right when it's needed again; running short on Energy Recharge is the most common reason a team that's correct on paper still feels weak in practice. In patch 6.7/Luna VIII, the current meta splits into two parallel directions: Lunar teams (Lunar-Bloom/Lunar-Charged/Lunar-Crystallize) have clearly gotten stronger since a dedicated Lunar-reaction support character arrived, while classic Freeze teams still hold a top spot since they don't depend on any Lunar-mechanic character — there's no single right answer, just the direction that fits the roster you actually have.
World exploration teams by region (Mondstadt/Liyue/Inazuma/Sumeru/Fontaine)
Beyond combat teams, Genshin also has world exploration teams — built for fast travel, resource gathering and surviving climbs/dives rather than damage. This kind of team needs no resonance or reaction, so you can break the usual 1 Main DPS + 3 Support formula here, since the goal is convenience, not power.
A good exploration team fills these 4 utility roles:
| Exploration role | What to pick |
|---|---|
| Movement | An Anemo character who glides/flies, or one with a stamina-reduction passive for sprinting/climbing |
| Resource detection | 1 character native to the region you're farming (reveals that region's specialties on the minimap) |
| Out-of-combat healing | 1 Support who heals without spending combat resources |
| Extra utility | Breaking ore/ice, or a character suited to the region's terrain |
Choosing by region is simple: many characters have an overworld passive that reveals the location of their own home region's specialties on the minimap. When farming Mondstadt/Liyue/Inazuma/Sumeru/Fontaine, put at least 1 character native to that region on the team so gathering spots show up automatically. Fontaine is special — every character swims/dives underwater freely there, so the movement factor is fast swimming rather than climbing.
5-star teams vs 4-star teams: when do you actually need 5-stars?
Quick answer: you do NOT need a 5-star roster to clear most content. The main difference between 5-star and 4-star teams is the damage ceiling and how easy they are to pilot, not whether you can clear at all.
The strongest 4-star team — the National Team (exactly 4 four-star characters: Xiangling, Bennett, Xingqiu, and Chongyun or Sucrose) — still clears hard content thanks to a continuous Vaporize loop. Several other 4-stars like Xingqiu, Bennett and Fischl are hard cores even inside teams that feature 5-star characters, rather than being replaced.
When it's worth investing in a 5-star team:
- Racing timed benchmarks (timed content like Spiral Abyss/Imaginarium Theater): 5-stars clearly cut clear times.
- Wanting fewer buttons: many 5-star teams pack damage into 1-2 buttons and play more easily.
- Unlocking archetypes only 5-stars enable: for example patch 6.7's Lunar line relies on a dedicated 5-star support character.
In short: a 4-star roster handles "can clear and can play", while 5-stars buy extra speed, comfort and a higher score ceiling — invest in 5-stars when you genuinely need those three things, not out of fear that 4-stars are weak.
Synergy notes & rotation order per team archetype
The general rotation section above gives the "fire the Main DPS's Burst last" rule. The table below goes deeper with synergy notes + a concrete order for the 3 most common archetypes, so you don't have to guess:
| Archetype | Suggested rotation order | Key point |
|---|---|---|
| National Team (Vaporize) | Xingqiu Burst → Xiangling Skill + Burst → Bennett Burst → normal attacks inside Bennett's circle | Bennett heals, buffs ATK and applies Pyro at once; keep the Main DPS standing inside Bennett's circle |
| Freeze | Apply Hydro first → apply Cryo to freeze enemies → Main DPS piles on damage while they're locked in place | Cryo Resonance gives +15% CRIT Rate against Frozen targets; frozen enemies can't act, so it's safe |
| Hyperbloom | Apply Dendro + Hydro to create Dendro Cores → trigger with Electro to detonate the Cores | Damage scales off Elemental Mastery, needs almost no CRIT; very F2P-friendly to build |
On the common question "with the 6.7 meta leaning toward Lunar, are Freeze teams still worth it?": YES, and they're still top-tier. The core reason is that Freeze teams need no Lunar-mechanic character at all, so they're completely independent of the Lunar line.
In particular, Furina — the strongest Hydro pillar for Freeze — does not fit the Lunar line, so instead of being pulled into Lunar teams, she stays as a Freeze backbone (the Skirk Freeze team is the typical example). The result: the Lunar and Freeze branches both sit at the top, and which one you pick depends on the roster you actually own.
Team-building checklist: 6 questions to ask before you lock in a comp
Before calling a team "done", run it through this 6-question checklist — most teams that feel weak in practice are missing one of these boxes, not because any single character is weak:
- Is there exactly 1 Main DPS as the core? This decides whether the team leans Physical or a specific element — every other choice revolves around this character.
- Is there enough secondary element to react with the Main DPS? If none of the 4 characters' elements ever touch each other, the team is wasting all reaction-based amplification.
- Is there a Sustain source? At least 1 character providing a Shield or healing, so the team doesn't die before dealing enough damage.
- Is there a Buffer or a Grouper? Someone boosting damage/lowering enemy RES, or an Anemo character grouping enemies — missing both usually means scattered, slow fights.
- Is Energy Recharge sufficient? If the Main DPS's Elemental Burst can't refill every rotation, the whole team feels clunky even when the comp is correct on paper.
- Is Elemental Resonance being used? Pairing 2+ characters of the same element is a free buff — skipping it without a clear reason wastes value.
A team that answers "yes" to all 6 questions is almost guaranteed to run smoothly; whichever answer comes back "no" is exactly what to fix first — instead of rebuilding the whole team.
TL;DR: the most important team-building takeaways, summarized
If you only read one paragraph on this page, read this one:
- Always check Elemental Resonance (2+ characters of the same element) BEFORE picking specific characters — the Pyro resonance (ATK +25%) is the strongest overall since it needs no secondary condition.
- Don't have enough 5-star characters yet? The National Team (Xiangling, Bennett, Xingqiu, Chongyun or Sucrose) is still the strongest and cheapest F2P team, clearing most content via a Vaporize loop.
- Build a team in this order: 1 Main DPS → 1-2 Sub-DPS with the right element → 1-2 Support (at least 1 Sustain or 1 Buffer/Grouper) → double-check Energy Recharge.
- In fights, always fire the Main DPS's Elemental Burst LAST, after secondary elements have already been spread onto enemies.
- In patch 6.7/Luna VIII, two top branches coexist: the Lunar line (Lunar-Bloom/Lunar-Charged/Lunar-Crystallize, needs at least 1 Lunar-mechanic character) and classic Freeze (needs no Lunar) — there's no single right answer, pick based on the roster you actually have.
- Before locking in a team, run through the 6-question checklist right above.
Spiral Abyss teams — the endgame that needs TWO teams
Spiral Abyss is Genshin's main endgame combat, and from Floor 9 up it asks for something ordinary content never does: not one team, but two.
- Two complete teams at once: every chamber in the Abyssal Moon Spire (Floors 9–12) splits into two halves, so you clear back-to-back with two separate teams — build several team cores (say a Vaporize core plus an Aggravate or Hyperbloom core) instead of pouring everything into one.
- Beat the clock: each chamber is timed for the full 9 stars, so you want a tight rotation and fast burst damage, not a slow war of attrition.
- Tailor it to the cycle: the enemies and the Blessing of the Abyssal Moon rotate every half-month — read the current buff and bring teams that counter the element and enemy type (AoE for packs, strong single-target for lone bosses).
- Two go-to line-ups: Team 1 — National (Childe/Xiangling/Bennett/Sucrose) or a Vaporize team (Hu Tao, Yelan…); Team 2 — Aggravate or Hyperbloom. Split your roster so the two teams never fight over the same character.
Tip: keep at least one healer or shielder on each team, and prioritize Energy Recharge so every Elemental Burst comes back online right when the window opens.
 Characters→