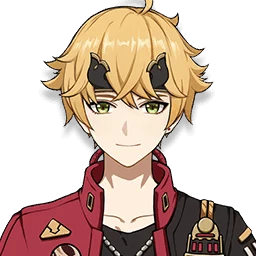
Thoma
Thoma is an easy-to-get 4-star shielder (his shield is usable even at C0), great for anyone who wants a durable layer of armor without spending a DPS slot. His shield scales with max HP, so stack HP% everywhere, and crucially build enough Energy Recharge to burst every rotation. He also shines as a Burgeon trigger with the Flower of Paradise Lost set. Don't expect damage; Thoma's value is safety. Prioritize Favonius Lance and full HP%.
 Ranking & buildright on this page
2
Ranking & buildright on this page
2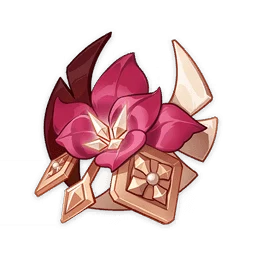 Farmingopen tool
3
Farmingopen tool
3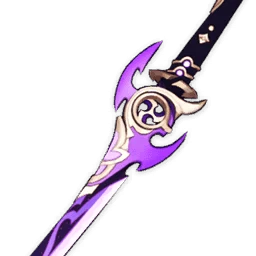 Damage Calculatoropen tool
4Build a teamready-made comps
Damage Calculatoropen tool
4Build a teamready-made comps
Thoma Build
-
1
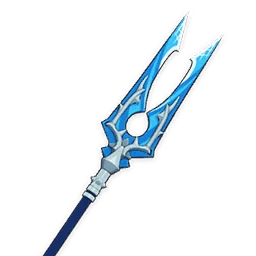
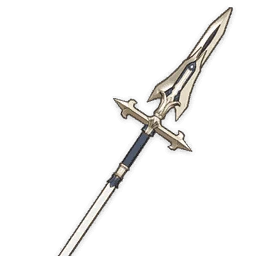 Favonius Lance Best
 -
2
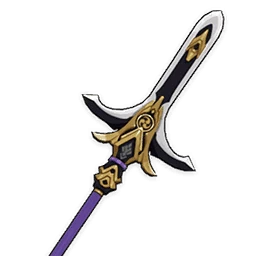 Kitain Cross Spear
 -
3
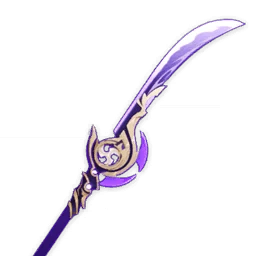 Engulfing Lightning
 -
4
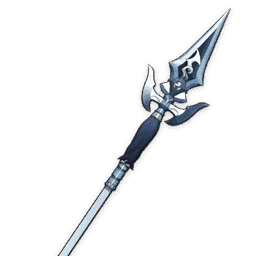 Black Tassel
 -
5
 "The Catch"
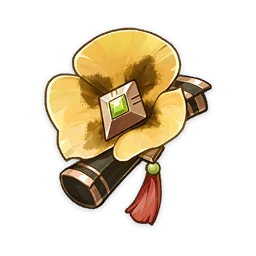 Tenacity of the Millelith
 Noblesse Oblige
 Flower of Paradise Lost
Priority substats: Energy Recharge › HP% › Elemental Mastery
Q ≈ E > NA — level Burst and Skill for a thick shield and steady Pyro, Normal Attacks basically skipped; build enough Energy Recharge.
Teams for Thoma



Thoma's talents
 Swiftshatter Spear
Performs up to 4 consecutive spear strikes.
Charged Attack
Consumes a certain amount of Stamina to lunge forward, dealing damage to opponents along the way.
Plunging Attack
Plunges from mid-air to strike the ground below, damaging opponents along the path and dealing AoE DMG upon impact.
 Blazing Blessing
The DMG Absorption of the Blazing Barrier scales off Thoma's Max HP.
The Blazing Barrier has the following traits:
·Absorbs Pyro DMG 250% more effectively.
·When a new Blazing Barrier is obtained, the remaining DMG Absorption of an existing Blazing Barrier will stack and its duration will be refreshed.
The maximum DMG Absorption of the Blazing Barrier will not exceed a certain percentage of Thoma's Max HP.
As a guest from afar, only the most burning passion would allow one to master the pure and precise spear arts of Inazuma. Thoma's mastery, indeed, is not limited to being the "swiftest-studying student" or "a master of the spear," but he has imbued his will to protect others and fend off foes into his art as well.
 Crimson Ooyoroi
Scorching Ooyoroi
While Scorching Ooyoroi is in effect, the active character's Normal Attacks will trigger Fiery Collapse, dealing AoE Pyro DMG and summoning a Blazing Barrier.
Fiery Collapse can be triggered once every 1s.
Except for the amount of DMG they can absorb, the Blazing Barriers created in this way are identical to those created by Thoma's Elemental Skill, Blazing Blessing:
·Absorbs Pyro DMG 250% more effectively.
·When a new Blazing Barrier is obtained, the remaining DMG Absorption of an existing Blazing Barrier will stack and its duration will be refreshed.
The maximum DMG Absorption of the Blazing Barrier will not exceed a certain percentage of Thoma's Max HP.
If Thoma falls, the effects of Scorching Ooyoroi will be cleared.
"I will not forget my initial promise. Let this burning flame protect those I cherish, and may it never be extinguished."
 Imbricated Armor
This effect can be triggered once every 0.3s seconds. Max 5 stacks.
 Flaming Assault
 Snap and Swing
Combat Rotation
- Cast Elemental Skill (E) "Blazing Blessing" — deals AoE Pyro DMG, applies Pyro to Thoma himself, and creates a Blazing Barrier shield (CD 15s).
- Right after E, swap to your driver character immediately — the Pyro just applied to Thoma lets their next hit trigger a reaction (Vaporize, Overloaded, etc.).
- Once you've charged 80 Energy, use Elemental Burst (Q) "Crimson Ooyoroi" — deals AoE Pyro DMG and grants Scorching Ooyoroi for 15 seconds.
- While Scorching Ooyoroi is active, switch to your main DPS and keep auto-attacking — each Normal Attack triggers Fiery Collapse (AoE Pyro DMG + a fresh shield), capped at once per second.
- Stick to Normal Attacks (avoid Charged Attacks) on your main DPS so the shield keeps refreshing and you get full value out of Scorching Ooyoroi's duration.
- Recast E on its 15-second cooldown between Bursts to refresh the shield and reapply Pyro to Thoma.
- Prioritize Energy Recharge (artifacts/support characters) to reach the 80-cost Burst quickly, then repeat: E → swap to DPS → Q → Normal Attacks.
- Thoma doesn't need to stay on field after E/Q — he functions as a background shielder/support, letting your main DPS hold field time while the shield and buff carry over.
Thoma constellations
When a character protected by Thoma's own Blazing Barrier (Thoma excluded) is attacked, Thoma's own Blazing Blessing CD is decreased by 3s, while his own Crimson Ooyoroi's CD is decreased by 3s.
This effect can be triggered once every 20s.
Crimson Ooyoroi's duration is increased by 3s.
Increases the Level of Blazing Blessing by 3.
Maximum upgrade level is 15.
After using Crimson Ooyoroi, 15 Energy will be restored to Thoma.
Increases the Level of Crimson Ooyoroi by 3.
Maximum upgrade level is 15.
When a Blazing Barrier is obtained or refreshed, the DMG dealt by all party members' Normal, Charged, and Plunging Attacks is increased by 15% for 6s.
Base Stats (Lv90)
Character Profile
- Region: Inazuma
- Voice Actors: JP 森田成一 · EN Christian Banas · KR Ryu Seung-kon · CN 张沛
Other Pyro characters






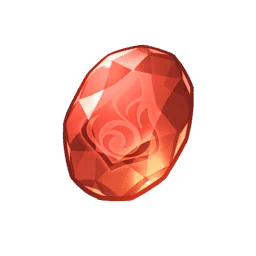
Ascension materials
Total ascension materials to reach level 90 (talent books not included).



Talent scaling by level
Swiftshatter Spear
| Lv 1 | Lv 10 | Lv 13 | |
|---|---|---|---|
| 1-Hit DMG | 44.4% | 87.8% | 106.3% |
| 2-Hit DMG | 43.6% | 86.2% | 104.5% |
| 3-Hit DMG | 26.8%×2 | 53.0%×2 | 64.2%×2 |
| 4-Hit DMG | 67.4% | 133.1% | 161.3% |
| Charged Attack DMG | 113% | 223% | 270% |
| Charged Attack Stamina Cost | 25.0 | 25.0 | 25.0 |
| Plunge DMG | 63.9% | 126.4% | 153.1% |
| Low/High Plunge DMG | 128%/160% | 253%/316% | 306%/382% |
Blazing Blessing
| Lv 1 | Lv 10 | Lv 13 | |
|---|---|---|---|
| Skill DMG | 146% | 264% | 311% |
| Shield DMG Absorption | 7.2% Max HP+693 | 13.0% Max HP+1525 | 15.3% Max HP+1907 |
| Shield Duration | 8.0s | 8.0s | 8.0s |
| Max Shield DMG Absorption | 19.6% Max HP+1887 | 35.3% Max HP+4153 | 41.7% Max HP+5191 |
| CD | 15.0s | 15.0s | 15.0s |
Crimson Ooyoroi
| Lv 1 | Lv 10 | Lv 13 | |
|---|---|---|---|
| Skill DMG | 88% | 158% | 187% |
| Fiery Collapse DMG | 58% | 104% | 123% |
| Shield DMG Absorption | 1.1% Max HP+110 | 2.1% Max HP+242 | 2.4% Max HP+303 |
| Shield Duration | 8.0s | 8.0s | 8.0s |
| Scorching Ooyoroi Duration | 15.0s | 15.0s | 15.0s |
| CD | 20.0s | 20.0s | 20.0s |
| Energy Cost | 80 | 80 | 80 |
Advanced frame data (official)
Elemental application ICD, gauge units and interruption resistance — official numbers rarely published anywhere.
Swiftshatter Spear
| Hit | Gauge | ICD | Interruption res. |
|---|---|---|---|
| Normal Attack 1-Hit | 1U | 2.5s/3 Hits | 41.3 |
| Normal Attack 2-Hit | 1U | — | 40.58 |
| Normal Attack 3-Hit A | 1U | — | 24.92 |
| Normal Attack 3-Hit B | 1U | — | 24.92 |
| Normal Attack 4-Hit | 1U | — | 62.66 |
| Charged Attack | 1U | 0.5s | 120 |
| Plunging Attack Collision | 0U | — | 25 |
| Low Plunge | 1U | — | 100 |
| High Plunge | 1U | — | 150 |
Blazing Blessing
| Hit | Gauge | Interruption res. |
|---|---|---|
| Skill DMG | 1U | 150 |
| Pyro to Self | 1U, 1s | — |
Crimson Ooyoroi
| Hit | Gauge | ICD | Interruption res. |
|---|---|---|---|
| Skill DMG | 2U | — | 200 |
| Fiery Collapse DMG | 1U | 2.5s/3 Hits | 35 |
FAQ about Thoma
What is the best weapon for Thoma?
How much Mora to max out Thoma?
What are Thoma base stats at Lv90?
Voice actors
- 日本語: 森田成一
- English: Christian Banas
- 中文: 张沛
- 한국어: Ryu Seung-kon
Ascension & Talent Materials
Ascension by phase
| Unlocks Lv | AR | Mora | Ascension & Talent Materials |
|---|---|---|---|
| Lv 40 | AR 15 | 20,000 | |
| Lv 50 | AR 25 | 40,000 | |
| Lv 60 | AR 30 | 60,000 | |
| Lv 70 | AR 35 | 80,000 | |
| Lv 80 | AR 40 | 100,000 | |
| Lv 90 | AR 50 | 120,000 |
Talent — one skill to Lv10
 Teachings of Transience
×3
Teachings of Transience
×3
 Treasure Hoarder Insignia
×6
Treasure Hoarder Insignia
×6
 Guide to Transience
×21
Guide to Transience
×21
 Silver Raven Insignia
×22
Silver Raven Insignia
×22
 Philosophies of Transience
×38
Philosophies of Transience
×38
 Golden Raven Insignia
×31
Golden Raven Insignia
×31
 Hellfire Butterfly
×6
Hellfire Butterfly
×6
 Crown of Insight
×1
Crown of Insight
×1
Multiply by 3 for all three skills. · Mora: 1,652,500
Total Mora to max out: 5,377,500
Official name in other languages
Wish banner history
Release date
Released: Nov 2, 2021 · Version 2.2
Voice Lines & Comments
Birthday
Quick, come with me! I remembered it's your birthday, obviously, so I thought I'd throw you a proper party. There's food, there's drinks, and I invited a whole bunch of your friends, too. Hey, this is your birthday we're talking about! I wasn't about to let you spend it all alone!
Self-Introduction
Hello
It's good to meet you at last, Traveler. I've been hearing about you for a long time now. I'm your new buddy, Thoma — as long as that's okay with you, of course!
About Thoma: Housekeeper
It was never Ayaka or Ayato's intention to make me the housekeeper, I volunteered. I like this kind of work. Putting everything in order gives me a great sense of achievement, and based on everyone's reactions... Yeah, I think I do a pretty good job.
About Thoma: Meaning
For me, housework is about keeping a space clean and tidy, so that everyone who lives there has a smile on their face. And now... it looks like I'm responsible for another smile. I'll do my best to deliver!
More About Thoma: I
Anything I can lend a hand with? If something needs doing around the house or you're having some interpersonal strife, just say the word. Hmm? A conversation... I see, I see. That's a little different from what I'm used to, but I'm all for it.
More About Thoma: II
I'm not from Inazuma originally — I think I've told you that before, right? I took a boat all the way here from Mondstadt, found I liked the place, and was also lucky enough to meet the wonderful Kamisato siblings, so I just ended up staying.
More About Thoma: III
I get homesick once in a while, too, so I completely relate to all the international merchants on Ritou. I try to look out for them as much as I can. The difference between us is that they see themselves as just passing by, and have no intention of trying to integrate here. And because that's how they think, it becomes their reality. The majority of Inazumans will never see them as anything more than outsiders.
More About Thoma: IV
For some of the more conservatively minded people in Inazuma, the idea of an outlander working as a retainer for one of the Commissions is unthinkable. So there was a time when I was not that welcome here. I'm pretty sure I'd have been deported a long time ago without a couple of Kamisatos fighting my corner. I couldn't let the clan down after they'd been so kind to me, so I put in a lot of honest work, and eventually, everyone was finally able to accept me.
More About Thoma: V
I'm not sure if I should get into this, but... Ah, hopefully you won't mind. I went through a period where I really just wanted to go home — Mondstadt is my homeland, after all. But I was torn... It wouldn't be easy to leave Inazuma behind, either. I mean, just look how good the people here have been to me. The Kamisato Clan always has a room for me, and there are people I've met here that are like family. So, I went back and forth over it, and ultimately decided I'd stay in Inazuma. When I'm missing Mondstadt... I can just chat with you. You don't mind my rambling, do you?
About Us: Eating Alone
Hey, how come you're eating here all alone? ...Uh, is it okay if I join you? Or did you just want some space?
About Us: Oath
If you hadn't put yourself out there during the Vision Hunt Ceremony and taken on the Raiden Shogun all by yourself, I would've lost my Vision, and with it all my aspirations. I've been thinking about this a lot, and it seems like there's only one way I could ever properly repay you... I, Thoma, give to you my weapon and my loyalty, and I promise to fight for you, no matter what.
Thoughts About Other Characters
 Yae Miko
Lady Miko? Wh—What about her? *sigh* Every time Miss Kamisato sends me out to deliver messages, my least-favorite destination is the Grand Narukami Shrine... Oh! N—Not because Lady Miko scares the bejeebers out of me, it's, uh... respect. Yes! She strikes respect deep into my heart, ahahahaha...
 Raiden Shogun
In my homeland of Mondstadt, almost everyone has great reverence for the Anemo Archon, Barbatos. But people in Inazuma feel a little differently toward the Shogun. How can I put this... They feel love, respect, gratitude... but also fear.
Raiden Shogun
Honestly, I don't harbor any resentment toward the Shogun. Yes, she almost took my Vision away, but ultimately that's just because of her unique perspective. Everyone has their own perspective, there's nothing strange about that. The only thing I don't understand is her goal in doing so. What does she imagine eternity really looks like for Inazuma? And why is sacrificing her people's aspirations so necessary to achieve it? I can neither understand nor agree with her approach.
 Beidou
The captain of The Crux — a formidable woman indeed. She once promised to take me out onto the open ocean to get a look at the thunderstorm that seals off Inazuma from the outside world. It's a shame that to this day, I've never had the chance to take her up on the offer...
 Kamisato Ayato
As head of the Kamisato Clan, he's in a tough position. With all the political upheaval, he has to contend with public disquiet on one hand and a bunch of self-serving, degenerate public officials on the other. It's best not to dwell on it. All I can do is make sure to look out for him when he's at home.
 Kamisato Ayaka
Milady is in all respects a well-rounded person: erudite, compassionate, well-mannered, and elegant... The one thing she could do better is to speak her mind more. In fact, watch out for this the next time you're talking to her — sometimes, she looks like she's about to say something, but then she holds back. If that happens, keep asking her opinion, see if you can encourage her to open up a little.
 Yoimiya
Of Naganohara Fireworks fame? She's so easy to get along with. Super straightforward, just says whatever she thinks. Oh, and Naganohara fireworks are just incredible, you should take every chance you get to see them in action. Ah, on that note — here, have a coupon!
 Sayu
Sayu
Ah Sayu, stubborn Sayu. I've asked her countless times to teach me ninjutsu, but she always refuses. She even goes out of her way to avoid me now... I'm just a student looking for a teacher, am I really that out of line?
 Kujou Sara
The Tenryou Commission General... Mm... Make sure to be extra careful if you have any dealings with her. She has a lot of power in her hands, and she's not very open to persuasion. Smiling and batting your eyelids certainly won't get you anywhere with her.
 Arataki Itto
Hmm... Word on the street is that he's quite a character — apparently, he even has youkai heritage. Have you met him? If you two are close, maybe you could introduce me sometime. It's good to make friends from all walks of life... youkai included!
 Shikanoin Heizou
Ho, that guy is a detective for the Tenryou Commission. He seems to have his own way of doing things — not the easiest person to get along with. Also... Any situation that involves a detective is probably not one that's going to end well. I think I'll keep on giving him a wide berth.
 Jean
Jean
Oh, so Jean from the Gunnhildr Clan is the Master of the Knights of Favonius now? She definitely deserves it, she's known all over for her impeccable conduct... Oh, just the "Acting" Grand Master? Haha, well, someone of her standing won't care about titles.
 Eula
Eula
You've had a run-in with Eula Lawrence before, huh? All I know is that their whole family are about the worst-tempered people you could ever meet. You're better off steering clear of them if you can help it. Ah, now I'm in a Mondstadt mood again... The memories.
Hobbies & Personality
Thoma's Hobbies
I've been really getting into stories about the unnatural recently. Especially ones about shapeshifting youkai — they're so fascinating. Before that, I was really into ninjutsu for a while, and before that... Hmm? You think I'm not dedicated enough? N—No! It's not like that, you got me all wrong!
Thoma's Troubles
I'm in a real pickle here. The chief is hosting a banquet for his friends tonight, and he says he wants me to splurge a little by cooking some Butter Crab. The only problem is that for the last two days, I haven't been able to buy crab anywhere! So, what, am I gonna have to dive into the ocean and grab them myself?
Favorite Food
Without a doubt, my favorite food is Rice Cake Soup. I like cooking up a big, delicious potful for everyone to share. It's a recipe for a good time.
Least Favorite Food
As far as food is concerned, I'm fine with anything. If we're counting beverages, though... I'm not very good with alcohol. Don't laugh, and before you say it — yes, I've wondered what this says about my identity as a Mondstadter. But, y'know... too much alcohol is bad for you, anyway. So not drinking is a good thing.
Feelings About Ascension
Feelings About Ascension: Intro
Really? This'll make me stronger? You'd better not be kidding, I have stacks of laundry to do.
Feelings About Ascension: Building Up
It feels like... a fire inside of me has just begun to burn.
Feelings About Ascension: Climax
I have all of this power, but how should I use it? I need to give this one some serious thought.
Feelings About Ascension: Conclusion
Thank you for placing your trust in me. Your kindness warms my heart more than the brightest flame ever could. But not to worry, I've figured out what I want to do now. My strength is your shield, and I will always be here to protect you.
Receiving a Gift
Receiving a Gift: I
Delicious! Could I get another bowl of rice?
Receiving a Gift: II
Um, are you free right now? Would you mind sharing some of your cooking tips with me?
Receiving a Gift: III
I don't think I've ever tasted anything like this... Oh, it's not too bad, though.
Source: official HoYoverse Fetter (friendship) voice-lines — Genshin Impact
Strengths & Weaknesses
- Can shield the team via Imbricated Armor.
- 4★ (Polearm) — obtainable via the standard wish/banner, no need to pull on a limited banner.
- The ascension stat is just plain ATK% — no built-in CRIT/EM/DMG Bonus advantage like many other characters, everything has to be rolled from scratch on artifacts.
Role Rankings
Machine-classified by scanning mechanic keywords in the OFFICIAL skill text (not another site's opinion ranking). Characters whose weapon type is inherently elemental (e.g. catalysts, bows) may not show "Does this well" for On-Field even if they can still be played on-field — this is a limit of text-based detection.
| Character | Weapon | Artifact Set | Main Stats | Substat Priority | Where To Farm |
|---|---|---|---|---|---|
|
ThomaB
|
Option 1
Option 2
Option 3
|
Sands: HP%
Goblet: HP%
Circlet: HP%
|
Energy Recharge › HP% › Elemental Mastery |
 Tier List→
 Teams→
Full profile
The Kamisato Clan's housekeeper. A well-known "fixer" in Inazuma.
- Affiliation: Yashiro Commission
- Birthday (day/month): 1/9
- Specialty dish: "Warmth"
- Namecard: Thoma: Blazing Guard — Namecard style. Blazing armor, flaming guards.