NIKKE Teams
Squad suggestions by role and Burst stage in Goddess of Victory: NIKKE.
65 teams
Updated: 2026-08-02



NIKKE team-building rules — the 7 that matter
- 1To reach Full Burst your squad must chain Burst I → II → III. Miss one stage and the whole rotation stalls.
- 2Run at least two Burst III units: Burst III cooldown is 40s while Burst I and II are usually 20s.
- 3Auto burst always fires the LEFT-most eligible Nikke. Push anyone you do not want bursting to the right.
- 4Range matters second only to burst: AR/MG want mid range, while RL damage ignores distance — easiest to use.
- 5Element advantage only ADDS damage; there is no penalty for being off-element, so early on do not force it.
- 6The Synchro Device pulls every Nikke up to the lowest of your top 5 slots — level cheap SR units to lift the whole roster.
- 7Standard 5-slot formula: Burst I + Burst I + Burst II + Burst III + Burst III, or Burst I + Burst II + Burst III + Burst III + Burst III. The two Burst III Nikkes are your main carries dealing damage; the remaining Burst I/II slots are buffers keeping the rotation alive so the carries can keep firing.
Deficit (Stage Penalty)
NIKKE has a penalty mechanic tied to the combat-power gap (often called Stage Penalty/Deficit): the further your team's combat power falls below a stage's recommended power, the more your damage dealt drops and your damage taken rises, scaling with the gap. That's why, in high-deficit stages, building the right team (a complete Burst I/II/III chain, matching elements, a Supporter or Defender) matters more than raw combat power, since an optimized team helps offset the penalty.
Team-building Tips for Beginners
Build your beginner team around the Burst-chain principle: a 5-member team can only trigger Full Burst when all 3 slots — Burst I, Burst II, Burst III — are filled. Missing Burst I means the chain never opens; missing Burst II breaks it midway; missing Burst III means no one unloads damage at the final slot. Check this before worrying about elements. Once the chain is complete, prioritize matching elements for damage resonance, and add a Supporter or Defender if you need to survive longer fights.
Teams by stage deficit
The bigger your stat deficit, the harder your team must stack buffs and drop defense. Pick your bracket.
| Deficit | How to build |
|---|---|
| 0–5% | Almost no penalty: any comfortable team clears. One healer, one buffer, three damage dealers — auto is fine. |
| 5–10% | It starts to bite: bring a cooldown-reduction Burst I so Full Burst comes back in time, plus a real healer (not just a shielder). |
| 10–20% | Funnel every buff into ONE carry: a cooldown Burst I, two buffers, one healer, one dedicated damage dealer. |
| 20–35% | Match the stage element and start dropping defense: four units serving one on-element carry, favouring core hits and pierce. |
| 35–45% | One-Nikke-Army territory: all four remaining slots exist to feed your single strongest carry. You will take damage — just kill it first. |
| 45–50% | Normal shots barely scratch: only true damage and defense-ignoring damage get through. Plan to end the stage in two or three Full Bursts. |
| 50%+ | This is the wall: stop pushing. Feed the Synchro Device and farm gear, then come back when the deficit drops under 45%. |
Squad Finder — build from the Nikkes you own
Tick the Nikkes you actually own. We filter to teams you can field right now, plus teams you are one unit away from.
Pick a few Nikkes above and we will find your teams.
Your roster is saved on this device for next time.
Teams
No team matches these filters. Try removing one.
Blaze-ing Through Campaign ft. Rapi
 Crown
Burst II
Crown
Burst II
 Liter
Burst I
Liter
Burst I
 Rapi: Red Hood
Burst III
Rapi: Red Hood
Burst III
 Mast: Romantic Maid
Burst II
Mast: Romantic Maid
Burst II
 Modernia
Burst III
Modernia
Burst III
Crown tanks and heals to open lanes, Liter fills Burst I to keep the CD loop tight, Mast: Romantic Maid reloads and buffs ATK at Burst II, letting Rapi: Red Hood clear waves with AoE while Modernia finishes single-target bosses at Burst III. The rotation never stalls, but the team struggles on stages with machine-gun-blocking shields since both DPS use MG weapons.
Solohood (CDR + RH Variant)
Liter fills Burst I so the team always reaches the next Full Burst before B2 cooldowns finish, while the flexible Λ Red Hood fills a second Burst III slot to shorten burst-stacking time. Mast: Romantic Maid heals the whole squad once at Burst III (great against heavy melee bosses), then Red Hood plus Rapi: Red Hood finish the stage boss. Weak without Liter since there is no stable B1 left.
Asuka & Alice ft. Red Hood (Fire)
Crown
Burst II
 Asuka Shikinami Langley
Burst III
Asuka Shikinami Langley
Burst III
 Alice
Burst III
Rapi: Red Hood
Burst III
Alice
Burst III
Rapi: Red Hood
Burst III
 Red Hood
Burst Λ
Red Hood
Burst Λ
Red Hood uses her flexible Λ burst to fill the team's only Burst I slot, Crown handles Burst II for damage plus healing, while Asuka Shikinami Langley, Alice and Rapi: Red Hood all sit at Burst III for stacked burst damage on stages without a shielder. Asuka breaks shields slowly, so this comp is strongest on stages without elemental shields; swap it out when a shielded Rapture shows up.
Substitutions: Mast: Romantic Maid
Breeze-ing ft. SBLice
Crown
Burst II
 Scarlet: Black Shadow
Burst III
Alice
Burst III
Rapi: Red Hood
Burst III
Red Hood
Burst Λ
Scarlet: Black Shadow
Burst III
Alice
Burst III
Rapi: Red Hood
Burst III
Red Hood
Burst Λ
Red Hood covers the flexible Burst I slot, Crown tanks and heals at Burst II, while Scarlet: Black Shadow remains one of the strongest low-deficit DPS units for many patches, rotating with Alice and Rapi: Red Hood at Burst III for continuous burst damage. The team excels against wind-weak enemies but needs a solid crit build on Scarlet since the squad gives her no dedicated ATK buff.
Substitutions: Mast: Romantic Maid
Zap-ping ft. Cinderella & Ein

Red Hood covers the flexible Burst I, Crown handles Burst II tanking and healing, while Cinderella, Ein and Rapi: Red Hood all sit at Burst III for successive AoE nukes. Ein hits especially hard thanks to True Damage that ignores armor, great for clearing mob-heavy waves. Without Red Hood, swap in Mast: Romantic Maid, but the team loses one Burst III slot.
Substitutions: Mast: Romantic Maid
Surf-ing ft. Rapi & Naga
Liter fills Burst I to keep the cooldown loop steady, while Crown, Naga and Mast: Romantic Maid handle Burst II for ATK buffs, reloading and CD reduction, leaving Rapi: Red Hood alone at Burst III to unleash full AoE damage. The team is easy and auto-friendly since only one DPS needs real investment, but its damage ceiling is lower than multi-DPS comps, making it slower against high-HP bosses.
Clash-ing (Iron Core)
Considered one of the best Iron-clearing comps for many patches: Liter holds Burst I, Crown and Naga sit at Burst II for ATK buffs and CDR, while the flexible Λ Red Hood and Rapi: Red Hood take Burst III to stack damage. Swap Naga for Mast: Romantic Maid for more healing and higher Combat Power, at the cost of Naga's Core Damage buff.
Red Hood & Maxwell (Iron)
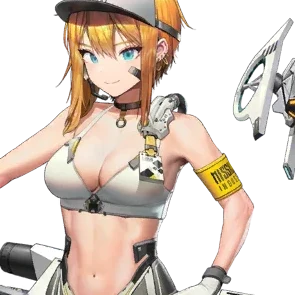
Red Hood uses her flexible Λ burst to fill the team's only Burst I slot, Crown and Naga take Burst II for buffs and CDR, while Maxwell and Rapi: Red Hood sit at Burst III to drill through the cores of large Iron enemies. The team excels at fast core-breaking but lacks a dedicated healer, so it can lose HP quickly on stages with heavy AoE hits.
One-Nikke-Army (Vesti: TU Core)
 Vesti: Tactical Upgrade
Burst III
Rapi: Red Hood
Burst III
Red Hood
Burst Λ
Vesti: Tactical Upgrade
Burst III
Rapi: Red Hood
Burst III
Red Hood
Burst Λ
 Naga
Burst II
Crown
Burst II
Naga
Burst II
Crown
Burst II
Follows the X-X-CORE-X-X structure: only Vesti: Tactical Upgrade needs deep investment as the CORE, the other four slots take whatever strong units are available. Naga and Crown sit at Burst II for ATK buffs and healing, Red Hood (Λ) fills Burst I, letting Vesti and Rapi: Red Hood stack damage at Burst III. Very resource-efficient since only one unit needs heavy investment.
Substitutions: ModerniaScarlet: Black Shadow
One-Nikke-Army (Alice Core)


Alice is the only unit that needs heavy investment (especially her Infinite Reload build); N102 covers Burst I and Anis covers Burst II as easy early-game F2P units, Red Hood (Λ) fills flexibly while Rapi: Red Hood supports Burst III alongside Alice. Great for new players with few SSRs since only one character needs deep investment; the rest can be freely substituted.
Substitutions: Privaty
Tia + Naga Duo

Tia and Liter both cover Burst I so the team always has a burst-opener even without many SSRs, Naga sits at Burst II granting a Core Damage buff to the main DPS, while Scarlet: Black Shadow and Red Hood (Λ) handle Burst III to finish enemies. Low-cost and great for early game since both Tia and Naga are easy to level via the Synchro Device.
El-Macho Team
Liter
Burst I
Mast: Romantic Maid
Burst II
 Anchor: Innocent Maid
Burst II
Anchor: Innocent Maid
Burst II
 Noir
Burst III
Noir
Burst III
 Blanc
Burst II
Blanc
Burst II
Replaces the classic Blanc/Noir healer core with Mast: Romantic Maid and Anchor: Innocent Maid for stronger unconditional buffs, better healing and faster reloads, letting players skip the Ammo OL stat. Liter holds Burst I, Mast/Anchor/Blanc cover Burst II for healing and buffs, and Noir alone handles Burst III to finish enemies. Weak on high-damage-check stages since the team leans heavily defensive.
Crown (Tia Upgrade)
Crown is often called "a better Tia" since her Burst II tanks and buffs ATK far stronger than Tia. Liter holds Burst I, Naga supports Burst II with a Core Damage buff, while Scarlet: Black Shadow and Red Hood (Λ) handle Burst III for fast finishes. Cheap, easy to level, and works for both newcomers and deep campaign pushing.
Auto Team (Full Set)
Liter
Burst I
Mast: Romantic Maid
Burst II
Vesti: Tactical Upgrade
Burst III
Rapi: Red Hood
Burst III
Anchor: Innocent Maid
Burst II
Balances healing, damage and buffs so it can auto-clear daily campaign runs with no manual input. Liter holds Burst I, Mast: Romantic Maid and Anchor: Innocent Maid take Burst II for healing and reloading, while Vesti: Tactical Upgrade and Rapi: Red Hood share Burst III as the main damage. Vesti can be swapped for Cinderella, Scarlet: Black Shadow or Modernia depending on your roster.
Substitutions: CinderellaScarlet: Black ShadowModerniaTia
Crowntr Team
Crown
Burst II
 Anis: Star
Burst I
Naga
Burst II
Vesti: Tactical Upgrade
Burst III
Rapi: Red Hood
Burst III
Anis: Star
Burst I
Naga
Burst II
Vesti: Tactical Upgrade
Burst III
Rapi: Red Hood
Burst III
Anis: Star holds Burst I, Crown and Naga cover Burst II for tanking and ATK buffs, while Vesti: Tactical Upgrade and Rapi: Red Hood sit at Burst III for maximum damage. Deals noticeably more damage than the Auto Team, but Auto Burst should be turned OFF and burst timing tapped manually, since auto mode wastes DPS with suboptimal activation order.
Old "God Team"

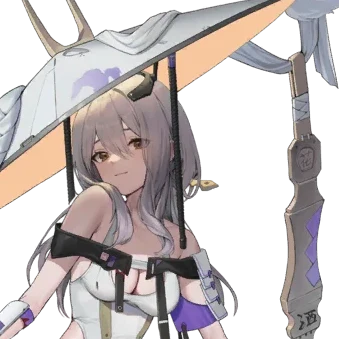

A legendary comp from the game's earliest seasons, built entirely from older units yet still clears campaign reliably: Liter and Rapunzel share Burst I, Centi tanks solidly at Burst II, while Scarlet and Modernia carry the main damage at Burst III. Great for veteran players with an old roster or newcomers who want a cheap team without chasing the newest meta.
Vesgod Team
Anis: Star
Burst I
Crown
Burst II
Vesti: Tactical Upgrade
Burst III
Rapi: Red Hood
Burst III
 Privaty
Burst III
Privaty
Burst III
A team famous for withstanding extremely high stage deficit by trading defense entirely for raw damage: Anis: Star holds Burst I, Crown tanks and buffs at Burst II, while Vesti: Tactical Upgrade, Rapi: Red Hood and Privaty all sit at Burst III to chain massive damage. Requires maxed ATK/Elemental Damage builds since the team has almost no defense, and missing burst timing loses units fast.
God Comp #1
Crown
Burst II
Anis: Star
Burst I
Mast: Romantic Maid
Burst II
Vesti: Tactical Upgrade
Burst III
Rapi: Red Hood
Burst III
Anis: Star holds Burst I, Crown and Mast: Romantic Maid take Burst II for tanking, healing and reloading, while Vesti: Tactical Upgrade and Rapi: Red Hood unleash damage at Burst III. This is the original base of the Vesgod philosophy — sacrificing Def for maxed ATK/Elemental Damage — best suited for extremely high-deficit stages that most teams cannot survive.
God Comp #2
 Takina Inoue
Burst II
Anis: Star
Burst I
Vesti: Tactical Upgrade
Burst III
Takina Inoue
Burst II
Anis: Star
Burst I
Vesti: Tactical Upgrade
Burst III
 Ada Wong
Burst III
Naga
Burst II
Ada Wong
Burst III
Naga
Burst II
Anis: Star holds Burst I, Takina Inoue and Naga support at Burst II, while Vesti: Tactical Upgrade and Ada Wong both deal True Damage at Burst III that completely ignores enemy defense. Strong against heavily armored bosses since damage isn't reduced by Def, but requires high Combat Power since the team's HP is low from skipping defense entirely.
God Comp #3 (Red Hood as B1)
Key detail: do NOT use Rapi: Red Hood here, since she would auto-convert to Burst I and disrupt the rotation. Instead, Red Hood (Λ) alone fills the team's only Burst I, Crown and Naga sit at Burst II for buffs, while Scarlet: Black Shadow and Modernia handle Burst III. The team can clear a stage in just 2-3 consecutive Full Bursts, extremely fast but requires all five units to be strongly built.
Crownaga Team
Built around the durable Crown-Naga axis: Liter holds Burst I, Crown and Naga cover Burst II for tanking, ATK buffs and Core Damage that stay relevant across many meta seasons, while Alice and Red Hood (Λ) handle Burst III for main damage. Flexible since the Crown-Naga axis remains useful almost regardless of which Burst III DPS is slotted in.
Duo Maids Team
Mast: Romantic Maid
Burst II
Anchor: Innocent Maid
Burst II
Rapi: Red Hood
Burst III
Red Hood
Burst Λ
Liter
Burst I
Mast: Romantic Maid and Anchor: Innocent Maid both sit at Burst II, stacking heals, reloads and ATK buffs for the DPS, making the team extremely durable with almost no survival concerns. Liter holds Burst I, freeing Rapi: Red Hood and Red Hood (Λ) at Burst III to focus purely on damage. The downside is a lower damage ceiling than offense-heavy teams since two support slots take up half the squad.
Mission Impossible
Anis: Star
Burst I
Crown
Burst II
Vesti: Tactical Upgrade
Burst III
Ada Wong
Burst III
Takina Inoue
Burst II
Anis: Star holds Burst I, Crown and Takina Inoue take Burst II for tanking and support, while Vesti: Tactical Upgrade and Ada Wong deal True Damage that pierces straight through boss defense at Burst III. Built specifically to break "impossible" stages by ignoring Def entirely, demanding precise play since the team's HP is razor-thin — one missed burst and the whole squad can go down.
F2P Newbie Team
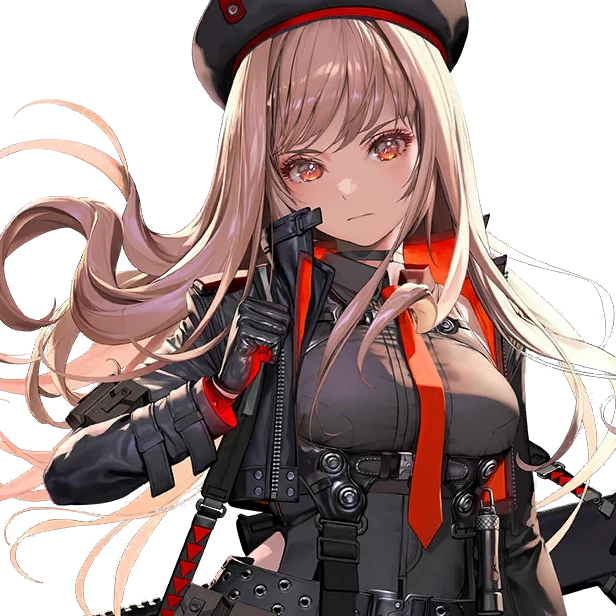


All five units are newbie rewards or easy early-game pulls that require no heavy gacha investment: N102 holds Burst I, Anis and Belorta cover Burst II for buffs, while Rapi and Mihara sit at Burst III for the main damage. With only a 1/10 push score, this is meant purely as a stopgap for the first days, to be replaced by stronger SSRs as your roster grows.
General Meta Team
The safest current all-purpose squad: Liter opens Burst I and grants shields, Crown sweeps the field with wide bleed damage on Burst II, Naga adds extra shields and healing, Modernia carries the main damage on Burst III, Red Hood flexibly fills whichever burst slot is missing. Easy to play, gear-agnostic, works through every campaign stage.
Low-Deficit Newbie Team
Applies the standard newbie substitution rule: use N102 when missing Burst I, Anis when missing Burst II, and Rapi when a second Burst III is needed. Crown handles tanking and ATK buffing at Burst II, while Rapi and Modernia both fire off Fire damage at Burst III. Best for 0-10% deficit stages when the roster is still thin; upgrade toward the Crown/Naga or General Meta teams once stronger SSRs are unlocked.
Red Riding Hood vs Ultra
Crown
Burst II
Anis: Star
Burst I
Red Hood
Burst Λ
Rapi: Red Hood
Burst III
Mast: Romantic Maid
Burst II
Team clears Ultra using a Crown-Crown-Mast burst loop: Crown cycles Burst II twice to keep rhythm, then Mast: Romantic Maid takes Burst III on the third rotation to heal and buff ATK before Rapi: Red Hood and Red Hood dump damage. Red Hood fills the flexible slot when the team needs a second B3. Avoid this comp without enough CDR or the rotation drifts.
Artillery vs Moth (Ultra)

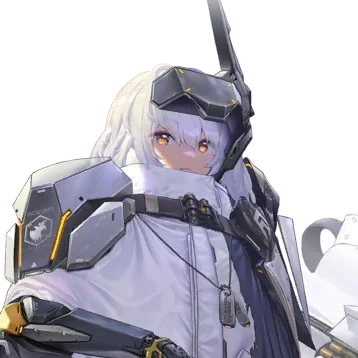

Anti-Ultra armor-piercing comp: Snow White and Maxwell are the two Burst III DPS taking turns hitting the weak core, Zwei (Treasure OL) sits Burst I for ammo refill and healing so the DPS never stop firing, Crown holds Burst II rhythm while Helm: Aquamarine adds extra piercing damage in B2. Time Crown correctly before Ultra enters its shield phase or you waste a burst.
Iron-element specialist vs Ultra
Community-consolidated Iron-element variant for Ultra: Liter takes Burst I for healing and CDR, Crown holds Burst II continuously, Rapi: Red Hood and Red Hood split Burst III duty so the loop never stalls when swapping lanes. Helm fires through after the ATK buff from the opening burst. Best with enough CDR for Liter and Crown to recycle fast.
Everyone is a DPS vs Kraken
 Nayuta
Burst II
Anis: Star
Burst I
Scarlet: Black Shadow
Burst III
Nayuta
Burst II
Anis: Star
Burst I
Scarlet: Black Shadow
Burst III
 Liberalio
Burst III
Mast: Romantic Maid
Burst II
Liberalio
Burst III
Mast: Romantic Maid
Burst II
The "everyone is a DPS" Kraken comp: Anis: Star opens Burst I to hold the shield, Nayuta and Mast: Romantic Maid cycle Burst II for CDR and continuous healing so Scarlet: Black Shadow and Liberalio (both Burst III) can dump full Wind damage back-to-back. Since it is nearly all DPS, survivability is low — dodge the Kraken AoE instead of tanking it.
Missing the swordwoman vs Kraken
Crown
Burst II
Anis: Star
Burst I
Liberalio
Burst III
 Asuka Shikinami Langley: WILLE
Burst III
Mast: Romantic Maid
Burst II
Asuka Shikinami Langley: WILLE
Burst III
Mast: Romantic Maid
Burst II
Without Scarlet: Black Shadow, use Asuka Shikinami Langley: WILLE as the main DPS: Crown holds the Burst II shield, Anis: Star opens Burst I, Mast: Romantic Maid heals on the second Burst II, letting Liberalio and Asuka: WILLE (both Burst III) alternate finishing the Kraken core. Time Asuka: WILLE right after the shield drops to avoid wasting piercing damage.
Wind-element specialist vs Kraken
 Little Mermaid
Burst I
Nayuta
Burst II
Liberalio
Burst III
Scarlet: Black Shadow
Burst III
Crown
Burst II
Little Mermaid
Burst I
Nayuta
Burst II
Liberalio
Burst III
Scarlet: Black Shadow
Burst III
Crown
Burst II
Community-consolidated Wind-element variant for Kraken: Little Mermaid opens Burst I with the opening buff, Nayuta and Crown keep cycling Burst II for CDR, while Liberalio and Scarlet: Black Shadow (both Burst III) alternate dumping Wind damage into the Kraken core. Needs fast burst recycle since two Burst III units want the slot.
Spider Slayer vs Harvester
Crown
Burst II
Anis: Star
Burst I
 Snow White: Heavy Arms
Burst III
Snow White: Heavy Arms
Burst III
 Helm
Burst III
Mast: Romantic Maid
Burst II
Helm
Burst III
Mast: Romantic Maid
Burst II
Anti-Harvester shield-heal-DPS combo: Anis: Star Burst I raises a shield against Harvester's AoE, Crown holds Burst II, Mast: Romantic Maid heals on the second Burst II before Snow White: Heavy Arms and Helm (Treasure OL) dump piercing Burst III into the weak underbelly. Skip this without ATK buffs — clear speed drops a lot.
Water-element specialist vs Harvester
Little Mermaid
Burst I
Crown
Burst II
Snow White: Heavy Arms
Burst III
 Dorothy: Serendipity
Burst III
Helm
Burst III
Dorothy: Serendipity
Burst III
Helm
Burst III
Community-consolidated Water-element variant for Harvester: Little Mermaid opens Burst I with a buff, Crown continuously holds the Burst II shield, while Dorothy: Serendipity, Snow White: Heavy Arms and Helm (all Burst III) split three consecutive Water-damage rotations. With three Burst III units, CDR timing must be tight or someone stalls mid-fight.
Classic MC killer
 Cinderella
Burst III
Anis: Star
Burst I
Cinderella
Burst III
Anis: Star
Burst I
 Anis: Sparkling Summer
Burst III
Crown
Burst II
Anis: Sparkling Summer
Burst III
Crown
Burst II
 Maiden: Ice Rose
Burst III
Maiden: Ice Rose
Burst III
The classic Mirror Container killer: Anis: Star Burst I raises the shield, Crown holds Burst II, while Cinderella, Anis: Sparkling Summer and Maiden: Ice Rose (all Burst III) alternate dumping Electric damage into the mirror faster than the boss can regen its shield. Three Burst III units require high CDR to keep the rotation up.
Real True Damage vs Mirror Container
The "Real True Damage" Mirror Container comp: Crown holds the Burst II shield, Anis: Star opens Burst I, Mast: Romantic Maid heals on the second Burst II, letting Ein and Ada Wong (both Burst III, True Damage) hit straight through the boss's armor and shields undiminished. Very strong when Mirror Container spams shields, since True Damage ignores that defense entirely.
Electric-element specialist vs Mirror Container
Anis: Star
Burst I
Crown
Burst II
 Neon: Vision Eye
Burst III
Anis: Sparkling Summer
Burst III
Maiden: Ice Rose
Burst III
Neon: Vision Eye
Burst III
Anis: Sparkling Summer
Burst III
Maiden: Ice Rose
Burst III
Community-consolidated Electric-element variant for Mirror Container: Anis: Star Burst I raises the shield, Crown holds Burst II, while Neon: Vision Eye, Anis: Sparkling Summer and Maiden: Ice Rose (all Burst III) split three consecutive Electric-damage rotations. Needs strong CDR since three Burst III units compete for the slot.
Fire-element specialist vs Indivilla
Rapi: Red Hood
Burst III
 Grave
Burst II
Asuka Shikinami Langley: WILLE
Burst III
Grave
Burst II
Asuka Shikinami Langley: WILLE
Burst III
 Rei
Burst I
Rei
Burst I
 Mihara: Bonding Chain
Burst III
Mihara: Bonding Chain
Burst III
Community-consolidated Fire-element variant for Indivilla: Rei opens Burst I to hold the front line, Grave takes Burst II for healing/support, while Rapi: Red Hood, Asuka Shikinami Langley: WILLE and Mihara: Bonding Chain (all Burst III) alternate dumping Fire damage. Indivilla goes invulnerable right at the start of phase 2, so dump every burst before that mark or it is wasted.
Literless boss variant (A)
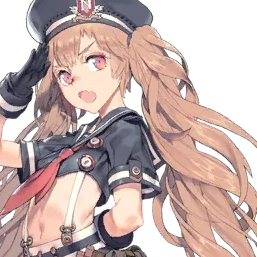

A "Literless" bossing comp for Solo Raid/Union Raid: Miranda takes Burst I for ammo, Dolla holds Burst II support, while Snow White, Maxwell and Helm (all Burst III) alternate hitting a multi-part boss. Use it when you lack Liter as the CDR core — three rotating B3 units keep the burst rhythm going instead.
Substitutions: Helm: AquamarineYulhaNoise
Literless boss variant (B)


The second Literless bossing variant: Miranda and Noise both take Burst I for ammo/support, Helm: Aquamarine holds Burst II, while Snow White and Yulha (Burst III) alternate piercing damage into a multi-part boss in Solo Raid/Union Raid. Pick this variant if you own Yulha and Noise instead of Maxwell and Dolla.
Elysion Tower: AoE + Heal + Tank
Rapi: Red Hood
Burst III
Mast: Romantic Maid
Burst II
 Emma
Burst I
Helm
Burst III
Anchor: Innocent Maid
Burst II
Emma
Burst I
Helm
Burst III
Anchor: Innocent Maid
Burst II
This Elysion tower squad centers on Rapi: Red Hood as the shield-piercing main DPS, with Mast: Romantic Maid spreading a team-wide ATK buff, Emma opening the burst chain as Burst I, Helm dealing heavy AoE damage, and Anchor: Innocent Maid healing the whole squad every Burst II. The Emma-Mast-Rapi:RH-Helm-Anchor:IM rotation runs smoothly on Auto, great for relaxed tower climbing, but it has no shield so one-shot bosses are dangerous.
Elysion Tower: Diesel Bossing
 D: Killer Wife
Burst I
Mast: Romantic Maid
Burst II
Rapi: Red Hood
Burst III
D: Killer Wife
Burst I
Mast: Romantic Maid
Burst II
Rapi: Red Hood
Burst III
 Diesel: Winter Sweets
Burst III
Anchor: Innocent Maid
Burst II
Diesel: Winter Sweets
Burst III
Anchor: Innocent Maid
Burst II
This Elysion tower team focuses raw single-target damage on the boss: D: Killer Wife opens as Burst I, Mast: Romantic Maid and Anchor: Innocent Maid alternate ATK buffs and healing at Burst II, while Rapi: Red Hood and Diesel: Winter Sweets chain Burst III to shred boss defense. It excels at tanky Base Defense bosses but clears trash mobs slowly due to weak AoE.
Missilis Tower: Tia-Naga-Liter

The classic Missilis trio Liter-Tia-Naga carries ATK buffs, healing and burst CD reduction; Tia opens Burst I while tanking hits, Naga locks in Burst II to boost crit damage, and Ein with Laplace alternate Burst III to clear wide AoE with armor-piercing damage. Very tanky and Auto-friendly, but lacks single-target defense penetration against thick-HP bosses.
Missilis Tower: Drake-Quency Swap


A variant of the Liter-Tia-Naga trio for tower floors weak to Fire or Water: Tia still opens Burst I and Naga locks Burst II for crit damage, but the Burst III pair swaps to Drake (Fire) or Quency: Escape Queen (Water) to match the floor elemental weakness. It keeps the same tankiness and Auto-friendliness as the original, just re-check the element before entering.
Tetra Tower: Ludmilla-Rouge
 Ludmilla: Winter Owner
Burst III
Ludmilla: Winter Owner
Burst III
 Rouge
Burst I
Alice
Burst III
Blanc
Burst II
Anis: Sparkling Summer
Burst III
Rouge
Burst I
Alice
Burst III
Blanc
Burst II
Anis: Sparkling Summer
Burst III
This Tetra tower squad stacks three Burst III attackers (Ludmilla: Winter Owner, Alice, Anis: Sparkling Summer) hitting back to back, with Rouge as Burst I refreshing cooldowns and buffing ATK, and Blanc holding Burst II with a shield to keep the line stable. The mixed Water/Fire/Electric elements mean no shield can wall the team, but with no wide-AoE unit it clears large mob waves slower than a single-element squad.
Tetra Tower: Anis Star Elements



This Tetra tower squad blends four different elements (Iron/Electric/Water/Fire) so no elemental shield can wall it: Anis: Star opens Burst I and tanks hits with her shield, Prika and Mint split Burst II for healing and buffs, while Milk: Blooming Bunny and Alice alternate Burst III to finish enemies off. It is ideal for floors mixing multiple shield elements, though total damage is lower than a single-element squad.
Pilgrim Tower: Rapunzel Support
This all-Pilgrim tower squad leans on Rapunzel as Burst I to heal the team open, Crown and Grave split Burst II for tanking and CD buffs, while Snow White: Heavy Arms and Liberalio alternate Burst III with wide defense-piercing shots. The spread across Iron/Water/Wind/Fire elements means no single shield type walls it, but being a safe, sustain-heavy comp it clears stages slower than a full-DPS lineup.
Pilgrim Tower: Cinderella Carry
 Dorothy
Burst I
Dorothy
Burst I
 Noah
Burst II
Cinderella
Burst III
Scarlet: Black Shadow
Burst III
Noah
Burst II
Cinderella
Burst III
Scarlet: Black Shadow
Burst III
 Nihilister
Burst II
Nihilister
Burst II
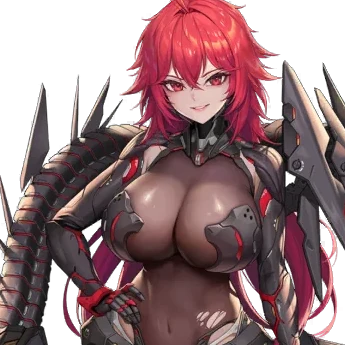
This Pilgrim tower squad channels damage through two Burst III units, Cinderella and Scarlet: Black Shadow, opened by Dorothy Burst I ammo/ATK refresh, while Noah and Nihilister split Burst II for aggro tanking and crit buffs. Cinderella spikes hard once the shield is broken thanks to her stacking bullets-fired damage mechanic, so the team needs Noah to survive — she is fragile since she pulls all boss aggro.
PVP: 2-RL Instant Nuke


A classic PvP squad that wins on speed: Jackal opens Burst I, Trina and Centi hold Burst II to buff ATK and stagger the enemy tempo, Red Hood (Lambda) flexibly fills whichever burst slot is missing, then Scarlet unloads Burst III to wipe the enemy team in one shot before they can reach full burst. It demands precise 2-RL burst timing — miss it by a second and you lose the first-strike advantage.
PVP: Cinderella Comp

A PvP squad built around Cinderella, whose Burst III grows stronger the more bullets she fires: Jackal opens Burst I to set the pace, Noah and Biscuit split Burst II for aggro tanking and CD refresh, and Helm provides a second Burst III with wide shield-piercing damage. Its weakness is needing a few seconds to ramp up, so it can lose to fast-burst squads like 2-RL Instant Nuke.
PVP: Jackal-Scarlet: Black Shadow
A PvP variant swapping the standard Scarlet for Scarlet: Black Shadow with Wind AoE damage: Jackal opens Burst I, Trina and Centi hold Burst II for ATK buffs and enemy slow, and Crown locks in as tank while cutting the team burst cooldown. It shines against enemy teams weak to Wind since Scarlet: Black Shadow hits harder in AoE, but it is one burst cycle slower to detonate than the standard Scarlet build.
PVP: Noah-Biscuit
A defense-leaning PvP squad: Jackal opens Burst I, while Noah, Biscuit and Crown split Burst II to tank aggro, refresh cooldowns and reduce damage taken, stalling the fight long enough for Cinderella to stack bullets at Burst III and unload big damage late-game. It counters fast-burst teams by surviving their opening barrage, but loses to teams with true damage that ignores shields.
Surface: ATK Stacking
D: Killer Wife
Burst I
 Eunhwa
Burst II
Eunhwa
Burst II
 Guillotine
Burst III
Scarlet: Black Shadow
Burst III
Modernia
Burst III
Guillotine
Burst III
Scarlet: Black Shadow
Burst III
Modernia
Burst III
This Surface exploration squad stacks three of the game highest team-wide ATK buffers: Guillotine at 35%, Scarlet: Black Shadow at 35% and Modernia at 35%, plus Eunhwa 30% at Burst II, while D: Killer Wife opens Burst I to keep the burst chain stable. The massive stacked ATK clears Surface time limit fast, but the squad has almost no damage-reduction to fall back on.
Surface: Damage Reduction


This Surface exploration squad stacks the strongest damage-reduction buffs: Liberalio at 40%, Maiden at 35% and Quiry at 20% all at Burst III, plus Anchor: Innocent Maid giving 25% reduction and healing at Burst II, with Miranda opening Burst I to keep the pace. It survives heavy-hitting, stun-spamming Surface zones very well, at the cost of noticeably lower total damage than an ATK-stacking squad.
F2P Team
Full free-to-play squad for new commanders: N102 shields the team on Burst I, Anis tanks the front line and opens Burst II, Rapi auto-fills Burst III when no other B3 exists, Mihara carries the damage, Belorta adds extra firepower. No rare materials needed, only meant to clear early campaign stages, weak against bosses.
Snow White Core
A squad built around Snow White as the core damage dealer, extremely strong versus Iron-weak enemies: Liter opens Burst I and buffs ATK, Crown holds the front line on Burst II, Rapi: Red Hood adds extra Burst III damage, Snow White breaks armor for massive burst damage, Modernia (Flex) fills extra firepower for multi-part bosses. Hard to control, needs precise burst timing.
Boss Variant (Crown)
A boss-focused variant that stacks both Crown and Naga for double shield/heal uptime: Liter opens Burst I, Crown and Naga alternate holding Burst II continuously, Snow White and Red Hood combine Burst III/Λ damage into each boss part. Tankier than the base version but slightly slower total damage output.
Literless Boss Variant
A workaround for players without Liter: Miranda opens Burst I and grants a substitute shield, Dolla holds Burst II with energy recovery, Snow White breaks armor on the target, Maxwell and Helm combine Burst III damage over a wide area. Noticeably lower score than the Liter/Crown version but usable while waiting to pull those two core units.
Substitutions: Helm: AquamarineYulhaNoise
Alice Infinite Reload
A squad built around Alice exploiting her infinite-reload mechanic when combo is kept up, rated FINGER BUSTING for its extreme execution difficulty: Liter opens Burst I and grants shields, Crown deals area damage on Burst II, Alice fires continuously without reloading if timed correctly, Privaty adds extra piercing damage, Naga (Flex) covers shield/heal when the combo breaks.
Duo Alice
A dual-carrier setup pairing Alice and Modernia, using Tia instead of Crown for more survivability: Tia opens Burst I with sturdier shields, Liter backs up Burst I with extra ATK buffs, Naga holds Burst II with healing, Alice and Modernia alternate constant Burst III damage, so the team does not collapse if one carrier gets countered.
Substitutions: Red Hood
Generalist (Alice)
Liter
Burst I
Mast: Romantic Maid
Burst II
Anchor: Innocent Maid
Burst II
Helm
Burst III
Alice
Burst III
A generalist squad that does not rely on Pilgrim units, using the Mast/Anchor skin pair instead of Crown/Naga: Liter opens Burst I with shields, Mast: Romantic Maid and Anchor: Innocent Maid alternate holding Burst II with wide-area healing, Helm and Alice chain continuous Burst III damage. Good when you lack a strong Pilgrim lineup while still pushing campaign steadily.
Red Hood Core (Buffer Playstyle)
A buffer-playstyle squad where Red Hood fills whichever burst slot is empty instead of a fixed role: Red Hood auto-covers the missing Burst I, Crown and Naga both hold Burst II continuously for shields/heals, Modernia and Alice alternate nonstop Burst III damage. Highest campaign-push score in this batch, but requires precise combo timing to avoid burst desync.
Crown + Triple DPS
An Iron-leaning team with three simultaneous damage sources around Crown: Liter opens Burst I with an initial shield, Crown holds Burst II sweeping wide bleed damage, Rapi: Red Hood, Red Hood and Helm stack continuous Burst III/Λ firepower onto one target, forcing extremely fast burst-window damage. In exchange the team lacks a dedicated healer and can crumble against enemy AoE combos.
Scarlet: Black Shadow Core (Wind Weak)
A wind-element team exploiting Wind-weak bosses, with Scarlet: Black Shadow as the main carry: Liter opens Burst I with shields, Crown holds Burst II sweeping damage while Naga adds parallel shield/heal support, Alice and Scarlet: Black Shadow alternate Burst III to exploit the elemental weakness. Very effective against Wind-weak bosses but nearly useless against a different element.
Substitutions: Elegg: Boom and ShockModernia
Rapi: Red Hood Core (Fire Focus)
Rapi: Red Hood
Burst III
Grave
Burst II
Asuka Shikinami Langley
Burst III
Rei
Burst I
Mihara: Bonding Chain
Burst III
A pure Fire-element firepower team for Fire-weak bosses or towers: Rei opens Burst I holding the defensive line, Grave provides buffs and keeps Burst II stable, Rapi: Red Hood, Asuka Shikinami Langley and Mihara: Bonding Chain stack continuous Burst III damage onto the target. Three simultaneous Burst III sources create an extremely dense damage window, but the team lacks wide-area shields and can lose HP fast against strong AoE hits.
Team-building FAQ
What is the best NIKKE team right now?
There is no single best team for every stage. For campaign the most-used frame is one cooldown Burst I, one buffer, one healer and two damage dealers — then swap the carry to match the element the stage is weak to. Use the mode filter above to pull the right team for what you are actually doing.
How many Burst III units does a team need?
At least two. Burst III has a 40-second cooldown while Burst I and II are usually 20 seconds, so with a single Burst III your rotation stalls every other cycle.
Why can my team not reach Full Burst?
Because a stage of the Burst I → II → III chain is missing. Check the Burst badge on each Nikke: all three stages must be present. If your squad has no Burst I at all, bring Rapi — she converts to Burst I when the team lacks one.
What do I run if I do not own a unit from the sample team?
Every team on this page lists Substitutions for that slot. You can also tick the Nikkes you own in the Squad Finder above: it shows the teams you can field right now and the ones you are exactly one unit away from.
Is a boss team different from a campaign team?
Yes. Campaign wants area damage to clear mobs, while a boss is a single target — so you funnel buffs into one carry and prioritise core hits. The mode filter separates the two.
Boss Team Builder
Special Interception bosses have a WEAK element that rotates weekly. Pick the counter element (check in-game this week) → the tool shows the strongest DPS of that element for a +10% damage team.
Counter element: Electric. Comp: 1 Burst I (CDR) + 1 Burst II (buff/shield) + 3 DPS of this element.

Counter element: Fire. Comp: 1 Burst I (CDR) + 1 Burst II (buff/shield) + 3 DPS of this element.




Counter element: Iron. Comp: 1 Burst I (CDR) + 1 Burst II (buff/shield) + 3 DPS of this element.



Counter element: Water. Comp: 1 Burst I (CDR) + 1 Burst II (buff/shield) + 3 DPS of this element.

Counter element: Wind. Comp: 1 Burst I (CDR) + 1 Burst II (buff/shield) + 3 DPS of this element.