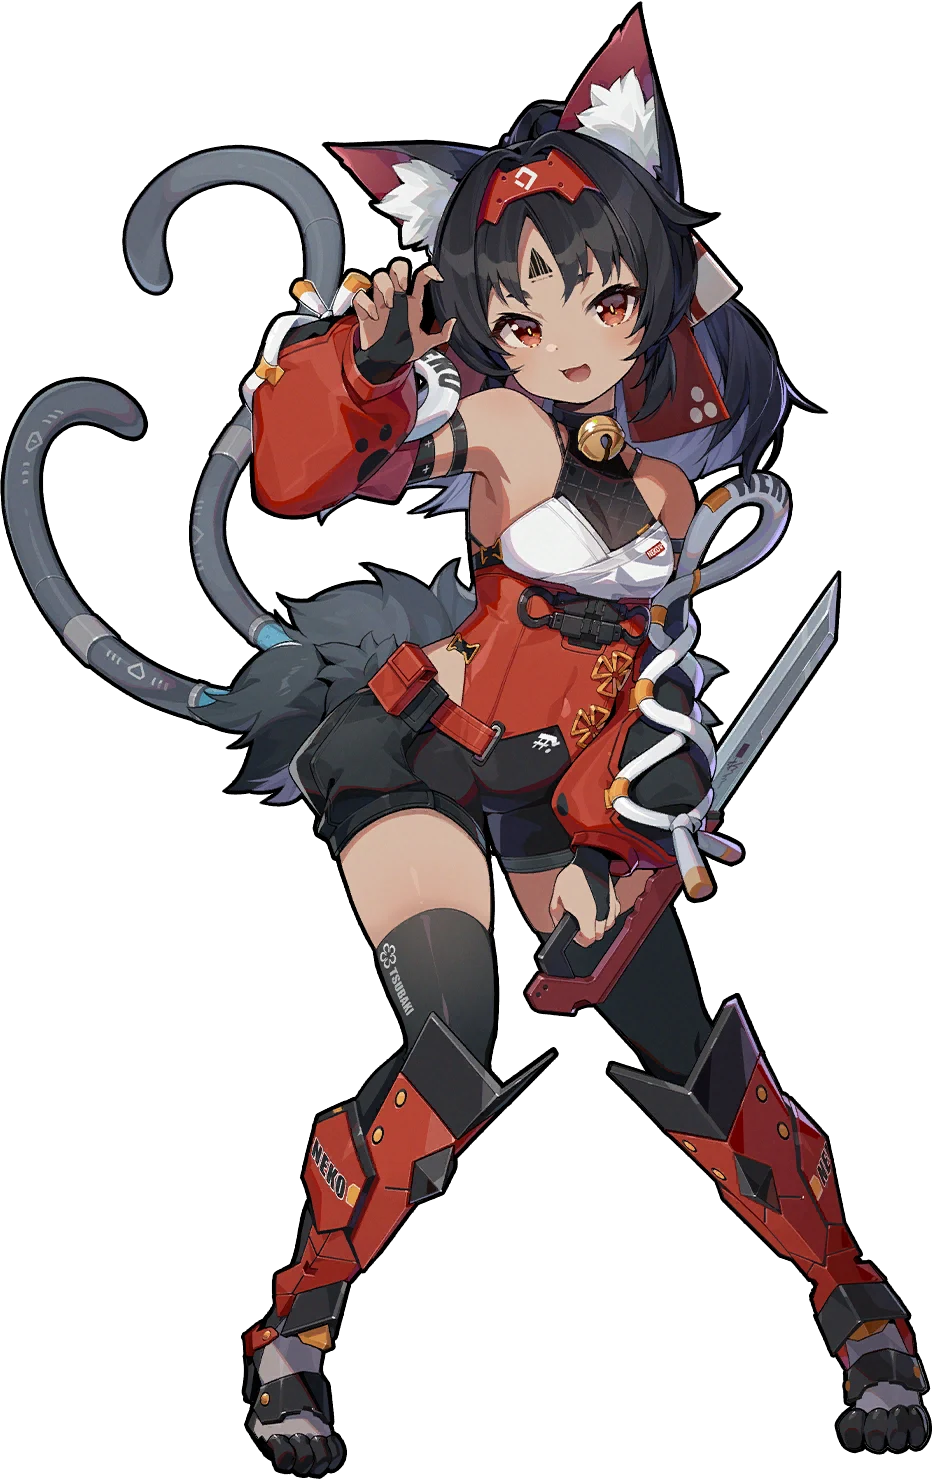
Nekomata
A high-crit Physical main DPS who attacks fast through Basic Attacks and Dodge Counters, and loves hitting enemies from behind.
Tier B · Attack · Physical. BiS: Steel Cushion. A high-crit Physical main DPS who attacks fast through Basic Attacks and Dodge Counters, and loves hitting enemies from behind.



Base stats
Recommended build
Best W-Engines

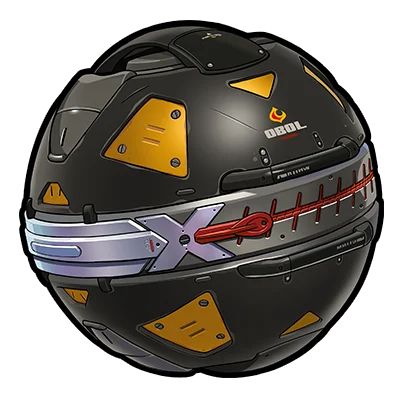
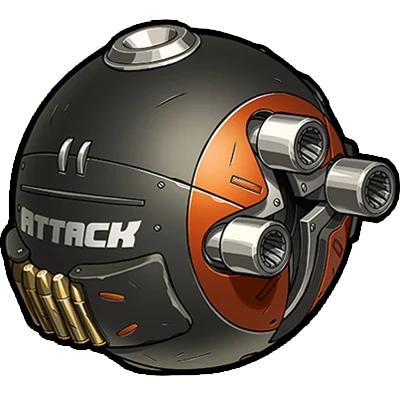
Recommendation order by current meta — the first is strongest, the rest are alternatives in decreasing priority. (Not a simulated DPS %.)
Recommended Drive Discs
 Fanged Metal
 Woodpecker Electro
 Puffer Electro
4: CRIT Rate / CRIT DMG · 5: Physical DMG · 6: ATK%
Prioritize CRIT Rate/DMG > ATK% > PEN
Skill priority: Basic Attack > Special > Dodge > Chain & Assist
Recommended teams





Nekomata is a 1.0 Physical DPS with a low damage ceiling compared to newer units like Jane, Evelyn, and Soldier 0. Her kit depends on back-attacks and Dodge Counters, so she's fairly execution-heavy. Only invest if you like her or lack a Physical DPS; she's not a worthwhile new pull in the 3.0 meta.
 Jane
Jane Evelyn
Role Ranking
The list below is pulled straight from the overall Tier List, keeping only the 16 agents who share the Attack role. Order within each tier is NOT a strength ranking — it simply groups agents by their original tier.














Stat targets
Stat targets: WITHOUT the signature — Crit Rate 50% / Crit DMG 100% / ATK ~2,000; WITH the signature (Steel Cushion) — Crit Rate 70% / Crit DMG 170% / ATK ~3,000. Since most of Neko's damage comes from Basic + back-hit Dodge Counters, balance Crit Rate and Crit DMG around a ~1:2 ratio. Main stats: Slot 4 Crit Rate or Crit DMG · Slot 5 Physical DMG · Slot 6 ATK% (swap to Energy Regen if you want faster EX/Ult uptime). Substat priority (per): Crit Rate ≈ Crit DMG ≈ ATK% > PEN > flat ATK.
Rotation & combos
1) FIELD CONTROL: open with a gather + finisher partner — Nicole's EX pulls enemies into a clump and shreds DEF, or a Stunner (Lycaon/Pulchra) builds Daze. 2) ENTER: swap to Neko, use EX Special to grab a back-position and gain Crit, then run a Basic Attack combo aimed at the enemy's back to trigger Steel Cushion's +25% back damage. 3) COUNTER: dodge on cue to fire Dodge Counters (umbrella counter) — a huge slice of Neko's crit damage. 4) STUN WINDOW: when the enemy is Stunned, unload the full Basic chain + Chain Attack + Ultimate; at M1, during Break EVERY hit counts as a back attack so you get full damage from any angle. 5) QUICK-SWAP: rotate Neko out when an off-field EX / assist is up, then loop from step 2.
- Mobile Physical DPS: leans on fast Basic Attacks + Dodge Counters and easily circles to the enemy's back, so she stays safe while pushing damage — safer than many stand-still attackers.
- Very cheap team cost for F2P: the classic Cunning Hares core (Neko + Anby + Nicole) is all free/A-rank agents and still clears basic content — a great starter for new players.
- Usable at M0 and a standard (permanent-pool) agent, so she's easy to own; her cheap M1 unlocks nearly her full power without deep whaling.
- Low damage ceiling in the 3.0 meta: against newer Physical DPS (Jane, Evelyn, Soldier 0-Anby, Pulchra) her total output clearly lags — only invest if you like her or lack a Physical DPS.
- Execution-heavy: relies on back-hits + Dodge Counter timing, and she can't self-generate quick-assists/dodges during the stun window, so she wants an assist-feeding support (Astra Yao fits well) to keep her core passive — harder than a point-and-shoot attacker.
- Very stat-hungry and reliant on the Steel Cushion signature: without it she loses the +25% back-damage and baseline Crit Rate, dropping her output noticeably.
Recommended Bangboo
Endgame mode fit
In Shiyu Defense Neko can clear a single/low-target side: pair a Stunner (Lycaon/Pulchra) + an assist-feeding support (Astra Yao) to hold her Crit core in the stun window, or the F2P Neko + Anby + Nicole. She can still clear but struggles for high stars on the hardest floors since her damage ceiling trails newer DPS — good if you lack a Physical DPS, not a top pick.
In Deadly Assault against multiple high-HP foes, Neko needs Nicole/a Stunner to clump enemies so her Basic combo sweeps them, but she's single-target leaning so she's at a disadvantage; scores are fine on easier tiers, hard to compete for top on high tiers — use as a stopgap when your roster is thin.
Skills
Basic Attack2
 Basic Attack
Basic Attack: Kitty Slash
Press to activate: Unleashes up to 5 slashes, dealing Physical DMG. On the last hit, there is a 33.33% chance to repeat this hit 3 times.
Basic Attack: Crimson Blade
Hold during the first 3 hits of Nekomata's Basic Attack to activate: Slashes enemies in front and passes through them, dealing Physical DMG. Upon activation, there is a 33.33% chance to repeat this attack 3 times.
Dodge3
 Dodge
DodgeDodge: Can't Touch Me-ow~
Press to activate: A rapid dodge. Character is invulnerable while using this skill.
Dash Attack: Over Here!
Press during a dodge to activate: Slashes enemies in front, dealing Physical DMG.
Dodge Counter: Phantom Claws
Press during a Perfect Dodge to activate: Slashes enemies in front, dealing Physical DMG. Character is invulnerable while using this skill.
Assist3
 Assist
Quick Assist: Cat's Paw
When the on-field character is launched, press to activate: Slashes enemies in front, dealing Physical DMG. Character is invulnerable while using this skill.
Defensive Assist: Desperate Defense
When the character on field is about to be attacked, press to activate: Parries the enemy's attack, dealing massive Daze. Character is invulnerable while using this skill.
Assist Follow-Up: Shadow Strike
Press after a Defensive Assist to activate: Charge and slash enemies in front, dealing Physical DMG. Character is invulnerable while using this skill.
Special Attack2
 Special Attack
Special Attack: Surprise Attack
Press to activate: Unleashes a downward strike, dealing Physical DMG. Anti-Interrupt level is increased while using this skill.
EX Special Attack: Super Surprise Attack!
With enough Energy, press to activate: Unleashes a powerful falling slash that deals massive Physical DMG. Character is invulnerable while using this skill.
Chain Attack2
 Chain Attack
Chain Attack: Claw Swipe
When a Chain Attack is triggered, select the character to activate: Unleashes a powerful slash at enemies ahead in a large area, dealing massive Physical DMG. Character is invulnerable while using this skill.
Ultimate: Claw Smash
When Decibel Rating is at Maximum, press to activate: Unleashes powerful slashes at enemies ahead in a large area, dealing massive Physical DMG. Character is invulnerable while using this skill.
Core Skill2
 Core Skill
Core Passive: Stealthy Paws
When Nekomata's Dodge Counter or Quick Assist hits an enemy, her DMG increases by 30% for 6s.*Stats shown are at Base level.
Additional Ability: Catwalk
When another character in your squad shares the same Attribute or Faction:After any character inflicts Assault, increases the DMG of Nekomata's next EX Special Attack by 35%, stacking up to 2 times.
Skill Coefficients by Level
Basic Attack2
Basic Attack: Kitty Slash
| Lv | Lv.1 | Lv.2 | Lv.3 | Lv.4 | Lv.5 | Lv.6 | Lv.7 | Lv.8 | Lv.9 | Lv.10 | Lv.11 | Lv.12 | Lv.13 | Lv.14 | Lv.15 | Lv.16 |
|---|---|---|---|---|---|---|---|---|---|---|---|---|---|---|---|---|
| 1st-Hit DMG Multiplier | 55.2% | 60.3% | 65.4% | 70.5% | 75.6% | 80.7% | 85.8% | 90.9% | 96% | 101.1% | 106.2% | 111.3% | 116.4% | 121.5% | 126.60% | 131.70% |
| 2nd-Hit DMG Multiplier | 62.6% | 68.3% | 74% | 79.7% | 85.4% | 91.1% | 96.8% | 102.5% | 108.2% | 113.9% | 119.6% | 125.3% | 131% | 136.7% | 142.4% | 148.1% |
| 3rd-Hit DMG Multiplier | 72.7% | 79.4% | 86.1% | 92.8% | 99.5% | 106.2% | 112.9% | 119.6% | 126.3% | 133% | 139.7% | 146.4% | 153.1% | 159.8% | 166.5% | 173.2% |
| 4th-Hit DMG Multiplier | 170.2% | 185.7% | 201.2% | 216.7% | 232.2% | 247.7% | 263.2% | 278.7% | 294.2% | 309.7% | 325.2% | 340.7% | 356.2% | 371.7% | 387.2% | 402.7% |
| 5th-Hit DMG Multiplier | 123.6% | 134.9% | 146.2% | 157.5% | 168.8% | 180.1% | 191.4% | 202.7% | 214% | 225.3% | 236.6% | 247.9% | 259.2% | 270.5% | 281.8% | 293.1% |
| 1st-Hit Daze Multiplier | 18% | 18.9% | 19.8% | 20.7% | 21.6% | 22.5% | 23.4% | 24.3% | 25.2% | 26.1% | 27% | 27.9% | 28.8% | 29.7% | 30.6% | 31.5% |
| 2nd-Hit Daze Multiplier | 37.1% | 38.8% | 40.5% | 42.2% | 43.9% | 45.6% | 47.3% | 49% | 50.7% | 52.4% | 54.1% | 55.8% | 57.5% | 59.2% | 60.9% | 62.6% |
| 3rd-Hit Daze Multiplier | 46.7% | 48.9% | 51% | 53.3% | 55.5% | 57.7% | 59.9% | 62.1% | 64.3% | 66.5% | 68.7% | 70.9% | 73.1% | 75.3% | 77.5% | 79.7% |
| 4th-Hit Daze Multiplier | 103.7% | 108.5% | 113.3% | 118.1% | 122.9% | 127.7% | 132.5% | 137.3% | 142.1% | 146.9% | 151.7% | 156.5% | 161.3% | 166.1% | 170.9% | 175.7% |
| 5th-Hit Daze Multiplier | 58.9% | 61.6% | 64.3% | 67% | 69.7% | 72.4% | 75.1% | 77.8% | 80.5% | 83.2% | 85.9% | 88.6% | 91.3% | 94% | 96.7% | 99.4% |
Basic Attack: Crimson Blade
| Lv | Lv.1 | Lv.2 | Lv.3 | Lv.4 | Lv.5 | Lv.6 | Lv.7 | Lv.8 | Lv.9 | Lv.10 | Lv.11 | Lv.12 | Lv.13 | Lv.14 | Lv.15 | Lv.16 |
|---|---|---|---|---|---|---|---|---|---|---|---|---|---|---|---|---|
| DMG Multiplier | 71.8% | 78.4% | 85% | 91.6% | 98.2% | 104.8% | 111.4% | 118% | 124.6% | 131.2% | 137.8% | 144.4% | 151% | 157.6% | 164.2% | 170.8% |
| Daze Multiplier | 58.9% | 61.6% | 64.3% | 67% | 69.7% | 72.4% | 75.1% | 77.8% | 80.5% | 83.2% | 85.9% | 88.6% | 91.3% | 94% | 96.7% | 99.4% |
Dodge2
Dash Attack: Over Here!
| Lv | Lv.1 | Lv.2 | Lv.3 | Lv.4 | Lv.5 | Lv.6 | Lv.7 | Lv.8 | Lv.9 | Lv.10 | Lv.11 | Lv.12 | Lv.13 | Lv.14 | Lv.15 | Lv.16 |
|---|---|---|---|---|---|---|---|---|---|---|---|---|---|---|---|---|
| DMG Multiplier | 35.1% | 38.3% | 41.5% | 44.7% | 47.9% | 51% | 54.3% | 57.5% | 60.7% | 63.9% | 67.1% | 70.3% | 73.5% | 76.7% | 79.9% | 83.1% |
| Daze Multiplier | 17.6% | 18.4% | 19.2% | 20% | 20.8% | 21.6% | 22.4% | 23.2% | 24% | 24.8% | 25.6% | 26.4% | 27.2% | 28% | 28.8% | 29.6% |
Dodge Counter: Phantom Claws
| Lv | Lv.1 | Lv.2 | Lv.3 | Lv.4 | Lv.5 | Lv.6 | Lv.7 | Lv.8 | Lv.9 | Lv.10 | Lv.11 | Lv.12 | Lv.13 | Lv.14 | Lv.15 | Lv.16 |
|---|---|---|---|---|---|---|---|---|---|---|---|---|---|---|---|---|
| DMG: Multiplier | 227.9% | 248.7% | 269.5% | 290.3% | 311.1% | 331.9% | 352.7% | 373.5% | 394.3% | 415.1% | 435.9% | 456.7% | 477.5% | 498.3% | 519.1% | 539.9% |
| Daze Multiplier | 199.5% | 208.6% | 217.7% | 226.8% | 235.9% | 245% | 254.1% | 263.2% | 272.3% | 281.4% | 290.5% | 299.6% | 308.7% | 317.8% | 326.9% | 336% |
Assist3
Quick Assist: Cat's Paw
| Lv | Lv.1 | Lv.2 | Lv.3 | Lv.4 | Lv.5 | Lv.6 | Lv.7 | Lv.8 | Lv.9 | Lv.10 | Lv.11 | Lv.12 | Lv.13 | Lv.14 | Lv.15 | Lv.16 |
|---|---|---|---|---|---|---|---|---|---|---|---|---|---|---|---|---|
| DMG Multiplier | 94.5% | 103.1% | 111.7% | 120.3% | 128.9% | 137.5% | 146.1% | 154.7% | 163.3% | 171.9% | 180.5% | 189.1% | 197.7% | 206.3% | 214.9% | 223.5% |
| Daze Multiplier | 94.5% | 98.8% | 103.1% | 107.4% | 111.7% | 116% | 120.3% | 124.6% | 128.9% | 133.2% | 137.5% | 141.80% | 146.1% | 150.4% | 154.7% | 159% |
Defensive Assist: Desperate Defense
| Lv | Lv.1 | Lv.2 | Lv.3 | Lv.4 | Lv.5 | Lv.6 | Lv.7 | Lv.8 | Lv.9 | Lv.10 | Lv.11 | Lv.12 | Lv.13 | Lv.14 | Lv.15 | Lv.16 |
|---|---|---|---|---|---|---|---|---|---|---|---|---|---|---|---|---|
| Light Defensive Daze Multiplier | 259% | 270.8% | 282.6% | 294.4% | 306.2% | 318% | 329.8% | 341.6% | 353.4% | 365.2% | 377% | 388.8% | 400.6% | 412.4% | 424.2% | 436% |
| Heavy Defensive Daze Multiplier | 327.3% | 342.2% | 357.1% | 372% | 386.9% | 401.8% | 416.7% | 431.6% | 446.5% | 461.4% | 476.3% | 491.2% | 506.1% | 521% | 535.9% | 550.8% |
| Chain Defensive Daze Multiplier | 159.3% | 166.6% | 173.9% | 181.2% | 188.5% | 195.8% | 203% | 210.4% | 217.7% | 225% | 232.3% | 239.6% | 246.9% | 254.2% | 261.5% | 268.8% |
Assist Follow-Up: Shadow Strike
| Lv | Lv.1 | Lv.2 | Lv.3 | Lv.4 | Lv.5 | Lv.6 | Lv.7 | Lv.8 | Lv.9 | Lv.10 | Lv.11 | Lv.12 | Lv.13 | Lv.14 | Lv.15 | Lv.16 |
|---|---|---|---|---|---|---|---|---|---|---|---|---|---|---|---|---|
| DMG Multiplier | 300.4% | 327.8% | 355.2% | 382.6% | 410% | 437.4% | 464.8% | 492.2% | 519.6% | 547% | 574.40% | 601.80% | 629.2% | 656.6% | 684% | 711.4% |
| Daze Multiplier | 258.1% | 269.9% | 281.7% | 293.5% | 305.3% | 317.1% | 328.9% | 340.7% | 352.5% | 364.3% | 376.1% | 387.9% | 399.7% | 411.5% | 423.3% | 435.1% |
Special Attack2
Special Attack: Surprise Attack
| Lv | Lv.1 | Lv.2 | Lv.3 | Lv.4 | Lv.5 | Lv.6 | Lv.7 | Lv.8 | Lv.9 | Lv.10 | Lv.11 | Lv.12 | Lv.13 | Lv.14 | Lv.15 | Lv.16 |
|---|---|---|---|---|---|---|---|---|---|---|---|---|---|---|---|---|
| DMG Multiplier | 47.3% | 51.6% | 55.9% | 60.2% | 64.5% | 68.8% | 73.1% | 77.4% | 81.7% | 86% | 90.3% | 94.6% | 98.9% | 103.2% | 107.5% | 111.8% |
| Daze Multiplier | 47.3% | 49.5% | 51.7% | 53.9% | 56.1% | 58.3% | 60.5% | 62.7% | 64.9% | 67.10% | 69.3% | 71.5% | 73.7% | 75.9% | 78.1% | 80.3% |
EX Special Attack: Super Surprise Attack!
| Lv | Lv.1 | Lv.2 | Lv.3 | Lv.4 | Lv.5 | Lv.6 | Lv.7 | Lv.8 | Lv.9 | Lv.10 | Lv.11 | Lv.12 | Lv.13 | Lv.14 | Lv.15 | Lv.16 |
|---|---|---|---|---|---|---|---|---|---|---|---|---|---|---|---|---|
| DMG Multiplier | 539.70% | 588.80% | 637.90% | 687% | 736.1% | 785.2% | 834.3% | 883.4% | 932.5% | 981.6% | 1030.7% | 1079.80% | 1128.9% | 1178% | 1227.1% | 1276.2% |
| Daze Multiplier | 455.4% | 476.1% | 496.8% | 517.5% | 538.2% | 558.9% | 579.6% | 600.3% | 621% | 641.7% | 662.4% | 683.1% | 703.8% | 724.5% | 745.2% | 765.9% |
| Energy Cost | 40 | 40 | 40 | 40 | 40 | 40 | 40 | 40 | 40 | 40 | 40 | 40 | 40 | 40 | 40 | 40 |
Chain Attack2
Chain Attack: Claw Swipe
| Lv | Lv.1 | Lv.2 | Lv.3 | Lv.4 | Lv.5 | Lv.6 | Lv.7 | Lv.8 | Lv.9 | Lv.10 | Lv.11 | Lv.12 | Lv.13 | Lv.14 | Lv.15 | Lv.16 |
|---|---|---|---|---|---|---|---|---|---|---|---|---|---|---|---|---|
| DMG Multiplier | 536.2% | 585% | 633.8% | 682.6% | 731.4% | 780.2% | 829% | 877.8% | 926.6% | 975.4% | 1024.2% | 1073% | 1121.8% | 1170.6% | 1219.4% | 1268.2% |
| Daze Multiplier | 159.2% | 166.5% | 173.8% | 181.1% | 188.4% | 195.7% | 203% | 210.3% | 217.6% | 224.9% | 232.2% | 239.5% | 246.8% | 254.1% | 261.4% | 268.7% |
Ultimate: Claw Smash
| Lv | Lv.1 | Lv.2 | Lv.3 | Lv.4 | Lv.5 | Lv.6 | Lv.7 | Lv.8 | Lv.9 | Lv.10 | Lv.11 | Lv.12 | Lv.13 | Lv.14 | Lv.15 | Lv.16 |
|---|---|---|---|---|---|---|---|---|---|---|---|---|---|---|---|---|
| DMG Multiplier | 1571.1% | 1714% | 1856.9% | 1999.8% | 2142.7% | 2285.6% | 2428.5% | 2571.4% | 2714.3% | 2857.2% | 3000.1% | 3143% | 3285.9% | 3428.8% | 3571.7% | 3714.6% |
| Daze Multiplier | 118.1% | 123.5% | 128.9% | 134.3% | 139.7% | 145.1% | 150.5% | 155.9% | 161.3% | 166.7% | 172.1% | 177.5% | 182.9% | 188.3% | 193.7% | 199.1% |
Core Skill1
Core Passive: Stealthy Paws
| Lv | Lv.1 | Lv.2 (A) | Lv.3 (B) | Lv.4 (C) | Lv.5 (D) | Lv.6 (E) | Lv.7 (F) |
|---|---|---|---|---|---|---|---|
| DMG Increase | 30% | 35% | 40% | 45% | 50% | 55% | 60% |
| CRIT Rate | - | - | 4.8% | - | 4.8% | - | 4.8% |
| Base ATK | - | +25 | - | +25 | - | +25 | - |
Mindscapes — how far is worth it?
When Nekomata hits an enemy from behind, she ignores 16% of her target's Physical RES. If the enemy is Stunned, all Nekomata's attacks are considered back attacks. While Nekomata lacks strength due to her small size, she has the perceptiveness and agility required to locate her enemies' weaknesses and strike right where it hurts most.
When there's only one enemy on the field and Nekomata is in combat, her Energy Generation Rate is increased by 25%. Cats always prefer to toy with their prey. If there's only one mouse left in combat — that's Nekomata's play time.
Basic Attack, Dodge, Assist, Special Attack, and Chain Attack Lv. +2 According to the legends of the old civilization, each tail represents one of a cat's many lives, with years of wisdom and experience stored within... Even if that's not true, the experience Nekomata has gained on the streets certainly is.
When Nekomata uses her EX Special Attack, her CRIT Rate increases by 7% for 15s, stacking up to 2 times, with each stack's duration being calculated separately. "Gimme more, gimme MORE! I can eat 'em all~" Her eyes sparkle as she licks the back of her paws.
Basic Attack, Dodge, Assist, Special Attack, and Chain Attack Lv. +2 According to the legends of the old civilization, each tail represents one of a cat's many lives, with years of wisdom and experience stored within... Sometimes Nekomata wonders to herself: If she is lucky enough to keep surviving, will she eventually grow another tail?
When Nekomata launches a Chain Attack or uses her Ultimate, her CRIT DMG increases by 18%, stacking up to 3 times. The effect expires when she's no longer in-combat. This effect gains maximum stacks immediately on defeating an enemy. "When a feline Thiren gets positive reinforcement from aggressive behavior, their latent animalistic tendencies emerge. Fortunately, these tendencies aren't permanent..." —Excerpt from the Handbook of Incomplete Research on Feline Thirens
Stats & Materials by Ascension Milestone
| Lv. | Before | After | Materials for this milestone |
|---|---|---|---|
| Lv.1 | HP: - ATK: - DEF: - [Recommended] ATK, CRIT Rate & CRIT DMG: - |
HP: 608 ATK: 131 DEF: 47 [Recommended] ATK, CRIT Rate & CRIT DMG: - |
|
| Lv.10 | HP: 1350 ATK: 202 DEF: 104 [Recommended] ATK, CRIT Rate & CRIT DMG: - |
HP: 1767 ATK: 249 DEF: 136 [Recommended] ATK, CRIT Rate & CRIT DMG: - |
Denny ×24,000
Basic Offense Certification Seal ×4
|
| Lv.20 | HP: 2592 ATK: 329 DEF: 200 [Recommended] ATK, CRIT Rate & CRIT DMG: - |
HP: 3009 ATK: 376 DEF: 233 [Recommended] ATK, CRIT Rate & CRIT DMG: - |
Denny ×56,000
Advanced Offense Certification Seal ×12
|
| Lv.30 | HP: 3833 ATK: 456 DEF: 298 [Recommended] ATK, CRIT Rate & CRIT DMG: - |
HP: 4250 ATK: 502 DEF: 330 [Recommended] ATK, CRIT Rate & CRIT DMG: - |
Denny ×120,000
Advanced Offense Certification Seal ×20
|
| Lv.40 | HP: 5075 ATK: 582 DEF: 394 [Recommended] ATK, CRIT Rate & CRIT DMG: - |
HP: 5492 ATK: 629 DEF: 427 [Recommended] ATK, CRIT Rate & CRIT DMG: - |
Denny ×200,000
Pioneer's Certification Seal ×10
|
| Lv.50 | HP: 6317 ATK: 708 DEF: 491 [Recommended] ATK, CRIT Rate & CRIT DMG: - |
HP: 6735 ATK: 755 DEF: 523 [Recommended] ATK, CRIT Rate & CRIT DMG: - |
Denny ×400,000
Pioneer's Certification Seal ×20
|
| Lv.60 | HP: - ATK: - DEF: - [Recommended] ATK, CRIT Rate & CRIT DMG: - |
HP: 7560 ATK: 835 DEF: 587 [Recommended] ATK, CRIT Rate & CRIT DMG: - |




Total materials across the whole ascension path
Materials Needed to Lv60







Total Denny for the character alone (ascension + basic skills + core skill A→F): about 1,706,000 Denny — W-Engine and Drive Discs not included.
Official Name in Other Languages
Voice Actors & Character Info
Background & Lore
More unlocks as Trust with this character increases in-game.
How to read this build page
Every Agent build page has 4 parts: a stat table by level, W-Engine/Drive Disc suggestions, a Mindscape roadmap, and recommended teams. Read them in that order — stats tell you "what you need", gear tells you "where to get it", Mindscape tells you "is it worth pulling", teams tell you "who to pair with". The section below explains how to read each part, and it applies the same way to every character on the site.
How to read the stat table and level
The stat table shows values at the ascension breakpoints (usually the final one, e.g. Lv60) — these are BASE stats with no gear added, useful for comparing Agents or checking whether you've ascended far enough. CRIT Rate and CRIT DMG are shown separately because they set the damage ceiling once Drive Disc substats stack on top. If your real stats are lower than the table, you likely haven't fully ascended or leveled yet — it's not a build mistake.
Why the W-Engine and Drive Disc picks make sense
Most Agents have a "signature" W-Engine designed for their exact role, plus a few cheaper standard-banner substitutes. Missing the signature isn't a dead end — most Agents keep most of their power with a well-matched substitute, just short by some amount of total damage.
- Drive Disc sets (2pc + 4pc) are picked for the set effect that fits that Agent's playstyle (mono-element, Anomaly, stun, and so on).
- Substats follow a priority that changes by role: Attack-type Agents usually chase CRIT Rate/CRIT DMG before ATK%; Anomaly-type Agents add Anomaly Proficiency to that mix; Stun/Support roles often value survivability or energy stats over pure CRIT.
These weights differ per character — follow the exact substat priority table above rather than applying one formula to every role.
Is Mindscape worth chasing
General rule: M0 (no duplicates) already clears the game's hardest content, even for S-rank Agents. Mindscape is a duplicate-fueled upgrade system, and each level costs more resources for a smaller power gain. For most Agents, the best value stop is usually M1–M2 (where some key effects unlock), while M6 is almost always for players chasing the absolute ceiling, not a requirement. Check the Mindscape section in the table above for that specific Agent's numbers.
Skill priority by role
There's no single order for every Agent, but the general pattern by role is:
- Attack: level the main damage skill first (Basic or Special Attack depending on kit), Dash/Dodge last.
- Stun: prioritize whichever skill builds Daze/Stun fastest, since the stun window is where the whole team dumps damage.
- Support: prioritize buff or energy-generating skills over personal damage — this role's value comes from lifting the whole team.
- Anomaly: prioritize the skill that stacks anomaly buildup, since most of the damage comes from the triggered effect, not the direct hit.
Always level the Core Skill steadily alongside the rest — it's a baseline stat that affects the whole rotation, not just one move.
Where to dig deeper
This section only teaches you how to read the page — for deeper comparisons, use the dedicated tools:
- Tier list to see where this Agent stands against the full roster.
- Teams for full in-game comps, including Bangboo and rotation order.
- Disc score to check how your current gear scores against the benchmark.
Agents of the same attribute





Nekomata FAQ
What is the best W-Engine for Nekomata?
Nekomata performs best with Steel Cushion. See alternatives and required stats in the Gear section above.
Is Nekomata worth pulling?
Nekomata is a 1.0 Physical DPS with a low damage ceiling compared to newer units like Jane, Evelyn, and Soldier 0. Her kit depends on back-attacks and Dodge Counters, so she's fairly execution-heavy. Only invest if you like her or lack a Physical DPS; she's not a worthwhile new pull in the 3.0 meta.
What is the best team for Nekomata?
Nekomata works best in the Sly Bunny Squad team. Full members and rotation are in the Teams section.
Who voices Nekomata in Zenless Zone Zero?
Nekomata (faction Cunning Hares, birthday Jul 30) is voiced according to the official credits published on the HoYoverse Wiki. See the full English/Japanese/Korean/Chinese voice actor list in the "Voice Actors & Character Info" block above — this data is pulled directly from the official wiki, not guessed.
Which Mindscape of Nekomata is worth investing in?
Nekomata has 6 Mindscape tiers (M1-M6), each unlocking its own effect detailed in the "Mindscape" block above (official wording). Mindscapes cost Mindscape Cinema currency farmed from limited banners, so weigh it against your budget — F2P players usually stop at M0-M1 and prioritize W-Engine and Drive Discs before pushing Mindscape higher.
How much Denny and how many materials to level Nekomata to Lv60?
Leveling Nekomata to max Lv60 (ascension + basic skills to 12 + core skill A→F) costs roughly 1,706,000 Denny, plus role-specific ascension materials, attribute-specific skill chips, high-dimensional data, and weekly boss drops — see the full list with exact quantities in the "Materials Needed" block above, sourced from the game's official leveling tables.
 Understand the mechanics behind this
 Drive Disc Scorer→