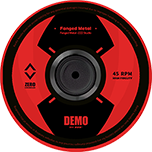
Fanged Metal
Set effect (official)
Physical DMG +10%
Whenever a squad member inflicts Assault on an enemy, the equipper deals 35% additional DMG to the target for 12s.
Main stat per slot 1 → 6
| Slot | Possible main stats |
|---|---|
| Slot 1 | |
| Slot 2 | |
| Slot 3 | |
| Slot 4 | |
| Slot 5 | |
| Slot 6 |
What it costs to max the set (by rarity)
| Level cap | Total EXP | Total Denny | |
|---|---|---|---|
| B | +9 | 8,000 | 12,000 |
| A | +12 | 24,000 | 36,000 |
| S | +15 | 48,000 | 72,000 |
Max Plating Agent needed for 1 disc
| Molded | Crystallized | Ether | |
|---|---|---|---|
| B | ×80 | ×16 | ×4 |
| A | ×240 | ×48 | ×12 |
| S | ×480 | ×96 | ×24 |
| Ether Plating Agent | Denny | |
|---|---|---|
| 1 disc to +15 ("graduated") | ×25 | 72,000 |
| Full set of 6 discs to +15 | ×150 | 432,000 |
 ×25
×25
Who should wear this set
4-Pc
2-Pc
Sub-stats worth prioritizing
Based on the roles of agents who actually use this set (full weights and methodology on the Drive Disc Score tool).
| CRIT Rate | CRIT DMG | ATK% | ATK (flat) | PEN | Anomaly Proficiency | HP% | DEF% | |
|---|---|---|---|---|---|---|---|---|
| Anomaly | 0.4 | 0.4 | 0.75 | 0.3 | 0.75 | 1 | 0 | 0 |
| Attack | 1 | 1 | 0.75 | 0.3 | 0.6 | 0 | 0 | 0 |
| Rupture | 1 | 1 | 0.45 | 0.2 | 0.35 | 0 | 0.75 | 0 |
Lore for each piece (6 pieces)
Slot 1 — HP%, ATK%, DEF%, Impact, Anomaly Mastery, Energy Regen
This Drive Disc contains track six from Fanged Metal. The melody that emanates with the rotation of the W-Engine is fierce and untamed.
Slot 2 — HP%, ATK%, DEF%, PEN Ratio, Physical/Fire/Ice/Electric/Ether DMG Bonus
This Drive Disc contains track five from Fanged Metal. The melody that emanates with the rotation of the W-Engine is fierce and untamed.
Slot 3 — HP%, ATK%, DEF%, CRIT Rate, CRIT DMG, Anomaly Proficiency
This Drive Disc contains track four from Fanged Metal. The melody that emanates with the rotation of the W-Engine is fierce and untamed.
Slot 4 — DEF
This Drive Disc contains track three from Fanged Metal. The melody that emanates with the rotation of the W-Engine is fierce and untamed.
Slot 5 — ATK
This Drive Disc contains track two from Fanged Metal. The melody that emanates with the rotation of the W-Engine is fierce and untamed.
Slot 6 — HP
This Drive Disc contains track one from Fanged Metal. The melody that emanates with the rotation of the W-Engine is fierce and untamed.
Official lore
A Drive Disc burned with specialized Ether technology offering personalized attribute amplification to the user.
How to read this Drive Disc page
The 2-piece effect unlocks once you equip 2 discs from the same set (usually a base stat buff); the 4-piece effect unlocks with 4 discs from the same set (usually stronger, with its own trigger condition — read the exact text above before committing). Since every agent only has 6 disc slots total, you always pick one of two splits: three different 2-piece sets, or one main 4-piece set plus one secondary 2-piece set.
The "who should use this" list below is pulled live from each character's build data: it shows whether this set is used as the 4-piece main pick or the 2-piece secondary pick, plus which other set it's paired with — so the list updates automatically whenever the meta does, it isn't hand-picked. The main stat on the first 3 slots (HP/ATK/DEF) is always fixed no matter the set; only slots 4-5-6 are yours to choose based on role (Crit Rate/Crit DMG for standard DPS, Anomaly Proficiency for Anomaly teams, Impact for Stun-role agents). See the full 6-slot mechanic and the complete set table on the Drive Discs page, or check terms in the ZZZ Glossary.
FAQ
What does the Fanged Metal Drive Disc set do?
The Fanged Metal set grants a 2-piece effect (Physical DMG +10%) and a 4-piece effect (Whenever a squad member inflicts Assault on an enemy, the equipper deals 35% additional DMG to the target for 12s.) once equipped. This is the fixed set bonus shared by all 6 pieces of the same name, independent of main/sub-stat rolls.
Which slot gives which stat on Fanged Metal?
Slots 1-3 (flat HP/ATK/DEF) are fixed by the game's design, while slots 4-6 unlock more main-stat options — check the "Main stat per slot" table above for the exact list per slot before upgrading, so you don't waste Ether Plating Agent on the wrong slot.
How much does it cost to max Fanged Metal?
Depends on the rarity it drops at: B caps at +9, A at +12, S at +15. Maxing one S-rank disc needs roughly 48,000 EXP and 72,000 Denny — see the "What it costs to max the set" table above for every rarity and the full 6-disc set.
Who should use the Fanged Metal set?
The site cross-checks the meta build database to list agents who actually run Fanged Metal as their main set (4-piece) or secondary set (2-piece) — see the "Who should wear this set" block above, auto-updated with the latest meta.
This is the detail page for ONE specific Drive Disc set: the verbatim 2-piece/4-piece effect text, a live list of characters who should use it pulled from real build data, and the fastest farm route already sit above. What follows fills in what most other set-detail pages skip: how to exchange straight for this set at the Bardic Needle shop instead of waiting on random drops, an exact sub-stat roll table by tier, which rarity is actually worth maxing out, how to weigh this set's 4-piece against a rival set's 2-piece without just eyeballing the printed percentages, and how to read the fine print in the 4-piece effect text above so you know how strong the set really is mid-fight, not just on paper.
Exchange this set directly at Bardic Needle — skip the random-drop grind
Beyond waiting on a random drop from Routine Cleanup, the set on this page can also be exchanged directly at the Bardic Needle shop using Plating Agents — you can't hand-pick every set this way, but at least it isn't blind grinding. Plating Agents come in the same rarity tiers as discs: B-tier drops straight from the same Routine Cleanup stage that drops this set, while A- and S-tier build up much slower — mainly from Rally Commissions, disassembling (scrapping) spare discs you don't need, and the seasonal City Fund reward track.
Since Plating Agents accumulate over time regardless of which stage you're farming, the efficient approach is running Routine Cleanup for direct drops while banking whatever Plating Agents you collect for whichever set or slot you're actually missing at the shop — the two sources complement each other rather than compete.
Exact sub-stat roll table — S-rank (reference, single source, not fully cross-verified)
The table below is the gain PER upgrade roll (not the total), for an S-rank disc, based on Korean community reporting — a single source, NOT yet cross-verified against official game data, so treat it as a relative reference rather than an exact match to your own rolls:
| Sub-stat | Per roll (S-rank) |
|---|---|
| CRIT Rate | +2.4% |
| CRIT DMG | +4.8% |
| ATK% | +3% |
| DEF% | +4.8% |
| HP% | +3% |
| ATK (flat) | +19 |
| DEF (flat) | +15 |
| HP (flat) | +112 |
| PEN | +9 |
| Anomaly Proficiency | +9 |
One note on the last row: the original source labeled it 'Anomaly Mastery,' but cross-checked against the sub-stats that actually exist on discs in-game, this is really Anomaly Proficiency — the two names are notoriously easy to mix up across languages, see the ZZZ Glossary for the full breakdown. B- and A-rank discs roll within a similar range but at lower values — no confirmed exact table for those two tiers yet.
How far is worth maxing — which rarity earns the full upgrade
Only an S-rank disc reaches the full +15 cap — the same threshold GameVika's own disc-scoring page uses as the 'graduated' mark, where a disc is good enough to stop swapping. B- and A-rank discs cap out well below that, so long-term, serious upgrade materials are only worth pouring into S-rank pieces; treat any B/A drop as a placeholder, or scrap it back into Plating Agents for something more useful instead of forcing it to full level.
Quick checkpoint at +9: if both rolls so far landed on the stats you actually want (say, CRIT Rate/CRIT DMG for a crit DPS), it's worth pushing on to +15. If most rolls went the wrong direction, stop at +9 and redirect materials to a disc that deserves it more instead of forcing a full set.
This set's 4-piece vs another set's 2-piece — don't just compare printed percentages
If a rival set's 2-piece effect adds a flat, fixed number, while this page's 4-piece effect stacks in LAYERS (a percentage per layer, sometimes counted separately per attack type, sometimes capped at a max stack count), resist the urge to compare the printed percentage at max stacks directly. Ask three questions before deciding which set is actually 'stronger':
- In a real combo or rotation, how many layers do you realistically hold on average — not the theoretical max you'd only hit with a flawless, uninterrupted string of hits?
- Does the buff RESET when you swap characters mid-combo, or when your attack rhythm breaks (dodging, getting knocked around, waiting on cooldowns)?
- Does the 4-piece effect require a specific condition (landing a crit, a specific attack type) that your team's playstyle can't reliably hit?
A 4-piece set that looks strong on paper but can't hold its layers in a real fight can absolutely lose out to a lower flat 2-piece bonus that's simply always active — this is exactly why communities across languages still argue over which set is 'actually better' even when both percentages are printed in black and white.
Read the fine print in the 4-piece effect text above
A few phrases in the 4-piece effect box above this section get skimmed past but completely change its real combat value — read them carefully before judging the set:
- 'Calculated separately per skill': the buff from Basic Attacks, Dodge Counters, and EX Special Attacks stacks INDEPENDENTLY, not off one shared counter — meaning alternating between attack types can hold more total layers than you'd expect from spamming just one.
- 'Up to N stacks': a hard cap for that specific layer type — landing more triggers past the cap refreshes the duration but adds nothing further.
- Duration measured in seconds: it always resets from the most recent qualifying hit (usually a crit), not fixed for the whole combo — standing idle or missing the trigger condition past that window drops the layer, and that's not a display bug.
Get these three right before comparing which set is 'stronger' just by eyeballing the percentage.
 Understand the mechanics behind this
 Drive Discs→
 Drive Disc Scorer→
 Characters→