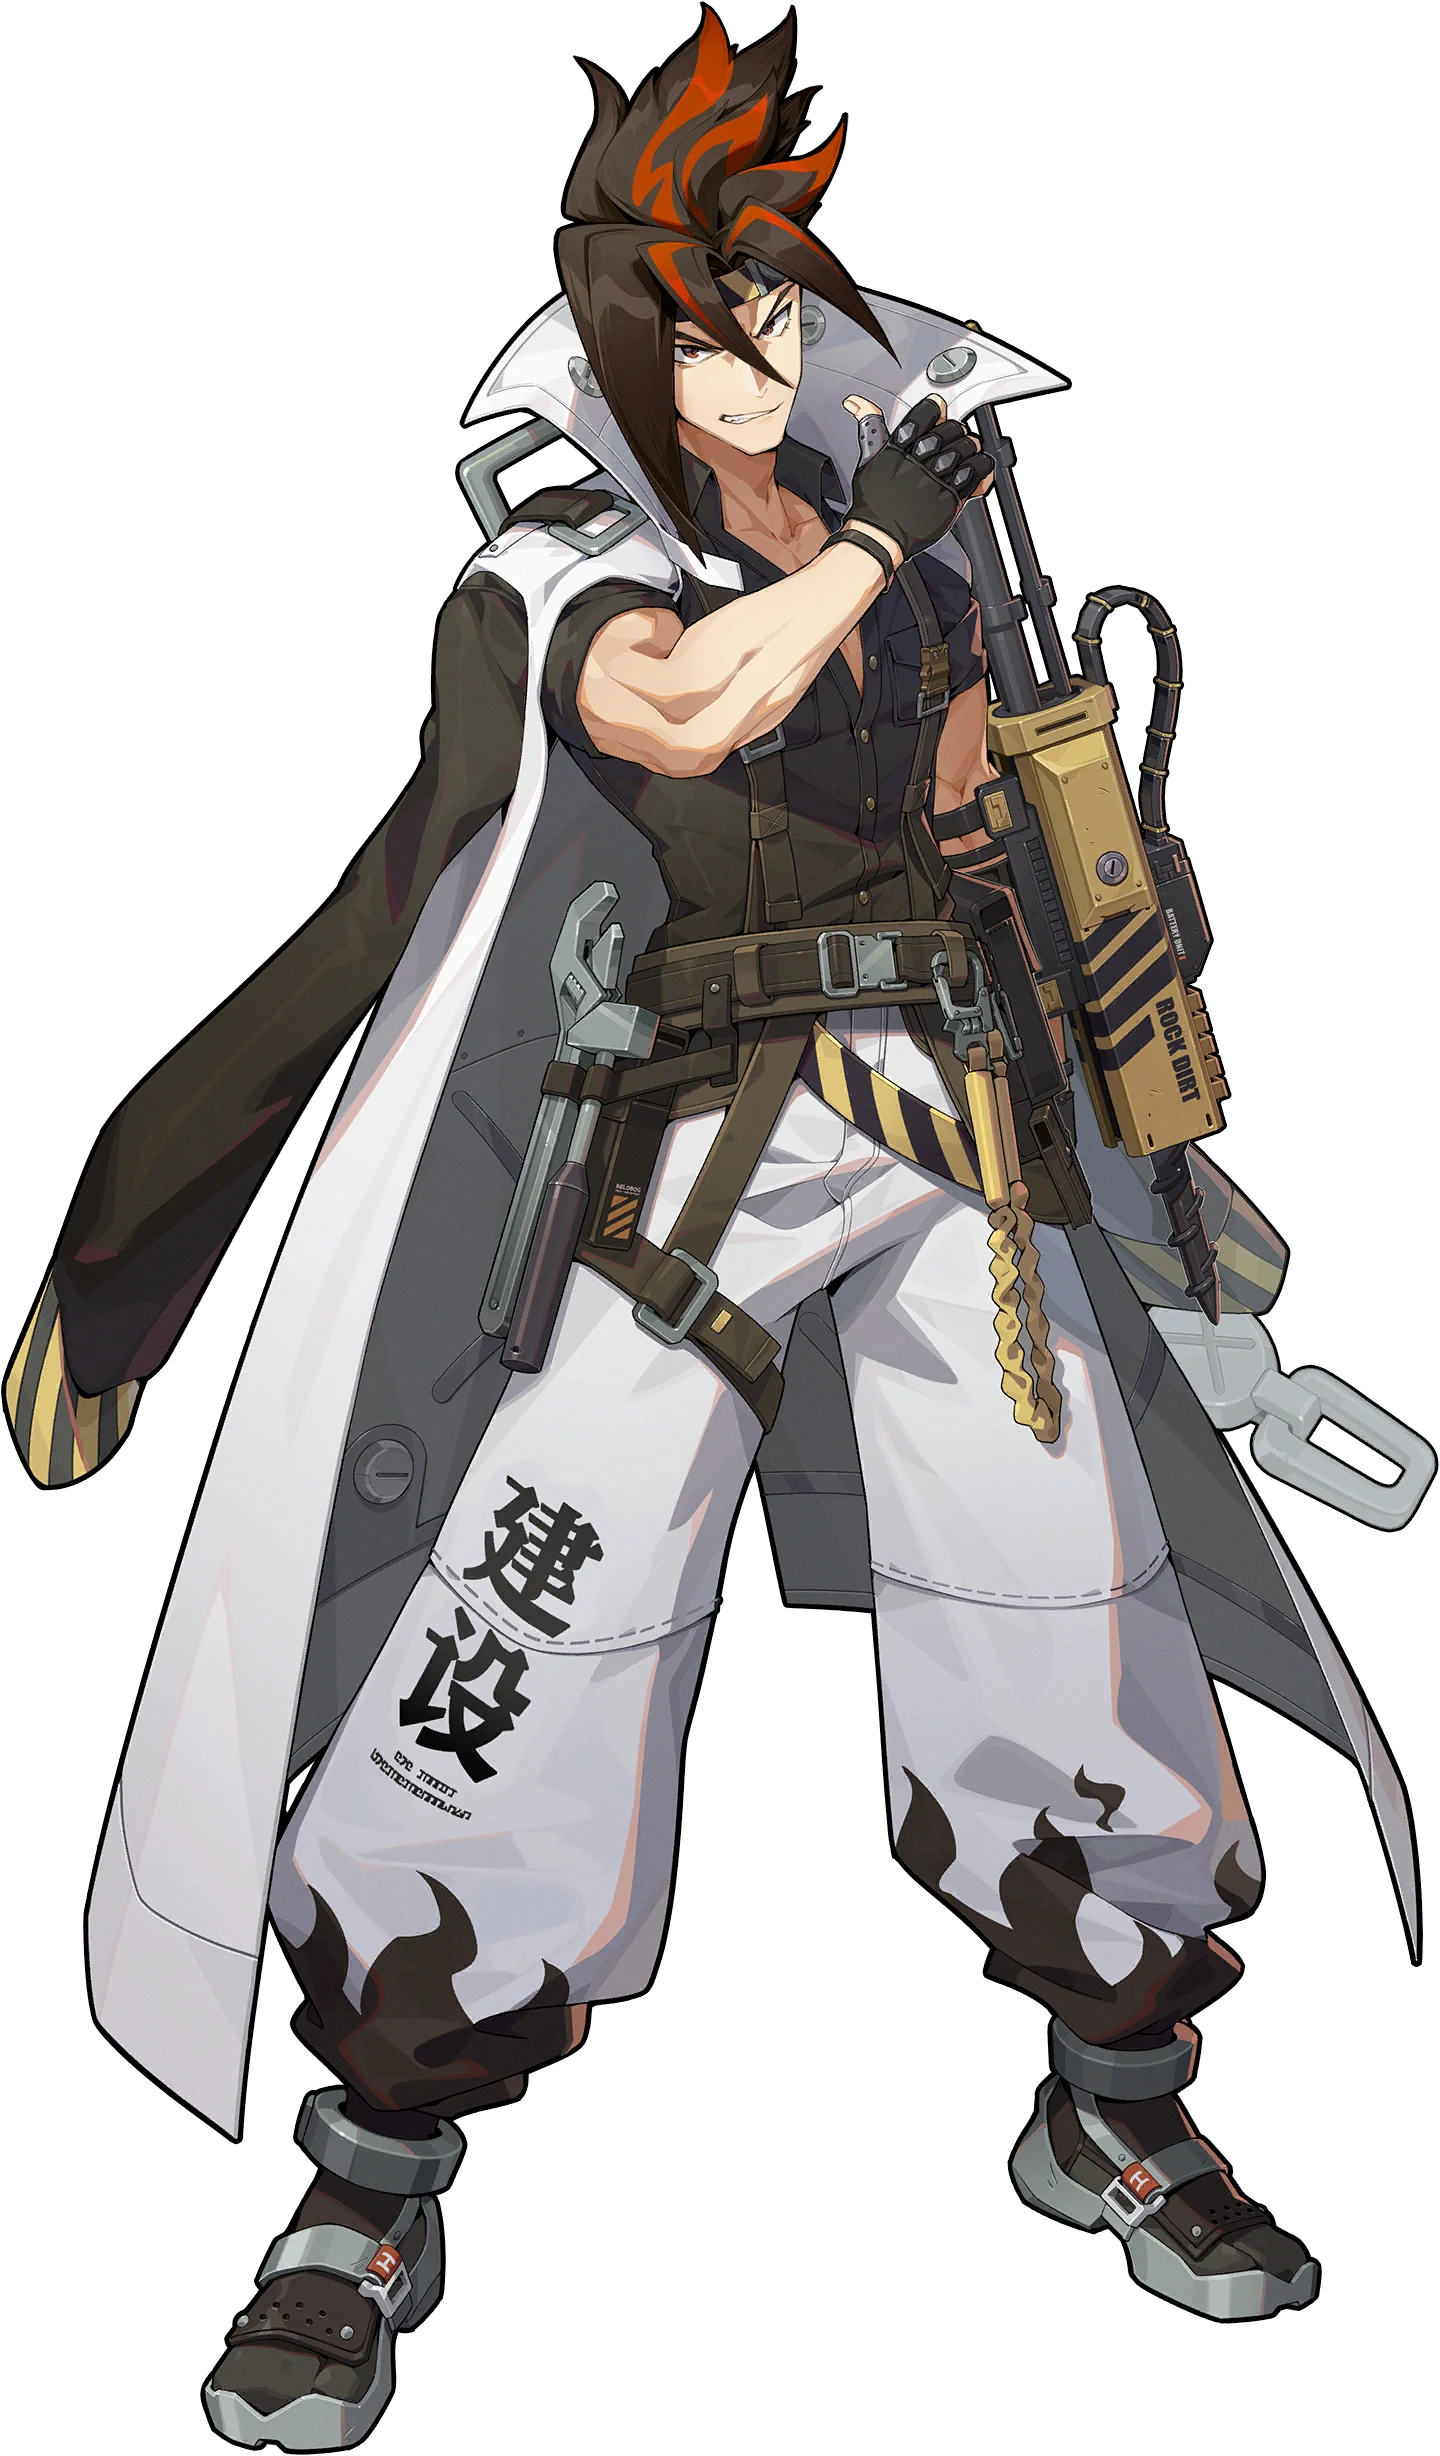
Anton
A drill-style Electric main DPS: enters Burst Mode to unleash a continuous stream of Basic/EX attacks, pairing well with Shock teams to stack Electric damage.
Tier B · Attack · Electric. BiS: Severed Innocence. A drill-style Electric main DPS: enters Burst Mode to unleash a continuous stream of Basic/EX attacks, pairing well with Shock teams to stack Electric damage.



Base stats
Recommended build
Best W-Engines
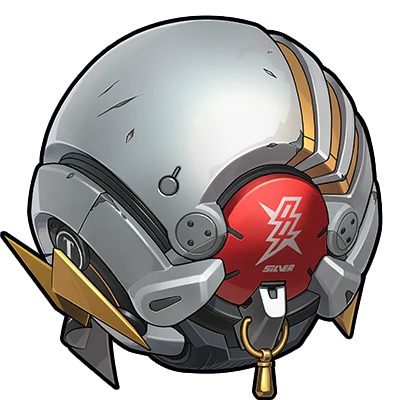
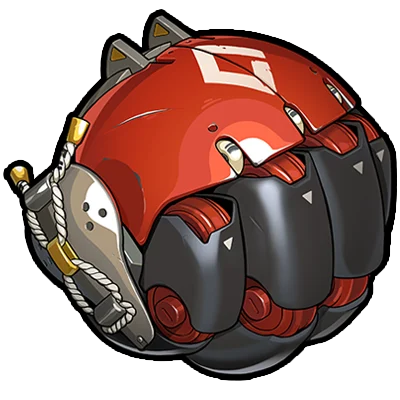
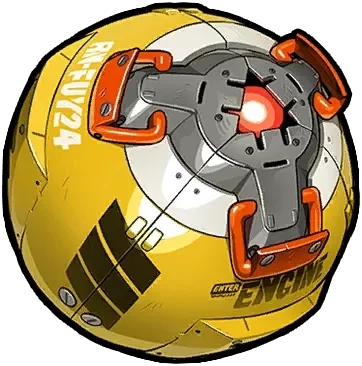
Recommendation order by current meta — the first is strongest, the rest are alternatives in decreasing priority. (Not a simulated DPS %.)
Recommended Drive Discs
 Thunder Metal
 Grace
Grace Rina
Rina4: CRIT Rate / CRIT DMG · 5: Electric DMG · 6: ATK%
CRIT Rate > CRIT DMG > ATK% > flat ATK/PEN
Skill priority: Basic Attack > EX Special > Chain Attack > Dodge
Recommended teams



Not a priority to invest in: Anton is an early A-rank Electric DPS with a fun playstyle, but his damage and convenience fall far behind newer Electric DPS like Harumasa or Soldier 0. Only invest if you love the drill theme or need a budget filler for a Shock team; skip him if you already own an S-rank Electric DPS.
 Harumasa
Role Ranking
The list below is pulled straight from the overall Tier List, keeping only the 16 agents who share the Attack role. Order within each tier is NOT a strength ranking — it simply groups agents by their original tier.













Stat targets
Reference Level 60 targets (per mobalytics): ATK 2,400+ / Crit Rate 70%+ / Crit DMG 130%+; in Shock teams aim for roughly a 70/140 crit pair before piling on ATK%. The key point is NOT one hard number but keeping Crit Rate high enough that Burst Mode Basic Attacks crit consistently (only every 4th crit retriggers Shock), while carrying enough Energy Regen to avoid falling out of Burst mid-rotation — Anton is one of the most Energy-hungry agents in the game (/mobalytics). Substat priority: Crit Rate = Crit DMG > PEN > ATK% > flat ATK; slot 6 takes ATK% or Energy Regen depending on whether the team already supplies enough energy.
Rotation & combos
1) OPENER / WAIT FOR SHOCK: let the partner (Grace/Rina, or Anby-Nicole) apply Shock first — Anton only shines against already-Shocked enemies. 2) ENTER BURST MODE: hold EX Special to send Anton into Burst Mode, the source of 90%+ of his damage. 3) DUMP IN BURST: chain Basic Attacks + Drill/Piledriver; every 4 crit Basics on a Shocked enemy retriggers Shock, snowballing Electric damage. 4) MANAGE ENERGY: weave EX/Drill to refill (M1 makes this far smoother) so you don't drop out of Burst mid-combo. 5) ULT/CHAIN: slot the Chain or Ultimate when available (M4 gives the whole team +Crit), then swap out for the partner to re-apply Shock and loop from step 2.
- Unique Shock retrigger: in Burst Mode, every 4 crit Basics on a Shocked enemy detonates another Shock — with a well-built Shock team the Electric damage stacks up thick.
- Very cheap and accessible: an A-rank that drops from the standard banner, and his A-rank signature Drill Rig – Red Axis means F2P can assemble a low-cost Electric Shock team that still functions.
- Fun, punchy drill-themed playstyle: once in Burst Mode you just plant and unload — easy for newcomers who enjoy a stand-and-spam stationary DPS.
- Among the most Energy-hungry agents: almost all his damage is locked behind Burst Mode, which drains Energy constantly — without M1 or an energy source he falls out of Burst and output becomes inconsistent.
- Dependent on enemies being Shocked: outside Burst and against non-Shocked foes he is notably weak — he must be paired with a Shock applier (Grace/Rina), limiting flexibility.
- Low, dated ceiling: an early A-rank Electric DPS whose damage and convenience both trail far behind Harumasa / Soldier 0 — not worth prioritizing if you already own an S-rank Electric DPS.
Recommended Bangboo
Endgame mode fit
Usable in Shiyu Defense but only decent: Anton is a stationary single-target DPS, best on the half with a single boss where he can camp Burst Mode and unload. He needs a safe stand-still window (a Grace/Rina Shock team, or a Stunner) to avoid combo interruption. His scoring ceiling is below newer S-rank Electric DPS, so treat him as an F2P gap-filler rather than an optimal pick.
In Deadly Assault Anton is weaker: the mode favors AoE / anomaly pile-up against multiple high-HP foes, whereas Anton is single-target and needs ramp time to build Burst — he usually scores below wide-hitting DPS/Anomaly units. If forced to use him, run a full Shock team (Grace + Rina) to keep Shock present, pick a stage with a single big-HP boss, and maximize Burst Mode uptime. Recommendation confidence: MEDIUM — Anton's guides are seldom updated and he rarely makes optimal Deadly Assault lineups.
Skills
Basic Attack2
 Basic Attack
Basic Attack: Enthusiastic Drills
Press to activate: Unleashes up to 4 mixed attacks in front, dealing Physical DMG. The 4th-hit is a Piledriver Attack.
Basic Attack: Enthusiastic Drills (Burst Mode)
Press while Anton is in Burst Mode to activate: Unleashes up to 3 mixed attacks in front of him, dealing massive Electric DMG. During the 2nd Drill Attack and 3rd Pile Driver Attack, repeatedly pressing or holding increases the attack duration.
Dodge4
 Dodge
DodgeDodge: Let's Move
Press to activate:A quick dash dodge. Character is invulnerable while using this skill.
Dash Attack: Fire With Fire
Press during a Dodge to activate. Rams into enemies in front of him, dealing Physical DMG.
Dodge Counter: Retaliation
Press during a Perfect Dodge to activate: Continuously strikes enemies in front of him with heavy punches, dealing Physical DMG. Character is invulnerable while using this attack.
Dodge Counter: Overload Drill (Burst Mode)
While in Burst Mode, press during a Perfect Dodge to activate: Launches a Drill Attack at enemies in front of him, dealing massive Electric DMG.Character is invulnerable during the attack.
Assist4
 Assist
Quick Assist: Shoulder-To-Shoulder
When the character in combat is launched, press to activate: Continuously strikes enemies in front of him with heavy punches, dealing Physical DMG. Character is invulnerable during the attack.
Quick Assist: Protective Drill (Burst Mode)
When the on-field character is launched, press to activate: Attacks enemies in front with a Drill Attack, dealing massive Electric DMG. Character is invulnerable during the attack.
Defensive Assist: Iron Wrist
When the character on field is about to be attacked, press to activate: Parries the enemy's attack, dealing massive Daze. This skill excels at parrying enemy attacks and reduces the consumption of Assist Points when the character is under intense attacks. Character is invulnerable while using this skill.
Assist Follow-Up: Limit Burst
Press after a Defensive Assist to activate: Launches a Drill Attack that ends in a Pile Driver Attack, dealing Electric DMG. Character is invulnerable while using this skill.
Special Attack3
 Special Attack
Special Attack: Spin, Bro!
Press to activate: Unleashes a Pile Driver Attack against enemies in a line in front, dealing Electric DMG. Anti-Interrupt level is increased while using this skill.
Special Attack: Explosive Drill (Burst Mode)
Press while in Burst Mode to activate:Launches a Pile Driver Attack at enemies in front, dealing Electric DMG. Anti-Interrupt level is increased while using this skill.
EX Special Attack: Smash the Horizon, Bro!
When Anton has enough Energy, press to activate: Launches several Pile Driver Attacks at enemies in a line in front of him, dealing massive Electric DMG.Character is invulnerable while using this skill. Anton enters Burst Mode after using this skill. When in Burst Mode, Anton's attacks become more powerful, dealing massive Electric DMG while continually consuming Energy upon hitting an enemy. Burst Mode remains active until his Energy is depleted.
Chain Attack2
 Chain Attack
Chain Attack: Go Go Go!
When a Chain Attack is triggered, select the character to activate: Unleashes a Pile Driver Attack onto the ground in front of him over a large area, dealing massive Electric DMG to enemies within range. Character is invulnerable while using this skill.
Ultimate: Go Go Go Go Go!
When Decibel Rating is at Maximum, press to activate: Unleashes a Pile Driver Attack onto the ground in front of him over a large area, dealing massive Electric DMG to enemies within range. Character is invulnerable while using this skill.
Core Skill2
 Core Skill
Core Passive: Brothers in Arms!
When Anton uses his Pile Driver Attack, the skill's DMG is increased by 12%. When he uses his Drill Attack, the skill's DMG is increased by 20%.*Stats shown are at Base level.
Additional Ability: Teamwork
When another character in your squad shares the same Attribute or Faction:While Anton is in Burst Mode, for every 4 critical hits, the next hit attack hitting Shocked enemies triggers an additional bout of Shock DMG at 45% of the original DMG. This effect can trigger once every 0.5s.
Skill Coefficients by Level
Basic Attack2
Basic Attack: Enthusiastic Drills
| Lv | Lv.1 | Lv.2 | Lv.3 | Lv.4 | Lv.5 | Lv.6 | Lv.7 | Lv.8 | Lv.9 | Lv.10 | Lv.11 | Lv.12 | Lv.13 | Lv.14 | Lv.15 | Lv.16 |
|---|---|---|---|---|---|---|---|---|---|---|---|---|---|---|---|---|
| 1st-Hit DMG Multiplier | 67.8% | 74% | 80.2% | 86.4% | 92.6% | 98.8% | 105% | 111.2% | 117.4% | 123.6% | 129.8% | 136% | 142.2% | 148.4% | 154.6% | 160.8% |
| 2nd-Hit DMG Multiplier | 92.3% | 100.7% | 109.1% | 117.5% | 125.9% | 134.3% | 142.7% | 151.1% | 159.5% | 167.9% | 176.3% | 184.7% | 193.1% | 201.5% | 209.9% | 218.3% |
| 3rd-Hit DMG Multiplier | 109.8% | 119.8% | 129.8% | 139.8% | 149.8% | 159.8% | 169.8% | 179.8% | 189.8% | 199.8% | 209.8% | 219.8% | 229.8% | 239.8% | 249.8% | 259.8% |
| 4th-Hit DMG Multiplier | 229.1% | 250% | 270.9% | 291.8% | 312.7% | 333.6% | 354.5% | 375.4% | 396.3% | 417.2% | 438.1% | 459% | 479.9% | 500.8% | 521.7% | 542.6% |
| 1st-Hit Daze Multiplier | 33.9% | 35.5% | 37.1% | 38.7% | 40.3% | 41.9% | 43.5% | 45.1% | 46.7% | 48.3% | 49.9% | 51.5% | 53.1% | 54.7% | 56.3% | 57.9% |
| 2nd-Hit Daze Multiplier | 75.3% | 78.8% | 82.3% | 85.8% | 89.3% | 92.8% | 96.3% | 99.8% | 103.3% | 106.8% | 110.3% | 113.8% | 117.3% | 120.8% | 124.3% | 127.8% |
| 3rd-Hit Daze Multiplier | 93.3% | 97.6% | 101.9% | 106.2% | 110.5% | 114.8% | 119.1% | 123.4% | 127.7% | 132% | 136.3% | 140.6% | 144.9% | 149.2% | 153.5% | 157.8% |
| 4th--Hit Daze Multiplier | 181.4% | 189.7% | 198% | 206.3% | 214.6% | 222.9% | 231.2% | 239.5% | 247.8% | 256.1% | 264.4% | 272.7% | 281% | 289.3% | 297.6% | 305.9% |
Basic Attack: Enthusiastic Drills (Burst Mode)
| Lv | Lv.1 | Lv.2 | Lv.3 | Lv.4 | Lv.5 | Lv.6 | Lv.7 | Lv.8 | Lv.9 | Lv.10 | Lv.11 | Lv.12 | Lv.13 | Lv.14 | Lv.15 | Lv.16 |
|---|---|---|---|---|---|---|---|---|---|---|---|---|---|---|---|---|
| 1st-Hit DMG Multiplier | 240.9% | 262.8% | 284.7% | 306.6% | 328.5% | 350.4% | 372.3% | 394.2% | 416.1% | 438% | 459.9% | 481.8% | 503.7% | 525.6% | 547.5% | 569.4% |
| 2nd-Hit DMG Multiplier | 469.2% | 511.9% | 554.6% | 597.3% | 640% | 682.7% | 725.4% | 768.1% | 810.8% | 853.5% | 896.2% | 938.9% | 981.6% | 1024.3% | 1067% | 1109.7% |
| 3rd-Hit DMG Multiplier | 456.9% | 498.5% | 540.1% | 581.7% | 623.3% | 664.9% | 706.5% | 748.1% | 789.7% | 831.3% | 872.9% | 914.5% | 956.1% | 997.7% | 1039.3% | 1080.9% |
| 1st-Hit Daze Multiplier | 166% | 173.6% | 181.2% | 188.8% | 196.4% | 204% | 211.6% | 219.2% | 226.8% | 234.4% | 242% | 249.6% | 257.2% | 264.8% | 272.4% | 280% |
| 2nd-Hit Daze Multiplier | 323.3% | 338% | 352.7% | 367.4% | 382.1% | 396.8% | 411.5% | 426.2% | 440.9% | 455.6% | 470.3% | 485% | 499.7% | 514.4% | 529.1% | 543.8% |
| 3rd-Hit Daze Multiplier | 314.8% | 329.2% | 343.6% | 358% | 372.4% | 386.8% | 401.2% | 415.6% | 430% | 444.4% | 458.8% | 473.2% | 487.6% | 502% | 516.4% | 530.8% |
Dodge3
Dash Attack: Fire With Fire
| Lv | Lv.1 | Lv.2 | Lv.3 | Lv.4 | Lv.5 | Lv.6 | Lv.7 | Lv.8 | Lv.9 | Lv.10 | Lv.11 | Lv.12 | Lv.13 | Lv.14 | Lv.15 | Lv.16 |
|---|---|---|---|---|---|---|---|---|---|---|---|---|---|---|---|---|
| DMG Multiplier | 68.4% | 74.7% | 81% | 87.3% | 93.6% | 99.9% | 106.2% | 112.5% | 118.8% | 125.1% | 131.4% | 137.7% | 144% | 150.3% | 156.6% | 162.9% |
| Daze Multiplier | 34.2% | 35.8% | 37.4% | 39% | 40.6% | 42.2% | 43.8% | 45.4% | 47% | 48.6% | 50.1% | 51.8% | 53.4% | 55% | 56.6% | 58.2% |
Dodge Counter: Retaliation
| Lv | Lv.1 | Lv.2 | Lv.3 | Lv.4 | Lv.5 | Lv.6 | Lv.7 | Lv.8 | Lv.9 | Lv.10 | Lv.11 | Lv.12 | Lv.13 | Lv.14 | Lv.15 | Lv.16 |
|---|---|---|---|---|---|---|---|---|---|---|---|---|---|---|---|---|
| DMG Multiplier | 271.2% | 295.9% | 320.6% | 345.3% | 370% | 394.7% | 419.4% | 444.1% | 468.8% | 493.5% | 518.2% | 542.9% | 567.6% | 592.3% | 617% | 641.7% |
| Daze Multiplier | 231.7% | 242.3% | 252.9% | 263.5% | 274.1% | 284.7% | 295.3% | 305.9% | 316.5% | 327.1% | 337.7% | 348.3% | 358.9% | 369.5% | 380.1% | 390.7% |
Dodge Counter: Overload Drill (Burst Mode)
| Lv | Lv.1 | Lv.2 | Lv.3 | Lv.4 | Lv.5 | Lv.6 | Lv.7 | Lv.8 | Lv.9 | Lv.10 | Lv.11 | Lv.12 | Lv.13 | Lv.14 | Lv.15 | Lv.16 |
|---|---|---|---|---|---|---|---|---|---|---|---|---|---|---|---|---|
| DMG Multiplier | 465.4% | 507.8% | 550.2% | 592.6% | 635% | 677.4% | 719.8% | 762.2% | 804.5% | 847% | 889.4% | 931.8% | 974.2% | 1016.6% | 1059% | 1101.4% |
| Daze Multiplier | 351.8% | 367.8% | 383.8% | 399.8% | 415.8% | 431.8% | 447.8% | 463.8% | 479.8% | 495.8% | 511.8% | 527.8% | 543.8% | 559.8% | 575.8% | 591.8% |
Assist4
Quick Assist: Shoulder-To-Shoulder
| Lv | Lv.1 | Lv.2 | Lv.3 | Lv.4 | Lv.5 | Lv.6 | Lv.7 | Lv.8 | Lv.9 | Lv.10 | Lv.11 | Lv.12 | Lv.13 | Lv.14 | Lv.15 | Lv.16 |
|---|---|---|---|---|---|---|---|---|---|---|---|---|---|---|---|---|
| DMG Multiplier | 263.4% | 287.4% | 311.4% | 335.4% | 359.4% | 383.4% | 407.4% | 431.4% | 455.4% | 479.4% | 503.4% | 527.4% | 551.4% | 575.4% | 599.4% | 623.4% |
| Daze Multiplier | 131.7% | 137.7% | 143.7% | 149.7% | 155.7% | 161.7% | 167.7% | 173.7% | 179.7% | 185.7% | 191.7% | 197.7% | 203.7% | 209.7% | 215.7% | 221.7% |
Quick Assist: Protective Drill (Burst Mode)
| Lv | Lv.1 | Lv.2 | Lv.3 | Lv.4 | Lv.5 | Lv.6 | Lv.7 | Lv.8 | Lv.9 | Lv.10 | Lv.11 | Lv.12 | Lv.13 | Lv.14 | Lv.15 | Lv.16 |
|---|---|---|---|---|---|---|---|---|---|---|---|---|---|---|---|---|
| DMG Multiplier | 365.4% | 398.7% | 432% | 465.3% | 498.6% | 531.9% | 565.2% | 598.5% | 631.8% | 665.1% | 698.4% | 731.7% | 765% | 798.3% | 831.6% | 864.9% |
| Daze Multiplier | 251.8% | 263.3% | 274.8% | 286.3% | 297.8% | 309.3% | 320.8% | 332.3% | 343.8% | 355.3% | 366.8% | 378.3% | 389.8% | 401.3% | 412.8% | 424.3% |
Defensive Assist: Iron Wrist
| Lv | Lv.1 | Lv.2 | Lv.3 | Lv.4 | Lv.5 | Lv.6 | Lv.7 | Lv.8 | Lv.9 | Lv.10 | Lv.11 | Lv.12 | Lv.13 | Lv.14 | Lv.15 | Lv.16 |
|---|---|---|---|---|---|---|---|---|---|---|---|---|---|---|---|---|
| Light Defensive Daze Multiplier | 246.7% | 258% | 269.3% | 280.6% | 291.9% | 303.2% | 314.5% | 325.8% | 337.1% | 348.4% | 359.7% | 371% | 382.3% | 393.6% | 404.8% | 416.2% |
| Heavy Defensive Daze Multiplier | 311.7% | 325.9% | 340.1% | 354.3% | 368.5% | 382.7% | 396.9% | 411.1% | 425.3% | 439.5% | 453.7% | 467.9% | 482.1% | 496.3% | 510.5% | 524.7% |
| Chain Defensive Daze Multiplier | 151.7% | 158.6% | 165.5% | 172.4% | 179.3% | 186.2% | 193.1% | 200% | 206.9% | 213.8% | 220.7% | 227.6% | 234.5% | 241.4% | 248.3% | 255.2% |
Assist Follow-Up: Limit Burst
| Lv | Lv.1 | Lv.2 | Lv.3 | Lv.4 | Lv.5 | Lv.6 | Lv.7 | Lv.8 | Lv.9 | Lv.10 | Lv.11 | Lv.12 | Lv.13 | Lv.14 | Lv.15 | Lv.16 |
|---|---|---|---|---|---|---|---|---|---|---|---|---|---|---|---|---|
| DMG Multiplier | 325.8% | 355.5% | 385.2% | 414.9% | 444.6% | 474.3% | 504% | 533.7% | 563.4% | 593.1% | 622.8% | 652.5% | 682.2% | 711.9% | 741.6% | 771.3% |
| Daze Multiplier | 282.7% | 295.6% | 308.5% | 321.4% | 334.3% | 347.2% | 360.1% | 373% | 385.9% | 398.8% | 411.7% | 424.6% | 437.5% | 450.4% | 463.3% | 476.2% |
Special Attack3
Special Attack: Spin, Bro!
| Lv | Lv.1 | Lv.2 | Lv.3 | Lv.4 | Lv.5 | Lv.6 | Lv.7 | Lv.8 | Lv.9 | Lv.10 | Lv.11 | Lv.12 | Lv.13 | Lv.14 | Lv.15 | Lv.16 |
|---|---|---|---|---|---|---|---|---|---|---|---|---|---|---|---|---|
| DMG Multiplier | 44.2% | 48.3% | 52.4% | 56.5% | 60.6% | 64.7% | 68.8% | 72.9% | 77% | 81.1% | 85.2% | 89.3% | 93.4% | 97.5% | 101.6% | 105.7% |
| Daze Multiplier | 44.2% | 46.3% | 48.4% | 50.5% | 52.6% | 54.7% | 56.8% | 58.9% | 61% | 63.1% | 65.2% | 67.3% | 69.4% | 71.5% | 73.6% | 75.7% |
Special Attack: Explosive Drill (Burst Mode)
| Lv | Lv.1 | Lv.2 | Lv.3 | Lv.4 | Lv.5 | Lv.6 | Lv.7 | Lv.8 | Lv.9 | Lv.10 | Lv.11 | Lv.12 | Lv.13 | Lv.14 | Lv.15 | Lv.16 |
|---|---|---|---|---|---|---|---|---|---|---|---|---|---|---|---|---|
| DMG Multiplier | 231.4% | 252.5% | 273.6% | 294.7% | 315.8% | 336.9% | 358% | 379.1% | 400.1% | 421.3% | 442.4% | 463.5% | 484.6% | 505.7% | 526.8% | 547.9% |
| Daze Multiplier | 118.4% | 123.8% | 129.2% | 134.6% | 140% | 145.4% | 150.8% | 156.2% | 161.6% | 167% | 172.4% | 177.8% | 183.2% | 188.6% | 194% | 199.4% |
EX Special Attack: Smash the Horizon, Bro!
| Lv | Lv.1 | Lv.2 | Lv.3 | Lv.4 | Lv.5 | Lv.6 | Lv.7 | Lv.8 | Lv.9 | Lv.10 | Lv.11 | Lv.12 | Lv.13 | Lv.14 | Lv.15 | Lv.16 |
|---|---|---|---|---|---|---|---|---|---|---|---|---|---|---|---|---|
| DMG Multiplier | 195.1% | 212.9% | 230.7% | 248.5% | 266.3% | 284.1% | 301.9% | 319.7% | 337.5% | 355.3% | 373.1% | 390.9% | 408.7% | 426.5% | 444.3% | 462.1% |
| Daze Multiplier | 195.1% | 204% | 212.9% | 221.8% | 230.7% | 239.6% | 248.5% | 257.4% | 266.3% | 275.2% | 284.1% | 293% | 301.9% | 310.8% | 319.7% | 328.6% |
| Energy Cost to Use | 40 | 40 | 40 | 40 | 40 | 40 | 40 | 40 | 40 | 40 | 40 | 40 | 40 | 40 | 40 | 40 |
Chain Attack2
Chain Attack: Go Go Go!
| Lv | Lv.1 | Lv.2 | Lv.3 | Lv.4 | Lv.5 | Lv.6 | Lv.7 | Lv.8 | Lv.9 | Lv.10 | Lv.11 | Lv.12 | ||||
|---|---|---|---|---|---|---|---|---|---|---|---|---|---|---|---|---|
| DMG Multiplier | 640.7% | 699% | 757.3% | 815.6% | 873.9% | 932.2% | 990.5% | 1048.8% | 1107.1% | 1165.4% | 1223.7% | 1282% | 1340.3% | 1398.6% | 1456.9% | 1515.2% |
| Daze Multiplier | 241.7% | 252.7% | 263.7% | 274.7% | 285.7% | 296.7% | 307.7% | 318.7% | 329.7% | 340.7% | 351.7% | 362.7% | 373.7% | 384.7% | 395.7% | 406.7% |
Chain Attack: Go Go Go Go Go!
| Lv | Lv.1 | Lv.2 | Lv.3 | Lv.4 | Lv.5 | Lv.6 | Lv.7 | Lv.8 | Lv.9 | Lv.10 | Lv.11 | Lv.12 | Lv.13 | Lv.14 | Lv.15 | Lv.16 |
|---|---|---|---|---|---|---|---|---|---|---|---|---|---|---|---|---|
| DMG Multiplier | 1816.4% | 1981.6% | 2146.8% | 2312% | 2477.2% | 2642.4% | 2807.6% | 2972.8% | 3138% | 3303.2% | 3468.4% | 3633.6% | 3798.8% | 3964% | 4129.2% | 4294.4% |
| Daze Multiplier | 243.4% | 254.5% | 265.6% | 276.7% | 287.8% | 298.9% | 310% | 321.1% | 332.2% | 343.3% | 354.4% | 365.5% | 376.6% | 387.7% | 398.8% | 409.9% |
Core Skill1
Core Passive: Brothers in Arms!
| Lv | Lv.1 | Lv.2 (A) | Lv.3 (B) | Lv.4 (C) | Lv.5 (D) | Lv.6 (E) | Lv.7 (F) |
|---|---|---|---|---|---|---|---|
| Piledriver Attack Skill DMG Increase | 12% | 14% | 16% | 18% | 20% | 22% | 24% |
| Drill Attack Skill DMG Increase | 20% | 23.3% | 26.6% | 30% | 33.3% | 36.6% | 40% |
| CRIT Rate | - | +4.8% | - | +4.8% | - | +4.8% | - |
| Base ATK | - | - | +25 | - | +25 | - | +25 |
Mindscapes — how far is worth it?
When Drill Attack hits an enemy, Anton gains additional Energy, up to a maximum of 5 Energy per skill use. "Are you awake? Get spinning, bro!" "Try and keep up. It's time to do our stretches!"
When Anton uses his EX Special Attack and enters Burst Mode, he gains a Shield that equals to 7.5% of his max HP. While in Burst Mode, entering combat or switching in reapplies the Shield effect. This effect can trigger once every 15s. The Shield dissipates when Burst Mode ends. After arduous training, a few lucky individuals will display exceptional vigor and perform above their usual level during high-intensity activities, entering a state of flow commonly known as "being in the zone." Are you ready to get moving and enter the zone? — Nitro-Fuel's exclusive program "Good Morning, Zealous Office Workers!"
Basic Attack, Dodge, Assist, Special Attack, and Chain Attack Lv. +2 Knowing a bit of everything may seem underwhelming, but in a complex and ever-changing Hollow worksite, having a wide skillset can present an opportunity to overcome difficulties.
When Anton uses a Chain Attack or Ultimate, all squad members' CRIT Rate increases by 10% for 12s. "Find your rhythm, and let's get moving!" When Anton starts to get serious, everyone becomes more nimble. They have to keep up or else they will be training alone the next day.
Basic Attack, Dodge, Assist, Special Attack, and Chain Attack Lv. +2 Knowing a bit of everything may seem underwhelming, but if you are resolute enough to change from "knowing a bit" to "being excellent," then you become omnipotent!
When Anton's Piledriver Attack triggers a critical hit, his Basic Attack: Enthusiastic Drills (Burst Mode) and Dodge Counter: Overload Drill (Burst Mode) deal 4% more DMG for 30s, stacking up to 6 times. Repeated triggers reset the duration. "Yeah bro, can you feel the burn?" Whenever Anton wants to exceed his limits, his "bro" starts spinning at an astonishing pace, its buzzing echoing Anton's resolution.
Stats & Materials by Ascension Milestone
| Lv. | Before | After | Materials for this milestone |
|---|---|---|---|
| Lv.1 | HP: - ATK: - DEF: - [Recommended] ATK, CRIT Rate & CRIT DMG: - |
HP: 580 ATK: 114 DEF: 50 [Recommended] ATK, CRIT Rate & CRIT DMG: - |
|
| Lv.10 | HP: 1289 ATK: 174 DEF: 111 [Recommended] ATK, CRIT Rate & CRIT DMG: - |
HP: 1686 ATK: 215 DEF: 145 [Recommended] ATK, CRIT Rate & CRIT DMG: - |
Denny ×24,000
Basic Offense Certification Seal ×4
|
| Lv.20 | HP: 2474 ATK: 283 DEF: 213 [Recommended] ATK, CRIT Rate & CRIT DMG: - |
HP: 2873 ATK: 323 DEF: 248 [Recommended] ATK, CRIT Rate & CRIT DMG: - |
Denny ×56,000
Advanced Offense Certification Seal ×12
|
| Lv.30 | HP: 3661 ATK: 391 DEF: 315 [Recommended] ATK, CRIT Rate & CRIT DMG: - |
HP: 4059 ATK: 432 DEF: 349 [Recommended] ATK, CRIT Rate & CRIT DMG: - |
Denny ×120,000
Advanced Offense Certification Seal ×20
|
| Lv.40 | HP: 4846 ATK: 500 DEF: 417 [Recommended] ATK, CRIT Rate & CRIT DMG: - |
HP: 5244 ATK: 541 DEF: 451 [Recommended] ATK, CRIT Rate & CRIT DMG: - |
Denny ×200,000
Pioneer's Certification Seal ×10
|
| Lv.50 | HP: 6032 ATK: 608 DEF: 519 [Recommended] ATK, CRIT Rate & CRIT DMG: - |
HP: 6431 ATK: 648 DEF: 554 [Recommended] ATK, CRIT Rate & CRIT DMG: - |
Denny ×400,000
Pioneer's Certification Seal ×20
|
| Lv.60 | HP: - ATK: - DEF: - [Recommended] ATK, CRIT Rate & CRIT DMG: - |
HP: 7219 ATK: 716 DEF: 622 [Recommended] ATK, CRIT Rate & CRIT DMG: - |

Total materials across the whole ascension path
Materials Needed to Lv60
Total Denny for the character alone (ascension + basic skills + core skill A→F): about 1,706,000 Denny — W-Engine and Drive Discs not included.
Official Name in Other Languages
Voice Actors & Character Info
Background & Lore
More unlocks as Trust with this character increases in-game.
How to read this build page
Every Agent build page has 4 parts: a stat table by level, W-Engine/Drive Disc suggestions, a Mindscape roadmap, and recommended teams. Read them in that order — stats tell you "what you need", gear tells you "where to get it", Mindscape tells you "is it worth pulling", teams tell you "who to pair with". The section below explains how to read each part, and it applies the same way to every character on the site.
How to read the stat table and level
The stat table shows values at the ascension breakpoints (usually the final one, e.g. Lv60) — these are BASE stats with no gear added, useful for comparing Agents or checking whether you've ascended far enough. CRIT Rate and CRIT DMG are shown separately because they set the damage ceiling once Drive Disc substats stack on top. If your real stats are lower than the table, you likely haven't fully ascended or leveled yet — it's not a build mistake.
Why the W-Engine and Drive Disc picks make sense
Most Agents have a "signature" W-Engine designed for their exact role, plus a few cheaper standard-banner substitutes. Missing the signature isn't a dead end — most Agents keep most of their power with a well-matched substitute, just short by some amount of total damage.
- Drive Disc sets (2pc + 4pc) are picked for the set effect that fits that Agent's playstyle (mono-element, Anomaly, stun, and so on).
- Substats follow a priority that changes by role: Attack-type Agents usually chase CRIT Rate/CRIT DMG before ATK%; Anomaly-type Agents add Anomaly Proficiency to that mix; Stun/Support roles often value survivability or energy stats over pure CRIT.
These weights differ per character — follow the exact substat priority table above rather than applying one formula to every role.
Is Mindscape worth chasing
General rule: M0 (no duplicates) already clears the game's hardest content, even for S-rank Agents. Mindscape is a duplicate-fueled upgrade system, and each level costs more resources for a smaller power gain. For most Agents, the best value stop is usually M1–M2 (where some key effects unlock), while M6 is almost always for players chasing the absolute ceiling, not a requirement. Check the Mindscape section in the table above for that specific Agent's numbers.
Skill priority by role
There's no single order for every Agent, but the general pattern by role is:
- Attack: level the main damage skill first (Basic or Special Attack depending on kit), Dash/Dodge last.
- Stun: prioritize whichever skill builds Daze/Stun fastest, since the stun window is where the whole team dumps damage.
- Support: prioritize buff or energy-generating skills over personal damage — this role's value comes from lifting the whole team.
- Anomaly: prioritize the skill that stacks anomaly buildup, since most of the damage comes from the triggered effect, not the direct hit.
Always level the Core Skill steadily alongside the rest — it's a baseline stat that affects the whole rotation, not just one move.
Where to dig deeper
This section only teaches you how to read the page — for deeper comparisons, use the dedicated tools:
- Tier list to see where this Agent stands against the full roster.
- Teams for full in-game comps, including Bangboo and rotation order.
- Disc score to check how your current gear scores against the benchmark.
Agents of the same attribute

Anton FAQ
What is the best W-Engine for Anton?
Anton performs best with Severed Innocence. See alternatives and required stats in the Gear section above.
Is Anton worth pulling?
Not a priority to invest in: Anton is an early A-rank Electric DPS with a fun playstyle, but his damage and convenience fall far behind newer Electric DPS like Harumasa or Soldier 0. Only invest if you love the drill theme or need a budget filler for a Shock team; skip him if you already own an S-rank Electric DPS.
What is the best team for Anton?
Anton works best in the Electric Shock team. Full members and rotation are in the Teams section.
Who voices Anton in Zenless Zone Zero?
Anton (faction Belobog Heavy Industries, birthday May 2) is voiced according to the official credits published on the HoYoverse Wiki. See the full English/Japanese/Korean/Chinese voice actor list in the "Voice Actors & Character Info" block above — this data is pulled directly from the official wiki, not guessed.
Which Mindscape of Anton is worth investing in?
Anton has 6 Mindscape tiers (M1-M6), each unlocking its own effect detailed in the "Mindscape" block above (official wording). Mindscapes cost Mindscape Cinema currency farmed from limited banners, so weigh it against your budget — F2P players usually stop at M0-M1 and prioritize W-Engine and Drive Discs before pushing Mindscape higher.
How much Denny and how many materials to level Anton to Lv60?
Leveling Anton to max Lv60 (ascension + basic skills to 12 + core skill A→F) costs roughly 1,706,000 Denny, plus role-specific ascension materials, attribute-specific skill chips, high-dimensional data, and weekly boss drops — see the full list with exact quantities in the "Materials Needed" block above, sourced from the game's official leveling tables.
 Understand the mechanics behind this
 Drive Disc Scorer→