
Rina
An off-field Support specializing in stacking PEN Ratio (DEF penetration) for the whole team, while also spreading Shock with her pair of electric pets.
Tier A · Support · Electric. BiS: Weeping Cradle. An off-field Support specializing in stacking PEN Ratio (DEF penetration) for the whole team, while also spreading Shock with her pair of electric pets.



Base stats
Recommended build
Best W-Engines


Recommendation order by current meta — the first is strongest, the rest are alternatives in decreasing priority. (Not a simulated DPS %.)
Recommended Drive Discs
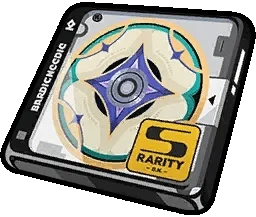 Moonlight Lullaby
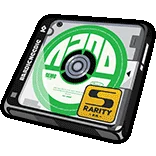 Swing Jazz
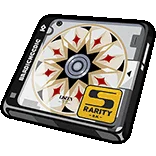 Astral Voice
4: ATK% · 5: PEN Ratio · 6: Energy Regen (swap to ATK% if you have enough energy)
PEN > ATK% > Energy Regen > flat ATK
Skill priority: Core Skill = Special Attack first (boosts the PEN buff), Assist/Basic later
Recommended teams




Rina is still a reliable PEN Ratio buffer for any DEF-penetration team, especially Electric carries. But newer supports (Astra Yao, Lucia) have surpassed her in total buffing, so only prioritize her if your team needs PEN. Great to use if you already have her; if not, don't force the pull.
 Astra Yao
 Lucia
LuciaRole Ranking
The list below is pulled straight from the overall Tier List, keeping only the 8 agents who share the Support role. Order within each tier is NOT a strength ranking — it simply groups agents by their original tier.





Stat targets
Endgame targets : ATK 2,200+ / HP 10,000+ / DEF 800+ / Anomaly Proficiency 220+ / PEN Ratio 40%+. KEY THRESHOLD: aim for ~72% PEN Ratio so the team receives the full 30% Core buff cap (Passive 6) — below that it scales down (buff = 25% of Rina's PEN Ratio + a flat amount, capped at 30%). Main stats: slot 4 ATK% · slot 5 PEN Ratio · slot 6 Energy Regen. Substat priority : Anomaly Proficiency > ATK% > PEN Ratio = flat ATK. As a buffer, having enough energy to cycle EX Special matters more than raw ATK.
Rotation & combos
1) OPENER: swap Rina in, press EX Special (when energy allows) to send Drusilla & Anastella at the enemy — the moment the pets strike, the whole team gains the PEN Ratio buff. 2) SWAP TO CARRY: immediately switch to your DPS/Stunner (Harumasa, Soldier 0 Anby, Qingyi...); the pets keep attacking off-field, holding the PEN buff while the carry bursts. 3) LOOP: when the pets return to Rina (M1 adds 5.5s), swap back and re-press EX Special / Basic to redeploy them. 4) ULT / CHAIN: fire when the group ult is ready to refresh buffs and pile on more Shock. 5) ELECTRIC TEAMS: Rina's Additional Ability extends Shock from 10s to 13s → keep at least one Shock applier active to bank the ~30% bonus damage.
- Rare PEN Ratio buffer: grants the whole team 25% of Rina's PEN Ratio + a flat amount, capped at 30% — raw armor penetration that suits any carry losing damage to enemy DEF (especially Electric carries).
- Nearly hands-free off-field buffing: just deploy the pets and swap, taking no field time from the carry — a simple rotation that's beginner-friendly.
- Extends Shock for Electric teams: her Additional Ability raises Shock duration from 10s to 13s → higher uptime and roughly 30% more total Electric anomaly damage.
- High movement speed makes it easy to reposition the pets around enemies — light execution, few mistakes.
- Rina herself is PEN-Ratio-hungry: below ~72% PEN her team buff falls short of the 30% cap, so an under-PEN Rina feels weak and awkward to play — demanding disc RNG and farming.
- Slow skill animations: her Special/EX inputs are sluggish, easy to fumble timing if you rush the rotation.
- Power-crept by 3.0: newer supports (Astra Yao, Lucia) out-buff her overall; only prioritize Rina when a team genuinely needs PEN Ratio — don't chase her otherwise.
Recommended Bangboo
Endgame mode fit
Fits Shiyu Defense when paired with armor-piercing Electric carries: the PEN Ratio buff lets Harumasa / Soldier 0 Anby burst inside Qingyi's stun window. Rina scores nothing herself but raises the whole team's damage ceiling. In 3.0 she's a 'solid' rather than 'top' support — pick her when the team needs DEF penetration; with Astra Yao available you'll usually prefer Astra.
Also usable in Deadly Assault with Electric/Shock teams: PEN Ratio plus the 13s Shock extension helps stack anomaly on multiple high-HP foes and keeps output steady across long stages. Not a highlight like a carry, but a dependable buff floor when bosses have high DEF.
Skills
Basic Attack2
 Basic Attack
Basic Attack: Whack the Dimwit
Press to activate:Order Drusilla and Anastella to attack up to 4 times, dealing Physical DMG and Electric DMG.Performing other actions with Rina during Drusilla and Anastella's attacks will not interrupt Rina's Basic Attack combo count.
Basic Attack: Shoo the Fool
Hold or to activate:Calls back Drusilla and Anastella to swing them around for a ranged attack, dealing Electric DMG.Anti-Interrupt level is increased while using this skill.
Dodge3
 Dodge
DodgeDodge: Dress Adjustment
Press to activate: A rapid dodge. Character is invulnerable while using this skill.
Dash Attack: Sudden Surprise
Press during a dodge to activate: Order Drusilla and Anastella to execute a piercing attack, dealing Physical DMG.
Dodge Counter: Bangboo Callback
Press during a Perfect Dodge to activate: Order Drusilla and Anastella to spin forward and trigger an explosion, dealing Electric DMG. Character is invulnerable while using this skill.
Assist3
 Assist
Quick Assist: Duple Meter Allemande
When the character on field is launched, press to activate: Order Drusilla and Anastella to spin forward and trigger an explosion, dealing Electric DMG. Character is invulnerable while using this skill.
Evasive Assist: Triple Meter Courante
When the character on field is about to be attacked, press to activate: Dodges the enemy's attack and activates Vital View. Character is invulnerable while using this skill.
Assist Follow-Up: Quadruple Meter Gavotte
Press after an Evasive Assist to activate: Order Drusilla and Anastella to push forward and generate an electrical vortex, dealing Electric DMG. Character is invulnerable while using this skill.
Special Attack2
 Special Attack
Special Attack: Beat the Blockhead
Press to activate: Order Anastella to execute a downward smash, dealing Electric DMG. Anti-Interrupt level is increased while using this skill.
EX Special Attack: Dimwit Disappearing Trick
With enough Energy, press to activate: Order Anastella to execute multiple downward smashes, dealing massive Electric DMG. Character is invulnerable while using this skill. A Quick Assist is triggered when this skill hits an enemy.
Chain Attack2
 Chain Attack
Chain Attack: Code of Conduct
When a Chain Attack is triggered, select the character to activate: Order Drusilla and Anastella to push forward and generate a ball-shaped electrical field that deals massive Electric DMG. During this skill, Drusilla and Anastella are unable to perform Basic Attacks, Dash Attacks, Special Attacks, and EX Special Attacks, but can be recalled to Rina's side through Basic Attack: Shoo the Fool. Character is invulnerable while using this skill. A Quick Assist is triggered when this skill hits an enemy.
Ultimate: The Queen's Attendants
When Decibel Rating is at Maximum, press to activate: Order Drusilla and Anastella to spin forward, dealing massive Electric DMG. During this skill, Drusilla and Anastella are unable to respond to Basic Attack, Dash Attack, Special Attack, or EX Special Attack commands, but can be recalled to Rina's side through Basic Attack: Shoo the Fool. Upon activating this skill, the other squad members recover 10 Energy. The next character to switch in recovers an additional 20 Energy. Character is invulnerable while using this skill. A Quick Assist is triggered when this skill hits an enemy.
Core Skill2
 Core Skill
Core Passive: Mini Destruction Partner
When ordering Drusilla or Anastella to attack, other squad members' PEN Ratio increases together with Rina's, by 25% of Rina's PEN Ratio + 6%, up to 30%. The effect ends when both Drusilla and Anastella return to Rina.
Additional Ability: Banquet of Perfection
When another character in your squad shares the same Attribute or Faction: Increases the duration of Shock inflicted on enemies by any character by 3s. When Shocked enemies are on the field, all squad members' Electric DMG increases by 10%.
Skill Coefficients by Level
Basic Attack2
Basic Attack: Whack the Dimwit
| Lv | Lv.1 | Lv.2 | Lv.3 | Lv.4 | Lv.5 | Lv.6 | Lv.7 | Lv.8 | Lv.9 | Lv.10 | Lv.11 | Lv.12 | Lv.13 | Lv.14 | Lv.15 | Lv.16 |
|---|---|---|---|---|---|---|---|---|---|---|---|---|---|---|---|---|
| 1st-Hit DMG Multiplier | 44% | 48% | 52% | 56% | 60% | 64% | 68% | 72% | 76% | 80% | 84% | 88% | 92.0% | 96.0% | 100.0% | 104.0% |
| 2nd-Hit DMG Multiplier | 111.4% | 121.6% | 131.8% | 142% | 152.2% | 162.4% | 172.6% | 182.8% | 193% | 203.2% | 213.4% | 223.6% | 233.8% | 244.0% | 254.2% | 264.4% |
| 3rd-Hit DMG Multiplier | 117.1% | 127.8% | 138.5% | 149.2% | 159.9% | 170.6% | 181.3% | 192% | 202.7% | 213.4% | 224.1% | 234.8% | 245.5% | 256.2% | 266.9% | 277.6% |
| 4th-Hit DMG Multiplier | 183.9% | 200.7% | 217.5% | 234.3% | 251.1% | 267.9% | 284.7% | 301.5% | 318.3% | 335.1% | 351.9% | 368.7% | 385.5% | 402.3% | 419.1% | 435.9% |
| 1st-Hit Daze Multiplier | 24.5% | 25.7% | 26.9% | 28.1% | 29.3% | 30.5% | 31.7% | 32.9% | 34.1% | 35.3% | 36.5% | 37.7% | 38.9% | 40.1% | 41.3% | 42.5% |
| 2nd-Hit Daze Multiplier | 88.4% | 92.5% | 96.6% | 100.7% | 104.8% | 108.9% | 113% | 117.1% | 121.2% | 125.3% | 129.4% | 133.5% | 137.6% | 141.7% | 145.8% | 149.9% |
| 3rd-Hit Daze Multiplier | 96.9% | 101% | 105.4% | 109.8% | 114.2% | 118.6% | 123% | 127.4% | 131.8% | 136.2% | 140.6% | 145% | 149.4% | 153.8% | 158.2% | 162.6% |
| 4th-Hit Daze Multiplier | 146.8% | 153.5% | 160.2% | 166.9% | 173.6% | 180.3% | 187% | 193.7% | 200.4% | 207.1% | 213.8% | 220.5% | 227.2% | 233.9% | 240.6% | 247.3% |
Basic Attack: Shoo the Fool
| Lv | Lv.1 | Lv.2 | Lv.3 | Lv.4 | Lv.5 | Lv.6 | Lv.7 | Lv.8 | Lv.9 | Lv.10 | Lv.11 | Lv.12 | Lv.13 | Lv.14 | Lv.15 | Lv.16 |
|---|---|---|---|---|---|---|---|---|---|---|---|---|---|---|---|---|
| DMG Multiplier | 315.1% | 343.8% | 372.5% | 401.2% | 429.9% | 458.6% | 487.3% | 516% | 544.7% | 573.4% | 602.1% | 630.8% | 659.5% | 688.2% | 716.9% | 745.6% |
| Daze Multiplier | 315.1% | 329.5% | 343.9% | 358.3% | 372.7% | 387.1% | 401.4% | 415.9% | 430.3% | 444.7% | 459.1% | 473.5% | 487.9% | 502.3% | 516.7% | 531.1% |
Dodge2
Dash Attack: Sudden Surprise
| Lv | Lv.1 | Lv.2 | Lv.3 | Lv.4 | Lv.5 | Lv.6 | Lv.7 | Lv.8 | Lv.9 | Lv.10 | Lv.11 | Lv.12 | Lv.13 | Lv.14 | Lv.15 | Lv.16 |
|---|---|---|---|---|---|---|---|---|---|---|---|---|---|---|---|---|
| DMG Multiplier | 105% | 114.6% | 124.2% | 133.8% | 143.4% | 153% | 162.6% | 172.2% | 181.8% | 191.4% | 201.% | 210.6% | 220.2% | 229.8% | 239.4% | 249.0% |
| Daze Multiplier | 52.5% | 54.9% | 57.3% | 59.7% | 62.1% | 64.5% | 66.9% | 69.3% | 71.7% | 74.1% | 76.5% | 78.9% | 81.3% | 83.7% | 86.1% | 88.5% |
Dodge Counter: Bangboo Callback
| Lv | Lv.1 | Lv.2 | Lv.3 | Lv.4 | Lv.5 | Lv.6 | Lv.7 | Lv.8 | Lv.9 | Lv.10 | Lv.11 | Lv.12 | Lv.13 | Lv.14 | Lv.15 | Lv.16 |
|---|---|---|---|---|---|---|---|---|---|---|---|---|---|---|---|---|
| DMG Multiplier | 227.6% | 248.3% | 269% | 289.7% | 310.4% | 331.1% | 351.8% | 372.5% | 393.2% | 413.9% | 434.6% | 455.3% | 476.0% | 496.7% | 517.4% | 538.1% |
| Daze Multiplier | 227.6% | 238% | 248.4% | 258.8% | 269.2% | 279.6% | 290% | 300.4% | 310.8% | 321.2% | 331.6% | 342% | 352.4% | 362.8% | 373.2% | 383.6% |
Assist2
Quick Assist: Duple Meter Allemande
| Lv | Lv.1 | Lv.2 | Lv.3 | Lv.4 | Lv.5 | Lv.6 | Lv.7 | Lv.8 | Lv.9 | Lv.10 | Lv.11 | Lv.12 | Lv.13 | Lv.14 | Lv.15 | Lv.16 |
|---|---|---|---|---|---|---|---|---|---|---|---|---|---|---|---|---|
| DMG Multiplier | 122.6% | 133.8% | 145% | 156.2% | 167.4% | 178.6% | 189.8% | 201% | 212.2% | 223.4% | 234.6% | 245.8% | 257.0% | 268.2% | 279.4% | 290.6% |
| Daze Multiplier | 122.6% | 128.2% | 133.8% | 139.4% | 145% | 150.6% | 156.2% | 161.8% | 167.4% | 173% | 178.6% | 184.2% | 189.8% | 195.4% | 201.0% | 206.6% |
Assist Follow-Up: Quadruple Meter Gavotte
| Lv | Lv.1 | Lv.2 | Lv.3 | Lv.4 | Lv.5 | Lv.6 | Lv.7 | Lv.8 | Lv.9 | Lv.10 | Lv.11 | Lv.12 | Lv.13 | Lv.14 | Lv.15 | Lv.16 |
|---|---|---|---|---|---|---|---|---|---|---|---|---|---|---|---|---|
| DMG Multiplier | 349.4% | 381.2% | 413% | 444.8% | 476.6% | 508.4% | 540.2% | 572% | 603.8% | 635.6% | 667.4% | 699.2% | 731.0% | 762.8% | 794.6% | 826.4% |
| Daze Multiplier | 303.6% | 317.4% | 331.2% | 345.0% | 358.8% | 372.6% | 386.4% | 400.1% | 414% | 427.8% | 441.6% | 455.4% | 469.2% | 483.0% | 496.8% | 510.6% |
Special Attack2
Special Attack: Beat the Blockhead
| Lv | Lv.1 | Lv.2 | Lv.3 | Lv.4 | Lv.5 | Lv.6 | Lv.7 | Lv.8 | Lv.9 | Lv.10 | Lv.11 | Lv.12 | Lv.13 | Lv.14 | Lv.15 | Lv.16 |
|---|---|---|---|---|---|---|---|---|---|---|---|---|---|---|---|---|
| DMG Multiplier | 61.3% | 66.9% | 72.5% | 78.1% | 83.7% | 89.3% | 94.9% | 100.5% | 106.1% | 111.7% | 117.3% | 122.9% | 128.5% | 134.1% | 139.7% | 145.3% |
| Daze Multiplier | 61.3% | 64.1% | 66.9% | 69.7% | 72.5% | 75.3% | 78.1% | 80.9% | 83.7% | 86.5% | 89.3% | 92.1% | 94.9% | 97.7% | 100.5% | 103.3% |
EX Special Attack: Dimwit Disappearing Trick
| Lv | Lv.1 | Lv.2 | Lv.3 | Lv.4 | Lv.5 | Lv.6 | Lv.7 | Lv.8 | Lv.9 | Lv.10 | Lv.11 | Lv.12 | Lv.13 | Lv.14 | Lv.15 | Lv.16 |
|---|---|---|---|---|---|---|---|---|---|---|---|---|---|---|---|---|
| DMG Multiplier | 546% | 595.7% | 645.4% | 695.1% | 744.8% | 749.5% | 844.2% | 893.9% | 943.6% | 993.3% | 1043% | 1092.7% | 1142.4% | 1192.1% | 1241.8% | 1291.5% |
| Daze Multiplier | 444.5% | 464.8% | 485.1% | 505.4% | 525.7% | 546% | 566.3% | 586.6% | 606.90% | 627.2% | 647.5% | 667.8% | 688.1% | 708.4% | 728.7% | 749.0% |
Chain Attack2
Chain Attack: Code of Conduct
| Lv | Lv.1 | Lv.2 | Lv.3 | Lv.4 | Lv.5 | Lv.6 | ||||||||||
|---|---|---|---|---|---|---|---|---|---|---|---|---|---|---|---|---|
| DMG Multiplier | 1013% | 1150.1% | 1197.2% | 1289.3% | 1381.4% | 1473.5% | 1565.6% | 1657.7% | 1749.8% | 1841.9% | 1934.0% | 2026.1% | 2118.2% | 2210.3% | 2302.4% | 2394.5% |
| Daze Multiplier | 175.1% | 183.1% | 191.1% | 199.1% | 207.1% | 215.1% | 223.1% | 231.1% | 239.1% | 247.1% | 255.1% | 263.1% | 271.1% | 279.1% | 287.1% | 295.1% |
Ultimate: The Queen's Attendants
| Lv | Lv.1 | Lv.2 | Lv.3 | Lv.4 | Lv.5 | Lv.6 | ||||||||||
|---|---|---|---|---|---|---|---|---|---|---|---|---|---|---|---|---|
| DMG Multiplier | 2116.7% | 2309.2% | 2501.7% | 2694.2% | 2886.7% | 3079.2% | 3271.7% | 3464.2% | 3656.7% | 3849.2% | 4041.7% | 4234.2% | 4426.7% | 4619.2% | 4811.7% | 5004.2% |
| Daze Multiplier | 113.8% | 119% | 124.2% | 129.4% | 134.6% | 139.8% | 145% | 150.2% | 155.4% | 160.6% | 165.8% | 171% | 176.2% | 181.4% | 186.6% | 191.8% |
Core Skill1
Core Passive: Mini Destruction Partner
| Lv | Lv.1 | Lv.2 (A) | Lv.3 (B) | Lv.4 (C) | Lv.5 (D) | Lv.6 (E) | Lv.7 (F) |
|---|---|---|---|---|---|---|---|
| Other Squad Members' PEN Ratio % | 6% | 7.5% | 9% | 10.2% | 10.8% | 11.4% | 12% |
| PEN Ratio | - | +4.8% | - | +4.8% | - | +4.8% | - |
| Base ATK | - | - | +25 | - | +25 | - | +25 |
Mindscapes — how far is worth it?
After being sent out to launch an attack, Drusilla and Anastella stay in place for an additional 5.5s before returning to Rina. The buff gained from Core Passive: Mini Destruction Partner by characters within 10m is increased to 130%. "Get your work done, or you're in for a beating!" is how Drusilla tries to encourage everyone. "Yeah, a beating!" Anastella always chimes in.
Upon entering combat or switching in, Rina's DMG increases by 15% for 12s. This effect can trigger once every 18s. "It takes an excellent head maid to lead excellent maids, and an exemplary master to raise exemplary Bangboo." — Excerpt from Rina's speech at the "Victoria Housekeeping Human Resource Management and Bangboo Training Insight Seminar."
Basic Attack, Dodge, Assist, Special Attack, and Chain Attack Lv. +2 Rina always has the confidence to excel at anything and the ability to annihilate everything. However, when it comes to being in the mood to annihilate enemies, both her confidence and capability align.
Rina's Energy Regen increases by 0.5/s when both Drusilla and Anastella are deployed. The effect ends when Drusilla or Anastella returns to Rina. Drusilla and Anastella can never agree on anything. "Beating up the dummy in front" is an exception.
Basic Attack, Dodge, Assist, Special Attack, and Chain Attack Lv.+2 "Rina" means perfection in the Bangboo language. Perfectionism is the number one rule in the Victoria Housekeeping handbook. And Rina has her own criteria for judging "perfection."
When EX Special Attack, Chain Attack, or Ultimate hits an enemy, the entire squad’s Electric DMG is increased by 15% for 8s. Thunder rumbles in the old castle on a rainy night. The depths of the long corridors are filled with eerie shadows. Fear circuits overloaded, the filming of a thriller commences.
Stats & Materials by Ascension Milestone
| Lv. | Before | After | Materials for this milestone |
|---|---|---|---|
| Lv.1 | HP: - ATK: - DEF: - [Recommended] PEN Ratio: - |
HP: 692 ATK: 103 DEF: 48 [Recommended] PEN Ratio: - |
|
| Lv.10 | HP: 1537 ATK: 157 DEF: 106 [Recommended] PEN Ratio: - |
HP: 2012 ATK: 194 DEF: 139 [Recommended] PEN Ratio: - |
Denny ×24,000
Basic Support Certification Seal ×4
|
| Lv.20 | HP: 2951 ATK: 254 DEF: 205 [Recommended] PEN Ratio: - |
HP: 3426 ATK: 291 DEF: 238 [Recommended] PEN Ratio: - |
Denny ×56,000
Advanced Support Certification Seal ×12
|
| Lv.30 | HP: 4366 ATK: 376 DEF: 304 [Recommended] PEN Ratio: - |
HP: 4841 ATK: 413 DEF: 337 [Recommended] PEN Ratio: - |
Denny ×120,000
Advanced Support Certification Seal ×20
|
| Lv.40 | HP: 5780 ATK: 473 DEF: 402 [Recommended] PEN Ratio: - |
HP: 6255 ATK: 509 DEF: 436 [Recommended] PEN Ratio: - |
Denny ×200,000
Ruler Certification Seal ×10
|
| Lv.50 | HP: 7194 ATK: 594 DEF: 502 [Recommended] PEN Ratio: - |
HP: 7669 ATK: 631 DEF: 535 [Recommended] PEN Ratio: - |
Denny ×400,000
Ruler Certification Seal ×20
|
| Lv.60 | HP: - ATK: - DEF: - [Recommended] PEN Ratio: - |
HP: 8609 ATK: 692 DEF: 600 [Recommended] PEN Ratio: - |




Total materials across the whole ascension path
Materials Needed to Lv60







Total Denny for the character alone (ascension + basic skills + core skill A→F): about 1,706,000 Denny — W-Engine and Drive Discs not included.
Official Name in Other Languages
Voice Actors & Character Info
Background & Lore
More unlocks as Trust with this character increases in-game.
How to read this build page
Every Agent build page has 4 parts: a stat table by level, W-Engine/Drive Disc suggestions, a Mindscape roadmap, and recommended teams. Read them in that order — stats tell you "what you need", gear tells you "where to get it", Mindscape tells you "is it worth pulling", teams tell you "who to pair with". The section below explains how to read each part, and it applies the same way to every character on the site.
How to read the stat table and level
The stat table shows values at the ascension breakpoints (usually the final one, e.g. Lv60) — these are BASE stats with no gear added, useful for comparing Agents or checking whether you've ascended far enough. CRIT Rate and CRIT DMG are shown separately because they set the damage ceiling once Drive Disc substats stack on top. If your real stats are lower than the table, you likely haven't fully ascended or leveled yet — it's not a build mistake.
Why the W-Engine and Drive Disc picks make sense
Most Agents have a "signature" W-Engine designed for their exact role, plus a few cheaper standard-banner substitutes. Missing the signature isn't a dead end — most Agents keep most of their power with a well-matched substitute, just short by some amount of total damage.
- Drive Disc sets (2pc + 4pc) are picked for the set effect that fits that Agent's playstyle (mono-element, Anomaly, stun, and so on).
- Substats follow a priority that changes by role: Attack-type Agents usually chase CRIT Rate/CRIT DMG before ATK%; Anomaly-type Agents add Anomaly Proficiency to that mix; Stun/Support roles often value survivability or energy stats over pure CRIT.
These weights differ per character — follow the exact substat priority table above rather than applying one formula to every role.
Is Mindscape worth chasing
General rule: M0 (no duplicates) already clears the game's hardest content, even for S-rank Agents. Mindscape is a duplicate-fueled upgrade system, and each level costs more resources for a smaller power gain. For most Agents, the best value stop is usually M1–M2 (where some key effects unlock), while M6 is almost always for players chasing the absolute ceiling, not a requirement. Check the Mindscape section in the table above for that specific Agent's numbers.
Skill priority by role
There's no single order for every Agent, but the general pattern by role is:
- Attack: level the main damage skill first (Basic or Special Attack depending on kit), Dash/Dodge last.
- Stun: prioritize whichever skill builds Daze/Stun fastest, since the stun window is where the whole team dumps damage.
- Support: prioritize buff or energy-generating skills over personal damage — this role's value comes from lifting the whole team.
- Anomaly: prioritize the skill that stacks anomaly buildup, since most of the damage comes from the triggered effect, not the direct hit.
Always level the Core Skill steadily alongside the rest — it's a baseline stat that affects the whole rotation, not just one move.
Where to dig deeper
This section only teaches you how to read the page — for deeper comparisons, use the dedicated tools:
- Tier list to see where this Agent stands against the full roster.
- Teams for full in-game comps, including Bangboo and rotation order.
- Disc score to check how your current gear scores against the benchmark.
Agents of the same attribute




Rina FAQ
What is the best W-Engine for Rina?
Rina performs best with Weeping Cradle. See alternatives and required stats in the Gear section above.
Is Rina worth pulling?
Rina is still a reliable PEN Ratio buffer for any DEF-penetration team, especially Electric carries. But newer supports (Astra Yao, Lucia) have surpassed her in total buffing, so only prioritize her if your team needs PEN. Great to use if you already have her; if not, don't force the pull.
What is the best team for Rina?
Rina works best in the Armor-Piercing Electric team. Full members and rotation are in the Teams section.
Who voices Rina in Zenless Zone Zero?
Rina (faction Victoria Housekeeping Co., birthday Sep 23) is voiced according to the official credits published on the HoYoverse Wiki. See the full English/Japanese/Korean/Chinese voice actor list in the "Voice Actors & Character Info" block above — this data is pulled directly from the official wiki, not guessed.
Which Mindscape of Rina is worth investing in?
Rina has 6 Mindscape tiers (M1-M6), each unlocking its own effect detailed in the "Mindscape" block above (official wording). Mindscapes cost Mindscape Cinema currency farmed from limited banners, so weigh it against your budget — F2P players usually stop at M0-M1 and prioritize W-Engine and Drive Discs before pushing Mindscape higher.
How much Denny and how many materials to level Rina to Lv60?
Leveling Rina to max Lv60 (ascension + basic skills to 12 + core skill A→F) costs roughly 1,706,000 Denny, plus role-specific ascension materials, attribute-specific skill chips, high-dimensional data, and weekly boss drops — see the full list with exact quantities in the "Materials Needed" block above, sourced from the game's official leveling tables.
 Understand the mechanics behind this
 Drive Disc Scorer→