
Orphie & Magus
An off-field sub-DPS and team buffer who sits in the backline, auto-firing Fire Aftershock lasers while feeding the whole team an ATK buff.
Tier S · Attack · Fire. BiS: Bellicose Blaze. An off-field sub-DPS and team buffer who sits in the backline, auto-firing Fire Aftershock lasers while feeding the whole team an ATK buff.



Base stats
Recommended build
Best W-Engines
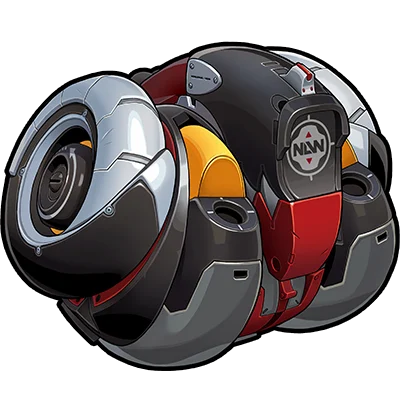
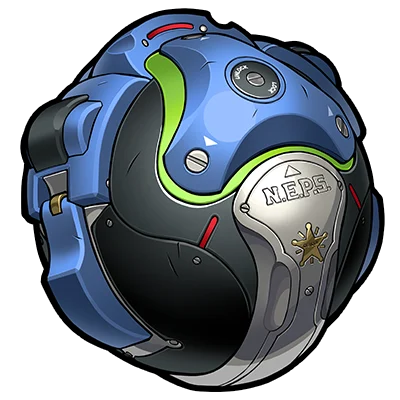
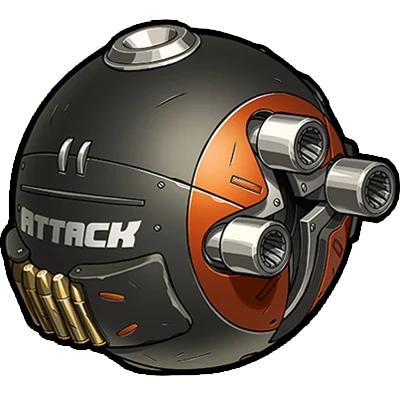
Recommendation order by current meta — the first is strongest, the rest are alternatives in decreasing priority. (Not a simulated DPS %.)
Recommended Drive Discs
 Shadow Harmony
 Swing Jazz
4: CRIT Rate / CRIT DMG · 5: Fire DMG / ATK% · 6: Energy Regen (hit the ER 1.6+ breakpoint) or ATK%
ATK% > CRIT Rate/DMG > Energy Regen > flat ATK
Skill priority: EX Special (Aftershock) > Chain & Ultimate > Basic > Dodge; max her Core early.
Recommended teams




Worth pulling if you own Soldier 0 - Anby or any Aftershock carry, since she buffs and adds her own damage while taking almost no field time. Her weakness is that she's team-picky: away from Aftershock comps her value drops sharply—she's not an all-purpose support like Astra.
Role Ranking
The list below is pulled straight from the overall Tier List, keeping only the 16 agents who share the Attack role. Order within each tier is NOT a strength ranking — it simply groups agents by their original tier.














Stat targets
Special mechanic: the ATK buff from her Core (Taming Wind and Fire → Zeroed In) SCALES with Energy Regen. She has 1.56 base ER at Lv60 and needs up to 3.66 ER to fully maximize the Zeroed In ATK bonus (+ mobalytics). Since Energy Regen can't come from disc substats, you must target ER as the Disc-6 mainstat (backed by an ER-friendly W-engine/bangboo). Her kit already grants +12.5% Crit Rate and +42.5% Aftershock DMG built-in, so once ER is met, pour into ATK% and Crit (Rate/DMG) for personal damage. Substat priority: ATK% > Crit Rate/DMG > flat ATK (Energy Regen goes on the slot-6 main, not subs). Mainstats: 4 Crit Rate/DMG · 5 Fire DMG or ATK% · 6 Energy Regen.
Rotation & combos
1) BUILD RESOURCES: use her Special Attack (Corrosive Flash) on field to bank at least 60 Bottled Heat. 2) BURST: swap Orphie & Magus in for EX Special (Heat Charge) then Ultimate (Dance With Fire) to apply Zeroed In to the team and unleash Aftershock. 3) OFF-FIELD: quick-swap to the Aftershock carry (Soldier 0 - Anby / Seed) as main damage — Orphie sits in the backline auto-firing Fire Aftershock lasers that ride her ATK buff + DEF ignore. 4) LOOP: when Ult/EX are up, cycle Orphie back in to refresh Zeroed In then swap out immediately, keeping her field time minimal so the main carry stays on screen.
- An Attacker that plays like a Support: sits off-field auto-firing Fire Aftershock, taking almost no field time so the main carry stays on screen.
- Genuine team buffer: applies Zeroed In to the whole team (ATK) and grants Aftershock DEF ignore — a real power spike for any Aftershock carry.
- Free personal damage: many of her hits (Basic/EX/Chain/Ult) are tagged Aftershock, and the kit grants +12.5% Crit Rate and +42.5% Aftershock DMG built-in, so she buffs while adding real damage.
- Friendly Mindscape ceiling: M0 is already strong, only M1 (Fire RES ignore + team +20% DMG) and M2 matter, so you don't need to whale to use her well.
- Very team-restrictive: her value is tied to Aftershock carries (Soldier 0 - Anby / Seed); off the Aftershock archetype she drops off hard, and she is NOT a universal support like Astra.
- Energy-Regen-hungry but ER can't come from substats: you must sacrifice the slot-6 mainstat to chase ~3.66 ER, which locks the build and cuts room for ATK/Crit.
- Wants her signature Bellicose Blaze to reach full potential; off-signature engines work but leave some damage/buff on the table.
Recommended Bangboo
Endgame mode fit
Excellent in single-target Shiyu Defense: an Aftershock burst team (Orphie + Soldier 0 - Anby + Trigger) dumps heavy damage in the stun window, with Orphie feeding Zeroed In and DEF ignore to the team. Endgame reference: ~150s per side clears indicate sufficient power.
Also strong in Deadly Assault: sustains continuous Aftershock on multiple high-HP foes, and runs well with the Orphie + Seed pairing (plus Trigger as stunner). Reference: 20,000+ scores per stage indicate sufficient power.
Skills
Basic Attack1
 Basic Attack
Basic Attack: High-Pressure Flamethrower
Press to activate: Unleashes up to 5 attacks in front, followed by a powerful flame blade strike, dealing Physical DMG and Fire DMG.
Dodge3
 Dodge
DodgeDodge: Flickering Flames
Press to activate: A quick dash dodge. Character is invulnerable while using this skill.
Dash Attack: Rush Command
Press during a dodge to activate: Perform a quick forward attack, dealing Physical DMG.
Dodge Counter: Counter Strike Opportunity
Press during a Perfect Dodge to activate: Launch a series of attacks on enemies in front, dealing Physical DMG and Fire DMG. Character is invulnerable while using this skill.
Assist3
 Assist
Quick Assist: Searing Slash
When the active character is launched, press to activate: Unleash a series of attacks on enemies in front, dealing Physical DMG and Fire DMG. Character is invulnerable while using this skill.
Defensive Assist: Blazing Gunblade
When the on-field character is about to be attacked, press to activate: Parries the enemy's attack, dealing massive Daze. Character is invulnerable while using this skill.
Assist Follow-Up: Boiling Pierce
Press after a Defensive Assist to activate: Unleash multiple attacks against enemies in front, dealing Fire DMG. Character is invulnerable while using this skill.
Special Attack6
 Special Attack
Special Attack: Blazing Chamber
Press to activate: Thrust forward and perform a tail attack, dealing Fire DMG. Anti-Interrupt level is increased while using this skill.
Special Attack: Corrosive Flash
Automatically triggers during ally attacks: Unleashes 4 laser Aftershock attacks, dealing Fire DMG. Triggers once per 5s. Upon activating this skill, restore 20 Bottled Heat. Character is invulnerable while using this skill.
EX Special Attack: Watch Your Step
With enough Energy, press to activate: Perform a sweeping laser attack forward, dealing Fire DMG. After using this skill, immediately follow up with the powerful fire blade from the Basic Attack. Upon activating this skill, restore 20 Bottled Heat. Character is invulnerable while using this skill.
EX Special Attack: Crimson Vortex
When off-field with 60 or more Energy, automatically triggers during ally attacks: Performs a sweeping laser attack in an area around, dealing Fire DMG. Upon activating this skill, restore 20 Bottled Heat. Character is invulnerable while using this skill.
EX Special Attack: Heat Charge
When Bottled Heat is greater than or equal to 100, hold to activate: Consume 100 Bottled Heat to continuously fire a laser forward, dealing Fire DMG. When firing begins, triggers Quick Assist. After continuous firing for a period, firepower increases, greatly boosting the skill's Interrupt Level. When attacked during firing, will parry enemy attacks and immediately increase firepower. When maximum firing duration is reached, automatically activates EX Special Attack: Fiery Eruption. During the low firepower phase, Anti-Interrupt Level increases and DMG taken is reduced by 40%, while character is invulnerable during the high firepower phase.
EX Special Attack: Fiery Eruption
Automatically activates after EX Special Attack: Heat Charge reaches maximum firing time: Performs a spinning attack forward, then fires a laser ahead dealing Fire DMG. Character is invulnerable while using this skill.
Chain Attack2
 Chain Attack
Chain Attack: Overheated Barrel
When a Chain Attack is triggered, select the character to activate: Perform a spinning attack forward, then fire a laser ahead, dealing Fire DMG. Upon activating this skill, restore 20 points of Bottled Heat. Character is invulnerable while using this skill.
Ultimate: Dance with Fire
When Decibel Rating is at Maximum, press to activate: Perform a spinning attack forward, then fire a laser ahead, dealing Fire DMG. When leaping into the air, a Quick Assist will be triggered. If the Quick Assist is activated, Orphie & Magus will extend the laser firing duration. Upon activating this skill, recover 20 Bottled Heat. Character is invulnerable while using this skill.
Core Skill2
 Core Skill
Core Passive: Taming Wind and Fire
Orphie & Magus's CRIT Rate increases by 12.5%, and Aftershock DMG increases by 42.5%.Orphie & Magus initially gain 100 Bottled Heat, up to a maximum of 125.When Orphie & Magus are off-field, if Special Attack: Corrosive Flash is available and Energy is greater than or equal to 60, consume 30 Energy to automatically trigger EX Special Attack: Crimson Vortex instead. When the laser from EX Special Attack: Heat Charge hits enemies, all squad members gain Zeroed In for 12s. Repeated triggers reset the duration. Zeroed In increases Agent ATK by 130. When Orphie & Magus's initial Energy Regen is greater than or equal to 1.6, for every 0.1 initial Energy Regen above this threshold, ATK increases by an additional 20. The total increase from both initial and additional ATK increases cannot exceed 340. When an Agent with Zeroed In triggers Aftershock, their Zeroed In duration extends by 4s, up to a maximum extension of 20s.The fire blade attack from Basic Attack: High-Pressure Flamethrower, EX Special Attack: Watch Your Step, EX Special Attack: Crimson Vortex, EX Special Attack: Heat Charge, EX Special Attack: Fiery Eruption, Chain Attack: Overheated Barrel, and Ultimate: Dance With Fire all count as Aftershock DMG, and using these skills counts as triggering Aftershock.*Stats shown are at Base level.
Additional Ability: Forged in Flames
When another character in your squad is a Stun or Support character: Aftershock DMG dealt by Agents with Zeroed In ignores 25% DEF.
Skill Coefficients by Level
Basic Attack1
Basic Attack: High-Pressure Flamethrower
| Lv | Lv.1 | Lv.2 | Lv.3 | Lv.4 | Lv.5 | Lv.6 | Lv.7 | Lv.8 | Lv.9 | Lv.10 | Lv.11 | Lv.12 | Lv.13 | Lv.14 | Lv.15 | Lv.16 |
|---|---|---|---|---|---|---|---|---|---|---|---|---|---|---|---|---|
| 1st-Hit DMG Multiplier | 14.5% | 15.9% | 17.3% | 18.7% | 20.1% | 21.5% | 22.9% | 24.3% | 25.7% | 27.1% | 28.5% | 29.9% | 31.3% | 32.7% | 34.1% | 35.5% |
| 2nd-Hit DMG Multiplier | 44.4% | 48.5% | 52.6% | 56.7% | 60.8% | 64.9% | 69% | 73.1% | 77.2% | 81.3% | 85.4% | 89.5% | 93.6% | 97.7% | 101.8% | 105.9% |
| 3rd-Hit DMG Multiplier | 41.5% | 45.3% | 49.1% | 52.9% | 56.7% | 60.5% | 64.3% | 68.1% | 72% | 75.7% | 79.5% | 83.3% | 87.1% | 90.9% | 94.7% | 98.5% |
| 4th-Hit DMG Multiplier | 86.7% | 94.6% | 102.5% | 110.4% | 118.3% | 126.2% | 134.1% | 142.0% | 149.9% | 158% | 165.7% | 173.6% | 181.5% | 189.4% | 197.3% | 205..2% |
| 5th-Hit DMG Multiplier | 181.6% | 198.2% | 214.8% | 231.4% | 248% | 264.6% | 281.2% | 297.8% | 314.4% | 331% | 347.6% | 364.2% | 380.8% | 397.4% | 414% | 430.6% |
| Fire Blade DMG Multiplier | 158.4% | 172.8% | 187.2% | 201.6% | 216% | 230.4% | 244.8% | 259.2% | 273.6% | 288.0% | 302.4% | 316.8% | 331.2% | 345.6% | 360.0% | 374.4% |
| 1st-Hit Daze Multiplier | 11.7% | 12.3% | 12.9% | 13.5% | 14.1% | 14.7% | 15.3% | 15.9% | 16.5% | 17.1% | 17.7% | 18.3% | 18.9% | 19.5% | 20.1% | 20.7% |
| 2nd-Hit Daze Multiplier | 32.4% | 33.9% | 35.4% | 36.9% | 38.4% | 39.9% | 41.4% | 42.9% | 44.4% | 45.9% | 47.4% | 48.9% | 50.4% | 51.9% | 53.4% | 54.9% |
| 3rd-Hit Daze Multiplier | 25.4% | 26.6% | 27.8% | 29% | 30.2% | 31.4% | 32.6% | 33.8% | 35.0% | 36.2% | 37.4% | 38.6% | 39.8% | 41.0% | 42.2% | 43.4% |
| 4th-Hit Daze Multiplier | 53.6% | 56% | 58.6% | 61.1% | 63.6% | 66.1% | 69% | 71.1% | 73.6% | 76.1% | 78.6% | 81.1% | 83.6% | 86.1% | 88.6% | 91.1% |
| 5th-Hit Daze Multiplier | 118.2% | 123.6% | 129% | 134% | 139.8% | 145.2% | 150.6% | 156.0% | 161% | 166.8% | 172.2% | 177.6% | 183.0% | 188.4% | 193.8% | 199.2% |
| Fire Blade Daze Multiplier | 103.6% | 108.4% | 113.2% | 118% | 122.8% | 127.6% | 132.4% | 137.2% | 142.0% | 146.8% | 151.6% | 156.4% | 161.2% | 166.0% | 170.8% | 175.6% |
Dodge2
Dash Attack: Rush Command
| Lv | Lv.1 | Lv.2 | Lv.3 | Lv.4 | Lv.5 | Lv.6 | Lv.7 | Lv.8 | Lv.9 | Lv.10 | Lv.11 | Lv.12 | Lv.13 | Lv.14 | Lv.15 | Lv.16 |
|---|---|---|---|---|---|---|---|---|---|---|---|---|---|---|---|---|
| DMG Multiplier | 62.3% | 68% | 73.7% | 79.4% | 85.1% | 90.8% | 96.5% | 102.1% | 107.9% | 113.6% | 119.3% | 125.0% | 130.7% | 136.4% | 142.1% | 147.8% |
| Daze Multiplier | 31.2% | 32.7% | 34.2% | 35.7% | 37.2% | 38.7% | 40.2% | 41.7% | 43.2% | 44.7% | 46.2% | 47.7% | 49.2% | 50.7% | 52.2% | 53.7% |
Dodge Counter: Counter Strike Opportunity
| Lv | Lv.1 | Lv.2 | Lv.3 | Lv.4 | Lv.5 | Lv.6 | Lv.7 | Lv.8 | Lv.9 | Lv.10 | Lv.11 | Lv.12 | Lv.13 | Lv.14 | Lv.15 | Lv.16 |
|---|---|---|---|---|---|---|---|---|---|---|---|---|---|---|---|---|
| DMG Multiplier | 257.8% | 281.3% | 304.8% | 328.3% | 351.8% | 375.3% | 398.8% | 422.3% | 445.8% | 469.3% | 492.8% | 516.3% | 539.8% | 563.3% | 586.8% | 610.3% |
| Daze Multiplier | 223.7% | 233.9% | 244.1% | 254.3% | 264.5% | 274.7% | 284.9% | 295.1% | 305.3% | 315.5% | 325.7% | 335.9% | 346.4% | 356.3% | 366.5% | 376.7% |
Assist3
Quick Assist: Searing Slash
| Lv | Lv.1 | Lv.2 | Lv.3 | Lv.4 | Lv.5 | Lv.6 | Lv.7 | Lv.8 | Lv.9 | Lv.10 | Lv.11 | Lv.12 | Lv.13 | Lv.14 | Lv.15 | Lv.16 |
|---|---|---|---|---|---|---|---|---|---|---|---|---|---|---|---|---|
| DMG Multiplier | 113.7% | 124.1% | 134.5% | 144.9% | 155.3% | 165.7% | 176.1% | 186.5% | 196.9% | 207.3% | 217.7% | 228.1% | 238.5% | 248.9% | 259.3% | 269.7% |
| Daze Multiplier | 113.7% | 118.9% | 124.1% | 129.3% | 134.5% | 139.7% | 144.9% | 150.1% | 155.3% | 160.5% | 165.7% | 170.9% | 176.1% | 181.3% | 186.5% | 191.7% |
Defensive Assist: Blazing Gunblade
| Lv | Lv.1 | Lv.2 | Lv.3 | Lv.4 | Lv.5 | Lv.6 | Lv.7 | Lv.8 | Lv.9 | Lv.10 | Lv.11 | Lv.12 | Lv.13 | Lv.14 | Lv.15 | Lv.16 |
|---|---|---|---|---|---|---|---|---|---|---|---|---|---|---|---|---|
| Light Defensive Daze Multiplier | 271.3% | 283.7% | 296.1% | 308.5% | 320.9% | 333.3% | 345.7% | 358.1% | 370.5% | 382.9% | 395.3% | 407.7% | 420.1% | 432.5% | 444.9% | 457.3% |
| Heavy Defensive Daze Multiplier | 342.8% | 358.4% | 374% | 389.6% | 405.2% | 420.8% | 436.4% | 452% | 467.6% | 483.2% | 498.8% | 514.4% | 530% | 545.6% | 561.2% | 576.8% |
| Chain Defensive Daze Multiplier | 166.8% | 174.4% | 182% | 189.6% | 197.2% | 204.8% | 212.4% | 220% | 227.6% | 235.2% | 242.8% | 250.4% | 258% | 265.6% | 273.2% | 280.8% |
Assist Follow-Up: Boiling Pierce
| Lv | Lv.1 | Lv.2 | Lv.3 | Lv.4 | Lv.5 | Lv.6 | Lv.7 | Lv.8 | Lv.9 | Lv.10 | Lv.11 | Lv.12 | Lv.13 | Lv.14 | Lv.15 | Lv.16 |
|---|---|---|---|---|---|---|---|---|---|---|---|---|---|---|---|---|
| DMG Multiplier | 360.9% | 393.8% | 426.7% | 459.6% | 492.5% | 525.4% | 558.3% | 591.2% | 624.1% | 657.0% | 689.9% | 722.8% | 755.7% | 788.6% | 821.5% | 854.4% |
| Daze Multiplier | 313.3% | 327.6% | 341.9% | 356.2% | 370.5% | 384.8% | 399.1% | 413.4% | 427.7% | 442.0% | 456.3% | 470.6% | 484.9% | 499.2% | 513.5% | 527.8% |
Special Attack6
Special Attack: Blazing Chamber
| Lv | Lv.1 | Lv.2 | Lv.3 | Lv.4 | Lv.5 | Lv.6 | Lv.7 | Lv.8 | Lv.9 | Lv.10 | Lv.11 | Lv.12 | Lv.13 | Lv.14 | Lv.15 | Lv.16 |
|---|---|---|---|---|---|---|---|---|---|---|---|---|---|---|---|---|
| DMG Multiplier | 39.5% | 43.1% | 46.7% | 50.3% | 53.9% | 57.5% | 61.1% | 64.7% | 68.3% | 71.9% | 75.5% | 79.1% | 82.7% | 86.3% | 89.9% | 93.5% |
| Daze Multiplier | 39.5% | 41.3% | 43.1% | 44.9% | 46.7% | 48.5% | 50.3% | 52.1% | 53.9% | 55.7% | 57.5% | 59.3% | 61.1% | 62.9% | 64.7% | 66.5% |
Special Attack: Corrosive Flash
| Lv | Lv.1 | Lv.2 | Lv.3 | Lv.4 | Lv.5 | Lv.6 | Lv.7 | Lv.8 | Lv.9 | Lv.10 | Lv.11 | Lv.12 | Lv.13 | Lv.14 | Lv.15 | Lv.16 |
|---|---|---|---|---|---|---|---|---|---|---|---|---|---|---|---|---|
| DMG Multiplier | 495% | 540% | 585% | 630% | 675% | 720% | 765% | 810.0% | 855% | 900.0% | 945.0% | 990.0% | 1035.0% | 1080.0% | 1125.0% | 1170.0% |
| Daze Multiplier | 55% | 57.5% | 60% | 62.5% | 65% | 67.5% | 70% | 72.5% | 75.0% | 77.5% | 80.0% | 82.5% | 85.0% | 87.5% | 90.0% | 92.5% |
EX Special Attack: Watch Your Step
| Lv | Lv.1 | Lv.2 | Lv.3 | Lv.4 | Lv.5 | Lv.6 | Lv.7 | Lv.8 | Lv.9 | Lv.10 | Lv.11 | Lv.12 | Lv.13 | Lv.14 | Lv.15 | Lv.16 |
|---|---|---|---|---|---|---|---|---|---|---|---|---|---|---|---|---|
| DMG Multiplier | 280.9% | 306.5% | 332.1% | 357.7% | 383.3% | 408.9% | 434.5% | 460.1% | 485.7% | 511.3% | 536.9% | 562.5% | 588.1% | 613.7% | 639.3% | 664.9% |
| Daze Multiplier | 280.9% | 293.7% | 306.5% | 319.3% | 332.1% | 344.9% | 357.7% | 370.5% | 383.3% | 396.1% | 408.9% | 421.7% | 434.5% | 447.3% | 460.1% | 472.9% |
| Energy Cost | 30 | 30 | 30 | 30 | 30 | 30 | 30 | 30 | 30 | 30 | 30 | 30 | 30 | 30 | 30 | 30 |
EX Special Attack: Crimson Vortex
| Lv | Lv.1 | Lv.2 | Lv.3 | Lv.4 | Lv.5 | Lv.6 | Lv.7 | Lv.8 | Lv.9 | Lv.10 | Lv.11 | Lv.12 | Lv.13 | Lv.14 | Lv.15 | Lv.16 |
|---|---|---|---|---|---|---|---|---|---|---|---|---|---|---|---|---|
| DMG Multiplier | 678.4% | 740.1% | 801.7% | 863.5% | 925.2% | 986.9% | 1048.6% | 1110.3% | 1172% | 1233.7% | 1295.4% | 1357.1% | 1418.8% | 1480.5% | 1542.2% | 1603.9% |
| Daze Multiplier | 55% | 57.5% | 60% | 62.5% | 65% | 67.5% | 70% | 72.5% | 75.0% | 77.5% | 80.0% | 82.5% | 85.0% | 87.5% | 90.0% | 92.5% |
| Energy Cost | 30 | 30 | 30 | 30 | 30 | 30 | 30 | 30 | 30 | 30 | 30 | 30 | 30 | 30 | 30 | 30 |
EX Special Attack: Heat Charge
| Lv | Lv.1 | Lv.2 | Lv.3 | Lv.4 | Lv.5 | Lv.6 | Lv.7 | Lv.8 | Lv.9 | Lv.10 | Lv.11 | Lv.12 | Lv.13 | Lv.14 | Lv.15 | Lv.16 |
|---|---|---|---|---|---|---|---|---|---|---|---|---|---|---|---|---|
| DMG Multiplier | 389.4% | 424.8% | 460.2% | 495.6% | 531% | 566.4% | 601.8% | 637.2% | 672.6% | 708.0% | 743.4% | 778.8% | 814.2% | 849.6% | 885.0% | 920.4% |
| Daze Multiplier | 33% | 34.5% | 36% | 37.5% | 39% | 40.5% | 42% | 43.5% | 45.0% | 46.5% | 48.0% | 49.5% | 51.0% | 52.5% | 54.0% | 55.5% |
EX Special Attack: Fiery Eruption
| Lv | Lv.1 | Lv.2 | Lv.3 | Lv.4 | Lv.5 | Lv.6 | Lv.7 | Lv.8 | Lv.9 | Lv.10 | Lv.11 | Lv.12 | Lv.13 | Lv.14 | Lv.15 | Lv.16 |
|---|---|---|---|---|---|---|---|---|---|---|---|---|---|---|---|---|
| DMG Multiplier | 259.6% | 283.2% | 306.8% | 330.4% | 354% | 377.6% | 401.2% | 424.8% | 448.4% | 472.0% | 495.6% | 519.2% | 542.8% | 566.4% | 590.0% | 613.6% |
| Daze Multiplier | 22% | 23% | 24% | 25% | 26% | 27% | 28% | 29.0% | 30.0% | 31.0% | 32.0% | 33.0% | 34.0% | 35.0% | 36.0% | 37.0% |
Chain Attack2
Chain Attack: Overheated Barrel
| Lv | Lv.1 | Lv.2 | Lv.3 | Lv.4 | Lv.5 | Lv.6 | Lv.7 | Lv.8 | Lv.9 | Lv.10 | Lv.11 | Lv.12 | Lv.13 | Lv.14 | Lv.15 | Lv.16 |
|---|---|---|---|---|---|---|---|---|---|---|---|---|---|---|---|---|
| DMG Multiplier | 626.3% | 683.3% | 740.3% | 797.3% | 854.3% | 911.3% | 968.3% | 1025.3% | 1082.3% | 1139.3% | 1196.3% | 1253.3% | 1310.3% | 1367.0% | 1424.3% | 1481.3% |
| Daze Multiplier | 333.7% | 348.9% | 364.1% | 379.3% | 394.5% | 409.7% | 424.9% | 440.1% | 455.3% | 470.5% | 485.7% | 500.9% | 516.1% | 531.3% | 546.5% | 561.7% |
Ultimate: Dance with Fire
| Lv | Lv.1 | Lv.2 | Lv.3 | Lv.4 | Lv.5 | Lv.6 | Lv.7 | Lv.8 | Lv.9 | Lv.10 | Lv.11 | Lv.12 | Lv.13 | Lv.14 | Lv.15 | Lv.16 |
|---|---|---|---|---|---|---|---|---|---|---|---|---|---|---|---|---|
| DMG Multiplier | 698.7% | 762.3% | 825.9% | 889.5% | 953.1% | 1016.7% | 1080.3% | 1143.9% | 1207.5% | 1271.3% | 1334.7% | 1398.3% | 1461.9% | 1525.5% | 1589.1% | 1652.7% |
| Daze Multiplier | 29.7% | 31.1% | 32.5% | 33.9% | 35.3% | 36.7% | 38.1% | 39.5% | 40.9% | 42.3% | 43.7% | 45.1% | 46.5% | 47.9% | 49.3% | 50.7% |
| Extended Duration Total DMG Multiplier | 465.8% | 508.2% | 550.6% | 593% | 635.4% | 677.8% | 720.2% | 762.6% | 805.0% | 847.4% | 889.8% | 932.2% | 974.6% | 1017.0% | 1059.4% | 1101.8% |
| Extended Duration Total Daze Multiplier | 19.8% | 20.7% | 21.6% | 22.5% | 23.4% | 24.3% | 25.2% | 26.1% | 27.0% | 27.9% | 28.8% | 29.7% | 30.6% | 31.5% | 32.4% | 33.3% |
Core Skill1
Core Passive: Taming Wind and Fire
| Lv | Lv.1 | Lv.2 (A) | Lv.3 (B) | Lv.4 (C) | Lv.5 (D) | Lv.6 (E) | Lv.7 (F) |
|---|---|---|---|---|---|---|---|
| Orphie & Magus's CRIT Rate Increases | 12.5% | 14.6% | 16.7% | 18.8% | 20.8% | 22.9% | 25% |
| Orphie & Magus's Aftershock Increases | 42.5% | 49.6% | 56.7% | 63.7% | 70.8% | 77.9% | 85% |
| Zeroed In Agent ATK Increase | 130 | 155 | 180 | 205 | 230 | 255 | 280 |
| Zeroed In Additional ATK Increase Cap | 340 | 400 | 460 | 520 | 580 | 640 | 700 |
| Base Energy Regen increases | - | 0.12/s | - | 0.12/s | - | 0.12/s | - |
| Base ATK increases | - | - | 25 | - | 25 | - | 25 |
Stats & Materials by Ascension Milestone
| Lv. | Before | After | Materials for this milestone |
|---|---|---|---|
| Lv.1 | HP: - ATK: - DEF: - [Recommended] ATK, CRIT Rate & DMG, Energy Regen: - |
HP: 626 ATK: 189 DEF: 49 [Recommended] ATK, CRIT Rate & DMG, Energy Regen: - |
|
| Lv.10 | HP: 1,390 ATK: 262 DEF: 109 [Recommended] ATK, CRIT Rate & DMG, Energy Regen: - |
HP: 1,820 ATK: 310 DEF: 143 [Recommended] ATK, CRIT Rate & DMG, Energy Regen: - |
Denny ×24,000
Basic Offense Certification Seal ×4
|
| Lv.20 | HP: 2,670 ATK: 392 DEF: 210 [Recommended] ATK, CRIT Rate & DMG, Energy Regen: - |
HP: 3,099 ATK: 439 DEF: 244 [Recommended] ATK, CRIT Rate & DMG, Energy Regen: - |
Denny ×56,000
Advanced Offense Certification Seal ×12
|
| Lv.30 | HP: 3,949 ATK: 520 DEF: 310 [Recommended] ATK, CRIT Rate & DMG, Energy Regen: - |
HP: 4,379 ATK: 568 DEF: 343 [Recommended] ATK, CRIT Rate & DMG, Energy Regen: - |
Denny ×120,000
Advanced Offense Certification Seal ×20
|
| Lv.40 | HP: 5,229 ATK: 650 DEF: 410 [Recommended] ATK, CRIT Rate & DMG, Energy Regen: - |
HP: 5,659 ATK: 698 DEF: 444 [Recommended] ATK, CRIT Rate & DMG, Energy Regen: - |
Denny ×200,000
Pioneer's Certification Seal ×10
|
| Lv.50 | HP: 6,508 ATK: 780 DEF: 511 [Recommended] ATK, CRIT Rate & DMG, Energy Regen: - |
HP: 6,938 ATK: 828 DEF: 545 [Recommended] ATK, CRIT Rate & DMG, Energy Regen: - |
Denny ×400,000
Pioneer's Certification Seal ×20
|
| Lv.60 | HP: - ATK: - DEF: - [Recommended] ATK, CRIT Rate & DMG, Energy Regen: - |
HP: 7,788 ATK: 909 DEF: 612 [Recommended] ATK, CRIT Rate & DMG, Energy Regen: - |



Total materials across the whole ascension path
Materials Needed to Lv60





Total Denny for the character alone (ascension + basic skills + core skill A→F): about 1,706,000 Denny — W-Engine and Drive Discs not included.
Official Name in Other Languages
Banner History
It's been 69 days since Orphie & Magus's banner last closed — no new rerun announced yet.
Alongside: Starlight - Billy
Alongside: Evelyn
How to read this build page
Every Agent build page has 4 parts: a stat table by level, W-Engine/Drive Disc suggestions, a Mindscape roadmap, and recommended teams. Read them in that order — stats tell you "what you need", gear tells you "where to get it", Mindscape tells you "is it worth pulling", teams tell you "who to pair with". The section below explains how to read each part, and it applies the same way to every character on the site.
How to read the stat table and level
The stat table shows values at the ascension breakpoints (usually the final one, e.g. Lv60) — these are BASE stats with no gear added, useful for comparing Agents or checking whether you've ascended far enough. CRIT Rate and CRIT DMG are shown separately because they set the damage ceiling once Drive Disc substats stack on top. If your real stats are lower than the table, you likely haven't fully ascended or leveled yet — it's not a build mistake.
Why the W-Engine and Drive Disc picks make sense
Most Agents have a "signature" W-Engine designed for their exact role, plus a few cheaper standard-banner substitutes. Missing the signature isn't a dead end — most Agents keep most of their power with a well-matched substitute, just short by some amount of total damage.
- Drive Disc sets (2pc + 4pc) are picked for the set effect that fits that Agent's playstyle (mono-element, Anomaly, stun, and so on).
- Substats follow a priority that changes by role: Attack-type Agents usually chase CRIT Rate/CRIT DMG before ATK%; Anomaly-type Agents add Anomaly Proficiency to that mix; Stun/Support roles often value survivability or energy stats over pure CRIT.
These weights differ per character — follow the exact substat priority table above rather than applying one formula to every role.
Is Mindscape worth chasing
General rule: M0 (no duplicates) already clears the game's hardest content, even for S-rank Agents. Mindscape is a duplicate-fueled upgrade system, and each level costs more resources for a smaller power gain. For most Agents, the best value stop is usually M1–M2 (where some key effects unlock), while M6 is almost always for players chasing the absolute ceiling, not a requirement. Check the Mindscape section in the table above for that specific Agent's numbers.
Skill priority by role
There's no single order for every Agent, but the general pattern by role is:
- Attack: level the main damage skill first (Basic or Special Attack depending on kit), Dash/Dodge last.
- Stun: prioritize whichever skill builds Daze/Stun fastest, since the stun window is where the whole team dumps damage.
- Support: prioritize buff or energy-generating skills over personal damage — this role's value comes from lifting the whole team.
- Anomaly: prioritize the skill that stacks anomaly buildup, since most of the damage comes from the triggered effect, not the direct hit.
Always level the Core Skill steadily alongside the rest — it's a baseline stat that affects the whole rotation, not just one move.
Where to dig deeper
This section only teaches you how to read the page — for deeper comparisons, use the dedicated tools:
- Tier list to see where this Agent stands against the full roster.
- Teams for full in-game comps, including Bangboo and rotation order.
- Disc score to check how your current gear scores against the benchmark.
Agents of the same attribute




Orphie & Magus FAQ
What is the best W-Engine for Orphie & Magus?
Orphie & Magus performs best with Bellicose Blaze. See alternatives and required stats in the Gear section above.
Is Orphie & Magus worth pulling?
Worth pulling if you own Soldier 0 - Anby or any Aftershock carry, since she buffs and adds her own damage while taking almost no field time. Her weakness is that she's team-picky: away from Aftershock comps her value drops sharply—she's not an all-purpose support like Astra.
What is the best team for Orphie & Magus?
Orphie & Magus works best in the Pure Aftershock team. Full members and rotation are in the Teams section.
How much Denny and how many materials to level Orphie & Magus to Lv60?
Leveling Orphie & Magus to max Lv60 (ascension + basic skills to 12 + core skill A→F) costs roughly 1,706,000 Denny, plus role-specific ascension materials, attribute-specific skill chips, high-dimensional data, and weekly boss drops — see the full list with exact quantities in the "Materials Needed" block above, sourced from the game's official leveling tables.
 Understand the mechanics behind this
 Drive Disc Scorer→