Drive Discs
This page gathers every Drive Disc currently in Zenless Zone Zero into one LIVE table, each disc listing its exact 2-piece and 4-piece effect so you can check it fast before building a team. One thing to remember before you scroll: a full 6-slot loadout only ever splits two ways — three separate 2-piece sets, or one 4-piece set plus one leftover 2-piece set. Learn that split first, because the strongest set on paper is useless if you slot it wrong.


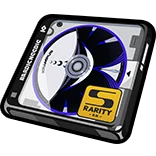

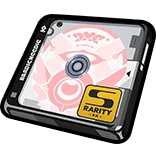

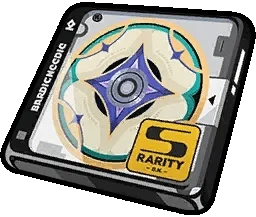
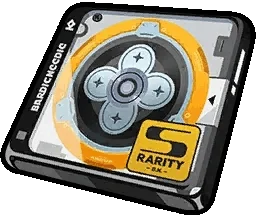







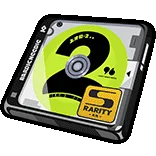
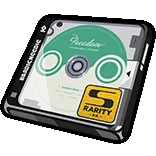
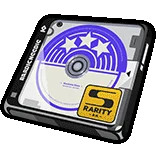
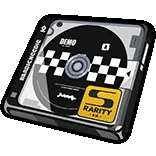

The table below takes the exact first-recommended 4-piece + 2-piece pick from each character's meta data, so it updates automatically whenever the meta does. Click an avatar to open that character's full build page, including engine picks and the reasoning behind the set choice. The "used by N characters" count on the full set table above is counted live from this same data.
 4pc King of the Summit 2pc Shockstar Disco
 4pc Wuthering Salon 2pc Swing Jazz
 4pc The Sky Ablaze 2pc Woodpecker Electro
 4pc Notes From the Chained 2pc Freedom Blues
 4pc Yunkui Tales 2pc Fanged Metal
 4pc Thunder Metal 2pc Woodpecker Electro
 4pc Phaethon's Melody 2pc Freedom Blues
 4pc Phaethon's Melody 2pc Freedom Blues
 4pc Moonlight Lullaby 2pc Swing Jazz
 4pc King of the Summit 2pc Woodpecker Electro
 4pc Yunkui Tales 2pc Branch & Blade Song
 4pc Dawn's Bloom 2pc Woodpecker Electro
 4pc Moonlight Lullaby 2pc Swing Jazz
 4pc White Water Ballad 2pc Branch & Blade Song
 4pc Swing Jazz 2pc Phaethon's Melody
 4pc Fanged Metal 2pc Freedom Blues
 4pc King of the Summit 2pc Woodpecker Electro
 4pc Shadow Harmony 2pc Woodpecker Electro
 4pc Yunkui Tales 2pc Woodpecker Electro
 4pc King of the Summit 2pc Shockstar Disco
 4pc Bunny in Wonderland 2pc Swing Jazz
 4pc Phaethon's Melody 2pc Chaos Jazz
 4pc Hormone Punk 2pc Woodpecker Electro
 4pc Astral Voice 2pc Swing Jazz
 4pc Shadow Harmony 2pc Swing Jazz
 4pc Woodpecker Electro 2pc Polar Metal
 4pc Fanged Metal 2pc Freedom Blues
 4pc Shockstar Disco 2pc Swing Jazz
 4pc Chaotic Metal 2pc Woodpecker Electro
 4pc Thunder Metal 2pc Freedom Blues
 4pc Moonlight Lullaby 2pc Swing Jazz
 4pc Shadow Harmony 2pc Woodpecker Electro
 4pc Polar Metal 2pc Woodpecker Electro
 4pc Thunder Metal 2pc Freedom Blues
 4pc Chaos Jazz 2pc Inferno Metal
 4pc King of the Summit 2pc Shockstar Disco
 4pc King of the Summit 2pc Shockstar Disco
 4pc Shockstar Disco 2pc Inferno Metal
 4pc Branch & Blade Song 2pc Woodpecker Electro
 4pc Proto Punk 2pc Shockstar Disco
 4pc Yunkui Tales 2pc Woodpecker Electro
 4pc Woodpecker Electro 2pc Inferno Metal
 4pc Fanged Metal 2pc Woodpecker Electro
 4pc Yunkui Tales 2pc Woodpecker Electro
 4pc Astral Voice 2pc Swing Jazz
 4pc Shadow Harmony 2pc Shockstar Disco
 4pc Fanged Metal 2pc Freedom Blues
 4pc Swing Jazz 2pc Freedom Blues
 4pc Moonlight Lullaby 2pc Puffer Electro
 4pc Swing Jazz 2pc Astral Voice
 4pc Swing Jazz 2pc Soul Rock
 4pc Woodpecker Electro 2pc Thunder Metal
 4pc Woodpecker Electro 2pc Fanged Metal
 4pc Woodpecker Electro 2pc Fanged Metal
 4pc Swing Jazz 2pc Chaotic Metal
 4pc King of the Summit 2pc Shockstar Disco
The 6-slot mechanic — what 2-piece and 4-piece mean and how to mix them
Each agent equips up to 6 Drive Discs, numbered slot 1 through 6. Equip 2 discs from the SAME set to unlock its 2-piece effect (usually a base stat buff); equip 4 discs from the same set to also unlock its 4-piece effect (usually a stronger, condition-based mechanic). Since you only have 6 slots, there are exactly two valid splits: three different sets at 2 pieces each, or one main set at 4 pieces plus a secondary set at 2 pieces.
Most DPS builds go 4+2: four pieces of the main set for the big effect, and two leftover pieces picked for whatever base stat needs filling out (usually PEN Ratio or an elemental stat). Support or defense builds sometimes prefer three 2-piece sets instead, since the goal there is stacking several small base buffs rather than one big 4-piece payoff.
Main stat per slot — which are fixed, which you choose
The first three slots always carry a fixed flat main stat, no choice involved: slot 1 is flat HP, slot 2 is flat ATK, slot 3 is flat DEF. The remaining three slots are where you actually decide the build:
- Slot 4: pick among base percentages (HP%, ATK%, DEF%) or Crit Rate, Crit DMG, Anomaly Proficiency.
- Slot 5: adds elemental damage options (Fire/Ice/Electric/Ether/Physical/Frost DMG) or PEN Ratio, alongside the base percentages.
- Slot 6: adds Anomaly Proficiency, Energy Regen, or Impact, on top of the options above.
Quick rule: standard crit DPS want Crit Rate, Crit DMG or elemental damage across slots 4-5-6; Anomaly teams want Anomaly Proficiency; Stun-role agents want Impact in slot 6 to build Daze faster.
Sub-stat priority and which slot to upgrade first by role
Each disc holds up to 4 sub-stats, none duplicating the main stat it already carries, and each roll lands within a set range (community-reported, not fully cross-verified: a flat ATK roll is roughly 19 points, Crit Rate roughly 2.4%, Crit DMG roughly 4.8% — always close to double Crit Rate). General priority: Crit Rate and Crit DMG for standard DPS, PEN% or Anomaly Proficiency for Anomaly teams, Impact for Stun-role agents.
With only 6 slots, upgrade checkpoints (+3/+6/+9) should follow role priority so you don't waste resources: Attack-role agents push slots 2-4-5-6 first (skip 1 and 3, which are just flat HP); Anomaly-role agents push slot 4 first since that's where Anomaly Proficiency appears; Stun-role agents push slot 6 first so Impact climbs fastest, opening the stun window sooner for the whole team.
Picking a set by role — Attack, Anomaly, Stun, Support, Defense
Every set has its own fixed 2-piece and 4-piece text, but its actual value depends on the role of the agent wearing it, not just the set's name:
- Attack (standard/crit DPS): look for a 4-piece that directly adds Crit DMG or boosts damage from a specific attack type (Basic/Dodge/Skill) while an elemental buff is active.
- Anomaly: look for a set that adds Anomaly Proficiency at 2 pieces and reduces enemy Anomaly RES at 4 pieces — the pair amplifies each other strongly.
- Stun: prioritize a set that directly boosts Impact or Daze gain on Basic/Dodge hits, opening the Chain Attack window faster for the team.
- Support: pick a set that restores Energy or buffs the whole team on Chain/Ultimate — a Support's value is feeding the combo, not personal damage.
- Defense: prioritize a set that boosts Daze on defensive hits or buffs the team's defense, matching the tanking role.
Since every 4-piece effect has its own trigger condition, read the description in the table above carefully before committing — a great set on one character can be dead weight on another if the trigger doesn't match its playstyle.
Where to farm, and when it's worth going serious
Drive Discs drop in pairs from Routine Cleanup — each stage typically drops one fixed pair of sets, so target the stage that drops what you actually need instead of grinding at random. There are three milestones worth remembering as you build: at lower ranks you already pick up S-rank discs occasionally through quests and chests; higher up you're guaranteed two S-rank discs each time you clear a hard stage; and later, once you unlock Legendary Proxy, higher-tier stages get an extra boost to rare-disc drop rate. These three milestones don't contradict each other — they simply unlock three separate mechanics (choosing via tuning, direct drops, boosted rate) in sequence.
Energy for entering stages has a fixed cap and regens in real time; the city's coffee shop also grants an instant Energy top-up plus a same-day double-drop buff, worth timing to speed up farming without spending extra Energy. Don't chase a perfect build too early — focus your Energy on stages that drop the exact sets you need first, instead of grinding scattershot before you've settled on a main team.
FAQ
What's the difference between 2-piece and 4-piece Drive Disc effects?
Equipping 2 discs from the same set unlocks its 2-piece effect, usually a small base stat buff. Equipping 4 unlocks the stronger 4-piece effect, usually with its own trigger condition. Since you only have 6 slots total, you can only pick one of two splits: three separate 2-piece sets, or one 4-piece set plus a leftover 2-piece set.
Which Drive Disc slots have a fixed main stat, and which do I choose?
Slots 1, 2, 3 are always fixed at flat HP, ATK, DEF respectively — no choice there. Slots 4, 5, 6 are where you decide the build, with slot 5 adding elemental damage/PEN Ratio and slot 6 adding Anomaly Proficiency, Energy Regen, or Impact.
Which slot should I upgrade first when checkpoints are limited?
By role: standard DPS push slots 2-4-5-6 first, skipping 1 and 3 since they're just flat HP. Anomaly teams prioritize slot 4 first since that's where Anomaly Proficiency appears. Stun-role agents push slot 6 first so Impact climbs faster, opening the stun window sooner.
When is it worth farming Drive Discs seriously?
Three milestones unlock gradually: at low ranks you already get occasional S-rank discs from quests and chests; higher up you're guaranteed two S-rank discs per hard stage clear; and once Legendary Proxy unlocks, higher-tier stages get a boosted rare-disc drop rate. Serious farming is worth it from the second milestone onward.
Why isn't there one single best Drive Disc for every agent?
Because a set's value depends on the role of the agent wearing it and the trigger condition of its 4-piece effect. A set that adds Anomaly Proficiency is dead weight on a standard DPS, and an Impact-boosting set is wasted on an agent that isn't Stun-role. Always read the effect description in the table before committing, never pick by set name alone.
 Understand the mechanics behind this
 Drive Disc Scorer→
 Characters→