
Aria
An Ether Anomaly main DPS that dumps heavy Abloom/Disorder damage during the stun window, needing one stunner and one support alongside her.
Tier S+ · Anomaly · Ether. BiS: Angel in the Shell. An Ether Anomaly main DPS that dumps heavy Abloom/Disorder damage during the stun window, needing one stunner and one support alongside her.
Best W-Engines


Recommended Drive Discs
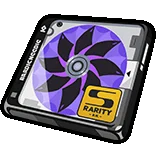 Phaethon's Melody directly pushes Anomaly/Ether DMG, 2pc
  Freedom Blues adds Anomaly Proficiency.
 Shining Aria directly raises Ether DMG and Anomaly Proficiency; mono-Ether teams prefer this set.
4: Anomaly Proficiency · 5: Ether DMG (or PEN Ratio / ATK%) · 6: Anomaly Mastery
Prioritize Anomaly Proficiency > ATK% > PEN > sub CRIT; push Anomaly Proficiency to ~350 before considering other stats.
Skill priority: Core Skill > Special/EX Special > Basic Attack > Assist > Chain > Dodge.




Worth fully investing in — Aria is one of the strongest Anomaly DPS in 3.0, with explosive and easy-to-play Disorder/Abloom damage. Her weaknesses are team dependence (she needs a stunner + Ether support) and a heavy hunger for Anomaly Proficiency to hit full power; solo or in a mixed team her damage drops noticeably.
Level 60 targets (takugame, with signature, ~12-13 rolls): ATK ~2,400 / Anomaly Mastery ~320. takugame explicitly states there is 'no hard stat threshold' — the goal is to stack as much Anomaly Mastery and ATK% as possible since both scale her anomaly damage directly. With M1, also push Anomaly Proficiency high, as each AP point above 100 converts to +0.5% Abloom Crit Rate. Substat priority: Anomaly Mastery ≈ ATK% > Anomaly Proficiency > PEN.
1) OPENER: bring Aria in, use Basic / EX Special to apply the Ether anomaly (Corruption) to enemies. 2) Swap to stunner Nangong Yu to break (and support Sunna to buff) — Aria banks Support Energy from her 4th basic hit + EX Special + Quick Assist. 3) LOOP: at 2 Support Energy, HOLD Basic to instantly release her Level 3 charge (Abloom) without charging up; hitting an anomaly-afflicted enemy detonates Abloom (big anomaly DMG), and +50% if the target is Stunned/Broken. 4) ULTIMATE: enter Moment of Delusion — Fever + full-team shield + Ether DMG buff for ~15s, spam Level 3 charges to keep detonating Abloom. 5) Repeat from step 2, keeping the Ether anomaly always applied so Abloom never whiffs.
The #1 stopping point (the community/gabbutz all say prioritize M1). 'Energetic Sound Waves': when Aria triggers Abloom it can now CRIT — base 25% Crit Rate, +0.5% Crit Rate per Anomaly Proficiency point above 100. Turns all her spare Anomaly Proficiency into damage and opens her single biggest ceiling of any mindscape. STOP AT M1 for most players (after the signature).
'Dream's Pulsation': ignores 16% of the target's DEF, plus another 8% (24% total) while in Moment of Delusion (her Ultimate window). Very valuable against high-DEF endgame bosses. The #2 stop after M1 if you have spare resources —
All skills +2 levels. A small flat bump with no gameplay change — low value, just a stepping stone toward M4/M6.
'Clockwork Angel': triggering Abloom restores 4 Energy and 70 Decibels (once per 10s). Only speeds up Ultimate uptime and rotation slightly, no damage ceiling change — low value, not worth pulling for on its own.
All skills +2 levels again. Still just flat numbers, a bridge to M6 — low value.
The biggest jump (whale-tier). 'Construct's Dream': Moment of Delusion no longer expires (near-permanent once you Ultimate) and grants +40% damage in that state; while enemies are anomaly-afflicted, gain 1 Fever stack every 6s. Extremely strong but whale-only — most players stop at M1 (or M2); only those with spare resources go straight for M6 (M3-M5 in between are filler).
- Break/Stun-hybrid anomaly: her Abloom gains +50% when the target is Stunned/Broken — rare for an Anomaly agent, so she pairs with a stunner and synergizes perfectly with the Angels of Delusion team (Nangong Yu + Sunna).
- Self-sufficient on-field DPS: banks her own Support Energy to instantly fire Level 3 charges, and her Ultimate grants a full-team shield + Fever — output plus survivability.
- M1 lets Abloom CRIT, converting spare Anomaly Proficiency into Crit Rate — a very high ceiling that puts her among the top Anomaly DPS in 3.0.
- Rare Ether anomaly (Corruption) enables flexible Disorder: works in mono-Ether and Disorder comps (with Vivian/Yanagi/Burnice), though Disorder teams output less than her core comp.
- Heavily team-dependent: needs a stunner + a support, ideally the Angels of Delusion set (Nangong Yu + Sunna); in Disorder or off-meta comps her damage drops noticeably (her Disorder teams perform the worst).
- An on-field DPS with a complex rotation: you must manage Support Energy, keep the Ether anomaly applied, and time the Break window — higher execution than a fire-and-forget off-field Anomaly.
- Stat-hungry for Anomaly Mastery and wants her signature Angel in the Shell (AM mainstat) to fully bloom; on a substitute engine (Flight of Fancy) she loses noticeable power.
Excellent in Shiyu Defense: single-target burst with the Angels of Delusion team (Aria + Nangong Yu + Sunna) — the Stun/Break window buffs Abloom by +50% for huge spikes; the community rank her a top Anomaly DPS in 3.0. Strongest when a stunner opens Break consistently.
Also strong in Deadly Assault: stays on-field sustaining Abloom on multiple high-HP foes and can trigger Disorder with a second anomaly partner (Vivian/Yanagi/Burnice) — though note her Disorder teams output less than the Angels of Delusion core. Still a high scorer when anomaly uptime and an Ether buffer are in place.
 Basic Attack2
Basic Attack: Sweet Melody
Press to activate: Launches up to four consecutive attacks forward, dealing Ether DMG. After hitting an enemy with the fourth hit, 1 Fandom Power is generated on the field after the attack ends.
Basic Attack: Perfect Pitch
Hold to activate: Aria enters a charging state and can reach three levels of charge. Releasing or reaching the maximum charge time causes Aria to unleash a powerful downward attack forward based on the current charge level, dealing massive Ether DMG. If there is Fandom Power nearby while Aria is charging, she will absorb the Fandom Power, with each absorbed Fandom Power instantly increasing charge level by 1 and granting 1 stack of a buff that increases the next Basic Attack: Perfect Pitch's Ether Anomaly Buildup by 10%. This buff can stack up to 2 times and is removed after the attack ends. After the 4th hit of Basic Attack: Sweet Melody, Special Attack: Full-Sugar Electronica - No Ice, an EX Special Attack, the 3rd hit of Basic Attack: Perfect Pitch, a Quick Assist, a Chain Attack, or an Ultimate, if there are at least 2 Fandom Power nearby, hold to consume 2 Fandom Power and quickly activate the 3rd hit of Basic Attack: Perfect Pitch. After the 3rd hit of Basic Attack: Perfect Pitch, a Chain Attack, or an Ultimate, if there are at least 2 Fandom Power nearby, the 3rd hit of Basic Attack: Perfect Pitch can also be quickly activated by pressing within a short window, consuming 2 Fandom Power. Anti-Interrupt Level is increased while charging, and received DMG is reduced by 40%. Character is invulnerable while using this attack.
 Dodge3
Dodge: On-Beat Precision
Press to activate: A quick dash dodge. If activated during a Basic Attack: Sweet Melody chain, this action does not reset the Basic Attack count. Character is invulnerable while using this skill.
Dash Attack: Silky-Smooth Combo
Press during a dodge to activate: Flies forward with a swift slashing attack, dealing Ether DMG. If activated during a Basic Attack: Sweet Melody chain, this action does not reset the Basic Attack count.
Dodge Counter: Slide-Shift Variation
Press during a Perfect Dodge to activate: Unleashes a powerful slash against the target, dealing Ether DMG. After using this skill, it can be immediately followed up with the 3rd hit of Basic Attack: Sweet Melody. Character is invulnerable while using this skill.
 Assist3
Quick Assist: Shatter Fantasy
When the active character is launched, press to activate: Delivers a powerful slash to the target, dealing Ether DMG. After using this skill, it can be immediately followed up with the 3rd hit of Basic Attack: Sweet Melody. Character is invulnerable while using this skill.
Defensive Assist: Clutch Save
When the on-field character is about to be attacked, press to activate: Parries the enemy's attack, dealing massive Daze. Character is invulnerable while using this skill.
Assist Follow-Up: Encore Song
Press after a Defensive Assist to activate: Unleashes a powerful series of slashes on the target, dealing massive Ether DMG. Character is invulnerable while using this skill.
 Special Attack4
Special Attack: Full-Sugar Electronica
Press to activate: Delivers a forward kick, dealing Ether DMG. Anti-Interrupt level is increased while using this skill.
Special Attack: Full-Sugar Electronica - No Ice
After the 4th hit of Basic Attack: Sweet Melody, an Assist Follow-Up, a Chain Attack, or an Ultimate, press to activate: Delivers a quicker forward kick, dealing Ether DMG. If the attack hits an enemy, 1 Fandom Power is generated on the field after the attack ends. Character is invulnerable while using this skill.
EX Special Attack: Fall Into Delusion
With enough energy, press to activate: Delivers a powerful forward kick followed by a sonic wave attack, dealing Ether DMG. If the attack hits an enemy, 3 Fandom Power are generated on the field after the attack ends. Character is invulnerable while using this skill.
EX Special Attack: Instantly Hooked
After launching EX Special Attack: Fall Into Delusion, and with enough Energy, press to activate: Performs a powerful downward attack in front, dealing Ether DMG. If the attack hits an enemy, 3 Fandom Power are generated on the field after the attack ends. Character is invulnerable while using this skill.
 Chain Attack2
Chain Attack: Dream Collab
When a Chain Attack is triggered, select the character to activate: Launches a series of attacks forward, dealing massive Ether DMG. 4 Fandom Power are generated on the field on skill activation. Character is invulnerable while using this skill.
Ultimate: 100% Energy
When Decibel Rating is at Maximum, press to activate: Releases all her power, entering Moment of Delusion, and fires multiple powerful shots at the target, dealing massive Ether DMG. Upon entering Moment of Delusion, Aria gains 3 stacks of All-Out Cheering and activates Ether Veil: Delusion Reprise. While Ether Veil: Delusion Reprise is active, all squad members gain an additional 50 ATK for 30s. Re-activating Ether Veil: Delusion Reprise will first cancel any existing instance of Ether Veil: Delusion Reprise. While Aria is charging, if she has All-Out Cheering, stacks of All-Out Cheering are consumed first to charge. Each stack of All-Out Cheering consumed increases the charge level by 2. Upon entering Moment of Delusion, if Aria already has All-Out Cheering, all remaining stacks of All-Out Cheering are first converted into Fandom Power and generated on the field. Each stack of All-Out Cheering is converted into 2 Fandom Power. Moment of Delusion lasts for up to 15s. During Moment of Delusion, Aria's Basic Attack: Perfect Pitch 3rd hit is upgraded to an enhanced version. When exiting Moment of Delusion, if Aria has All-Out Cheering, all remaining stacks of All-Out Cheering are converted into Fandom Power and generated on the field. Each stack of All-Out Cheering is converted into 2 Fandom Power. Character is invulnerable while using this skill.
 Core Skill2
Core Passive: Innate Stage Presence
Aria's Anomaly Proficiency increases by 45. If Aria's 3rd hit of Basic Attack: Perfect Pitch lands a heavy attack on an enemy suffering an Ether, Electric, Fire, Physical, or Ice Anomaly, it will trigger Abloom, which resolves an additional instance of Attribute Anomaly DMG. The additional DMG is calculate as 13.8%/7.2%/17.9%/1.25%/1.8% per 10 points of initial Anomaly Mastery of the original Anomaly DMG. If the target is Stunned, the DMG ratio is further increased by 50%.*Stats shown are at Base level.
Additional Ability: Collaborative Stage
When another character in your squad is a Stun or Support character, or shares the same Faction: When Ether Veil is activated, 4 Fandom Power are generated on the field. This can trigger once every 1s. When any squad member applies Corruption to an enemy, its duration is extended by 3s.
How to read this build page
Every Agent build page has 4 parts: a stat table by level, W-Engine/Drive Disc suggestions, a Mindscape roadmap, and recommended teams. Read them in that order — stats tell you "what you need", gear tells you "where to get it", Mindscape tells you "is it worth pulling", teams tell you "who to pair with". The section below explains how to read each part, and it applies the same way to every character on the site.
How to read the stat table and level
The stat table shows values at the ascension breakpoints (usually the final one, e.g. Lv60) — these are BASE stats with no gear added, useful for comparing Agents or checking whether you've ascended far enough. CRIT Rate and CRIT DMG are shown separately because they set the damage ceiling once Drive Disc substats stack on top. If your real stats are lower than the table, you likely haven't fully ascended or leveled yet — it's not a build mistake.
Why the W-Engine and Drive Disc picks make sense
Most Agents have a "signature" W-Engine designed for their exact role, plus a few cheaper standard-banner substitutes. Missing the signature isn't a dead end — most Agents keep most of their power with a well-matched substitute, just short by some amount of total damage.
- Drive Disc sets (2pc + 4pc) are picked for the set effect that fits that Agent's playstyle (mono-element, Anomaly, stun, and so on).
- Substats follow a priority that changes by role: Attack-type Agents usually chase CRIT Rate/CRIT DMG before ATK%; Anomaly-type Agents add Anomaly Proficiency to that mix; Stun/Support roles often value survivability or energy stats over pure CRIT.
These weights differ per character — follow the exact substat priority table above rather than applying one formula to every role.
Is Mindscape worth chasing
General rule: M0 (no duplicates) already clears the game's hardest content, even for S-rank Agents. Mindscape is a duplicate-fueled upgrade system, and each level costs more resources for a smaller power gain. For most Agents, the best value stop is usually M1–M2 (where some key effects unlock), while M6 is almost always for players chasing the absolute ceiling, not a requirement. Check the Mindscape section in the table above for that specific Agent's numbers.
Skill priority by role
There's no single order for every Agent, but the general pattern by role is:
- Attack: level the main damage skill first (Basic or Special Attack depending on kit), Dash/Dodge last.
- Stun: prioritize whichever skill builds Daze/Stun fastest, since the stun window is where the whole team dumps damage.
- Support: prioritize buff or energy-generating skills over personal damage — this role's value comes from lifting the whole team.
- Anomaly: prioritize the skill that stacks anomaly buildup, since most of the damage comes from the triggered effect, not the direct hit.
Always level the Core Skill steadily alongside the rest — it's a baseline stat that affects the whole rotation, not just one move.
Where to dig deeper
This section only teaches you how to read the page — for deeper comparisons, use the dedicated tools:
- Tier list to see where this Agent stands against the full roster.
- Teams for full in-game comps, including Bangboo and rotation order.
- Disc score to check how your current gear scores against the benchmark.



What is the best W-Engine for Aria?
Aria performs best with Angel in the Shell. See alternatives and required stats in the Gear section above.
Is Aria worth pulling?
Worth fully investing in — Aria is one of the strongest Anomaly DPS in 3.0, with explosive and easy-to-play Disorder/Abloom damage. Her weaknesses are team dependence (she needs a stunner + Ether support) and a heavy hunger for Anomaly Proficiency to hit full power; solo or in a mixed team her damage drops noticeably.
What is the best team for Aria?
Aria works best in the Ether Anomaly-Stun team. Full members and rotation are in the Teams section.
 Understand the mechanics behind this
 Teams→
 Drive Disc Scorer→