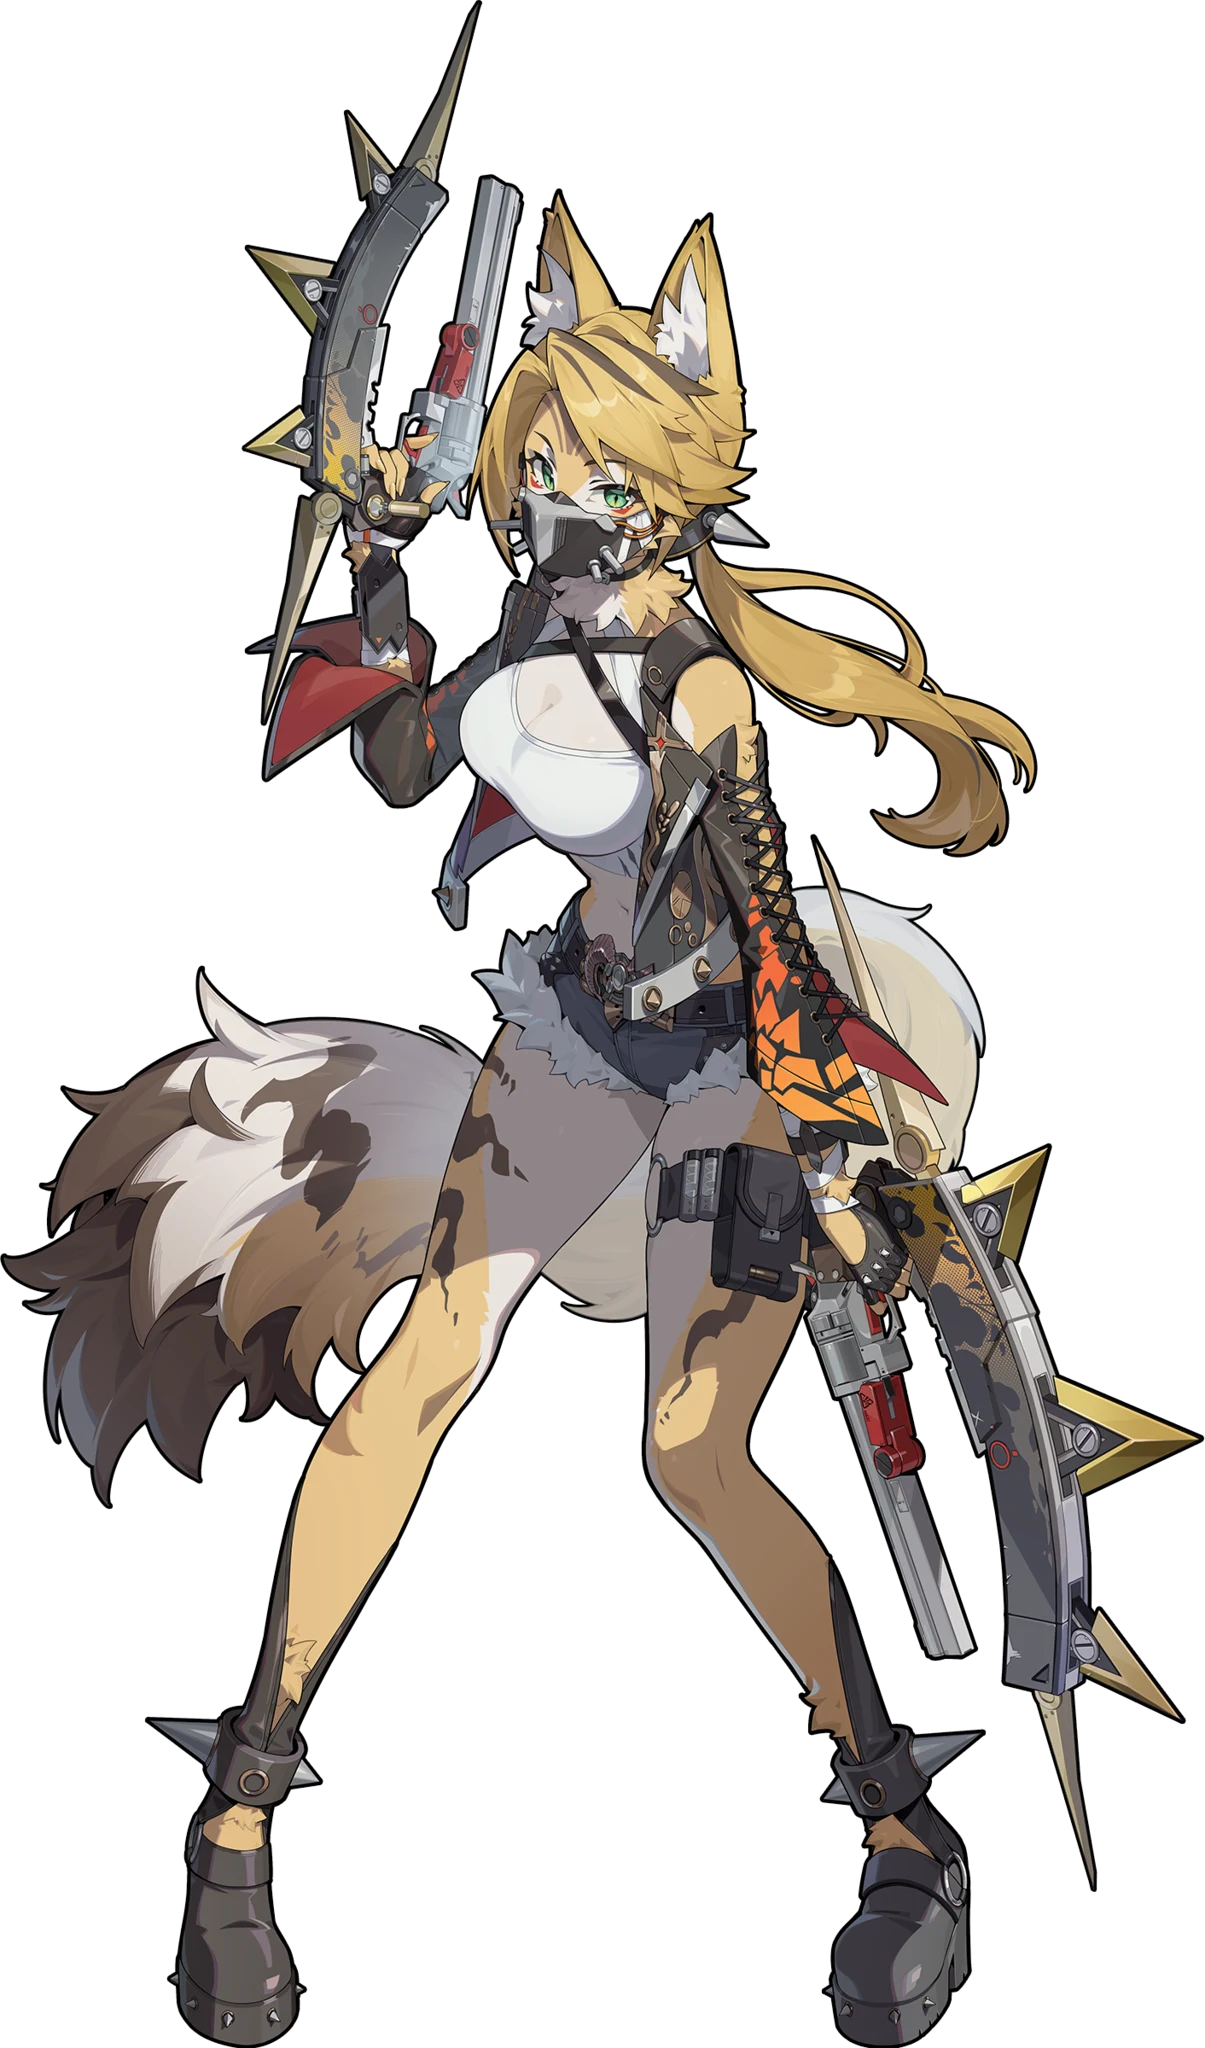
Pulchra
An off-field Physical Stun agent who fires off Aftershocks to keep stacking Daze and grants the whole team +30% Aftershock DMG, ceding the field to the main DPS.
Tier A · Stun · Physical. BiS: Hellfire Gears. An off-field Physical Stun agent who fires off Aftershocks to keep stacking Daze and grants the whole team +30% Aftershock DMG, ceding the field to the main DPS.



Base stats
Recommended build
Best W-Engines



Recommendation order by current meta — the first is strongest, the rest are alternatives in decreasing priority. (Not a simulated DPS %.)
Recommended Drive Discs
4: CRIT Rate (or ATK%) · 5: Physical DMG · 6: Impact%
Impact > CRIT Rate > CRIT DMG > ATK% (prioritize Impact for faster stuns).
Skill priority: Core Skill (up to +30% Daze) first → Special Attack → Chain Attack.
Recommended teams





Worth investing in if you run an Aftershock team (Soldier 0 Anby, Trigger)—a cheap, perfect fit. Outside that niche Pulchra is just a mid-tier A-rank stunner: her off-field Daze is decent but no match for a dedicated S-rank stunner. Pull if you're short on stunners; otherwise save your pulls.
 Anby
AnbyRole Ranking
The list below is pulled straight from the overall Tier List, keeping only the 11 agents who share the Stun role. Order within each tier is NOT a strength ranking — it simply groups agents by their original tier.








Stat targets
Pulchra is a stunner, so priority #1 is ENOUGH Impact to fill the Daze bar fast; then stack CRIT so her off-field damage carries weight. Disc main stats (/mobalytics): slot 4 Crit Rate (or Crit DMG) · slot 5 Physical DMG (or PEN Ratio) · slot 6 Impact%. Substat order: Crit Rate ≈ Crit DMG > ATK% > PEN, plus pick up Impact until the stun threshold is met. Base Lv1 stats: Impact 94, Crit Rate 5%, Crit DMG 50% (per mobalytics) — there is no official ATK/Impact target table, so this is qualitative guidance, no fabricated numbers. W-engine: Box Cutter (her A-rank signature, adds Daze via Aftershock) or Hellfire Gears; discs 4pc Shadow Harmony + 2pc Shockstar Disco.
Rotation & combos
1) Use EX Special (Rending Claw - Flashstep) or an Assist Follow-Up to put Pulchra into Hunter's Gait (+30% Daze for 6s) and plant Binding Trap on the enemy. 2) Quick-swap to your on-field main DPS. 3) DPS uses Special / EX Special → triggers Pulchra's off-field Aftershock (Coordinate) attacks, each adding Daze + damage. 4) Keep chaining Basics / skills to fire more Aftershock waves within the Hunter's Gait window. 5) When Decibel is full, pop Pulchra's Ult (wide invulnerable shot) to refresh Binding Trap, then repeat from step 1.
- A true off-field stunner: applies Daze and fires Aftershocks from the bench, barely eating the main DPS's field time — perfect for hyper-carry playstyles.
- Team-wide buff: Binding Trap boosts the Aftershock DMG all agents deal to the target by 30% — making her a strong piece for Aftershock cores (Soldier 0 - Anby, Trigger).
- Cheap and accessible: as an A-rank both she and her mindscapes are easy to obtain; F2P can aim straight for M6 (her strongest node) — rare value-per-cost for a stunner.
- Low-maintenance loop: press EX/Assist then swap and it runs, with smooth Quick Assist and no long combos required — easy for players of any skill level.
- Low personal damage: primarily support/stun with weak output — she can't carry, always needing a main DPS to capitalize on Aftershock/stun.
- Team-restrictive below M6: without M6 her Binding Trap only buffs Aftershock DMG, boxing her into Aftershock teams (S0-Anby, Trigger); pairing other-element DPS wastes part of her buff.
- Split stat demand: needs enough Impact to stun quickly yet also wants high CRIT for damage — the divided stat budget makes disc-building fiddlier than a pure-Impact stunner.
Recommended Bangboo
Endgame mode fit
Good in Shiyu Defense: a cheap off-field stunner for single-target burst teams, opening stun windows for the main DPS while Binding Trap's +30% Aftershock feeds extra damage. Her own output is low so her value rides on the main DPS's quality; in Aftershock teams (S0-Anby/Trigger) she has ample Impact to keep stun uptime steady. (medium confidence.)
Serviceable in Deadly Assault: stuns high-HP bosses quickly thanks to Impact, and in low-scoring fights a Daze-rich W-engine like Fossilized Core / Box Cutter lets her fill the Daze bar very efficiently. Still needs a strong main DPS to exploit the stun window; a budget option when you lack an S-rank stunner. (medium confidence.)
Skills
Basic Attack2
 Basic Attack
Basic Attack: Swift Strike
Press to activate: Unleashes up to 3 attacks forward, dealing Physical DMG.
Basic Attack: Leaping Strike
Hold to activate: Leap forward and unleash a series of slashes, dealing Physical DMG.
Dodge3
 Dodge
DodgeDodge: Reversal Shot
Press to activate: A quick dash dodge. Character is invulnerable while using this skill.
Dash Attack: First Strike Advantage
Press during a dodge to activate: Dash forward and slash, dealing Physical DMG.
Dodge Counter: Relentless Retribution
Press during a Perfect Dodge to activate: Thrust at enemies in front, then follow up with a swift slash, dealing Physical DMG. Character is invulnerable while using this skill.
Assist3
 Assist
Quick Assist: Contract - Bodyguard
Press during a dodge to activate: Dash forward and slash, dealing Physical DMG.
Evasive Assist: Contract - Outsourced Combat
When the on-field character is about to be attacked, press to activate: Dodges the enemy's attack and activates Vital View. Character is invulnerable while using this skill.
Assist Follow-Up: Independent Pricing
Press after an Evasive Assist to activate: Leap forward into the air and fire, dealing Physical DMG. Upon activating this skill, consume 1 Assist Point to enter the Hunter's Gait state. Character is invulnerable while using this skill.
Special Attack3
 Special Attack
Special Attack: Rending Claw
Press to activate: Perform a rapid back-and-forth piercing attack, dealing Physical DMG. Anti-Interrupt level is increased while using this skill.
Special Attack: Rending Claw - Nightmare Shadow
While Pulchra is in the Hunter's Gait state, and when another active character in the squad hits an enemy with a heavy attack from a Special Attack or EX Special Attack: Dash back-and-forth piercing enemies surrounding the target, dealing Physical DMG. After using this skill, if another active character in the squad hits an enemy, Pulchra will repeat the attack up to 5 additional times, with the final attack being a more powerful Finishing Move. Character is invulnerable while using this skill. Special Attack: Rending Claw - Nightmare Shadow is an Aftershock attack.
EX Special Attack: Rending Claw - Flashstep
With enough Energy, press to activate: Pierce back and forth times, dealing massive Physical DMG. Character is invulnerable while using this skill.
Chain Attack2
 Chain Attack
Chain Attack: Hey, Didn't Expect That, Right?
When a Chain Attack is triggered, select the character to activate: Unleashes a charged shot forward, dealing massive Physical DMG. Character is invulnerable while using this skill.
Ultimate: Oh, Time to Play?
When Decibel Rating is at Maximum, press to activate: Unleash a powerful shot at enemies in a large area ahead, dealing massive Physical DMG. Character is invulnerable while using this skill.
Core Skill2
 Core Skill
Core Passive: Hunter's Instinct
When Pulchra activates an EX Special Attack, Assist Follow-Up, Chain Attack, or Ultimate, she enters the Hunter's Gait state, increasing the Daze she deals by 15% for 6s. After switching to another character, if Pulchra is still in the Hunter's Gait state, the state will last until Pulchra switches back in. While in the Hunter's Gait state and as the active character, when Pulchra lands a heavy attack on enemies, she can trigger a Quick Assist from the previous character in the squad.*Stats shown are at Base level.
Additional Ability: Business Partner
When another character in your squad is an Attack character or shares the same Faction: When Pulchra hits enemies with Special Attack: Rending Claw - Nightmare Shadow, an EX Special Attack, Assist Follow-Up, Chain Attack, or Ultimate, it applies the Binding Trap effect for 15s. After applying Binding Trap, all units' Aftershock DMG against the target is increased by 30%.
Skill Coefficients by Level
Basic Attack2
Basic Attack: Swift Strike
| Lv | Lv.1 | Lv.2 | Lv.3 | Lv.4 | Lv.5 | Lv.6 | Lv.7 | Lv.8 | Lv.9 | Lv.10 | Lv.11 | Lv.12 | Lv.13 | Lv.14 | Lv.15 | Lv.16 |
|---|---|---|---|---|---|---|---|---|---|---|---|---|---|---|---|---|
| 1st-Hit DMG Multiplier | 35.7% | 39% | 42.3% | 45.6% | 48.9% | 52.2% | 55.5% | 58.8% | 62.1% | 65.4% | 68.7% | 72% | 75.3% | 78.6% | 81.9% | 85.2% |
| 2nd-Hit DMG Multiplier | 94.1% | 102.7% | 111.3% | 119.9% | 128.5% | 137.1% | 145.7% | 154.3% | 162.9% | 171.5% | 180.1% | 188.7% | 197.3% | 205.9% | 214.5% | 223.1% |
| 3rd-Hit DMG Multiplier | 167.6% | 182.9% | 198.2% | 213.5% | 228.8% | 244.1% | 259.4% | 274.7% | 290% | 305.3% | 320.6% | 335.9% | 351.2% | 366.5% | 381.8% | 397.1% |
| 1st-Hit Daze Multiplier | 28.5% | 29.8% | 31.1% | 32.4% | 33.7% | 35% | 36.3% | 37.6% | 38.9% | 40.2% | 41.5% | 42.8% | 44.1% | 45.4% | 46.7% | 48% |
| 2nd-Hit Daze Multiplier | 75.3% | 78.8% | 82.3% | 85.8% | 89.3% | 92.8% | 96.3% | 99.8% | 103.3% | 106.8% | 110.3% | 113.8% | 117.3% | 120.8% | 124.3% | 127.8% |
| 3rd-Hit Daze Multiplier | 134.1% | 140.2% | 146.3% | 152.4% | 158.5% | 164.6% | 170.7% | 176.8% | 182.9% | 189% | 195.1% | 201.2% | 207.3% | 213.4% | 219.5% | 225.6% |
Basic Attack: Shimotsuki
| Lv | Lv.1 | Lv.2 | Lv.3 | Lv.4 | Lv.5 | Lv.6 | Lv.7 | Lv.8 | Lv.9 | Lv.10 | Lv.11 | Lv.12 | Lv.13 | Lv.14 | Lv.15 | Lv.16 |
|---|---|---|---|---|---|---|---|---|---|---|---|---|---|---|---|---|
| DMG Multiplier | 135% | 147.3% | 159.6% | 171.9% | 184.2% | 196.5% | 208.8% | 221.1% | 233.4% | 245.7% | 258% | 270.3% | 282.6% | 294.9% | 307.2% | 319.5% |
| Daze Multiplier | 108% | 113% | 118% | 123% | 128% | 133% | 138% | 143% | 148% | 153% | 158% | 163% | 168% | 173% | 178% | 183% |
Dodge2
Dash Attack: First Strike Advantage
| Lv | Lv.1 | Lv.2 | Lv.3 | Lv.4 | Lv.5 | Lv.6 | Lv.7 | Lv.8 | Lv.9 | Lv.10 | Lv.11 | Lv.12 | Lv.13 | Lv.14 | Lv.15 | Lv.16 |
|---|---|---|---|---|---|---|---|---|---|---|---|---|---|---|---|---|
| DMG Multiplier | 48.3% | 52.7% | 57.1% | 61.5% | 65.9% | 70.3% | 74.7% | 79.1% | 83.5% | 87.9% | 92.3% | 96.7% | 101.1% | 105.5% | 109.9% | 114.3% |
| Daze Multiplier | 24.2% | 25.2% | 26.4% | 27.5% | 28.6% | 29.7% | 30.8% | 31.9% | 33% | 34.1% | 35.2% | 36.3% | 37.4% | 38.5% | 39.6% | 40.7% |
Dodge Counter: Relentless Retribution
| Lv | Lv.1 | Lv.2 | Lv.3 | Lv.4 | Lv.5 | Lv.6 | Lv.7 | Lv.8 | Lv.9 | Lv.10 | Lv.11 | Lv.12 | Lv.13 | Lv.14 | Lv.15 | Lv.16 |
|---|---|---|---|---|---|---|---|---|---|---|---|---|---|---|---|---|
| DMG Multiplier | 201.7% | 220.2% | 238.6% | 257% | 275.4% | 293.8% | 312.2% | 330.6% | 349% | 367.4% | 385.8% | 404.1% | 422.6% | 441% | 459.4% | 477.8% |
| Daze Multiplier | 178.3% | 186.5% | 194.7% | 202.9% | 211.1% | 219.3% | 227.5% | 235.7% | 243.9% | 252.1% | 260.3% | 268.5% | 276.7% | 284.9% | 293.1% | 301.3% |
Assist2
Quick Assist: Contract - Bodyguard
| Lv | Lv.1 | Lv.2 | Lv.3 | Lv.4 | Lv.5 | Lv.6 | Lv.7 | Lv.8 | Lv.9 | Lv.10 | Lv.11 | Lv.12 | Lv.13 | Lv.14 | Lv.15 | Lv.16 |
|---|---|---|---|---|---|---|---|---|---|---|---|---|---|---|---|---|
| DMG Multiplier | 78.3% | 85.5% | 92.7% | 99.9% | 107.1% | 114.3% | 121.5% | 128.7% | 135.9% | 143.1% | 150.3% | 157.5% | 164.7% | 171.9% | 179.1% | 186.3% |
| Daze Multiplier | 78.3% | 81.9% | 85.5% | 89.1% | 92.7% | 96.3% | 99.9% | 103.5% | 107.1% | 110.7% | 114.3% | 117.9% | 121.5% | 125.1% | 128.7% | 132.3% |
Assist Follow-Up: Independent Pricing
| Lv | Lv.1 | Lv.2 | Lv.3 | Lv.4 | Lv.5 | Lv.6 | Lv.7 | Lv.8 | Lv.9 | Lv.10 | Lv.11 | Lv.12 | Lv.13 | Lv.14 | Lv.15 | Lv.16 |
|---|---|---|---|---|---|---|---|---|---|---|---|---|---|---|---|---|
| DMG Multiplier | 307.1% | 335.1% | 363.1% | 391.1% | 419.1% | 447.1% | 475.1% | 503.1% | 531.1% | 559.1% | 587.1% | 615.1% | 643.1% | 671.1% | 699.1% | 727.1% |
| Daze Multiplier | 265.3% | 277.4% | 289.5% | 301.6% | 313.7% | 325.8% | 337.9% | 350% | 362.1% | 374.2% | 386.3% | 398.4% | 410.5% | 422.6% | 434.7% | 446.8% |
Special Attack3
Special Attack: Rending Claw
| Lv | Lv.1 | Lv.2 | Lv.3 | Lv.4 | Lv.5 | Lv.6 | Lv.7 | Lv.8 | Lv.9 | Lv.10 | Lv.11 | Lv.12 | Lv.13 | Lv.14 | Lv.15 | Lv.16 |
|---|---|---|---|---|---|---|---|---|---|---|---|---|---|---|---|---|
| DMG Multiplier | 25% | 27.4% | 29.7% | 32% | 34.3% | 36.6% | 38.9% | 41.2% | 43.5% | 45.8% | 48.1% | 50.4% | 52.7% | 55% | 57.3% | 59.6% |
| Daze Multiplier | 50.1% | 52.4% | 54.7% | 57% | 59.3% | 61.6% | 63.9% | 66.2% | 68.5% | 70.8% | 73.1% | 75.4% | 77.7% | 80% | 82.3% | 84.6% |
Special Attack: Rending Claw - Nightmare Shadow
| Lv | Lv.1 | Lv.2 | Lv.3 | Lv.4 | Lv.5 | Lv.6 | Lv.7 | Lv.8 | Lv.9 | Lv.10 | Lv.11 | Lv.12 | Lv.13 | Lv.14 | Lv.15 | Lv.16 |
|---|---|---|---|---|---|---|---|---|---|---|---|---|---|---|---|---|
| DMG Multiplier | 46.3% | 50.5% | 54.9% | 59.2% | 63.5% | 67.8% | 72.1% | 76.4% | 80.7% | 85% | 89.3% | 93.6% | 97.9% | 102.1% | 106.5% | 110.8% |
| Finishing Move DMG Multiplier | 53.5% | 58.4% | 63.3% | 68.2% | 73.1% | 78% | 82.9% | 87.8% | 92.7% | 97.6% | 102.5% | 107.4% | 112.3% | 117.2% | 122.1% | 127% |
| Daze Multiplier | 29% | 30.4% | 31.8% | 33.2% | 34.6% | 36% | 37.4% | 38.8% | 40.2% | 41.6% | 43% | 44.4% | 45.8% | 47.2% | 48.6% | 50% |
| Finishing Move Daze Multiplier | 34.8% | 36.4% | 38% | 39.6% | 41.2% | 42.8% | 44.4% | 46% | 47.6% | 49.2% | 50.8% | 52.4% | 54% | 55.6% | 57.2% | 58.8% |
EX Special Attack: Rending Claw - Flashstep
| Lv | Lv.1 | Lv.2 | Lv.3 | Lv.4 | Lv.5 | Lv.6 | Lv.7 | Lv.8 | Lv.9 | Lv.10 | Lv.11 | Lv.12 | Lv.13 | Lv.14 | Lv.15 | Lv.16 |
|---|---|---|---|---|---|---|---|---|---|---|---|---|---|---|---|---|
| DMG Multiplier | 347.7% | 379.4% | 411.1% | 442.8% | 474.5% | 506.2% | 537.9% | 569.6% | 601.3% | 633% | 664.7% | 696.4% | 728.1% | 759.8% | 791.5% | 823.2% |
| Daze Multiplier | 211.7% | 221.4% | 231.1% | 240.8% | 250.5% | 260.2% | 269.9% | 279.6% | 289.3% | 299% | 308.7% | 318.4% | 329.1% | 337.8% | 347.5% | 357.2% |
| Energy Cost | 60 | 60 | 60 | 60 | 60 | 60 | 60 | 60 | 60 | 60 | 60 | 60 | 60 | 60 | 60 | 60 |
Chain Attack2
Chain Attack: Hey, Didn't Expect That, Right?
| Lv | Lv.1 | Lv.2 | Lv.3 | Lv.4 | Lv.5 | Lv.6 | Lv.7 | Lv.8 | Lv.9 | Lv.10 | Lv.11 | Lv.12 | Lv.13 | Lv.14 | Lv.15 | Lv.16 |
|---|---|---|---|---|---|---|---|---|---|---|---|---|---|---|---|---|
| DMG Multiplier | 534.1% | 582.7% | 631.3% | 679.9% | 728.5% | 777.1% | 825.7% | 874.3% | 922.9% | 971.5% | 1,020.1% | 1,068.7% | 1,117.3% | 1,165.9% | 1,214.5% | 1,263.1% |
| Daze Multiplier | 135.1% | 141.3% | 147.5% | 153.7% | 159.9% | 166.1% | 172.3% | 178.5% | 184.7% | 190.9% | 197.1% | 203.3% | 209.5% | 215.7% | 221.9% | 228.1% |
Ultimate: Oh, Time to Play?
| Lv | Lv.1 | Lv.2 | Lv.3 | Lv.4 | Lv.5 | Lv.6 | Lv.7 | Lv.8 | Lv.9 | Lv.10 | Lv.11 | Lv.12 | Lv.13 | Lv.14 | Lv.15 | Lv.16 |
|---|---|---|---|---|---|---|---|---|---|---|---|---|---|---|---|---|
| DMG Multiplier | 1,393.8% | 1,520.6% | 1,647.4% | 1,774.2% | 1,901% | 2,027.8% | 2,154.6% | 2,281.4% | 2,408.2% | 2,535% | 2,661.8% | 2,788.6% | 2,915.4% | 3,042.2% | 3,169% | 3,295.8% |
| Daze Multiplier | 882.3% | 922.5% | 962.7% | 1,002.9% | 1,043.1% | 1,083.3% | 1,123.5% | 1,163.7% | 1,203.9% | 1,244.1% | 1,284.3% | 1,324.% | 1,364.7% | 1,404.9% | 1,445.1% | 1,485.3% |
Core Skill1
Core Passive: Hunter's Instinct
| Lv | Lv.1 | Lv.2 (A) | Lv.3 (B) | Lv.4 (C) | Lv.5 (D) | Lv.6 (E) | Lv.7 (F) |
|---|---|---|---|---|---|---|---|
| Hunter's Gait Daze Increase | 15% | 17.5% | 20% | 22.5% | 25% | 27.5% | 30% |
| Base Impact | - | +6 | - | +6 | - | +6 | - |
| Base ATK | - | - | +25 | - | +25 | - | +25 |
Mindscapes — how far is worth it?
When dealing DMG to enemies affected by Binding Trap, increase own CRIT Rate by 10%. "Self-interest is an instinct, but it can also be learned over time." "How do you learn it?" "Get burned a few times and you'll figure it out."
While in the Hunter's Gait state from Core Passive: Hunter's Instinct, Pulchra's ATK is increased by an additional 10%. "A mercenary's most valuable trait isn't loyalty - it's knowing when an opportunity appears. Picking the right employer, taking the right commissions, doing what's required, and never signing long-term contracts. Then even if you switch sides to work for the competition, your former employer can't say a thing." "Pulchra, someone else came looking for trouble just now. I sent them packing. How did you manage to make so many enemies?" "Too many people let their emotions get the better of them. See? That's why they're all just losers who don't know their own lack of worth."
Basic Attack, Dodge, Assist, Special Attack, and Chain Attack Lv. +2. There's a large note posted on the door of Pulchra's car. Written in big red letters: THIS IS MY TURF! KNOCK BEFORE ENTERING! KNOCK! KNOCK! Below it, there's a slightly smaller note with big black letters that reads: Caesar, you'd better pay for breaking my lock! 100,000 Dennies! Under the black letters, there's a crooked line of small text: I asked Proxy, lock's only worth 20,000!
Reduces Energy Cost of activating EX Special Attack: Rending Claw - Flashstep by 5. "What's the point of challenging strong opponents? I'm not a masochist. For me, the real joy of the hunt comes when I know I'm gonna win!" 5 minutes later... "Man, this game's AI is way too weak. Boring."
Basic Attack, Dodge, Assist, Special Attack, and Chain Attack Lv. +2. Pulchra's earliest blurry childhood memory was of a warm, big tail. When she first learned to crawl, she loved to chase after it. "And then what?" "They tell me it was my own tail." But Pulchra knew it wasn't hers. Aside from the tail game, at night, it would wrap tightly around her, keeping her warm through each cold night. Maybe the Hollow took it, or maybe something else... But it doesn't matter - she stopped playing that game long ago.
Special Attack: Rending Claw - Nightmare Shadow's DMG is increased by 15%, and the number of times the repeated attack can trigger is increased by 2. Additional Ability: Business Partner's Binding Trap effect now also applies to all damage types, not just Aftershock DMG. The respirator mask blocks out Ether particles and pollen, and shields her from curious, fearful, or malicious gazes — but it makes it impossible to curl up and get a good night's sleep. How she longs to find a warm place and take a carefree afternoon nap... The car door suddenly swings open without warning. Startled awake, she instantly grabs her old partner and straps it to her face. "Would it kill you to knock?!" ...Ah, right. She can actually take it off now.
Stats & Materials by Ascension Milestone
| Lv. | Before | After | Materials for this milestone |
|---|---|---|---|
| Lv.1 | HP: - ATK: - DEF: - [Recommended] Impact, CRIT Rate & CRIT DMG: - |
HP: 612 ATK: 96 DEF: 49 [Recommended] Impact, CRIT Rate & CRIT DMG: - |
|
| Lv.10 | HP: 1359 ATK: 145 DEF: 108 [Recommended] Impact, CRIT Rate & CRIT DMG: - |
HP: 1779 ATK: 179 DEF: 141 [Recommended] Impact, CRIT Rate & CRIT DMG: - |
데니 ×24,000
Basic Stun Certification Seal ×4
|
| Lv.20 | HP: 2610 ATK: 234 DEF: 207 [Recommended] Impact, CRIT Rate & CRIT DMG: - |
HP: 3030 ATK: 268 DEF: 241 [Recommended] Impact, CRIT Rate & CRIT DMG: - |
데니 ×56,000
Advanced Stun Certification Seal ×12
|
| Lv.30 | HP: 3860 ATK: 323 DEF: 307 [Recommended] Impact, CRIT Rate & CRIT DMG: - |
HP: 4280 ATK: 358 DEF: 340 [Recommended] Impact, CRIT Rate & CRIT DMG: - |
데니 ×120,000
Advanced Stun Certification Seal ×20
|
| Lv.40 | HP: 5111 ATK: 413 DEF: 407 [Recommended] Impact, CRIT Rate & CRIT DMG: - |
HP: 5531 ATK: 447 DEF: 441 [Recommended] Impact, CRIT Rate & CRIT DMG: - |
데니 ×200,000
Buster Certification Seal ×10
|
| Lv.50 | HP: 6362 ATK: 501 DEF: 507 [Recommended] Impact, CRIT Rate & CRIT DMG: - |
HP: 6782 ATK: 535 DEF: 540 [Recommended] Impact, CRIT Rate & CRIT DMG: - |
데니 ×400,000
Buster Certification Seal ×20
|
| Lv.60 | HP: - ATK: - DEF: - [Recommended] Impact, CRIT Rate & CRIT DMG: - |
HP: 7612 ATK: 590 DEF: 606 [Recommended] Impact, CRIT Rate & CRIT DMG: - |




Total materials across the whole ascension path
Materials Needed to Lv60






Total Denny for the character alone (ascension + basic skills + core skill A→F): about 1,706,000 Denny — W-Engine and Drive Discs not included.
Official Name in Other Languages
Voice Actors & Character Info
Background & Lore
More unlocks as Trust with this character increases in-game.
How to read this build page
Every Agent build page has 4 parts: a stat table by level, W-Engine/Drive Disc suggestions, a Mindscape roadmap, and recommended teams. Read them in that order — stats tell you "what you need", gear tells you "where to get it", Mindscape tells you "is it worth pulling", teams tell you "who to pair with". The section below explains how to read each part, and it applies the same way to every character on the site.
How to read the stat table and level
The stat table shows values at the ascension breakpoints (usually the final one, e.g. Lv60) — these are BASE stats with no gear added, useful for comparing Agents or checking whether you've ascended far enough. CRIT Rate and CRIT DMG are shown separately because they set the damage ceiling once Drive Disc substats stack on top. If your real stats are lower than the table, you likely haven't fully ascended or leveled yet — it's not a build mistake.
Why the W-Engine and Drive Disc picks make sense
Most Agents have a "signature" W-Engine designed for their exact role, plus a few cheaper standard-banner substitutes. Missing the signature isn't a dead end — most Agents keep most of their power with a well-matched substitute, just short by some amount of total damage.
- Drive Disc sets (2pc + 4pc) are picked for the set effect that fits that Agent's playstyle (mono-element, Anomaly, stun, and so on).
- Substats follow a priority that changes by role: Attack-type Agents usually chase CRIT Rate/CRIT DMG before ATK%; Anomaly-type Agents add Anomaly Proficiency to that mix; Stun/Support roles often value survivability or energy stats over pure CRIT.
These weights differ per character — follow the exact substat priority table above rather than applying one formula to every role.
Is Mindscape worth chasing
General rule: M0 (no duplicates) already clears the game's hardest content, even for S-rank Agents. Mindscape is a duplicate-fueled upgrade system, and each level costs more resources for a smaller power gain. For most Agents, the best value stop is usually M1–M2 (where some key effects unlock), while M6 is almost always for players chasing the absolute ceiling, not a requirement. Check the Mindscape section in the table above for that specific Agent's numbers.
Skill priority by role
There's no single order for every Agent, but the general pattern by role is:
- Attack: level the main damage skill first (Basic or Special Attack depending on kit), Dash/Dodge last.
- Stun: prioritize whichever skill builds Daze/Stun fastest, since the stun window is where the whole team dumps damage.
- Support: prioritize buff or energy-generating skills over personal damage — this role's value comes from lifting the whole team.
- Anomaly: prioritize the skill that stacks anomaly buildup, since most of the damage comes from the triggered effect, not the direct hit.
Always level the Core Skill steadily alongside the rest — it's a baseline stat that affects the whole rotation, not just one move.
Where to dig deeper
This section only teaches you how to read the page — for deeper comparisons, use the dedicated tools:
- Tier list to see where this Agent stands against the full roster.
- Teams for full in-game comps, including Bangboo and rotation order.
- Disc score to check how your current gear scores against the benchmark.
Agents of the same attribute





Pulchra FAQ
What is the best W-Engine for Pulchra?
Pulchra performs best with Hellfire Gears. See alternatives and required stats in the Gear section above.
Is Pulchra worth pulling?
Worth investing in if you run an Aftershock team (Soldier 0 Anby, Trigger)—a cheap, perfect fit. Outside that niche Pulchra is just a mid-tier A-rank stunner: her off-field Daze is decent but no match for a dedicated S-rank stunner. Pull if you're short on stunners; otherwise save your pulls.
What is the best team for Pulchra?
Pulchra works best in the Aftershock Trio team. Full members and rotation are in the Teams section.
Who voices Pulchra in Zenless Zone Zero?
Pulchra (faction Sons of Calydon, birthday Jun 19th) is voiced according to the official credits published on the HoYoverse Wiki. See the full English/Japanese/Korean/Chinese voice actor list in the "Voice Actors & Character Info" block above — this data is pulled directly from the official wiki, not guessed.
Which Mindscape of Pulchra is worth investing in?
Pulchra has 6 Mindscape tiers (M1-M6), each unlocking its own effect detailed in the "Mindscape" block above (official wording). Mindscapes cost Mindscape Cinema currency farmed from limited banners, so weigh it against your budget — F2P players usually stop at M0-M1 and prioritize W-Engine and Drive Discs before pushing Mindscape higher.
How much Denny and how many materials to level Pulchra to Lv60?
Leveling Pulchra to max Lv60 (ascension + basic skills to 12 + core skill A→F) costs roughly 1,706,000 Denny, plus role-specific ascension materials, attribute-specific skill chips, high-dimensional data, and weekly boss drops — see the full list with exact quantities in the "Materials Needed" block above, sourced from the game's official leveling tables.
 Understand the mechanics behind this
 Drive Disc Scorer→