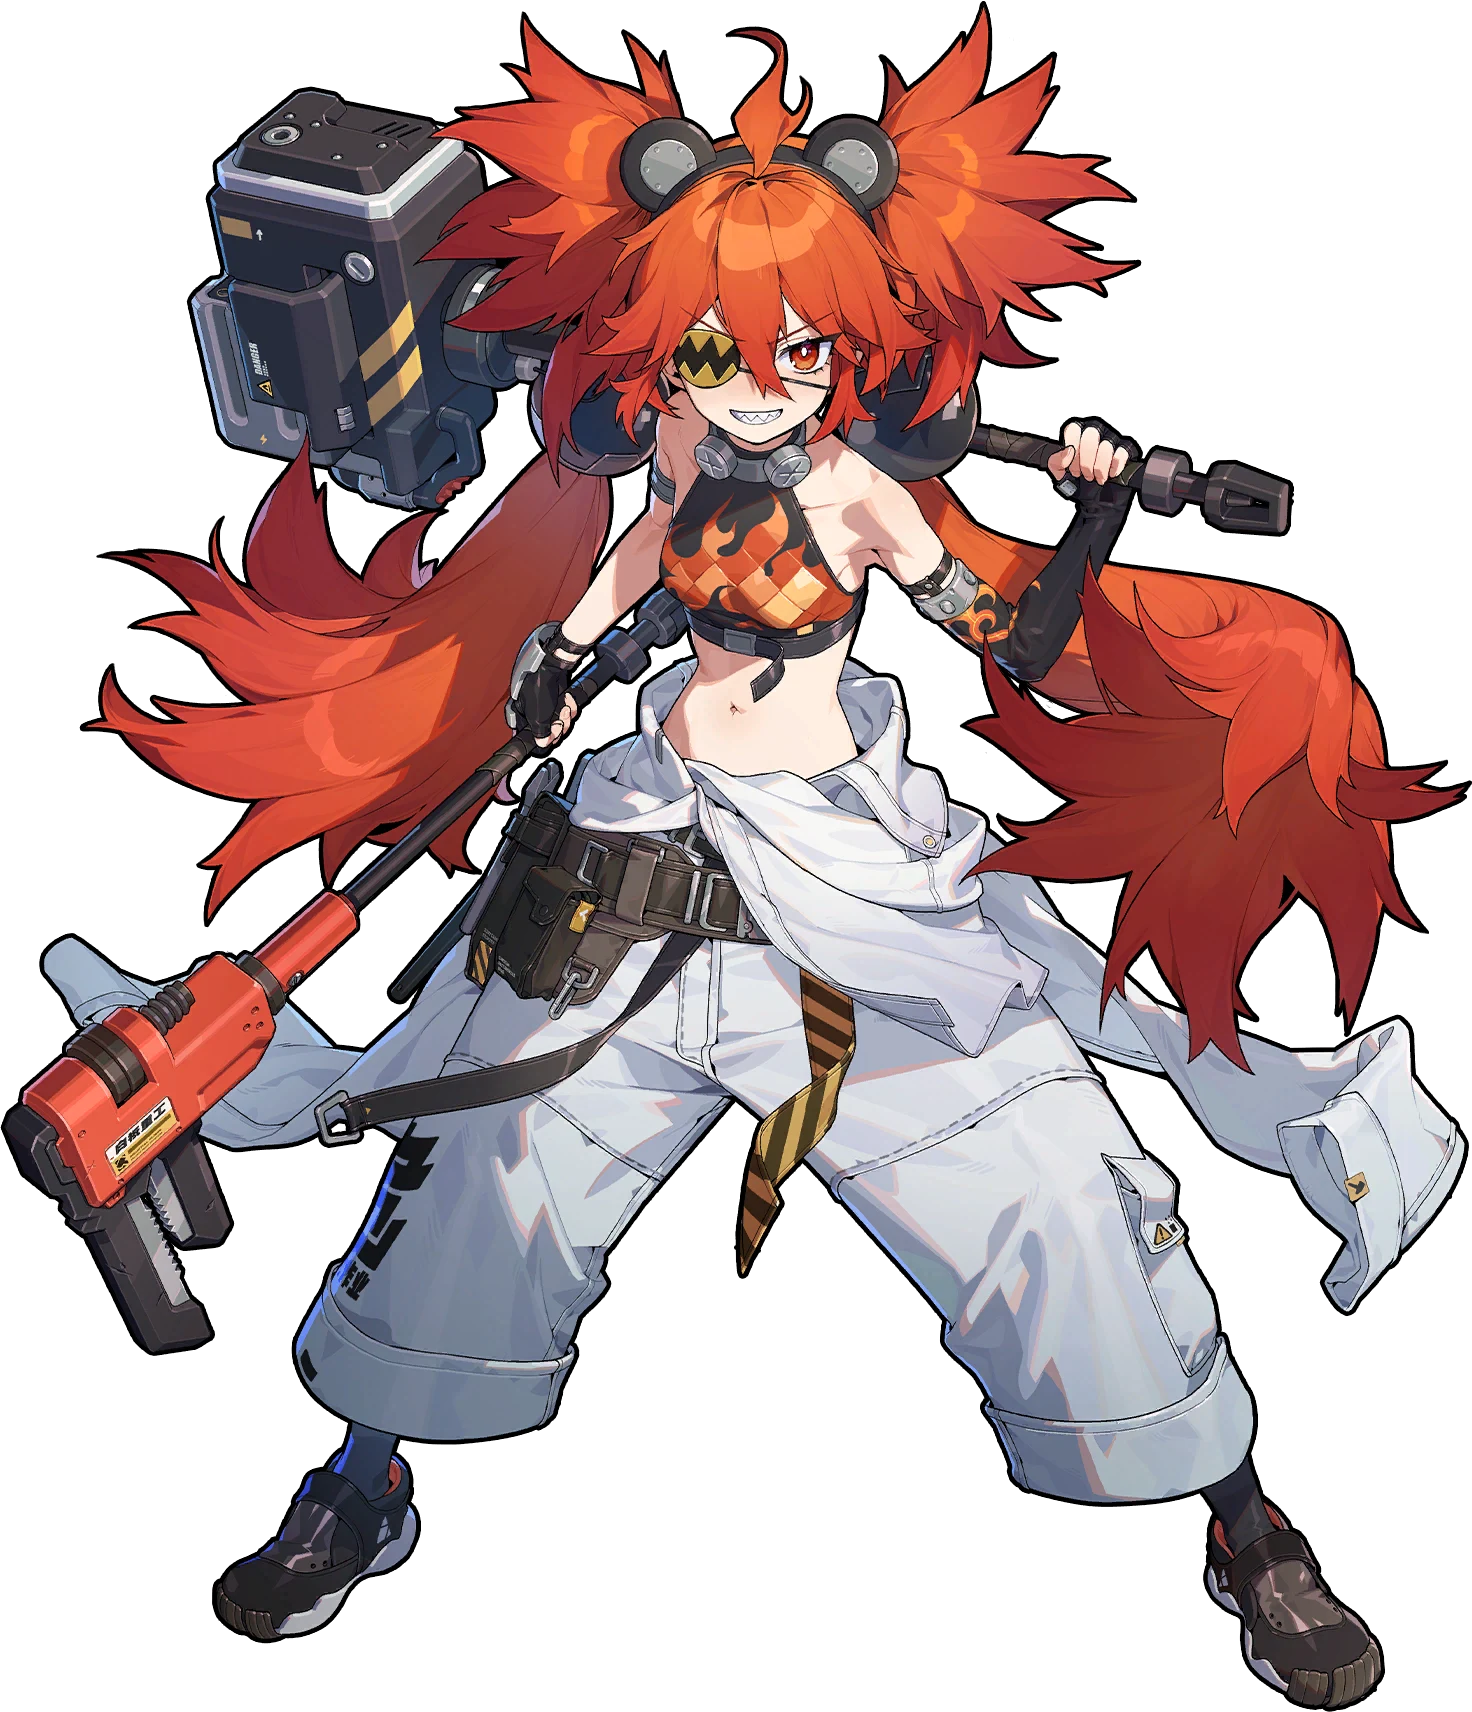
Koleda
A Fire Stunner: she specializes in piling up Daze to stun enemies and open combo windows, while also adding a fairly thick chunk of Fire damage of her own.
Tier A · Stun · Fire. BiS: Hellfire Gears. A Fire Stunner: she specializes in piling up Daze to stun enemies and open combo windows, while also adding a fairly thick chunk of Fire damage of her own.



Base stats
Recommended build
Best W-Engines

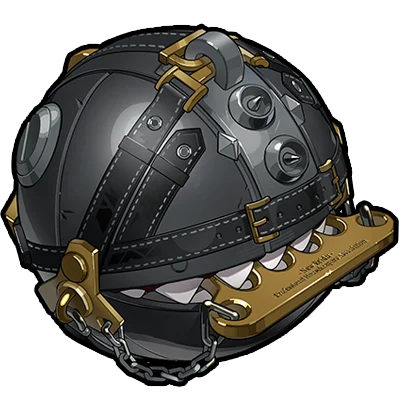

Recommendation order by current meta — the first is strongest, the rest are alternatives in decreasing priority. (Not a simulated DPS %.)
Recommended Drive Discs
 Shockstar Disco
 Inferno Metal
4: ATK% · 5: Fire DMG · 6: Impact
Impact > ATK% > Energy Regen > CRIT
Skill priority: EX Special > Basic Attack > Chain Attack > Dodge
Recommended teams





Only worth upgrading if you need a cheap A-rank (4★) Fire Stunner. Koleda builds Daze reliably and carries a bit of damage herself, but she's far behind modern Stunners like Lighter or Ju Fufu in speed and smoothness. She's a solid backbone for Belobog and Evelyn teams, but not an investment priority if you already own a proper S-rank Stunner.
 Lighter
 Ju Fufu
Role Ranking
The list below is pulled straight from the overall Tier List, keeping only the 11 agents who share the Stun role. Order within each tier is NOT a strength ranking — it simply groups agents by their original tier.








Stat targets
Koleda is a stunner, so she does NOT need carry-level CRIT — prioritize Daze buildup and enough energy. Serviceable targets (per): Impact 170+, ATK 1,800+, and enough Energy Regen to spam EX Special; these matter more than CRIT since Daze doesn't need to crit. Only for the 'stun + damage' variant (also listed by) do you chase CRIT Rate 60%+ / CRIT DMG 100%+ with a CRIT slot-4 disc. Suggested main stats: slot 4 ATK% (pure stun) or CRIT (damage variant) / slot 5 Fire DMG / slot 6 Impact. Substat priority: Impact > ATK% > Energy Regen > CRIT.
Rotation & combos
1) OPENER: enter, throw 2-3 Basic hits then immediately EX Special (hammer slam) — her strongest Daze source; with M1, time it after the 2nd/4th Basic for +15% Daze. 2) BUILD DAZE: loop Basic -> EX Special, weaving Chain Attack when available for extra Daze; watch the enemy stun bar. 3) STUN: the moment the enemy is Dazed, swap to your carry (Soldier 11 / Evelyn) to unload in the stun window. 4) ENERGY: Koleda is energy-hungry for EX Special, so let her farm off-field orbs/assists; with M2 each EX hit refunds 60 energy so you can spam more freely. 5) ULTIMATE: use when the stun bar is nearly full to seal the stun or extend the window, then repeat from step 1.
- Steady Daze output with invincibility frames (i-frames) in her combos — easy to play, hard to interrupt, friendly for stunner beginners.
- A cheap, readily available Fire stunner for F2P — a solid backbone for Belobog fire teams (Ben, Soldier 11) without spending rare resources.
- Contributes a decent chunk of Fire damage for a stunner, and boosts Impact plus the team's Chain Attack damage on stunned enemies.
- Slow and clunkier than modern stunners (Lighter, Ju Fufu, Qingyi) — lower Daze-per-second and slower to open the stun window.
- Very energy-hungry for EX Special; without M2 or a battery partner her rotation can stall.
- Mindscapes past M2 are weak (M3/M5 just +levels, M4/M6 lean into damage) so deep investment gives little return for the stun role.
Recommended Bangboo
Endgame mode fit
Usable in Shiyu Defense for single-target sides: Koleda opens and holds the stun window for a fire carry (Soldier 11 / Evelyn) to burst. A budget F2P option, but modern S-rank stunners post higher scores thanks to faster stun — Koleda fits 'good enough' rather than top of the ladder.
In Deadly Assault — with high-HP bosses/foes where stun mechanics are rewarded — Koleda's stun role has a place, especially on a Belobog fire team. She still trails premium stunners in speed, so treat her as a fallback when you lack a top S-rank stunner.
Skills
Basic Attack1
 Basic Attack
Basic Attack: Smash 'n' Bash
Press to activate: Unleashes up to 4 strikes, dealing Physical DMG. When Koleda has the Furnace Fire effect, she can launch an enhanced Basic Attack after the 2nd hit, consuming the Furnace Fire effect and dealing massive Fire DMG. Koleda and Ben can team up when fighting together to launch a coordinated attack, further increasing the power of the attack. Character is invulnerable while using this skill.
Dodge3
 Dodge
DodgeDodge: Wait 'n' See
Press to activate: A rapid dodge. Character is invulnerable while using this skill.
Dash Attack: Tremble!
Press during a Dodge to activate: Strikes enemies in front of her, dealing Physical DMG.
Dodge Counter: Don't Look Down on Me
Press during a Perfect Dodge to activate: Strikes enemies in front and creates an explosion, dealing Fire DMG. Character is invulnerable while using this skill.
Assist3
 Assist
Quick Assist: Coming Thru!
When the on-field character is launched, press to activate: Strikes enemies in front, dealing Fire DMG. Character is invulnerable during the attack.
Defensive Assist: Protective Hammer
When the character on field is about to be attacked, press to activate: Parries the enemy's attack, dealing massive Daze. This skill excels at parrying enemy attacks and reduces the consumption of Assist Points when the character is under intense attacks. Character is invulnerable while using this skill.
Assist Follow-Up: Hammer Bell
Press after a Defensive Assist to activate: Koleda charges and strikes enemies in front, dealing Fire DMG and obtaining Furnace Fire effect. Character is invulnerable while using this skill.
Special Attack2
 Special Attack
Special Attack: Hammer Time
Press to activate: Strikes enemies in front and triggers an explosion, dealing Fire DMG.This skill launches faster and triggers an explosion when used after the 2nd or 4th hit of Koleda's Basic Attack or enhanced Basic Attack. When Koleda and Ben are both in your squad, and this skill is activated after an enhanced Basic Attack, they team up to launch a coordinated attack, further increasing the power of the skill. Anti-Interrupt level is increased while using this skill.
EX Special Attack: Boiling Furnace
With enough Energy, press to activate:Strikes enemies in front and triggers a powerful explosion, dealing massive Fire DMG. Koleda also gains the Furnace Fire effect. This skill activates faster and triggers an explosion when used after the 2nd or 4th hit of Koleda's Basic Attack or enhanced Basic Attack. When Koleda and Ben are both in your squad and this skill is activated after an enhanced Basic Attack, they team up to launch a coordinated attack, further increasing the power of the skill. Character is invulnerable while using this skill.
Chain Attack2
 Chain Attack
Chain Attack: Natural Disaster
When a Chain Attack is triggered, select the character to activate: Unleashes a powerful explosion on enemies in a large area, dealing massive Fire DMG while also obtaining the Furnace Fire effect. Character is invulnerable while using this skill.
Ultimate: Hammerquake
When Decibel Rating is at Maximum, press to activate: Unleashes a powerful explosion on enemies in a large area in front, dealing massive Fire DMG while also obtaining the Furnace Fire effect. Koleda and Ben can team up when fighting together to launch a coordinated attack, further increasing the power of the attack. Character is invulnerable while using this skill.
Core Skill2
 Core Skill
Core Passive: Demolition Hammer
When Koleda uses her EX Special Attack or consumes Furnace Fire to use an enhanced Basic Attack, the Daze she deals increases by 30%.
Additional Ability: Belobog Management
When another character in your squad shares the same Attribute or Faction: When the explosion from Koleda's EX Special Attack hits an enemy, it applies a debuff to the target. While the target is Stunned, all squad members' Chain Attacks deal 35% more DMG to the target. This effect can stack up to 2 times and resets when the Stunned effect ends.
Skill Coefficients by Level
Basic Attack1
Basic Attack: Smash 'n' Bash
| Lv | Lv.1 | Lv.2 | Lv.3 | Lv.4 | Lv.5 | Lv.6 | Lv.7 | Lv.8 | Lv.9 | Lv.10 | Lv.11 | Lv.12 | Lv.13 | Lv.14 | Lv.15 | Lv.16 |
|---|---|---|---|---|---|---|---|---|---|---|---|---|---|---|---|---|
| 1st-Hit DMG Multiplier | 63.6% | 69.4% | 75.2% | 81.0% | 86.8% | 92.6% | 98.4% | 104.2% | 110.0% | 115.8% | 121.6% | 127.4% | 133.2% | 139.0% | 144.8% | 150.6% |
| 2nd-Hit DMG Multiplier | 79.2% | 86.4% | 93.6% | 100.8% | 108.0% | 115.2% | 122.4% | 129.6% | 136.8% | 144.0% | 151.2% | 158.4% | 165.6% | 172.8% | 180.0% | 187.2% |
| 3rd-Hit DMG Multiplier | 126.1% | 137.6% | 149.1% | 160.6% | 172.1% | 183.6% | 195.1% | 206.6% | 218.1% | 229.6% | 241.1% | 252.6% | 264.1% | 275.6% | 287.1% | 298.6% |
| 4th-Hit DMG Multiplier | 317.4% | 346.3% | 375.2% | 404.1% | 433.0% | 461.9% | 490.8% | 519.7% | 548.6% | 577.5% | 606.4% | 635.3% | 664.2% | 693.1% | 722.0% | 750.9% |
| Enhanced Basic Attack 1st-Hit DMG Multiplier | 160.8% | 175.5% | 190.2% | 204.9% | 219.6% | 234.3% | 249.0% | 263.7% | 278.4% | 293.1% | 307.8% | 322.5% | 337.2% | 351.9% | 366.6% | 381.3% |
| Enhanced Basic Attack 2nd-Hit DMG Multiplier | 404.8% | 441.8% | 478.7% | 515.6% | 552.5% | 589.4% | 626.3% | 663.2% | 700.1% | 737.0% | 773.9% | 810.8% | 847.7% | 884.6% | 921.5% | 958.4% |
| Enhanced Basic Attack 2nd-Hit DMG Multiplier (Teamwork) | 501.3% | 546.9% | 592.5% | 638.1% | 683.7% | 729.3% | 774.9% | 820.5% | 866.1% | 911.7% | 957.3% | 1002.9% | 1048.5% | 1094.1% | 1139.7% | 1185.3% |
| 1st-Hit Daze Multiplier | 31.8% | 33.3% | 34.8% | 36.3% | 37.8% | 39.3% | 40.8% | 42.3% | 43.8% | 45.3% | 46.8% | 48.3% | 49.8% | 51.3% | 52.8% | 54.3% |
| 2nd-Hit Daze Multiplier | 65.5% | 68.5% | 71.5% | 74.5% | 77.5% | 80.5% | 83.5% | 86.5% | 89.5% | 92.5% | 95.5% | 98.5% | 101.5% | 104.5% | 107.5% | 110.5% |
| 3rd-Hit Daze Multiplier | 104.3% | 109.1% | 113.9% | 118.7% | 123.5% | 128.3% | 133.1% | 137.9% | 142.7% | 147.5% | 152.3% | 157.1% | 161.9% | 166.7% | 171.5% | 176.3% |
| 4th-Hit Daze Multiplier | 249.3% | 260.7% | 272.1% | 283.5% | 294.9% | 306.3% | 317.7% | 329.1% | 340.5% | 351.9% | 363.3% | 374.7% | 386.1% | 397.5% | 408.9% | 420.3% |
| Enhanced Basic Attack 1st-Hit Daze Multiplier | 61.4% | 64.2% | 67.0% | 69.8% | 72.6% | 75.4% | 78.2% | 81.0% | 83.8% | 86.6% | 89.4% | 92.2% | 95.0% | 97.8% | 100.6% | 103.4% |
| Enhanced Basic Attack 2nd-Hit Daze Multiplier | 156.6% | 163.8% | 171.0% | 178.2% | 185.4% | 192.6% | 199.8% | 207.0% | 214.2% | 221.4% | 228.6% | 235.8% | 243.0% | 250.2% | 257.4% | 264.6% |
| Enhanced Basic Attack 2nd-Hit Daze Multiplier (Teamwork) | 234.6% | 245.3% | 256.0% | 266.7% | 277.4% | 288.1% | 298.8% | 309.5% | 320.2% | 330.9% | 341.6% | 352.3% | 363.0% | 373.7% | 384.4% | 395.1% |
Dodge2
Dash Attack: Tremble!
| Lv | Lv.1 | Lv.2 | Lv.3 | Lv.4 | Lv.5 | Lv.6 | Lv.7 | Lv.8 | Lv.9 | Lv.10 | Lv.11 | Lv.12 | Lv.13 | Lv.14 | Lv.15 | Lv.16 |
|---|---|---|---|---|---|---|---|---|---|---|---|---|---|---|---|---|
| DMG Multiplier | 56.1% | 61.2% | 66.3% | 71.4% | 76.5% | 81.6% | 86.7% | 91.8% | 96.9% | 102.0% | 107.1% | 112.2% | 117.3% | 122.4% | 127.5% | 132.6% |
| Daze Multiplier | 28.1% | 29.4% | 30.7% | 32.0% | 33.3% | 34.6% | 35.9% | 37.2% | 38.5% | 39.8% | 41.1% | 42.4% | 43.7% | 45.0% | 46.3% | 47.6% |
Dodge Counter: Don't Look Down on Me
| Lv | Lv.1 | Lv.2 | Lv.3 | Lv.4 | Lv.5 | Lv.6 | Lv.7 | Lv.8 | Lv.9 | Lv.10 | Lv.11 | Lv.12 | Lv.13 | Lv.14 | Lv.15 | Lv.16 |
|---|---|---|---|---|---|---|---|---|---|---|---|---|---|---|---|---|
| DMG Multiplier | 343.9% | 375.2% | 406.5% | 437.8% | 469.1% | 500.4% | 531.7% | 563.0% | 594.3% | 625.6% | 656.9% | 688.2% | 719.5% | 750.8% | 782.1% | 813.4% |
| Daze Multiplier | 288.8% | 302.0% | 315.2% | 328.4% | 341.6% | 354.8% | 368.0% | 381.2% | 394.4% | 407.6% | 420.8% | 434.0% | 447.2% | 460.4% | 473.6% | 486.8% |
Assist3
Quick Assist: Coming Thru!
| Lv | Lv.1 | Lv.2 | Lv.3 | Lv.4 | Lv.5 | Lv.6 | Lv.7 | Lv.8 | Lv.9 | Lv.10 | Lv.11 | Lv.12 | Lv.13 | Lv.14 | Lv.15 | Lv.16 |
|---|---|---|---|---|---|---|---|---|---|---|---|---|---|---|---|---|
| DMG Multiplier | 183.8% | 200.6% | 217.4% | 234.2% | 251.0% | 267.8% | 284.6% | 301.4% | 318.2% | 335.0% | 351.8% | 368.6% | 385.4% | 402.2% | 419.0% | 435.8% |
| Daze Multiplier | 183.8% | 192.2% | 200.6% | 209.0% | 217.4% | 225.8% | 234.2% | 242.6% | 251.0% | 259.4% | 267.8% | 276.2% | 284.6% | 293.0% | 301.4% | 309.8% |
Defensive Assist: Protective Hammer
| Lv | Lv.1 | Lv.2 | Lv.3 | Lv.4 | Lv.5 | Lv.6 | Lv.7 | Lv.8 | Lv.9 | Lv.10 | Lv.11 | Lv.12 | Lv.13 | Lv.14 | Lv.15 | Lv.16 |
|---|---|---|---|---|---|---|---|---|---|---|---|---|---|---|---|---|
| Light Defensive Daze Multiplier | 259.0% | 270.8% | 282.6% | 294.4% | 306.2% | 318.0% | 329.8% | 341.6% | 353.4% | 365.2% | 377.0% | 388.8% | 400.6% | 412.4% | 424.2% | 436.0% |
| Heavy Defensive Daze Multiplier | 327.3% | 342.2% | 357.1% | 372.0% | 386.9% | 401.8% | 416.7% | 431.6% | 446.5% | 461.4% | 476.3% | 491.2% | 506.1% | 521.0% | 535.9% | 550.8% |
| Chain Defensive Daze Multiplier | 159.3% | 166.6% | 173.9% | 181.2% | 188.5% | 195.8% | 203.0% | 210.2% | 217.4% | 224.6% | 231.8% | 239.0% | 246.2% | 253.4% | 260.6% | 267.8% |
Assist Follow-Up: Hammer Bell
| Lv | Lv.1 | Lv.2 | Lv.3 | Lv.4 | Lv.5 | Lv.6 | Lv.7 | Lv.8 | Lv.9 | Lv.10 | Lv.11 | Lv.12 | Lv.13 | Lv.14 | Lv.15 | Lv.16 |
|---|---|---|---|---|---|---|---|---|---|---|---|---|---|---|---|---|
| DMG Multiplier | 359.2% | 391.9% | 424.6% | 457.3% | 490.0% | 522.7% | 555.4% | 588.1% | 620.8% | 653.5% | 686.2% | 718.9% | 751.6% | 784.3% | 817.0% | 849.7% |
| Daze Multiplier | 312.7% | 327.0% | 341.3% | 355.6% | 369.9% | 384.2% | 398.5% | 412.8% | 427.1% | 441.4% | 455.7% | 470.0% | 484.3% | 498.6% | 512.9% | 527.2% |
Special Attack2
Special Attack: Hammer Time
| Lv | Lv.1 | Lv.2 | Lv.3 | Lv.4 | Lv.5 | Lv.6 | Lv.7 | Lv.8 | Lv.9 | Lv.10 | Lv.11 | Lv.12 | Lv.13 | Lv.14 | Lv.15 | Lv.16 |
|---|---|---|---|---|---|---|---|---|---|---|---|---|---|---|---|---|
| Strike DMG Multiplier | 51.9% | 56.7% | 61.5% | 66.3% | 71.1% | 75.9% | 80.7% | 85.5% | 90.3% | 95.1% | 99.9% | 104.7% | 109.5% | 114.3% | 119.1% | 123.9% |
| Explosion DMG Multiplier | 77.8% | 84.9% | 92.0% | 99.1% | 106.2% | 113.3% | 120.4% | 127.5% | 134.6% | 141.7% | 148.8% | 155.9% | 163.0% | 170.1% | 177.2% | 184.3% |
| Explosion DMG Multiplier (Teamwork) | 85.5% | 93.3% | 101.1% | 108.9% | 116.7% | 124.5% | 132.3% | 140.1% | 147.9% | 155.7% | 163.5% | 171.3% | 179.1% | 186.9% | 194.7% | 202.5% |
| Strike Daze Multiplier | 51.9% | 54.3% | 56.7% | 59.1% | 61.5% | 63.9% | 66.3% | 68.7% | 71.1% | 73.5% | 75.9% | 78.3% | 80.7% | 83.1% | 85.5% | 87.9% |
| Explosion Daze Multiplier | 77.8% | 81.4% | 85.0% | 88.6% | 92.2% | 95.8% | 99.4% | 103.0% | 106.6% | 110.2% | 113.8% | 117.4% | 121.0% | 124.6% | 128.2% | 131.8% |
| Explosion Daze Multiplier (Teamwork) | 77.8% | 81.4% | 85.0% | 88.6% | 92.2% | 95.8% | 99.4% | 103.0% | 106.6% | 110.2% | 113.8% | 117.4% | 121.0% | 124.6% | 128.2% | 131.8% |
EX Special Attack: Boiling Furnace
| Lv | Lv.1 | Lv.2 | Lv.3 | Lv.4 | Lv.5 | Lv.6 | Lv.7 | Lv.8 | Lv.9 | Lv.10 | Lv.11 | Lv.12 | Lv.13 | Lv.14 | Lv.15 | Lv.16 |
|---|---|---|---|---|---|---|---|---|---|---|---|---|---|---|---|---|
| Strike DMG Multiplier | 152.3% | 166.2% | 180.1% | 194.0% | 207.9% | 221.8% | 235.7% | 249.6% | 263.5% | 277.4% | 291.3% | 305.2% | 319.1% | 333.0% | 346.9% | 360.8% |
| Explosion DMG Multiplier | 606.0% | 661.1% | 716.2% | 771.3% | 826.4% | 881.5% | 936.6% | 991.7% | 1046.8% | 1101.9% | 1157.0% | 1212.1% | 1267.2% | 1322.3% | 1377.4% | 1432.5% |
| Explosion DMG Multiplier (Teamwork) | 666.6% | 727.2% | 787.8% | 848.4% | 909.0% | 969.6% | 1030.2% | 1090.8% | 1151.4% | 1212.0% | 1272.6% | 1333.2% | 1393.8% | 1454.4% | 1515.0% | 1575.6% |
| Strike Daze Multiplier | 152.3% | 159.3% | 166.3% | 173.3% | 180.3% | 187.3% | 194.3% | 201.3% | 208.3% | 215.3% | 222.3% | 229.3% | 236.3% | 243.3% | 250.3% | 257.3% |
| Explosion Daze Multiplier | 494.0% | 516.5% | 539.0% | 561.5% | 584.0% | 606.5% | 629.0% | 651.5% | 674.0% | 696.5% | 719.0% | 741.5% | 764.0% | 786.5% | 809.0% | 831.5% |
| Explosion Daze Multiplier (Teamwork) | 494.0% | 516.5% | 539.0% | 561.5% | 584.0% | 606.5% | 629.0% | 651.5% | 674.0% | 696.5% | 719.0% | 741.5% | 764.0% | 786.5% | 809.0% | 831.5% |
| Energy Cost | 60 | 60 | 60 | 60 | 60 | 60 | 60 | 60 | 60 | 60 | 60 | 60 | 60 | 60 | 60 | 60 |
Chain Attack2
Chain Attack: Natural Disaster
| Lv | Lv.1 | Lv.2 | Lv.3 | Lv.4 | Lv.5 | Lv.6 | Lv.7 | Lv.8 | Lv.9 | Lv.10 | Lv.11 | Lv.12 | Lv.13 | Lv.14 | Lv.15 | Lv.16 |
|---|---|---|---|---|---|---|---|---|---|---|---|---|---|---|---|---|
| DMG Multiplier | 636.0% | 693.9% | 751.8% | 809.7% | 867.6% | 925.5% | 983.4% | 1041.3% | 1099.2% | 1157.1% | 1215.0% | 1272.9% | 1330.8% | 1388.7% | 1446.6% | 1504.5% |
| Daze Multiplier | 217.0% | 226.9% | 236.8% | 246.7% | 256.6% | 266.5% | 276.4% | 286.3% | 296.2% | 306.1% | 316.0% | 325.9% | 335.8% | 345.7% | 355.6% | 365.5% |
Ultimate: Hammerquake
| Lv | Lv.1 | Lv.2 | Lv.3 | Lv.4 | Lv.5 | Lv.6 | Lv.7 | Lv.8 | Lv.9 | Lv.10 | Lv.11 | Lv.12 | Lv.13 | Lv.14 | Lv.15 | Lv.16 |
|---|---|---|---|---|---|---|---|---|---|---|---|---|---|---|---|---|
| DMG Multiplier | 1548.8% | 1689.6% | 1830.4% | 1971.2% | 2112.0% | 2252.8% | 2393.6% | 2534.4% | 2675.2% | 2816.0% | 2956.8% | 3097.6% | 3238.4% | 3379.2% | 3520.0% | 3660.8% |
| DMG Multiplier (Teamwork) | 1694.0% | 1848.0% | 2002.0% | 2156.0% | 2310.0% | 2464.0% | 2618.0% | 2772.0% | 2926.0% | 3080.0% | 3234.0% | 3388.0% | 3542.0% | 3696.0% | 3850.0% | 4004.0% |
| Daze Multiplier | 1004.9% | 1050.6% | 1096.3% | 1142.0% | 1187.7% | 1233.4% | 1279.1% | 1324.8% | 1370.5% | 1416.2% | 1461.9% | 1507.6% | 1553.3% | 1599.0% | 1644.7% | 1690.4% |
| Daze Multiplier (Teamwork) | 1096.5% | 1146.4% | 1196.3% | 1246.2% | 1296.1% | 1346.0% | 1395.9% | 1445.8% | 1495.7% | 1545.6% | 1595.5% | 1645.4% | 1695.3% | 1745.2% | 1795.1% | 1845.0% |
Core Skill1
Core Passive: Demolition Hammer
| Lv | Lv.1 | Lv.2 (A) | Lv.3 (B) | Lv.4 (C) | Lv.5 (D) | Lv.6 (E) | Lv.7 (F) |
|---|---|---|---|---|---|---|---|
| Daze % | 30% | 35% | 40% | 45% | 50% | 55% | 60% |
| Base Impact | - | +6 | - | +6 | - | +6 | - |
| Base ATK | - | - | +25 | - | +25 | - | +25 |
Mindscapes — how far is worth it?
After the 2nd or 4th hit of Koleda's Basic Attack or her enhanced Basic Attack, quickly use a Special Attack or EX Special Attack to increase the Daze dealt by 15%. Her fiery temper is just a facade. In reality, Koleda's thoughts are quite intricate. For example, she knows when to swing her hammer for a more painful strike.
When Koleda's EX Special Attack hits an enemy, she recovers 60 Energy. Can trigger once every 45s. Koleda believes perfect hammering has its own natural rhythm. It's like tapping a tambourine, with each hit building up the tempo of the next beat. Of course, it's hard to say how many taps her "toys" can endure.
Basic Attack, Dodge, Assist, Special Attack, and Chain Attack Lv. +2 As a qualified "toy," you better not cause trouble when Koleda starts to get a feel for swinging her hammer. Just take the beating. —After all, what's the point of resisting?
Koleda gains one stack of Charge (max 2 stacks) when consuming Furnace Fire to use her Enhanced Basic Attack. When her Chain Attack or Ultimate hits an enemy, she consumes all stacks of Charge to increase the attack's DMG by 18% per stack. Koleda feels the flames of war as her hammer swings raise the surrounding temperature. She's now even more flammable and explosive than Ether.
Basic Attack, Dodge, Assist, Special Attack, and Chain Attack Lv. +2 Koleda cares deeply about her role as a young leader potentially causing others to underestimate Belobog Heavy Industries. To compensate, she consistently trains diligently in secret.
When EX Special Attack, Chain Attack, or Ultimate triggers an explosion that hits an enemy, it deals additional DMG equal to 360% of Koleda's ATK. There are two types of people that Koleda really hates: Stupid people, and hopelessly stupid people. Luckily for her, Belobog always has a good supply of strong Ether explosives — plenty to use on the stupid.
Stats & Materials by Ascension Milestone
| Lv. | Before | After | Materials for this milestone |
|---|---|---|---|
| Lv.1 | HP: - ATK: - DEF: - [Recommended] Impact: - |
HP: 653 ATK: 106 DEF: 48 [Recommended] Impact: - |
|
| Lv.10 | HP: 1451 ATK: 161 DEF: 106 [Recommended] Impact: - |
HP: 1899 ATK: 199 DEF: 139 [Recommended] Impact: - |
Denny ×24,000
Basic Stun Certification Seal ×4
|
| Lv.20 | HP: 2785 ATK: 261 DEF: 204 [Recommended] Impact: - |
HP: 3234 ATK: 299 DEF: 237 [Recommended] Impact: - |
Denny ×56,000
Advanced Stun Certification Seal ×12
|
| Lv.30 | HP: 4121 ATK: 361 DEF: 302 [Recommended] Impact: - |
HP: 4569 ATK: 398 DEF: 334 [Recommended] Impact: - |
Denny ×120,000
Advanced Stun Certification Seal ×20
|
| Lv.40 | HP: 5456 ATK: 460 DEF: 398 [Recommended] Impact: - |
HP: 5905 ATK: 498 DEF: 431 [Recommended] Impact: - |
Denny ×200,000
Buster Certification Seal ×10
|
| Lv.50 | HP: 6792 ATK: 560 DEF: 431 [Recommended] Impact: - |
HP: 7240 ATK: 598 DEF: 529 [Recommended] Impact: - |
Denny ×400,000
Buster Certification Seal ×20
|
| Lv.60 | HP: - ATK: - DEF: - [Recommended] Impact: - |
HP: 8127 ATK: 660 DEF: 594 [Recommended] Impact: - |




Total materials across the whole ascension path
Materials Needed to Lv60






Total Denny for the character alone (ascension + basic skills + core skill A→F): about 1,706,000 Denny — W-Engine and Drive Discs not included.
Official Name in Other Languages
Voice Actors & Character Info
Background & Lore
More unlocks as Trust with this character increases in-game.
How to read this build page
Every Agent build page has 4 parts: a stat table by level, W-Engine/Drive Disc suggestions, a Mindscape roadmap, and recommended teams. Read them in that order — stats tell you "what you need", gear tells you "where to get it", Mindscape tells you "is it worth pulling", teams tell you "who to pair with". The section below explains how to read each part, and it applies the same way to every character on the site.
How to read the stat table and level
The stat table shows values at the ascension breakpoints (usually the final one, e.g. Lv60) — these are BASE stats with no gear added, useful for comparing Agents or checking whether you've ascended far enough. CRIT Rate and CRIT DMG are shown separately because they set the damage ceiling once Drive Disc substats stack on top. If your real stats are lower than the table, you likely haven't fully ascended or leveled yet — it's not a build mistake.
Why the W-Engine and Drive Disc picks make sense
Most Agents have a "signature" W-Engine designed for their exact role, plus a few cheaper standard-banner substitutes. Missing the signature isn't a dead end — most Agents keep most of their power with a well-matched substitute, just short by some amount of total damage.
- Drive Disc sets (2pc + 4pc) are picked for the set effect that fits that Agent's playstyle (mono-element, Anomaly, stun, and so on).
- Substats follow a priority that changes by role: Attack-type Agents usually chase CRIT Rate/CRIT DMG before ATK%; Anomaly-type Agents add Anomaly Proficiency to that mix; Stun/Support roles often value survivability or energy stats over pure CRIT.
These weights differ per character — follow the exact substat priority table above rather than applying one formula to every role.
Is Mindscape worth chasing
General rule: M0 (no duplicates) already clears the game's hardest content, even for S-rank Agents. Mindscape is a duplicate-fueled upgrade system, and each level costs more resources for a smaller power gain. For most Agents, the best value stop is usually M1–M2 (where some key effects unlock), while M6 is almost always for players chasing the absolute ceiling, not a requirement. Check the Mindscape section in the table above for that specific Agent's numbers.
Skill priority by role
There's no single order for every Agent, but the general pattern by role is:
- Attack: level the main damage skill first (Basic or Special Attack depending on kit), Dash/Dodge last.
- Stun: prioritize whichever skill builds Daze/Stun fastest, since the stun window is where the whole team dumps damage.
- Support: prioritize buff or energy-generating skills over personal damage — this role's value comes from lifting the whole team.
- Anomaly: prioritize the skill that stacks anomaly buildup, since most of the damage comes from the triggered effect, not the direct hit.
Always level the Core Skill steadily alongside the rest — it's a baseline stat that affects the whole rotation, not just one move.
Where to dig deeper
This section only teaches you how to read the page — for deeper comparisons, use the dedicated tools:
- Tier list to see where this Agent stands against the full roster.
- Teams for full in-game comps, including Bangboo and rotation order.
- Disc score to check how your current gear scores against the benchmark.
Agents of the same attribute



Koleda FAQ
What is the best W-Engine for Koleda?
Koleda performs best with Hellfire Gears. See alternatives and required stats in the Gear section above.
Is Koleda worth pulling?
Only worth upgrading if you need a cheap A-rank (4★) Fire Stunner. Koleda builds Daze reliably and carries a bit of damage herself, but she's far behind modern Stunners like Lighter or Ju Fufu in speed and smoothness. She's a solid backbone for Belobog and Evelyn teams, but not an investment priority if you already own a proper S-rank Stunner.
What is the best team for Koleda?
Koleda works best in the Belobog Fire team. Full members and rotation are in the Teams section.
Who voices Koleda in Zenless Zone Zero?
Koleda (faction Belobog Heavy Industries, birthday Aug 10) is voiced according to the official credits published on the HoYoverse Wiki. See the full English/Japanese/Korean/Chinese voice actor list in the "Voice Actors & Character Info" block above — this data is pulled directly from the official wiki, not guessed.
Which Mindscape of Koleda is worth investing in?
Koleda has 6 Mindscape tiers (M1-M6), each unlocking its own effect detailed in the "Mindscape" block above (official wording). Mindscapes cost Mindscape Cinema currency farmed from limited banners, so weigh it against your budget — F2P players usually stop at M0-M1 and prioritize W-Engine and Drive Discs before pushing Mindscape higher.
How much Denny and how many materials to level Koleda to Lv60?
Leveling Koleda to max Lv60 (ascension + basic skills to 12 + core skill A→F) costs roughly 1,706,000 Denny, plus role-specific ascension materials, attribute-specific skill chips, high-dimensional data, and weekly boss drops — see the full list with exact quantities in the "Materials Needed" block above, sourced from the game's official leveling tables.
 Understand the mechanics behind this
 Drive Disc Scorer→