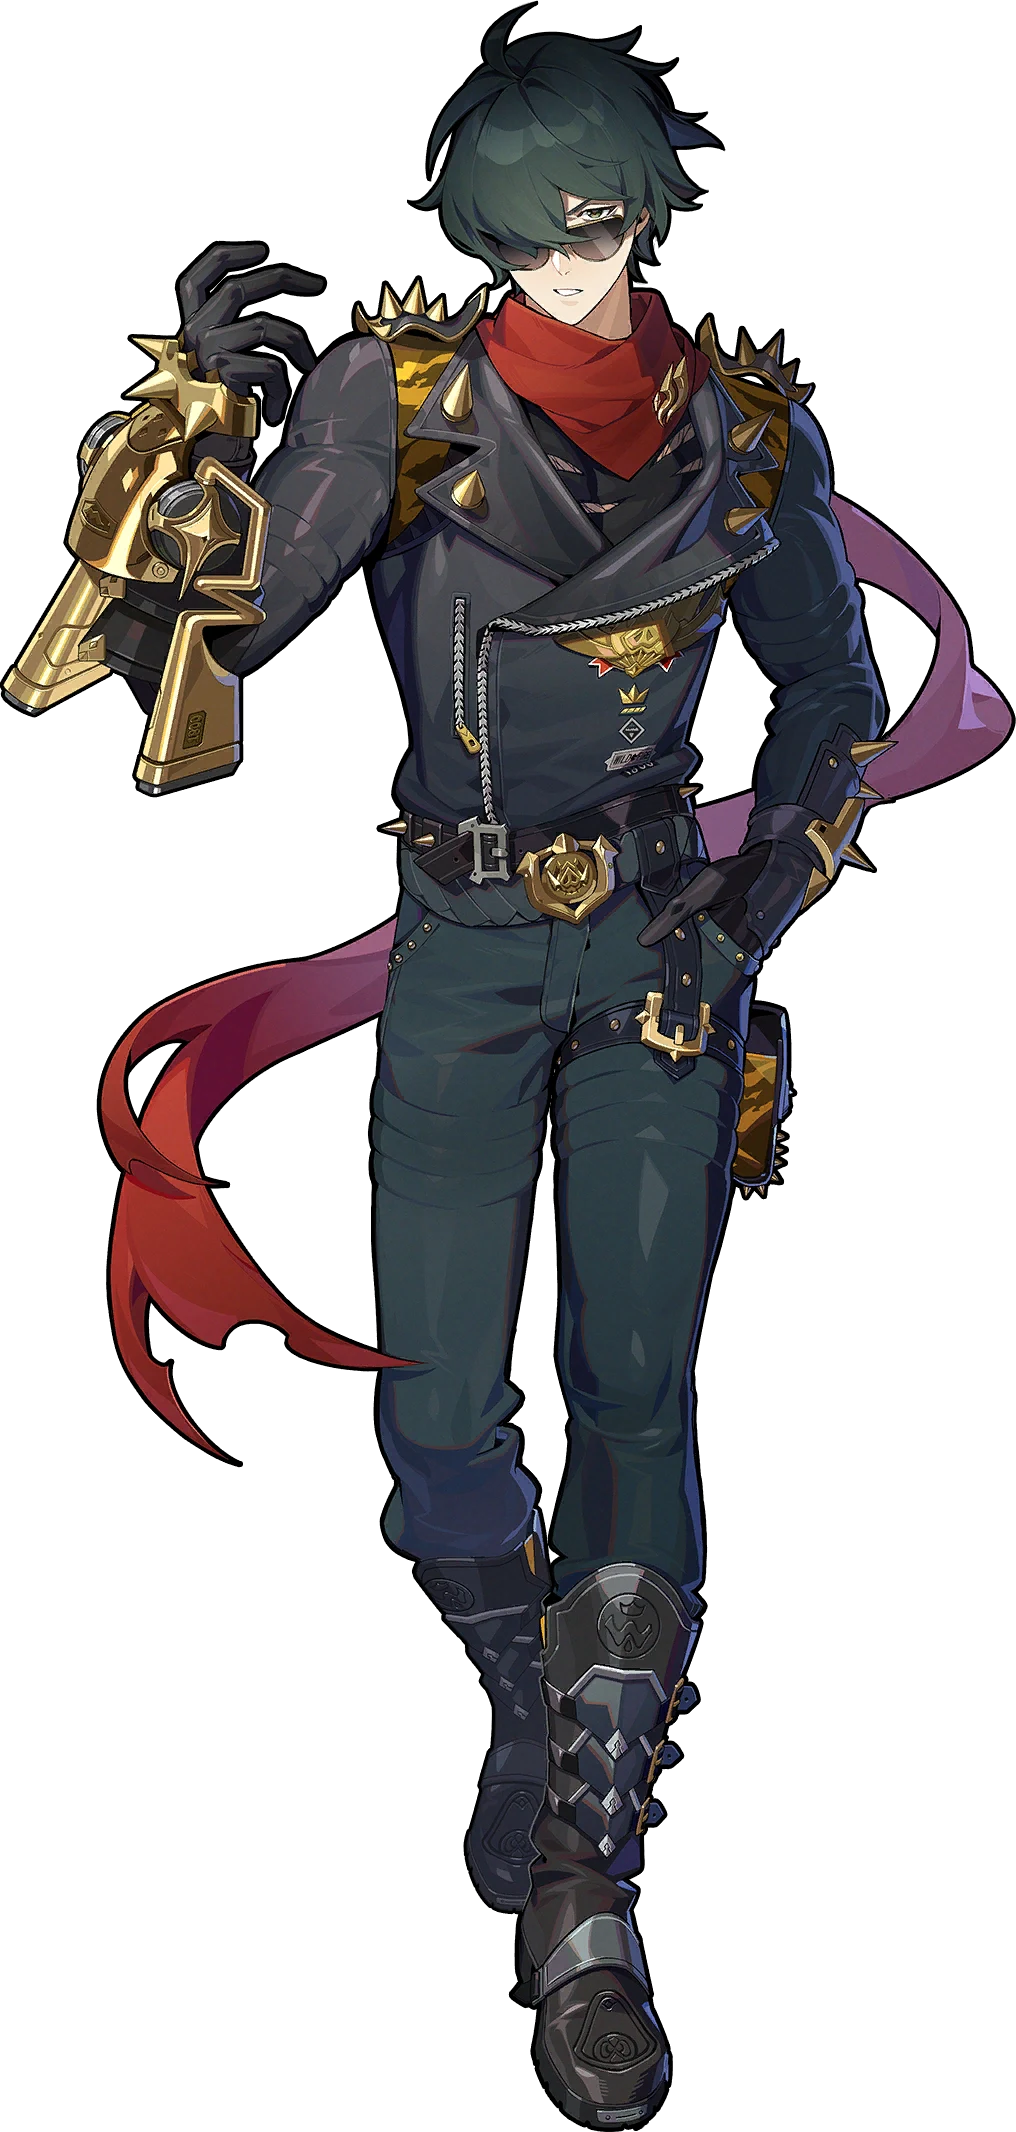
Lighter
A dual-buff Fire Stunner: he shreds both Fire and Ice RES, increases the Ice/Fire CRIT DMG enemies take by up to 30%, and extends stun duration.
Tier S · Stun · Fire. BiS: Blazing Laurel. A dual-buff Fire Stunner: he shreds both Fire and Ice RES, increases the Ice/Fire CRIT DMG enemies take by up to 30%, and extends stun duration.



Base stats
Recommended build
Best W-Engines
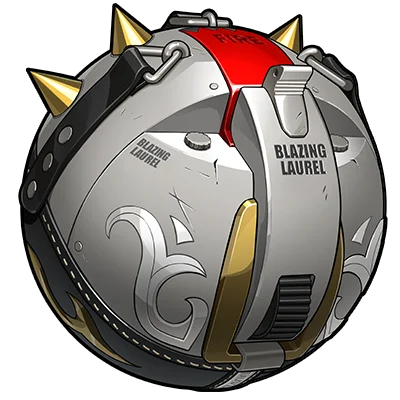
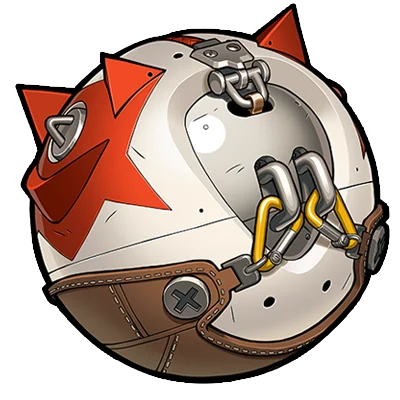

Recommendation order by current meta — the first is strongest, the rest are alternatives in decreasing priority. (Not a simulated DPS %.)
Recommended Drive Discs
 King of the Summit
 Shockstar Disco
 Inferno Metal
4: CRIT Rate · 5: ATK% · 6: Impact
Prioritize Impact > CRIT Rate (up to ~50%) > CRIT DMG > ATK%
Skill priority: Core Skill > Basic Attack ≈ Special/Assist (whichever has the highest Daze multiplier)
Recommended teams





A top-tier Fire Stunner, well worth upgrading if you have Evelyn or a high-end Fire/Ice DPS. Buffing Ice+Fire CRIT DMG and shredding both RES makes him more flexible than Lycaon; the downsides are needing high Impact to hit his buff thresholds and still depending on an element-appropriate DPS.
 Lycaon
Role Ranking
The list below is pulled straight from the overall Tier List, keeping only the 11 agents who share the Stun role. Order within each tier is NOT a strength ranking — it simply groups agents by their original tier.









Stat targets
The single MOST important stat is Impact: aim for ~270 Impact so the team gets the full 75% Ice/Fire DMG boost cap — this is the core kit threshold; short on Impact and both the buff and Daze fall off. Main stats: disc 6 Impact (mandatory) · disc 5 Fire DMG or ATK% · disc 4 Crit Rate / Crit DMG / ATK% (depending on whether you want Lighter to add damage or purely stun). Substat priority: Impact > Crit Rate (~50% if you want on-field damage) > Crit DMG > ATK% > PEN (per gamerant). If running Lighter as a pure off-field buffer, load up Impact first, then Crit.
Rotation & combos
Lighter stays mostly OFF-FIELD, waiting on Morale. 1) Let your other two fight on-field; when the enemy attacks, Hot-Swap to Lighter for his Defensive Assist + Assist Follow-Up (his signature back-and-forth) to dodge and load Daze. 2) Build Morale to 80: now swapping in gives an instant Quick Assist — run the 5-hit Basic chain to enter Morale Burst, whose 5th hit massively boosts damage & Daze and converts Morale into Impact. 3) Fire his Core Skill / Ultimate in this window to apply the Ice/Fire RES shred and the team DMG buff. 4) The moment the enemy is stunned, swap back to your main DPS to dump burst inside the stun window (extended by M1 if owned). 5) Repeat: keep the DPS on-field, dipping to Lighter periodically to keep Morale and buff uptime.
- A rare DUAL buffer: shreds both Ice AND Fire RES and boosts team Ice/Fire DMG by up to 75% — flexible enough to pair with Fire DPS (Evelyn, Soldier 11, Hugo) or Ice DPS (Ellen, Miyabi), something Lycaon can't do.
- Huge Daze output and an extended stun window (especially with M1) — the main DPS gets far more time to dump burst than with other stunners.
- Off-field friendly: just dip in for a Defensive Assist and swap out, with multiple invulnerability windows for safety, taking little field-time away from the DPS.
- Contributes decent Fire damage himself when on-field (especially in Morale Burst / M6), not purely a 'stand and buff' support like some pure supports.
- Very Impact-hungry: needs ~270 Impact to hit the 75% buff cap — demands heavy Impact main/substat investment, and newer players often fall short, noticeably weakening the buff.
- Complex rotation: must manage Morale, time Morale Burst, and quick-swap on rhythm — harder to play optimally than a point-and-stun stunner.
- Element-locked buff: only amplifies Ice/Fire DPS; paired with Electric/Physical/Ether DPS most of the DMG buff is wasted, so you still need the right-element DPS.
Recommended Bangboo
Endgame mode fit
Excellent in Shiyu Defense: single-target high-HP boss floors — Lighter's extended stun window gives burst DPS (Ellen/Evelyn/Miyabi) enough time to dump their full combo, often clearing one side fast. He's rated a top-tier Fire stunner for Ice/Fire teams.
Also strong in Deadly Assault: very high-HP bosses that need consistent stun to open burst windows — Lighter's high Daze and dual Ice/Fire shred keep a steady stun cadence for the DPS to unload, regularly a top scorer with Ellen/Evelyn teams.
Skills
Basic Attack1
 Basic Attack
Basic Attack: L-Form Thundering Fist
Press or hold to activate:Perform up to five forward strikes, dealing Physical DMG and Fire DMG.During the 3rd hit of the Basic Attack, drag the , and repeatedly press or hold to unleash a series of melee follow-up attacks. Release the to follow up with the 4th hit of the Basic Attack. While performing the startup light punch in the 5th hit of the Basic Attack, drag the and repeatedly press or hold to keep alternating between the light punch and 4th hit of the Basic Attack. Release the to follow up with the subsequent jab combo. Continue repeatedly pressing or holding to extend the duration of the jab combo. When you stop pressing or holding , or when the combo reaches its maximum duration, launches a Finishing Move forward. Lighter is invulnerable during the Finishing Move. During the 5th hit of the Basic Attack, Lighter takes 40% less DMG.While in the Morale Burst state, Anti-Interrupt Level is increased during the 5th hit of his Basic Attack, and the DMG reduction effect is increased to 80%.
Dodge3
 Dodge
DodgeDodge: Shadowed Slide
Press to activate:A quick dash dodge. Character is invulnerable while using this skill. Press while the character is attacking to activate:Perform a quick shuffle dodge in the direction of the .This skill will not interrupt the combo count for Basic Attacks. Character is invulnerable while using this skill.
Dash Attack: Charging Slam
Press during a dodge to activate:Rapidly strikes enemies in front, dealing Physical DMG.
Dodge Counter: Blazing Flash
Press during a Perfect Dodge to activate:Strike enemies in front, dealing Fire DMG.Character is invulnerable while using this skill. After using the skill, press or hold to immediately follow up with the 5th hit of the Basic Attack.
Assist3
 Assist
Quick Assist: Blazing Flash - Guard
When the on-field character is launched, press to activate:Strike enemies in front, dealing Fire DMG.Character is invulnerable while using this skill. After using the skill, press or hold to immediately follow up with the 5th hit of the Basic Attack.
Defensive Assist: Swift Break
When the on-field character is about to be attacked, press to activate: Parries the enemy's attack, dealing massive Daze. Character is invulnerable while using this skill.
Assist Follow-Up: Charging Slam - Stab
Press after a Defensive Assist to activate:Strike enemies in front, dealing Fire DMG.Character is invulnerable while using this skill. After using this skill, press or hold to immediately follow up with the 5th hit of the Basic Attack.
Special Attack2
 Special Attack
Special Attack: V-Form Sunrise Uppercut
Press to activate:Strikes enemies in front with an uppercut, dealing Fire DMG.Anti-Interrupt level is increased while using this skill. Press during a shuffle dodge to activate:Strike forward with a series of punches, dealing Fire DMG.This skill will not interrupt the combo count for Basic Attacks. Anti-Interrupt level is increased while using this skill.
EX Special Attack: V-Form Sunrise Uppercut - Full Distance
With enough Energy, press to activate:Leaps into the air with a powerful uppercut, striking enemies in front and dealing massive Fire DMG.Press again during this skill to spend additional Energy to perform a powerful follow-up attack, dealing massive Fire DMG.Character is invulnerable while using this skill. After using this skill, press or hold to follow up with the 4th hit of the Basic Attack. With enough Energy, press during the shuffle dodge to activate:Strike forward with a powerful punch combo, dealing massive Fire DMG.This skill will not interrupt the combo count for Basic Attacks. Character is invulnerable while using this skill. After using this skill, press or hold to immediately follow up with the 5th hit of the Basic Attack.
Chain Attack2
 Chain Attack
Chain Attack: V-Form Scorching Sun
When a Chain Attack is triggered, select the character to activate:Unleashes a powerful strike at enemies in front in a small area, dealing massive Fire DMG.Character is invulnerable while using this skill.
Ultimate: W-Form Crowned Inferno
When Decibel Rating is at Maximum, press to activate:Unleashes a powerful strike in a large area around, dealing massive Fire DMG.Character is invulnerable while using this skill.
Core Skill2
 Core Skill
Core Passive: Accelerant
Lighter automatically gains Morale over time, at a rate of 2.9 points per second. For each point of Energy consumed by any squad member, Lighter recovers an additional 0.26 Morale, up to a maximum of 100. When Morale reaches 80, the next time Lighter switches into battle he immediately launches a Quick Assist. Once Morale is 80 or higher, executing the 5th hit of his Basic Attack puts Lighter in the Morale Burst state, enhancing the power of the startup light punch, jab combo, and the Finishing Move of the 5th hit of his Basic Attack. When a skill hits an enemy with its power increased, it will continuously consume Morale. With every 10 points of Morale consumed, Lighter's Impact increases by 1%, up to a maximum increase of 10%, and lasting 6s.In the Morale Burst state, Lighter will no longer automatically gain Morale over time. If his Morale is exhausted during a startup light punch or jab combo, he will automatically follow up with a more powerful Finishing Move. In the Morale Burst state, when startup light punches or jab combos hit enemies, the target's Ice RES and Fire RES are reduced by 15%, lasting 30s. In the Morale Burst state, when the Finishing Move hits an enemy, it applies the Collapse effect on the target, extending its Stunned duration by 3s. The Collapse effect can trigger only once on the same target before they recover from Stun. When the Finishing Move of the 5th hit of his Basic Attack hits an enemy, when he switches off field, or when his Morale runs out, Lighter will leave the Morale Burst state, keeping any unspent Morale.*Stats shown are at Base level.
Additional Ability: Fighting Spirit
When another character in your squad is an Attack character or shares the same Faction:While under the Morale Burst state, when the 5th hit of Lighter's Basic Attack hits an enemy, all squad members gain a stack of Elation, stacking up to 20 times and lasting 30s. Repeated triggers reset the duration. For each stack of Elation, an Agent's Ice DMG and Fire DMG increase by 1.25%.When obtaining Elation, if Lighter's Impact exceeds 170, every additional 10 points of Impact will increase the buff effect provided by each stack of Elation by an extra 0.25%. When any squad member launches a Chain Attack, it will refresh the duration of all squad members' Elation. Elation can increase the Ice DMG and Fire DMG of Agents by a maximum of 75%.
Skill Coefficients by Level
Basic Attack1
Basic Attack: L-Form Thundering Fist
| Lv | Lv.1 | Lv.2 | Lv.3 | Lv.4 | Lv.5 | Lv.6 | Lv.7 | Lv.8 | Lv.9 | Lv.10 | Lv.11 | Lv.12 | Lv.13 | Lv.14 | Lv.15 | Lv.16 |
|---|---|---|---|---|---|---|---|---|---|---|---|---|---|---|---|---|
| 1st-Hit DMG Multiplier | 39.2% | 42.8% | 46.4% | 50% | 53.6% | 57.2% | 60.8% | 64.4% | 68% | 71.6% | 75.2% | 78.8% | 82.4% | 86% | 89.6% | 93.2% |
| 2nd-Hit DMG Multiplier | 48% | 52.4% | 56.8% | 61.2% | 65.6% | 70% | 74.4% | 78.8% | 83.2% | 87.6% | 92% | 96.4% | 100.8% | 105.2% | 109.6% | 114% |
| 3rd-Hit DMG Multiplier | 55.3% | 60.4% | 65.5% | 70.6% | 75.7% | 80.8% | 85.9% | 91% | 96.1% | 101.1% | 106.3% | 111.4% | 116.5% | 121.6% | 126.7% | 131.8% |
| Follow-Up 1st-Hit DMG Multiplier | 86.9% | 94.8% | 102.7% | 110.6% | 118.5% | 126.4% | 134.3% | 142.2% | 150.1% | 158% | 165.9% | 173.8% | 181.7% | 189.6% | 197.5% | 205.4% |
| Follow-Up 2nd-Hit DMG Multiplier | 47.7% | 52.1% | 56.5% | 60.9% | 65.3% | 69.7% | 74.1% | 78.5% | 82.9% | 87.3% | 91.7% | 96.1% | 100.5% | 104.9% | 109.3% | 113.7% |
| Follow-Up 3rd-Hit DMG Multiplier | 58.1% | 63.4% | 68.7% | 74% | 79.3% | 84.6% | 89.9% | 95.2% | 100.5% | 105.8% | 111.1% | 116.4% | 121.7% | 127% | 132.3% | 137.6% |
| Follow-Up 4th-Hit DMG Multiplier | 32.8% | 35.8% | 38.8% | 41.8% | 44.8% | 47.8% | 50.8% | 53.8% | 56.8% | 59.8% | 62.8% | 65.8% | 68.8% | 71.8% | 74.8% | 77.8% |
| Follow-Up 5th-Hit DMG Multiplier | 89% | 97.1% | 105.2% | 113.3% | 121.4% | 129.5% | 137.6% | 145.7% | 153.8% | 161.9% | 170% | 178.1% | 186.2% | 194.3% | 202.3% | 210.5% |
| 4th-Hit DMG Multiplier | 78.9% | 86.1% | 93.3% | 100.5% | 107.7% | 114.9% | 122.1% | 129.3% | 136.5% | 143.7% | 150.9%. | 158.1% | 165.3% | 172.5% | 179.7% | 186.9% |
| 5th-Hit Startup DMG Multiplier | 163.6% | 178.5% | 193.4% | 208.3% | 223.2% | 238.1% | 253% | 267.9% | 282.8% | 297.7% | 312.6% | 327.5% | 342.4% | 357.3% | 372.2% | 387.1% |
| 5th-Hit Combo DMG Multiplier | 122.9% | 134.1% | 145.3% | 156.5% | 167.7% | 178.9% | 190.1% | 201.3% | 212.5% | 223.7% | 234.9% | 246.1% | 257.3% | 268.5% | 279.7% | 290.9% |
| 5th-Hit Finisher DMG Multiplier | 104.6% | 114.2% | 123.8% | 133.4% | 143% | 152.6% | 162.2% | 171.8% | 181.4% | 191% | 200.6% | 210.2% | 219.8% | 229.4% | 239% | 248.6% |
| 5th-Hit Startup DMG Multiplier (Morale Burst) | 177.2% | 193.4% | 209.6% | 225.8% | 242% | 258.2% | 274.4% | 290.6% | 306.8% | 323% | 339.2% | 355.4% | 371.6% | 387.8% | 404% | 420.2% |
| 5th-Hit Combo DMG Multiplier (Morale Burst) | 364.3% | 397.5% | 430.7% | 463.9% | 497.1% | 530.3% | 563.5% | 596.7% | 626.9% | 663.1% | 696.3% | 729.5% | 762.7% | 795.9% | 829.1% | 862.3% |
| 5th-Hit Finisher DMG Multiplier (Morale Burst) | 119.7% | 130.6% | 141.5% | 152.4% | 163.3% | 174.2% | 185.1% | 196% | 206.9% | 217.8% | 228.7% | 239.6% | 250.5% | 261.4% | 272.3% | 283.2% |
| 5th-Hit Powerful Finisher DMG Multiplier (Morale Burst) | 435.4% | 475% | 514.6% | 554.2% | 593.8% | 633.4% | 673% | 712.6% | 752.2% | 791.8% | 831.4% | 871% | 910.6% | 950.2% | 989.8% | 1029.4% |
| 1st-Hit Daze Multiplier | 19.6% | 20.5% | 21.4% | 22.3% | 23.2% | 24.1% | 25% | 25.9% | 26.8% | 27.7% | 28.6% | 29.5% | 30.4% | 31.3% | 32.2% | 33.1% |
| 2nd-Hit Daze Multiplier | 32.9% | 34.4% | 35.9% | 37.4% | 38.9% | 40.4% | 41.9% | 43.4% | 44.9% | 46.4% | 47.9% | 49.4% | 50.9% | 52.4% | 53.9% | 55.4% |
| 3rd-Hit Daze Multiplier | 46.7% | 48.9% | 51% | 53.3% | 55.5% | 57.7% | 59.9% | 62.1% | 64.3% | 66.5% | 68.7% | 70.9% | 73.1% | 75.3% | 77.5% | 79.7% |
| Follow-Up 1st-Hit Daze Multiplier | 60.5% | 63.3% | 66.1% | 68.9% | 71.7% | 74.5% | 77.3% | 80.1% | 82.9% | 85.7% | 88.5% | 91.3% | 94.1% | 96.9% | 99.7% | 102.5% |
| Follow-Up 2nd-Hit Daze Multiplier | 33.2% | 34.8% | 36.4% | 38% | 39.6% | 41.2% | 42.8% | 44.4% | 46% | 47.6% | 49.2% | 50.8% | 52.4% | 54% | 55.6% | 57.2% |
| Follow-Up 3rd-Hit Daze Multiplier | 40.4% | 42.3% | 44.2% | 46.1% | 48% | 49.9% | 51.8% | 53.7% | 55.6% | 57.5% | 59.4% | 61.3% | 63.2% | 65.1% | 67% | 68.9% |
| Follow-Up 4th-Hit Daze Multiplier | 22.8% | 23.9% | 25% | 26.1% | 27.2% | 28.3% | 29.4% | 30.5% | 31.6% | 32.7% | 33.8% | 34.9% | 36% | 37.1% | 38.2% | 39.3% |
| Follow-Up 5th-Hit Daze Multiplier | 61.9% | 64.8% | 67.7% | 70.6% | 73.5% | 76.4% | 79.3% | 82.2% | 85.1% | 88% | 90.9% | 93.8% | 96.7% | 99.6% | 102.5% | 105.4% |
| 4th-Hit Daze Multiplier | 76.1% | 79.6% | 83.1% | 86.6% | 90.1% | 93.6% | 97.1% | 100.6% | 104.1% | 107.6% | 111.1% | 114.6% | 118.1% | 121.6% | 125.1% | 128.6% |
| 5th-Hit Startup Daze Multiplier | 129.5% | 135.4% | 141.3% | 147.2% | 153.1% | 159% | 164.9% | 170.8% | 176.7% | 182.6% | 188.5% | 194.4% | 200.3% | 206.2% | 212.1% | 218% |
| 5th-Hit Combo Daze Multiplier | 81.3% | 85% | 88.7% | 92.4% | 96.1% | 99.8% | 103.5% | 107.2% | 110.9% | 114.6% | 118.3% | 122% | 125.7% | 129.4% | 133.1% | 136.8% |
| 5th-Hit Finisher Daze Multiplier | 79.5% | 83.2% | 86.9% | 90.6% | 94.3% | 98% | 101.6% | 105.4% | 109.1% | 112.8% | 116.5% | 120.2% | 123.9% | 127.6% | 131.3% | 135% |
| 5th-Hit Startup Daze Multiplier (Morale Burst) | 136.3% | 142.5% | 148.7% | 154.9% | 161.1% | 167.3% | 173.5% | 179.7% | 185.9% | 192.1% | 198.3% | 204.5% | 210.7% | 216.9% | 223.1% | 229.3% |
| 5th-Hit Combo Daze Multiplier (Morale Burst) | 85.5% | 89.4% | 93.3% | 97.2% | 101.1% | 105% | 108.9% | 112.8% | 116.7% | 120.6% | 124.5% | 128.4% | 132.3% | 136.2% | 140.1% | 144% |
| 5th-Hit Finisher Daze Multiplier (Morale Burst) | 92.1% | 96.3% | 100.5% | 104.7% | 108.9% | 113.1% | 117.3% | 121.5% | 125.7% | 129.9% | 134.1% | 138.3% | 142.5% | 146.7% | 150.9% | 155.1% |
| 5th-Hit Powerful Finisher Daze Multiplier (Morale Burst) | 132.4% | 138.5% | 144.6% | 150.7% | 156.8% | 162.9% | 169% | 175.1% | 181.2% | 187.3% | 193.4% | 199.5% | 205.6% | 211.7% | 217.8% | 223.9% |
Dodge2
Dash Attack: Charging Slam
| Lv | Lv.1 | Lv.2 | Lv.3 | Lv.4 | Lv.5 | Lv.6 | Lv.7 | Lv.8 | Lv.9 | Lv.10 | Lv.11 | Lv.12 | Lv.13 | Lv.14 | Lv.15 | Lv.16 |
|---|---|---|---|---|---|---|---|---|---|---|---|---|---|---|---|---|
| DMG Multiplier | 89.9% | 98.1% | 106.3% | 114.5% | 122.7% | 130.9% | 139.1% | 147.3% | 155.5% | 163.7% | 171.9% | 180.1% | 188.3% | 196.5% | 204.6% | 212.9% |
| Daze Multiplier | 45% | 47.1% | 49.2% | 51.3% | 53.4% | 55.5% | 57.6% | 59.7% | 61.8% | 63.9% | 66% | 68.1% | 70.2% | 72.3% | 74.4% | 76.5% |
Dodge Counter: Blazing Flash
| Lv | Lv.1 | Lv.2 | Lv.3 | Lv.4 | Lv.5 | Lv.6 | Lv.7 | Lv.8 | Lv.9 | Lv.10 | Lv.11 | Lv.12 | Lv.13 | Lv.14 | Lv.15 | Lv.16 |
|---|---|---|---|---|---|---|---|---|---|---|---|---|---|---|---|---|
| DMG Multiplier | 186.3% | 203.3% | 220.3% | 237.3% | 254.3% | 271.3% | 288.3% | 305.3% | 322.3% | 339.3% | 356.3% | 373.3% | 390.3% | 407.3% | 424.3% | 441.3% |
| Daze Multiplier | 168.7% | 176.4% | 184.1% | 191.8% | 199.5% | 207.2% | 214.9% | 222.6% | 230.3% | 238% | 245.7% | 253.4% | 261.1% | 268.8% | 276.5% | 284.2% |
Assist3
Quick Assist: Blazing Flash - Guard
| Lv | Lv.1 | Lv.2 | Lv.3 | Lv.4 | Lv.5 | Lv.6 | Lv.7 | Lv.8 | Lv.9 | Lv.10 | Lv.11 | Lv.12 | Lv.13 | Lv.14 | Lv.15 | Lv.16 |
|---|---|---|---|---|---|---|---|---|---|---|---|---|---|---|---|---|
| DMG Multiplier | 69.7% | 76.1% | 82.5% | 88.9% | 95.3% | 101.6% | 108.1% | 114.5% | 120.9% | 127.3% | 133.7% | 140.1% | 146.5% | 152.9% | 159.3% | 165.7% |
| Daze Multiplier | 69.7% | 72.9% | 76.1% | 79.3% | 82.5% | 85.7% | 88.9% | 92.1% | 95.3% | 98.5% | 101.6% | 104.9% | 108.1% | 111.3% | 114.5% | 117.7% |
Defensive Assist: Swift Break
| Lv | Lv.1 | Lv.2 | Lv.3 | Lv.4 | Lv.5 | Lv.6 | Lv.7 | Lv.8 | Lv.9 | Lv.10 | Lv.11 | Lv.12 | Lv.13 | Lv.14 | Lv.15 | Lv.16 |
|---|---|---|---|---|---|---|---|---|---|---|---|---|---|---|---|---|
| Light Defensive Daze Multiplier | 271.3% | 283.7% | 296.1% | 308.5% | 320.9% | 333.3% | 345.7% | 358.1% | 370.5% | 382.9% | 395.3% | 407.7% | 420.1% | 432.5% | 444.9% | 457.3% |
| Heavy Defensive Daze Multiplier | 342.8% | 358.4% | 374% | 389.6% | 405.2% | 420.8% | 436.4% | 452% | 467.6% | 483.2% | 498.8% | 514.4% | 530% | 545.6% | 561.2% | 576.8% |
| Chain Defensive Daze Multiplier | 166.8% | 174.4% | 182% | 189.6% | 197.2% | 204.8% | 212.4% | 220% | 227.6% | 235.2% | 242.8% | 250.4% | 258% | 265.6% | 273.2% | 280.8% |
Assist Follow-Up: Charging Slam - Stab
| Lv | Lv.1 | Lv.2 | Lv.3 | Lv.4 | Lv.5 | Lv.6 | Lv.7 | Lv.8 | Lv.9 | Lv.10 | Lv.11 | Lv.12 | Lv.13 | Lv.14 | Lv.15 | Lv.16 |
|---|---|---|---|---|---|---|---|---|---|---|---|---|---|---|---|---|
| DMG Multiplier | 219.8% | 239.8% | 259.8% | 279.8% | 299.8% | 319.8% | 339.8% | 359.8% | 379.8% | 399.8% | 419.8% | 439.8% | 459.8% | 479.8% | 499.8% | 519.8% |
| Daze Multiplier | 182.3% | 190.6% | 198.9% | 207.2% | 215.5% | 223.8% | 232.1% | 240.4% | 248.7% | 257% | 265.3% | 273.6% | 281.9% | 290.2% | 298.5% | 306.8% |
Special Attack2
Special Attack: V-Form Sunrise Uppercut
| Lv | Lv.1 | Lv.2 | Lv.3 | Lv.4 | Lv.5 | Lv.6 | Lv.7 | Lv.8 | Lv.9 | Lv.10 | Lv.11 | Lv.12 | Lv.13 | Lv.14 | Lv.15 | Lv.16 |
|---|---|---|---|---|---|---|---|---|---|---|---|---|---|---|---|---|
| DMG Multiplier | 36.3% | 39.6% | 42.9% | 46.2% | 49.5% | 52.8% | 56.1% | 59.4% | 62.7% | 66% | 69.3% | 72.6% | 75.9% | 79.2% | 82.5% | 85.8% |
| Daze Multiplier | 36.3% | 38% | 39.7% | 41.4% | 43.1% | 44.8% | 46.5% | 48.2% | 49.9% | 51.6% | 53.3% | 55% | 56.7% | 58.4% | 60.1% | 61.8% |
EX Special Attack: V-Form Sunrise Uppercut - Full Distance
| Lv | Lv.1 | Lv.2 | Lv.3 | Lv.4 | Lv.5 | Lv.6 | Lv.7 | Lv.8 | Lv.9 | Lv.10 | Lv.11 | Lv.12 | Lv.13 | Lv.14 | Lv.15 | Lv.16 |
|---|---|---|---|---|---|---|---|---|---|---|---|---|---|---|---|---|
| DMG Multiplier | 486.3% | 530.6% | 574.9% | 619.2% | 663.5% | 707.8% | 752.1% | 796.4% | 840.7% | 885% | 929.3% | 973.6% | 1017.9% | 1062.2% | 1106.5% | 1150.8% |
| Follow-Up DMG Multiplier | 292.7% | 319.4% | 346.1% | 372.8% | 399.5% | 426.2% | 452.9% | 479.6% | 506.3% | 533% | 559.7% | 586.4% | 613.1% | 639.8% | 666.5% | 693.2% |
| Daze Multiplier | 403.4% | 421.9% | 440.3% | 458.7% | 477.1% | 495.5% | 513.9% | 532.3% | 550.7% | 569.1% | 587.5% | 605.9% | 624.3% | 642.7% | 661.1% | 679.5% |
| Follow-Up Daze Multiplier | 247.7% | 259% | 270.3% | 281.6% | 292.9% | 304.2% | 315.5% | 326.8% | 338.1% | 349.4% | 360.7% | 372% | 383.3% | 394.6% | 405.9% | 417.2% |
| Activation Energy Cost | 40 | 40 | 40 | 40 | 40 | 40 | 40 | 40 | 40 | 40 | 40 | 40 | 40 | 40 | 40 | 40 |
| Follow-Up Energy Cost | 20 | 20 | 20 | 20 | 20 | 20 | 20 | 20 | 20 | 20 | 20 | 20 | 20 | 20 | 20 | 20 |
Chain Attack2
Chain Attack: V-Form Scorching Sun
| Lv | Lv.1 | Lv.2 | Lv.3 | Lv.4 | Lv.5 | Lv.6 | Lv.7 | Lv.8 | Lv.9 | Lv.10 | Lv.11 | Lv.12 | Lv.13 | Lv.14 | Lv.15 | Lv.16 |
|---|---|---|---|---|---|---|---|---|---|---|---|---|---|---|---|---|
| DMG Multiplier | 712.1% | 776.9% | 841.7% | 906.5% | 971.3% | 1036.1% | 1100.9% | 1165.7% | 1230.5% | 1295.3% | 1360.1% | 1424.9% | 1489.7% | 1554.5% | 1619.3% | 1684.1% |
| Daze Multiplier | 273.2% | 285.7% | 298.2% | 310.7% | 323.2% | 335.7% | 348.2% | 360.7% | 373.2% | 385.7% | 398.2% | 410.7% | 423.2% | 435.7% | 448.2% | 460.7% |
Ultimate: W-Form Crowned Inferno
| Lv | Lv.1 | Lv.2 | Lv.3 | Lv.4 | Lv.5 | Lv.6 | Lv.7 | Lv.8 | Lv.9 | Lv.10 | Lv.11 | Lv.12 | Lv.13 | Lv.14 | Lv.15 | Lv.16 |
|---|---|---|---|---|---|---|---|---|---|---|---|---|---|---|---|---|
| DMG Multiplier | 1508% | 1645.1% | 1782.2% | 1919.3% | 2056.4% | 2193.5% | 2330.6% | 2467.7% | 2604.8% | 2741.9% | 2879% | 3016.1% | 3153.2% | 3290.3% | 3427.4% | 3564.5% |
| Daze Multiplier | 947.4% | 990.5% | 1033.6% | 1076.7% | 1119.8% | 1162.9% | 1206% | 1249.1% | 1292.2% | 1335.3% | 1378.4% | 1421.5% | 1464.6% | 1507.7% | 1550.8% | 1593.9% |
Core Skill1
Core Passive: Accelerant
| Lv | Lv.1 | Lv.2 (A) | Lv.3 (B) | Lv.4 (C) | Lv.5 (D) | Lv.6 (E) | Lv.7 (F) |
|---|---|---|---|---|---|---|---|
| Interval Impact Increase | 1% | 1.17% | 1.33% | 1.5% | 1.67% | 1.83% | 2% |
| Maximum Increase Limit | 10% | 11.7% | 13.3% | 15% | 16.7% | 18.3% | 20% |
| Base Impact | - | +6 | - | +6 | - | +6 | - |
| Base ATK | - | - | +25 | - | +25 | - | +25 |
Mindscapes — how far is worth it?
Among the debuffs imposed by Core Passive: Accelerant, the Collapse effect increases Stun duration by 5s, while further reducing Ice RES and Fire RES by 10%. The more powerful Finishing Move that follows when Lighter's Morale is completely exhausted during a startup light punch or jab combo deals 30% increased DMG. Victory for the champion is crucial. By facing off against the strongest fighter from the opposing side, he eliminates the threat to his leader — bringing an immense morale uplift to the team. For him, only victory deserves recognition. "The Champion cannot be defeated."
When applying Collapse via Core Passive: Accelerant to enemies, the target's Stun DMG Multiplier increases by 25%. The increase to Ice DMG and Fire DMG provided by Elation from Additional Ability: Fighting Spirit increases to 120% of the original. As the "Red Scarf" of the Sons of Calydon, Lighter is quite famous in the Outer Ring, and not just because of his fists, but also due to... his unique way of speaking. "I enjoy taking it easy... but you wouldn't manage without me, would you?"
Basic Attack, Dodge, Assist, Special Attack, and Chain Attack Lv. +2. "I'm probably the last person anyone should pick as their leader."
When Lighter is off-field, the Energy Regen for the on-field character is increased by 10%. Upon entering the Morale Burst state, Lighter restores 4 Energy for off-field characters. This effect can trigger once every 18s. "You're asking why I wear sunglasses? Uh... it's because I get queasy at the sight of blood, I guess."
Basic Attack, Dodge, Assist, Special Attack, and Chain Attack Lv. +2. "Give me an order, and I'll carry it out. It's that simple." Lighter adjusted his sunglasses with a carefree smile. "Just don't put me in charge of making decisions."
Lighter's Morale recovery efficiency is increased to 200% of its original value. When Lighter lands a heavy strike on enemies during a Basic Attack, Dodge Counter, Special Attack, EX Special Attack, Quick Assist, Assist Follow-Up, Chain Attack, or Ultimate, it will trigger the Blazing Impact effect, dealing 250% of ATK as Fire DMG. This effect can trigger once every 8s on each enemy. If Lighter's Impact exceeds 170 points, each additional point will further increase the multiplier of Blazing Impact by 5%, up to a maximum increase of 500%. The more powerful Finishing Move that follows when Lighter's Morale is completely exhausted during a light punch or jab combo will trigger an additional activation of Blazing Impact when hitting an enemy, ignoring the effect's cooldown. If given the chance to do it all over again, he would never opt to be the only survivor. Unfortunately, fate is rarely a choice.
Stats & Materials by Ascension Milestone
| Lv. | Before | After | Materials for this milestone |
|---|---|---|---|
| Lv.1 | HP: - ATK: - DEF: - [Recommended] Impact: - |
HP: 677 ATK: 109 DEF: 49 [Recommended] Impact: - |
|
| Lv.10 | HP: 1503 ATK: 166 DEF: 109 [Recommended] Impact: - |
HP: 1935 ATK: 213 DEF: 143 [Recommended] Impact: - |
Denny ×24,000
Basic Stun Certification Seal ×4
|
| Lv.20 | HP: 2853 ATK: 277 DEF: 210 [Recommended] Impact: - |
HP: 3285 ATK: 325 DEF: 244 [Recommended] Impact: - |
Denny ×56,000
Advanced Stun Certification Seal ×12
|
| Lv.30 | HP: 4203 ATK: 389 DEF: 310 [Recommended] Impact: - |
HP: 4635 ATK: 436 DEF: 343 [Recommended] Impact: - |
Denny ×120,000
Advanced Stun Certification Seal ×20
|
| Lv.40 | HP: 5553 ATK: 500 DEF: 410 [Recommended] Impact: - |
HP: 5984 ATK: 548 DEF: 444 [Recommended] Impact: - |
Denny ×200,000
Buster Certification Seal ×10
|
| Lv.50 | HP: 6903 ATK: 612 DEF: 511 [Recommended] Impact: - |
HP: 7335 ATK: 659 DEF: 545 [Recommended] Impact: - |
Denny ×400,000
Buster Certification Seal ×20
|
| Lv.60 | HP: - ATK: - DEF: - [Recommended] Impact: - |
HP: 8253 ATK: 722 DEF: 612 [Recommended] Impact: - |


Total materials across the whole ascension path
Materials Needed to Lv60




Total Denny for the character alone (ascension + basic skills + core skill A→F): about 1,706,000 Denny — W-Engine and Drive Discs not included.
Official Name in Other Languages
Banner History
It's been 445 days since Lighter's banner last closed — no new rerun announced yet.
Alongside: Hugo
Voice Actors & Character Info
Background & Lore
More unlocks as Trust with this character increases in-game.
How to read this build page
Every Agent build page has 4 parts: a stat table by level, W-Engine/Drive Disc suggestions, a Mindscape roadmap, and recommended teams. Read them in that order — stats tell you "what you need", gear tells you "where to get it", Mindscape tells you "is it worth pulling", teams tell you "who to pair with". The section below explains how to read each part, and it applies the same way to every character on the site.
How to read the stat table and level
The stat table shows values at the ascension breakpoints (usually the final one, e.g. Lv60) — these are BASE stats with no gear added, useful for comparing Agents or checking whether you've ascended far enough. CRIT Rate and CRIT DMG are shown separately because they set the damage ceiling once Drive Disc substats stack on top. If your real stats are lower than the table, you likely haven't fully ascended or leveled yet — it's not a build mistake.
Why the W-Engine and Drive Disc picks make sense
Most Agents have a "signature" W-Engine designed for their exact role, plus a few cheaper standard-banner substitutes. Missing the signature isn't a dead end — most Agents keep most of their power with a well-matched substitute, just short by some amount of total damage.
- Drive Disc sets (2pc + 4pc) are picked for the set effect that fits that Agent's playstyle (mono-element, Anomaly, stun, and so on).
- Substats follow a priority that changes by role: Attack-type Agents usually chase CRIT Rate/CRIT DMG before ATK%; Anomaly-type Agents add Anomaly Proficiency to that mix; Stun/Support roles often value survivability or energy stats over pure CRIT.
These weights differ per character — follow the exact substat priority table above rather than applying one formula to every role.
Is Mindscape worth chasing
General rule: M0 (no duplicates) already clears the game's hardest content, even for S-rank Agents. Mindscape is a duplicate-fueled upgrade system, and each level costs more resources for a smaller power gain. For most Agents, the best value stop is usually M1–M2 (where some key effects unlock), while M6 is almost always for players chasing the absolute ceiling, not a requirement. Check the Mindscape section in the table above for that specific Agent's numbers.
Skill priority by role
There's no single order for every Agent, but the general pattern by role is:
- Attack: level the main damage skill first (Basic or Special Attack depending on kit), Dash/Dodge last.
- Stun: prioritize whichever skill builds Daze/Stun fastest, since the stun window is where the whole team dumps damage.
- Support: prioritize buff or energy-generating skills over personal damage — this role's value comes from lifting the whole team.
- Anomaly: prioritize the skill that stacks anomaly buildup, since most of the damage comes from the triggered effect, not the direct hit.
Always level the Core Skill steadily alongside the rest — it's a baseline stat that affects the whole rotation, not just one move.
Where to dig deeper
This section only teaches you how to read the page — for deeper comparisons, use the dedicated tools:
- Tier list to see where this Agent stands against the full roster.
- Teams for full in-game comps, including Bangboo and rotation order.
- Disc score to check how your current gear scores against the benchmark.
Agents of the same attribute



Lighter FAQ
What is the best W-Engine for Lighter?
Lighter performs best with Blazing Laurel. See alternatives and required stats in the Gear section above.
Is Lighter worth pulling?
A top-tier Fire Stunner, well worth upgrading if you have Evelyn or a high-end Fire/Ice DPS. Buffing Ice+Fire CRIT DMG and shredding both RES makes him more flexible than Lycaon; the downsides are needing high Impact to hit his buff thresholds and still depending on an element-appropriate DPS.
What is the best team for Lighter?
Lighter works best in the Evelyn Fire team. Full members and rotation are in the Teams section.
Who voices Lighter in Zenless Zone Zero?
Lighter (faction Sons of Calydon, birthday Dec 27) is voiced according to the official credits published on the HoYoverse Wiki. See the full English/Japanese/Korean/Chinese voice actor list in the "Voice Actors & Character Info" block above — this data is pulled directly from the official wiki, not guessed.
Which Mindscape of Lighter is worth investing in?
Lighter has 6 Mindscape tiers (M1-M6), each unlocking its own effect detailed in the "Mindscape" block above (official wording). Mindscapes cost Mindscape Cinema currency farmed from limited banners, so weigh it against your budget — F2P players usually stop at M0-M1 and prioritize W-Engine and Drive Discs before pushing Mindscape higher.
How much Denny and how many materials to level Lighter to Lv60?
Leveling Lighter to max Lv60 (ascension + basic skills to 12 + core skill A→F) costs roughly 1,706,000 Denny, plus role-specific ascension materials, attribute-specific skill chips, high-dimensional data, and weekly boss drops — see the full list with exact quantities in the "Materials Needed" block above, sourced from the game's official leveling tables.
 Understand the mechanics behind this
 Drive Disc Scorer→