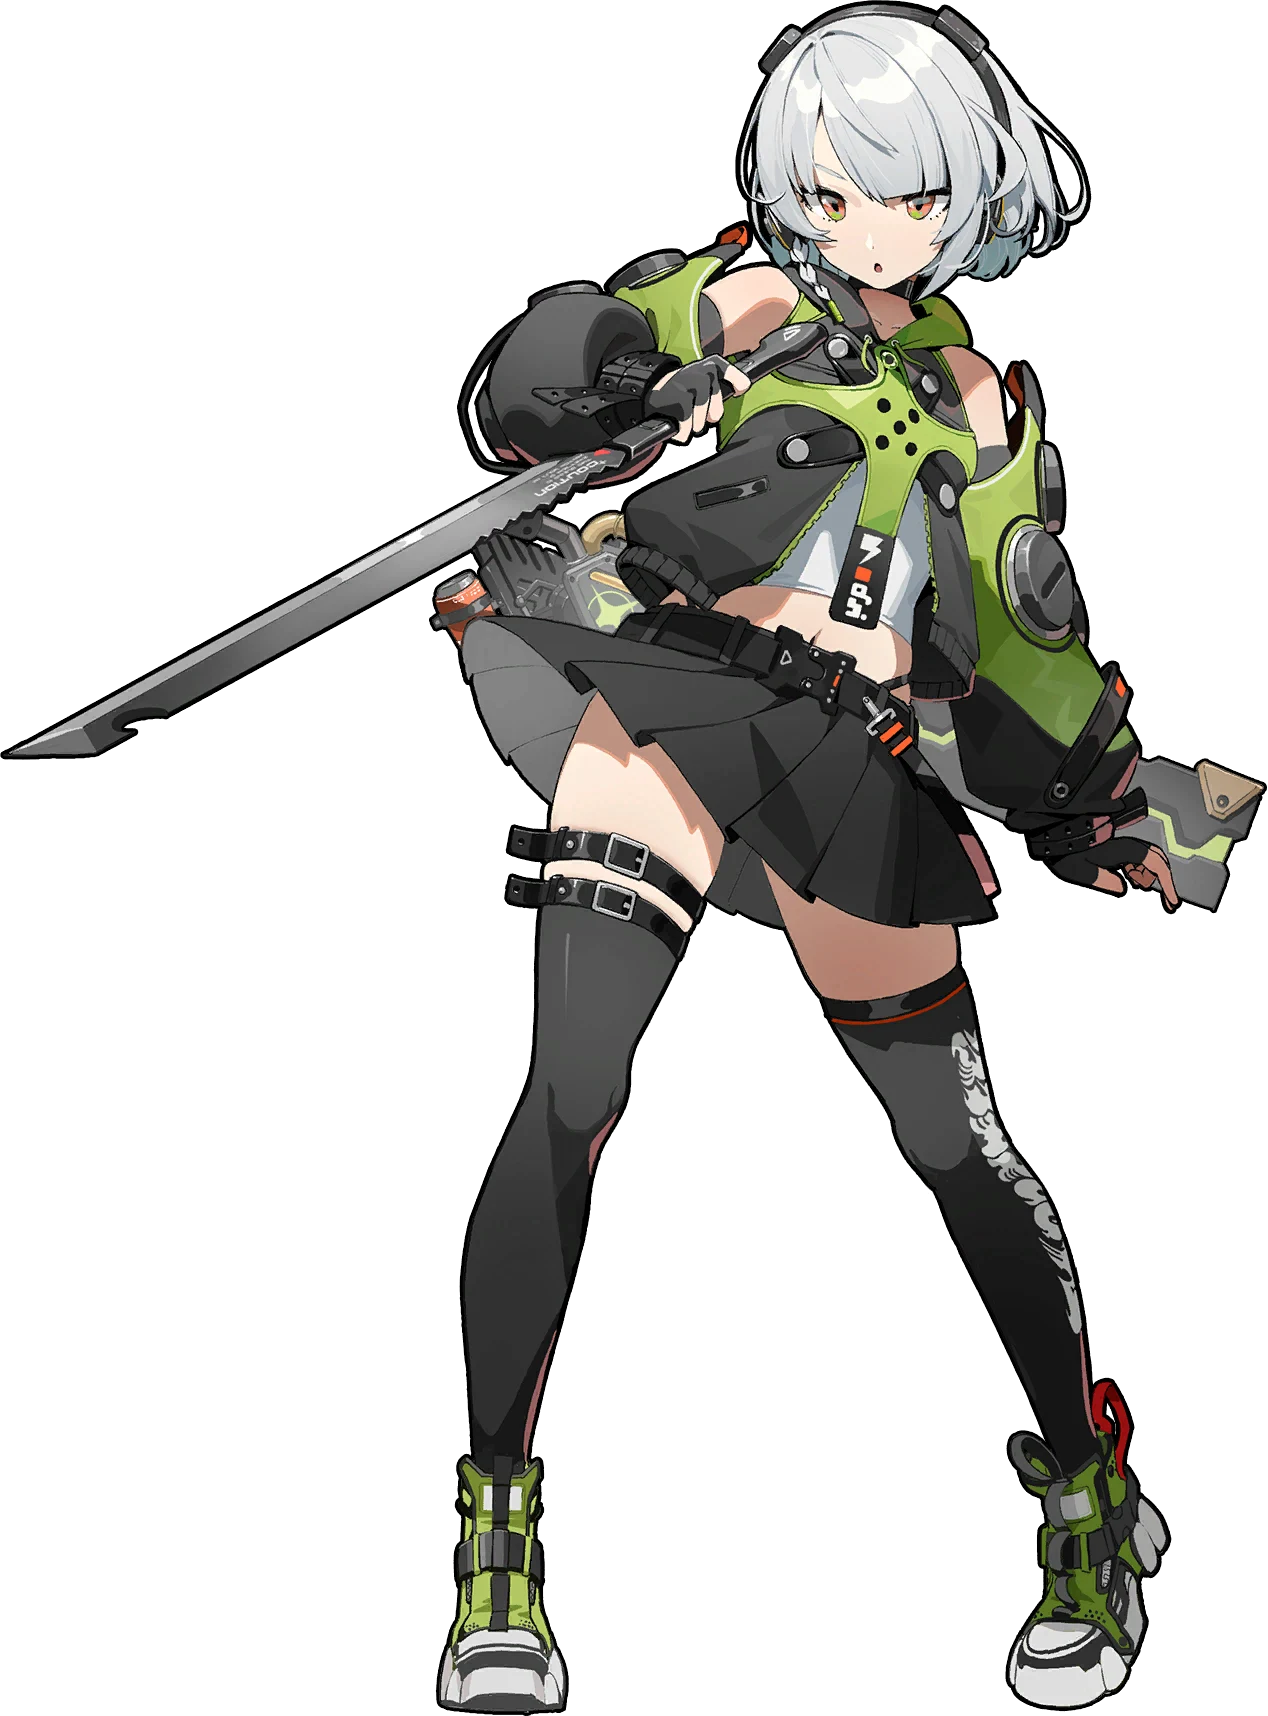
Anby
A free early-game Electric stunner — simple and easy to use, specializing in building Daze to push enemies into Stun so your DPS can finish them off.
Tier B · Stun · Electric. BiS: The Restrained. A free early-game Electric stunner — simple and easy to use, specializing in building Daze to push enemies into Stun so your DPS can finish them off.



Base stats
Recommended build
Best W-Engines
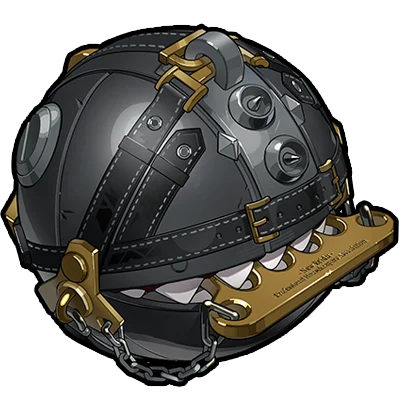
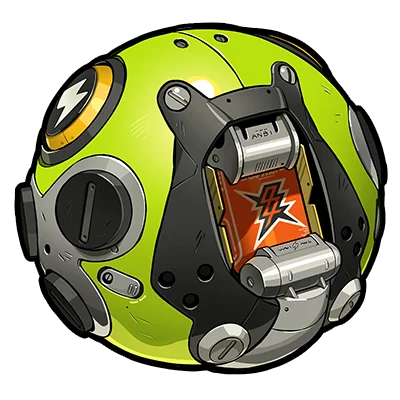
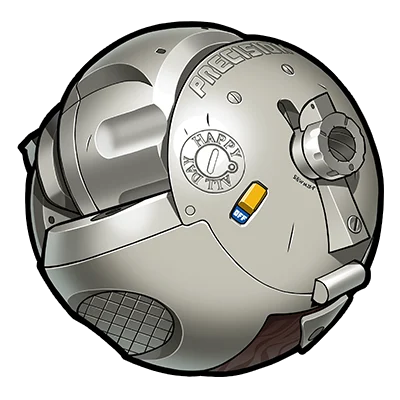
Recommendation order by current meta — the first is strongest, the rest are alternatives in decreasing priority. (Not a simulated DPS %.)
Recommended Drive Discs
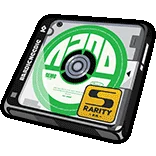 Swing Jazz
4: CRIT Rate / ATK% · 5: ATK% · 6: Impact
Prioritize Impact > ATK% > CRIT Rate > PEN
Skill priority: Special/EX > Basic Attack > Chain & Assist > Dodge
Recommended teams





As a free stunner, almost everyone has Anby, and she still works fine for learning the game or filling a slot in an Electric team. That said, S-rank stunners like Qingyi, Trigger, Lighter, and Lycaon have surpassed her in stun speed and buffs. Not worth burning resources on if you own an S-rank stunner; just keep her playable and that's enough.
 Qingyi
 Lighter
 Lycaon
Stat targets
There is no widely-published exact stat number specifically for Anby (she is a free stunner and guides rarely cite hard targets), so treat these as QUALITATIVE goals: maximize Impact to build Daze fast — the 4pc Shockstar Disco (+6% Impact & +20% Daze) is the core. Keep enough Energy to fire EX Special on cooldown (a 2pc Swing Jazz gives +20% Energy Regen). CRIT only lets her chip in some damage and is not the focus. Stat priority: Impact > Energy Regen > ATK% > CRIT. Only if you build a damage-leaning M6 should you push the CRIT/Electric DMG line.
Rotation & combos
1) OPENER: enter and use Basic Attacks to build energy. 2) Core combo: 3 Basics → HOLD Basic to release Thunderbolt for a big chunk of Daze. 3) Fire EX Special (her strongest Daze move) the moment it's off cooldown. 4) When the Daze bar fills → Chain Attack to open the stun window, then QUICK-SWAP to your DPS to finish. 5) Park Anby off-field while the DPS works; when stun ends, swap back and repeat from step 2. Tip: time Ultimate/Chain well to (with M4) feed energy to your Electric DPS.
- A FREE agent from the very start: nearly everyone owns her, costs no pulls, and works right away to learn the stunner role.
- Extremely simple: easy combo, no fiddly mechanics, point-and-Daze — great for beginners and low-effort players.
- Reliable Daze output plus surprisingly decent personal damage for a stunner, especially once at M6.
- A cheap Electric-team enabler: pairs smoothly with Harumasa/Soldier 0/Rina, and with M4 even feeds energy to the Electric DPS.
- Power-crept: S-rank stunners like Qingyi, Trigger, Lighter and Lycaon stun faster and buff the team far more.
- Almost no team buffs: she only Dazes and doesn't grant Crit DMG/damage to the DPS the way premium stunners do.
- Energy-dependent: her Daze uptime hinges on EX Special, so slow energy regen leaves gaps in the stun cadence.
Recommended Bangboo
Endgame mode fit
A serviceable early/mid pick in Shiyu Defense: Anby stuns fast enough to open windows for an Electric DPS to clear one side. In the hardest floors her lack of team buffs drags the score versus a Qingyi/Trigger team — fine for F2P, but swap her out if you own an S-rank stunner.
In Deadly Assault — which needs 3 teams — Anby is a valuable filler: slot her into a third Electric team so you don't have to stack all your good stunners on one squad. Not a top scorer, but she lets F2P players field all three lineups.
Skills
Basic Attack2
 Basic Attack
Basic Attack: Turbo Volt
Press to activate: Unleashes up to 4 slashes. The first 3 hits deal Physical DMG, the 4th hit deals Electric DMG.
Basic Attack: Thunderbolt
After unleashing the 3rd hit of the Basic Attack, hold down or pause for a short while, and then press to activate:Unleashes a downward strike that deals Electric DMG.Anti-Interrupt level is increased while using this skill.
Dodge3
 Dodge
DodgeDodge: Slide
Press to activate: A rapid dodge. Character is invulnerable while using this skill.
Dash Attack: Taser Blast
Press during a dodge to activate: Slashes all nearby enemies, dealing Physical DMG.
Dodge Counter: Thunderclap
Press during a Perfect Dodge to activate:Slashes enemies in front, dealing Electric DMG.Character is invulnerable while using this skill.
Assist3
 Assist
Quick Assist: Thunderfall
When the on-field character is launched, press to activate: Slashes enemies in front, dealing Electric DMG. Character is invulnerable while using this skill.
Defensive Assist: Flash
When the character on field is about to be attacked, press to activate: Parries the enemy's attack, inflicting massive Daze. Character is invulnerable while using this skill.
Assist Follow-Up: Lightning Whirl
Press after a Defensive Assist to activate:Perform a spinning slash against enemies in front, dealing Electric DMG.Character is invulnerable while using this skill.
Special Attack2
 Special Attack
Special Attack: Fork Lightning
Press to activate:Unleashes an upward slash that deals Electric DMG.This attack launches faster when used after the 3rd-hit of the Basic Attack or Basic Attack: Thunderbolt. Anti-Interrupt level is increased while using this skill.
EX Special Attack: Lightning Bolt
When Anby has enough Energy, press to activate:Unleashes a powerful upward slash that deals Electric DMG. This attack launches faster when used after the 3rd hit of her Basic Attack or Basic Attack: Thunderbolt. Character is invulnerable while using this skill.
Chain Attack2
 Chain Attack
Chain Attack: Electro Engine
When a Chain Attack is triggered, select the character to activate:Unleashes a powerful upwards slash at enemies in a small area, dealing massive Electric DMG.Character is invulnerable while using this skill.
Ultimate: Overdrive Engine
When Decibel Rating is at Maximum, press to activate:Unleashes a powerful upward slash at enemies in a small area followed by several falling attacks, dealing massive Electric DMG.Character is invulnerable while using this skill.
Core Skill2
 Core Skill
Core Passive: Fluctuating Voltage
Launch a Basic Attack: Thunderbolt, Special Attack, or EX Special Attack after the 3rd-hit of Anby's Basic Attack for an extra 32% Daze.* Stats shown are at Base level.
Additional Ability: Parallel Connection
When another character in your squad shares the same Attribute or Faction: When Anby's Dodge Counter hits an enemy, she gains an extra 7.2 Energy. This effect can trigger once every 5s.
Skill Coefficients by Level
Basic Attack2
Basic Attack: Turbo Volt
| Lv | Lv.1 | Lv.2 | Lv.3 | Lv.4 | Lv.5 | Lv.6 | Lv.7 | Lv.8 | Lv.9 | Lv.10 | Lv.11 | Lv.12 | Lv.13 | Lv.14 | Lv.15 | Lv.16 |
|---|---|---|---|---|---|---|---|---|---|---|---|---|---|---|---|---|
| 1st-Hit DMG Multiplier | 31.2% | 34.1% | 37% | 39.9% | 42.8% | 45.7% | 48.6% | 51.5% | 54.4% | 57.3% | 60.2% | 63.1% | 66% | 68.9% | 71.8% | 74.7% |
| 2nd-Hit DMG Multiplier | 33.7% | 36.8% | 39.9% | 43% | 46.1% | 49.2% | 52.3% | 55.4% | 58.5% | 61.6% | 64.7% | 67.8% | 70.9% | 74% | 77.1% | 80.2% |
| 3rd-Hit DMG Multiplier | 113.6% | 124% | 134.4% | 144% | 155.2% | 165.6% | 176% | 186.4% | 196.8% | 207.2% | 217.6% | 228% | 238.4% | 248.8% | 259.2% | 269.6% |
| 4th-Hit DMG Multiplier | 239.1% | 260.9% | 282.7% | 304.5% | 326.3% | 348.1% | 369.9% | 391.7% | 413.5% | 435.3% | 457.1% | 478.9% | 500.7% | 522.5% | 544.3% | 566.1% |
| 1st-Hit Daze Multiplier | 15.6% | 16.4% | 17.2% | 18% | 18.8% | 19.6% | 20.4% | 21.2% | 22% | 22.8% | 23.6% | 24.4% | 25.2% | 26% | 26.8% | 27.6% |
| 2nd-Hit Daze Multiplier | 28.7% | 30.1% | 31.5% | 32.9% | 34.3% | 35.7% | 37.1% | 38.5% | 39.9% | 41.3% | 42.7% | 44.1% | 45.5% | 46.9% | 48.3% | 49.7% |
| 3rd-Hit Daze Multiplier | 89.6% | 93.7% | 97.8% | 101.9% | 106% | 110.1% | 114.2% | 118.3% | 122.4% | 126.5% | 130.6% | 134.7% | 138.8% | 142.9% | 147% | 151.1% |
| 4th-Hit Daze Multiplier | 187.4% | 196% | 204.6% | 213.2% | 221.8% | 230.4% | 239% | 247.6% | 256.2% | 264.8% | 273.4% | 282% | 290.6% | 299.2% | 307.8% | 316.4% |
Basic Attack: Thunder Bolt
| Lv | Lv.1 | Lv.2 | Lv.3 | Lv.4 | Lv.5 | Lv.6 | Lv.7 | Lv.8 | Lv.9 | Lv.10 | Lv.11 | Lv.12 | Lv.13 | Lv.14 | Lv.15 | Lv.16 |
|---|---|---|---|---|---|---|---|---|---|---|---|---|---|---|---|---|
| DMG Multiplier | 328.6% | 358.5% | 388.40% | 418.3% | 448.2% | 478.1% | 508% | 537.9% | 567.8% | 597.7% | 627.6% | 657.5% | 687.4% | 717.3% | 747.2% | 777.10% |
| Daze Multiplier | 142.4% | 148.9% | 155.4% | 161.9% | 168.4% | 174.9% | 181.4% | 187.9% | 194.4% | 200.9% | 207.4% | 213.9% | 220.4% | 226.9% | 233.4% | 239.90% |
Dodge2
Dash Attack: Taser Blast
| Lv | Lv.1 | Lv.2 | Lv.3 | Lv.4 | Lv.5 | Lv.6 | Lv.7 | Lv.8 | Lv.9 | Lv.10 | Lv.11 | Lv.12 | Lv.13 | Lv.14 | Lv.15 | Lv.16 |
|---|---|---|---|---|---|---|---|---|---|---|---|---|---|---|---|---|
| DMG Multiplier | 56.7% | 61.9% | 67.1% | 72.3% | 77.5% | 82.7% | 87.9% | 93.1% | 98.3% | 103.5% | 108.7% | 113.9% | 119.1% | 124.3% | 129.5% | 134.7% |
| Daze Multiplier | 28.4% | 29.7% | 31% | 32.3% | 191.3% | 34.9% | 36.2% | 37.5% | 38.8% | 40.1% | 41.4% | 42.7% | 44% | 45.3% | 46.6% | 47.9% |
Dodge Counter: Thunderclap
| Lv | Lv.1 | Lv.2 | Lv.3 | Lv.4 | Lv.5 | Lv.6 | Lv.7 | Lv.8 | Lv.9 | Lv.10 | Lv.11 | Lv.12 | Lv.13 | Lv.14 | Lv.15 | Lv.16 |
|---|---|---|---|---|---|---|---|---|---|---|---|---|---|---|---|---|
| DMG Multiplier | 180.2% | 196.6% | 213% | 229.4% | 245.8% | 262.2% | 278.6% | 295% | 311.4% | 327.8% | 344.2% | 360.6% | 377% | 393.4% | 409.8% | 426.2% |
| Daze Multiplier | 161.7% | 169.1% | 176.5% | 183.9% | 191.3% | 198.7% | 206.1% | 213.5% | 220.9% | 228.3% | 235.7% | 243.1% | 250.5% | 257.9% | 265.3% | 272.7% |
Assist3
Quick Assist: Thunderfall
| Lv | Lv.1 | Lv.2 | Lv.3 | Lv.4 | Lv.5 | Lv.6 | Lv.7 | Lv.8 | Lv.9 | Lv.10 | Lv.11 | Lv.12 | Lv.13 | Lv.14 | Lv.15 | Lv.16 |
|---|---|---|---|---|---|---|---|---|---|---|---|---|---|---|---|---|
| DMG Multiplier | 61.7% | 67.4% | 73.1% | 78.8% | 84.5% | 90.2% | 95.9% | 101.6% | 107.3% | 113% | 118.7% | 124.4% | 130.1% | 135.8% | 141.5% | 147.2% |
| Daze Multiplier | 61.7% | 64.6% | 67.5% | 70.4% | 73.3% | 76.2% | 79.1% | 82% | 84.9% | 87.8% | 90.7% | 93.6% | 96.5% | 99.4% | 102.3% | 105.2% |
Defensive Assist: Flash
| Lv | Lv.1 | Lv.2 | Lv.3 | Lv.4 | Lv.5 | Lv.6 | Lv.7 | Lv.8 | Lv.9 | Lv.10 | Lv.11 | Lv.12 | Lv.13 | Lv.14 | Lv.15 | Lv.16 |
|---|---|---|---|---|---|---|---|---|---|---|---|---|---|---|---|---|
| Light Daze Multiplier | 246.7% | 258% | 269.3% | 280.6% | 291.9% | 303.2% | 314.5% | 325.8% | 337.1% | 348.4% | 359.7% | 371% | 382.3% | 393.6% | 404.8% | 416.2% |
| Heavy Daze Multiplier | 311.7% | 325.9% | 340.1% | 354.3.% | 368.5% | 382.7% | 396.9% | 411.1% | 425.3% | 439.5% | 453.7% | 467.9% | 482.1% | 496.3% | 510.5% | 524.7% |
| Chain Daze Multiplier | 151.7% | 158.6% | 165.5% | 172.4% | 179.3% | 186.2% | 193.1% | 200% | 206.9% | 213.8% | 220.7% | 227.6% | 234.5% | 241.4% | 248.3% | 255.2% |
Assist Follow-Up: Lightning Whirl
| Lv | Lv.1 | Lv.2 | Lv.3 | Lv.4 | Lv.5 | Lv.6 | Lv.7 | Lv.8 | Lv.9 | Lv.10 | Lv.11 | Lv.12 | Lv.13 | Lv.14 | Lv.15 | Lv.16 |
|---|---|---|---|---|---|---|---|---|---|---|---|---|---|---|---|---|
| DMG Multiplier | 335.2% | 365.7% | 396.2% | 426.7% | 457.2% | 487.7% | 518.2% | 548.7% | 579.2% | 609.7% | 640.2% | 670.7% | 701.2% | 731.7% | 762.2% | 792.7% |
| Daze Multiplier | 291.4% | 304.7% | 318% | 331.3% | 344.6% | 357.9% | 371.2% | 384.5% | 397.8% | 411.1% | 424.4% | 437.7% | 451% | 464.3% | 477.6% | 490.9% |
Special Attack2
Special Attack: Fork Lightning
| Lv | Lv.1 | Lv.2 | Lv.3 | Lv.4 | Lv.5 | Lv.6 | Lv.7 | Lv.8 | Lv.9 | Lv.10 | Lv.11 | Lv.12 | Lv.13 | Lv.14 | Lv.15 | Lv.16 |
|---|---|---|---|---|---|---|---|---|---|---|---|---|---|---|---|---|
| DMG Multiplier | 93.4% | 101.9% | 110.4% | 118.9% | 127.4% | 135.9% | 144.4% | 152.9% | 161.4% | 169.9% | 178.4% | 186.9% | 195.4% | 203.9% | 212.4% | 220.9% |
| Daze Multiplier | 93.4% | 97.7% | 102% | 106.3% | 110.6% | 114.9% | 119.2% | 123.5% | 127.8% | 132.1% | 136.4% | 140.7% | 145% | 149.3% | 153.6% | 157.9% |
Special Attack: Lightning Bolt
| Lv | Lv.1 | Lv.2 | Lv.3 | Lv.4 | Lv.5 | Lv.6 | Lv.7 | Lv.8 | Lv.9 | Lv.10 | Lv.11 | Lv.12 | Lv.13 | Lv.14 | Lv.15 | Lv.16 |
|---|---|---|---|---|---|---|---|---|---|---|---|---|---|---|---|---|
| DMG Multiplier | 583% | 636% | 689% | 742% | 795% | 848% | 901% | 954% | 1007% | 1060% | 1113% | 1166% | 1219% | 1272% | 1325% | 1378% |
| Daze Multiplier | 481.8% | 503.7% | 525.6% | 547.5% | 569.4% | 591.3% | 613.2% | 635.1% | 657% | 678.9% | 700.8% | 722.7% | 744.6% | 766.5% | 788.4% | 810.2% |
| Energy Cost | 60 |
Chain Attack2
Chain Attack: Electro Engine
| Lv | Lv.1 | Lv.2 | Lv.3 | Lv.4 | Lv.5 | Lv.6 | Lv.7 | Lv.8 | Lv.9 | Lv.10 | Lv.11 | Lv.12 | Lv.13 | Lv.14 | Lv.15 | Lv.16 |
|---|---|---|---|---|---|---|---|---|---|---|---|---|---|---|---|---|
| DMG Multiplier | 542.4% | 591.8% | 641.2% | 690.6% | 740% | 789.4% | 838.8% | 888.2% | 937.6% | 987% | 1036.4% | 1085.8% | 1135.2% | 1184.6% | 1234% | 1283.4% |
| Daze Multiplier | 143.4% | 150% | 156.6% | 163.2% | 169.8% | 176.4% | 183% | 189.6% | 196.2% | 202.8% | 209.4% | 216% | 222.6% | 229.2% | 235.8% | 242.4% |
Ultimate: Overdrive Engine
| Lv | Lv.1 | Lv.2 | Lv.3 | Lv.4 | Lv.5 | Lv.6 | Lv.7 | Lv.8 | Lv.9 | Lv.10 | Lv.11 | Lv.12 | Lv.13 | Lv.14 | Lv.15 | Lv.16 |
|---|---|---|---|---|---|---|---|---|---|---|---|---|---|---|---|---|
| DMG Multiplier | 1512.6% | 1650.2% | 1787.8% | 1925.4% | 2063% | 2200% | 2338.2% | 2475.8% | 2613.4% | 2751% | 2888.6% | 3026.2% | 3163.8% | 3301.4% | 3439% | 3576.6% |
| Daze Multiplier | 991.6% | 1036.7 | 1081.8% | 1126.9% | 1172% | 1217.1% | 1262.2% | 1307.3 | 1352.4% | 1397.5% | 1442.6% | 1487.7% | 1532.8% | 1577.9% | 1623% | 1668.1% |
Core Skill1
Core Passive: Fluctuating Voltage
| Lv | Lv.1 | Lv.2 (A) | Lv.3 (B) | Lv.4 (C) | Lv.5 (D) | Lv.6 (E) | Lv.7 (F) |
|---|---|---|---|---|---|---|---|
| Extra Daze | 32% | 37.3% | 42.6% | 48% | 53.3% | 58.6% | 64 |
| Base Impact | - | +6 | - | +6 | - | +6 | - |
| Base ATK | - | - | +25 | - | +25 | - | +25 |
Mindscapes — how far is worth it?
When the 4th hit of Anby's Basic Attack hits an enemy, her Energy Generation Rate is increased by 12% for 30s. "Charge up for just a minute, and you're set to fight for an hour!" That's the sales pitch for these weapon expansion modules. And they deliver exactly that.
When Basic Attack: Thunderbolt hits a Stunned enemy, its DMG is increased by 30%. When Anby's EX Special Attack hits an enemy that is not Stunned, the Daze inflicted is increased by 10%. "Electric shocks will knock you out cold." Looking at the enemy out cold at her feet, she added: "At least, that's what happens in the movies."
Basic Attack, Dodge, Assist, Special Attack, and Chain Attack Lv. +2 Run, slash, move like lightning. She is no amateur when it comes to Hollows—she's an expert.
When Anby launches a Chain Attack or uses her Ultimate, off-field Electric Agents recover 3 Energy. For every 12% Energy Generation Rate Anby has, recover an additional 2 Energy, up to a maximum of 6. You won't last long fighting solo. An experienced Hollow Raider knows how to create opportunities for their teammates.
Basic Attack, Dodge, Assist, Special Attack, and Chain Attack Lv. +2 Working for the Cunning Hares not only builds your mental toughness but also helps (or rather, forces) you to get in shape.
When Anby uses her EX Special Attack, she gains 8 stacks of Charge (max 8 stacks). When she hits an enemy with her Basic Attack or Dash Attack, 1 stack of Charge is consumed, increasing that attack's DMG by 45%. Coils of electricity flickered over her fingertips. Anby raised her head, eyes brimming with determination beyond her years. Perhaps, one day, she will be the one with total mastery over electricity.
Stats & Materials by Ascension Milestone
| Lv. | Before | After | Materials for this milestone |
|---|---|---|---|
| Lv.1 | HP: - ATK: - DEF: - [Recommended] Impact: - |
HP: 603 ATK: 95 DEF: 49 [Recommended] Impact: - |
|
| Lv.10 | HP: 1339 ATK: 143 DEF: 109 [Recommended] Impact: - |
HP: 1753 ATK: 177 DEF: 109 [Recommended] Impact: - |
Denny ×24,000
Basic Stun Certification Seal ×4
|
| Lv.20 | HP: 2572 ATK: 258 DEF: 210 [Recommended] Impact: - |
HP: 2986 ATK: 266 DEF: 244 [Recommended] Impact: - |
Denny ×56,000
Advanced Stun Certification Seal ×12
|
| Lv.30 | HP: 3804 ATK: 320 DEF: 310 [Recommended] Impact: - |
HP: 4218 ATK: 354 DEF: 343 [Recommended] Impact: - |
Denny ×120,000
Advanced Stun Certification Seal ×20
|
| Lv.40 | HP: 5036 ATK: 408 DEF: 410 [Recommended] Impact: - |
HP: 5450 ATK: 441 DEF: 444 [Recommended] Impact: - |
Denny ×200,000
Buster Certification Seal ×10
|
| Lv.50 | HP: 6269 ATK: 495 DEF: 511 [Recommended] Impact: - |
HP: 6682 ATK: 529 DEF: 545 [Recommended] Impact: - |
Denny ×400,000
Buster Certification Seal ×20
|
| Lv.60 | HP: - ATK: - DEF: - [Recommended] Impact: - |
HP: 7500 ATK: 583 DEF: 612 [Recommended] Impact: - |




Total materials across the whole ascension path
Materials Needed to Lv60





Total Denny for the character alone (ascension + basic skills + core skill A→F): about 1,706,000 Denny — W-Engine and Drive Discs not included.
Voice Actors & Character Info
Background & Lore
More unlocks as Trust with this character increases in-game.
How to read this build page
Every Agent build page has 4 parts: a stat table by level, W-Engine/Drive Disc suggestions, a Mindscape roadmap, and recommended teams. Read them in that order — stats tell you "what you need", gear tells you "where to get it", Mindscape tells you "is it worth pulling", teams tell you "who to pair with". The section below explains how to read each part, and it applies the same way to every character on the site.
How to read the stat table and level
The stat table shows values at the ascension breakpoints (usually the final one, e.g. Lv60) — these are BASE stats with no gear added, useful for comparing Agents or checking whether you've ascended far enough. CRIT Rate and CRIT DMG are shown separately because they set the damage ceiling once Drive Disc substats stack on top. If your real stats are lower than the table, you likely haven't fully ascended or leveled yet — it's not a build mistake.
Why the W-Engine and Drive Disc picks make sense
Most Agents have a "signature" W-Engine designed for their exact role, plus a few cheaper standard-banner substitutes. Missing the signature isn't a dead end — most Agents keep most of their power with a well-matched substitute, just short by some amount of total damage.
- Drive Disc sets (2pc + 4pc) are picked for the set effect that fits that Agent's playstyle (mono-element, Anomaly, stun, and so on).
- Substats follow a priority that changes by role: Attack-type Agents usually chase CRIT Rate/CRIT DMG before ATK%; Anomaly-type Agents add Anomaly Proficiency to that mix; Stun/Support roles often value survivability or energy stats over pure CRIT.
These weights differ per character — follow the exact substat priority table above rather than applying one formula to every role.
Is Mindscape worth chasing
General rule: M0 (no duplicates) already clears the game's hardest content, even for S-rank Agents. Mindscape is a duplicate-fueled upgrade system, and each level costs more resources for a smaller power gain. For most Agents, the best value stop is usually M1–M2 (where some key effects unlock), while M6 is almost always for players chasing the absolute ceiling, not a requirement. Check the Mindscape section in the table above for that specific Agent's numbers.
Skill priority by role
There's no single order for every Agent, but the general pattern by role is:
- Attack: level the main damage skill first (Basic or Special Attack depending on kit), Dash/Dodge last.
- Stun: prioritize whichever skill builds Daze/Stun fastest, since the stun window is where the whole team dumps damage.
- Support: prioritize buff or energy-generating skills over personal damage — this role's value comes from lifting the whole team.
- Anomaly: prioritize the skill that stacks anomaly buildup, since most of the damage comes from the triggered effect, not the direct hit.
Always level the Core Skill steadily alongside the rest — it's a baseline stat that affects the whole rotation, not just one move.
Where to dig deeper
This section only teaches you how to read the page — for deeper comparisons, use the dedicated tools:
- Tier list to see where this Agent stands against the full roster.
- Teams for full in-game comps, including Bangboo and rotation order.
- Disc score to check how your current gear scores against the benchmark.
Agents of the same attribute





Anby FAQ
What is the best W-Engine for Anby?
Anby performs best with The Restrained. See alternatives and required stats in the Gear section above.
Is Anby worth pulling?
As a free stunner, almost everyone has Anby, and she still works fine for learning the game or filling a slot in an Electric team. That said, S-rank stunners like Qingyi, Trigger, Lighter, and Lycaon have surpassed her in stun speed and buffs. Not worth burning resources on if you own an S-rank stunner; just keep her playable and that's enough.
What is the best team for Anby?
Anby works best in the Cunning Hares team. Full members and rotation are in the Teams section.
Who voices Anby in Zenless Zone Zero?
Anby (faction Cunning Hares, birthday Feb 20) is voiced according to the official credits published on the HoYoverse Wiki. See the full English/Japanese/Korean/Chinese voice actor list in the "Voice Actors & Character Info" block above — this data is pulled directly from the official wiki, not guessed.
Which Mindscape of Anby is worth investing in?
Anby has 6 Mindscape tiers (M1-M6), each unlocking its own effect detailed in the "Mindscape" block above (official wording). Mindscapes cost Mindscape Cinema currency farmed from limited banners, so weigh it against your budget — F2P players usually stop at M0-M1 and prioritize W-Engine and Drive Discs before pushing Mindscape higher.
How much Denny and how many materials to level Anby to Lv60?
Leveling Anby to max Lv60 (ascension + basic skills to 12 + core skill A→F) costs roughly 1,706,000 Denny, plus role-specific ascension materials, attribute-specific skill chips, high-dimensional data, and weekly boss drops — see the full list with exact quantities in the "Materials Needed" block above, sourced from the game's official leveling tables.
 Understand the mechanics behind this
 Drive Disc Scorer→