Where to Forge: There Is No Forge
Here is the answer that ends the search: there is no physical forge, anvil, or workbench to walk to. Gear crafting is a menu system called Gear Assembly, opened from the AIC/Explore panel — it is not attached to any location on the map. That is exactly why so many players report being unable to "find" it: they are looking for a building instead of a menu.
- Progress the Chapter 1 main story in Valley IV until you complete the Rally and Unite quest.
- Repair the Hub Base Comms Node as part of that questline.
- Open the AIC/Explore panel — the Gear Assembly tab now exists and stays permanently available for the rest of the game.
Before that quest is done, the menu simply does not exist yet — it is not hidden behind an obscure map marker, it has not unlocked. Stop exploring for it and finish the quest instead.
Gear Artificing (the reroll system, covered below) unlocks separately through the Gear Artificing mission in Wuling City, then lives permanently as an "Artificing" tab inside the same Gear Assembly menu.
Crafting and Set Bonuses: What to Build First
Each operator has four gear slots: 1 armor, 1 pair of gloves, and 2 kits. Every piece grants flat DEF plus rolls on Attribute/Secondary stats. Crafting consumes Components + Stock Bills, with cost scaling sharply by gear level — reported range runs from 10 Wood at Level 10 up to 50 Xiranite Components at Level 70 (single-source figure; treat exact mid-tier costs as directional until you confirm them in your own menu).
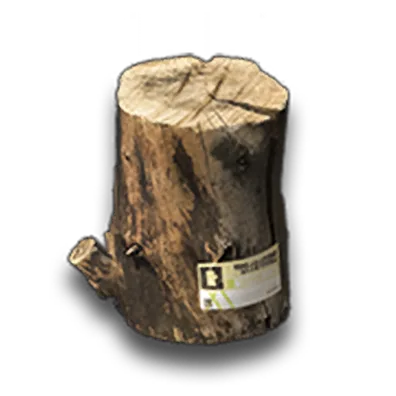 Wood
Wood Xiranite
Equipping 3 or more pieces from the same set grants a set effect. Confirmed examples:
| Set | 3-piece effect |
|---|---|
| AIC Heavy | HP +500, restores 100 HP after defeating an enemy (5s cooldown) |
| Bonekrusha | ATK +15%, gains a stacking buff when casting combo skills |
| LYNX | HP Treatment Efficiency +20%, grants allies DMG Reduction after being healed |
Higher-tier gear blueprints (Gear Template Crates) are not purchased with currency — they are found in explorable zones such as the Xiranflow Channel and Tianshi Bureau Academy in Wuling. Actionable rule: if you are missing a specific set, prioritize exploring those zones over grinding currency; no amount of farming Stock Bills unlocks a blueprint you have not physically found.
Gear Artificing Step by Step: The Sub-Stat Reroll System
Artificing is how you push a piece of gear's sub-stats higher after crafting it — and it only works on gold-quality gear. The actual attempt loop:
- Open Gear Assembly → the Artificing tab.
- Select the gold-quality piece you want to improve and pick a target stat on it.
- Consume a matching same-slot gold gear piece as fodder, plus a regional Gear Artificing Catalyst, and commit the attempt.
- Whether the attempt succeeds or fails, materials are consumed either way — but failures build hidden progress toward that stat.
- Gear with a "Good Match" for the target stat has a meaningfully higher success rate than "Standard Match" gear, so check the match quality before you commit rare Catalysts.
- Each individual stat can be improved up to 3 times (9 total improvements possible across a full piece), and once your accumulated failure progress hits the threshold below, the next attempt is a guaranteed success.
| Gear type / stage transition | Attempts for guaranteed success |
|---|---|
| Single-stat gear, stage 0→1 | 6 attempts |
| Single-stat gear, stage 1→2 | 12 attempts |
| Single-stat gear, stage 2→3 | 20 attempts |
| Two-stat gear, stage 0→1 | 12 attempts |
Priority order for which stat to Artifice first:
- Physical DMG Bonus / Battle Skill DMG Bonus — Gear is close to the only source of these two stats anywhere in your whole kit, so spend your best Catalysts here first.
- Your operator's Main Attribute — feeds the uncapped ATK multiplier explained below.
- Spread remaining rolls across multiple pieces instead of dumping everything into one slot. Raising four pieces from a usable floor to slightly better costs far less total material than pushing one piece to its hard cap while the other three sit unrolled.
Essence Rarities: Stable, Clean, Pure, and Flawless
Essence is a separate, consumable material slotted onto a weapon (not gear) to raise the rank of skills that weapon already has — it does not add new effects, only amplifies existing ones. Rarity decides how many stat lines it carries and how much rank it grants:
| Rarity | Stat lines | Skill-rank bonus on equip | Disassembly value |
|---|---|---|---|
| Stable (2★) | 1 | +1 level | 20 regional Stock Bills |
| Clean (3★) | 2 | up to +2 levels | 50 regional Stock Bills |
| Pure (4★) | 3 | up to +3 levels | 100 regional Stock Bills |
| Flawless (5★ / Gold) | 3 | +6 for Attribute/Secondary stats; up to +3 for named Skill Stats | Cannot be disassembled — only usable as Etching fuel |
Actionable rule: never disassemble a Flawless Essence, even one with a bad roll. It converts to zero Stock Bill value and its only use is as Etching fodder below — feeding it to Etching is strictly better than deleting it.
 Flawless Essence
Etching Success Rates and Coolant Gel Cost: The Missing Table
This is the table most guides never publish in full. Etching raises an individual stat line on a Flawless Essence by consuming a second Flawless Essence per attempt.
| Stat category | Level transition | Success chance | Coolant Gel to guarantee |
|---|---|---|---|
| Attribute / Secondary Stats | 1 → 2 | 60% | 30 |
| 2 → 3 | 24% | 60 | |
| 3 → 4 | 10.9% | 120 | |
| 4 → 5 | 5% | 250 | |
| 5 → 6 (reported) | 2.7% | 450 | |
| Skill Stats | 1 → 2 | 10.9% | 120 |
| 2 → 3 | 4.2% | 300 |
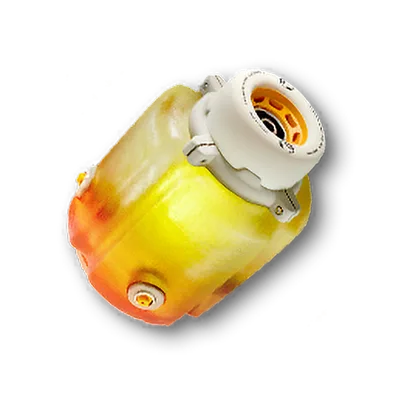 Coolant Gel
How the pity actually works, step by step:
- Every failed Etching attempt awards 10 Coolant Gel — the target Essence is untouched, only the fodder Essence you fed in is consumed.
- Coolant Gel accumulates across all your Etching attempts, it does not reset per Essence.
- Once your banked Coolant Gel meets the threshold listed for the level you are attempting, you can spend it to force a guaranteed success instead of rolling the percentage.
- This is a hard-pity currency, not a soft-pity rate increase — your odds stay flat at the listed percentage until you either hit or buy the guarantee.
When to stop gambling and start banking: levels 1→2 and 2→3 on Attribute/Secondary stats average roughly 2.7 Flawless Essences per stat at 60%/24% — cheap enough to always roll naturally. Once you pass +3, the math flips: 3→4 at 10.9% and beyond burns Essences far faster than it burns Coolant Gel, so switch to banking Gel and buying the guarantee instead of continuing to gamble. On Skill Stats, stop rolling naturally after +1 — 10.9% is already the expensive tier — and save every attempt's Gel toward the guaranteed 2→3 push instead.
Sub-Stat Priority by Role: DPS, Tank, and Support
Every operator has a Main Attribute (large ATK weight) and a Secondary Attribute (small ATK weight), and both feed a shared multiplier: AttributeBonus = 1 + 0.005 × Main + 0.002 × Secondary, sitting inside the core damage chain (Damage = ATK × Skill% × (1+Bonus) × Crit × DefMult × ResMult, DefMult = 100/(DEF+100), base Crit Rate 5% / base Crit DMG 50%). Do the math and a point of Main Attribute is worth 2.5x a point of Secondary Attribute for damage purposes — so on any Gear or Essence roll that offers a choice between the two, take Main every time unless you specifically need the Secondary's other effect (for example Agility's Physical DMG reduction on a squishy caster).
| Role | Weapon type | Main / Secondary Attribute | Priority stats on Gear/Essence |
|---|---|---|---|
| Guard (melee DPS) | Sword / Polearm | Agility or Strength | Main Attribute, Physical DMG Bonus, Crit |
| Defender (tank) | Great Sword | Strength | Main Attribute (HP), DEF, Physical DMG Bonus |
| Caster (Arts DPS) | Arts Unit (typically) | Intellect | Main Attribute, Battle Skill DMG Bonus (Arts) |
| Support / Healer | Arts Unit | Will and Intellect | Will (healing scaling), Skill Stat ranks on weapon |
Reference the four Attributes' raw effects when deciding what a squishy unit needs beyond damage: Strength = 5 HP per point; Agility = 1% Physical DMG reduction per point (cap 90%); Intellect = 1% Arts DMG reduction per point (cap 90%); Will = 0.001 × Will as healing-received bonus.
Farming Route: Energy Alluvium to Pre-Engraving
Flawless Essences do not drop reliably from normal overworld enemies — farming blind wastes Sanity. Follow this exact route:
- Early game: clear regular Energy Alluvium encounters on the overworld map. Drop rarity is gated by enemy level — low-level enemies drop Stable/Clean, higher-level enemies drop Pure.
- Reach Exploration Level 4 by clearing the "Beyond the World's Expanse I" main-story checkpoint. Every Energy Alluvium site converts into a repeatable Severe Energy Alluvium dungeon, gated by Sanity instead of a one-time clear — this is the actual reliable source of Flawless Essences.
- Check the site's fixed stat pool before you farm it. Each Severe Energy Alluvium location has its own locked pool of possible stats, so running the wrong site for your target weapon skill wastes Sanity regardless of drop rarity.
- Always Pre-Engrave before running. Interact with the rift at the entrance and select "Pre-Engrave" to lock in 3 candidate Attribute stats plus 1 Secondary/Skill stat before the run starts. The resulting Essence is guaranteed to carry one of your chosen Attribute stats plus your chosen Secondary/Skill stat — only the third line stays random. This costs Engraving Permits (region-specific, obtained via Regional Stock Redistribution — e.g. Wuling Engraving Permit in Wuling).
 Wuling Engraving Permit
Pre-Engraving turns a 3-random-line drop into an effectively 1-random-line drop. It is the single biggest efficiency lever in the entire Essence loop — never run a Severe Energy Alluvium blind once it is unlocked.
The Actionable Priority List: What to Do, in Order
Follow this sequence exactly — each step is a hard prerequisite for the next one being worth doing:
- Craft a full 4-slot gold Gear set via Gear Assembly before touching Artificing or Essence at all. This is cheap and sets your DEF/Attribute floor.
- Level your operator and weapon to the current cap. ATK scales close to linearly with weapon level with zero RNG — always finish this before spending on any RNG-gated system.
- Push Skill Ranks via Tuning and Potential before farming Essence for that skill. Tuning (5 stages) and Potential (6 stages) raise the rank ceiling; Essence only fills toward whatever ceiling already exists, so farming Essence for a rank your weapon cannot reach yet is wasted Sanity.
- Farm Flawless Essences via Severe Energy Alluvium with Pre-Engraving active — never skip the Pre-Engrave step once Exploration Level 4 is unlocked.
- Etch every stat evenly to +3 first, then switch to banking Coolant Gel for guaranteed pushes past +3 (Attribute/Secondary) or past +1 (Skill Stats) — see the stopping-point rule above.
- Run Gear Artificing in parallel, prioritizing Physical/Battle Skill DMG Bonus, then Main Attribute, spreading rolls across all four pieces rather than min-maxing one slot.
Where to spend this on first: according to the site's own operator tier list, the current T0 · Meta-defining operators are Gilberta, Yvonne, Zhuang Fangyi, Ardelia, Rossi, Tangtang, Wulfgard, and Estella — these are the highest-return targets for a full Gear + Artificing + Etching investment, since every point of Main Attribute or Skill Stat rank you land on them compounds through a kit that is already rated at the top of the tier list. Push T1 operators (Laevatain, Perlica, Ember, Last Rite, Pogranichnik, both Endministrators, Antal, Akekuri, Mi Fu) to the +3 evenly-rolled floor described above, then stop — save Coolant Gel and Catalysts for your T0 roster rather than chasing +5/+6 rolls on a T1 unit.
 Gilberta
 Yvonne
 Zhuang Fangyi
 Ardelia
 Rossi
Rossi Tangtang
 Wulfgard
Numbers marked "reported" above (mid-tier crafting costs, the 5→6 Etching tier) come from a single guide source not yet cross-confirmed by a second independent source — treat them as directionally correct, but verify against your own menu before committing materials you cannot get back.