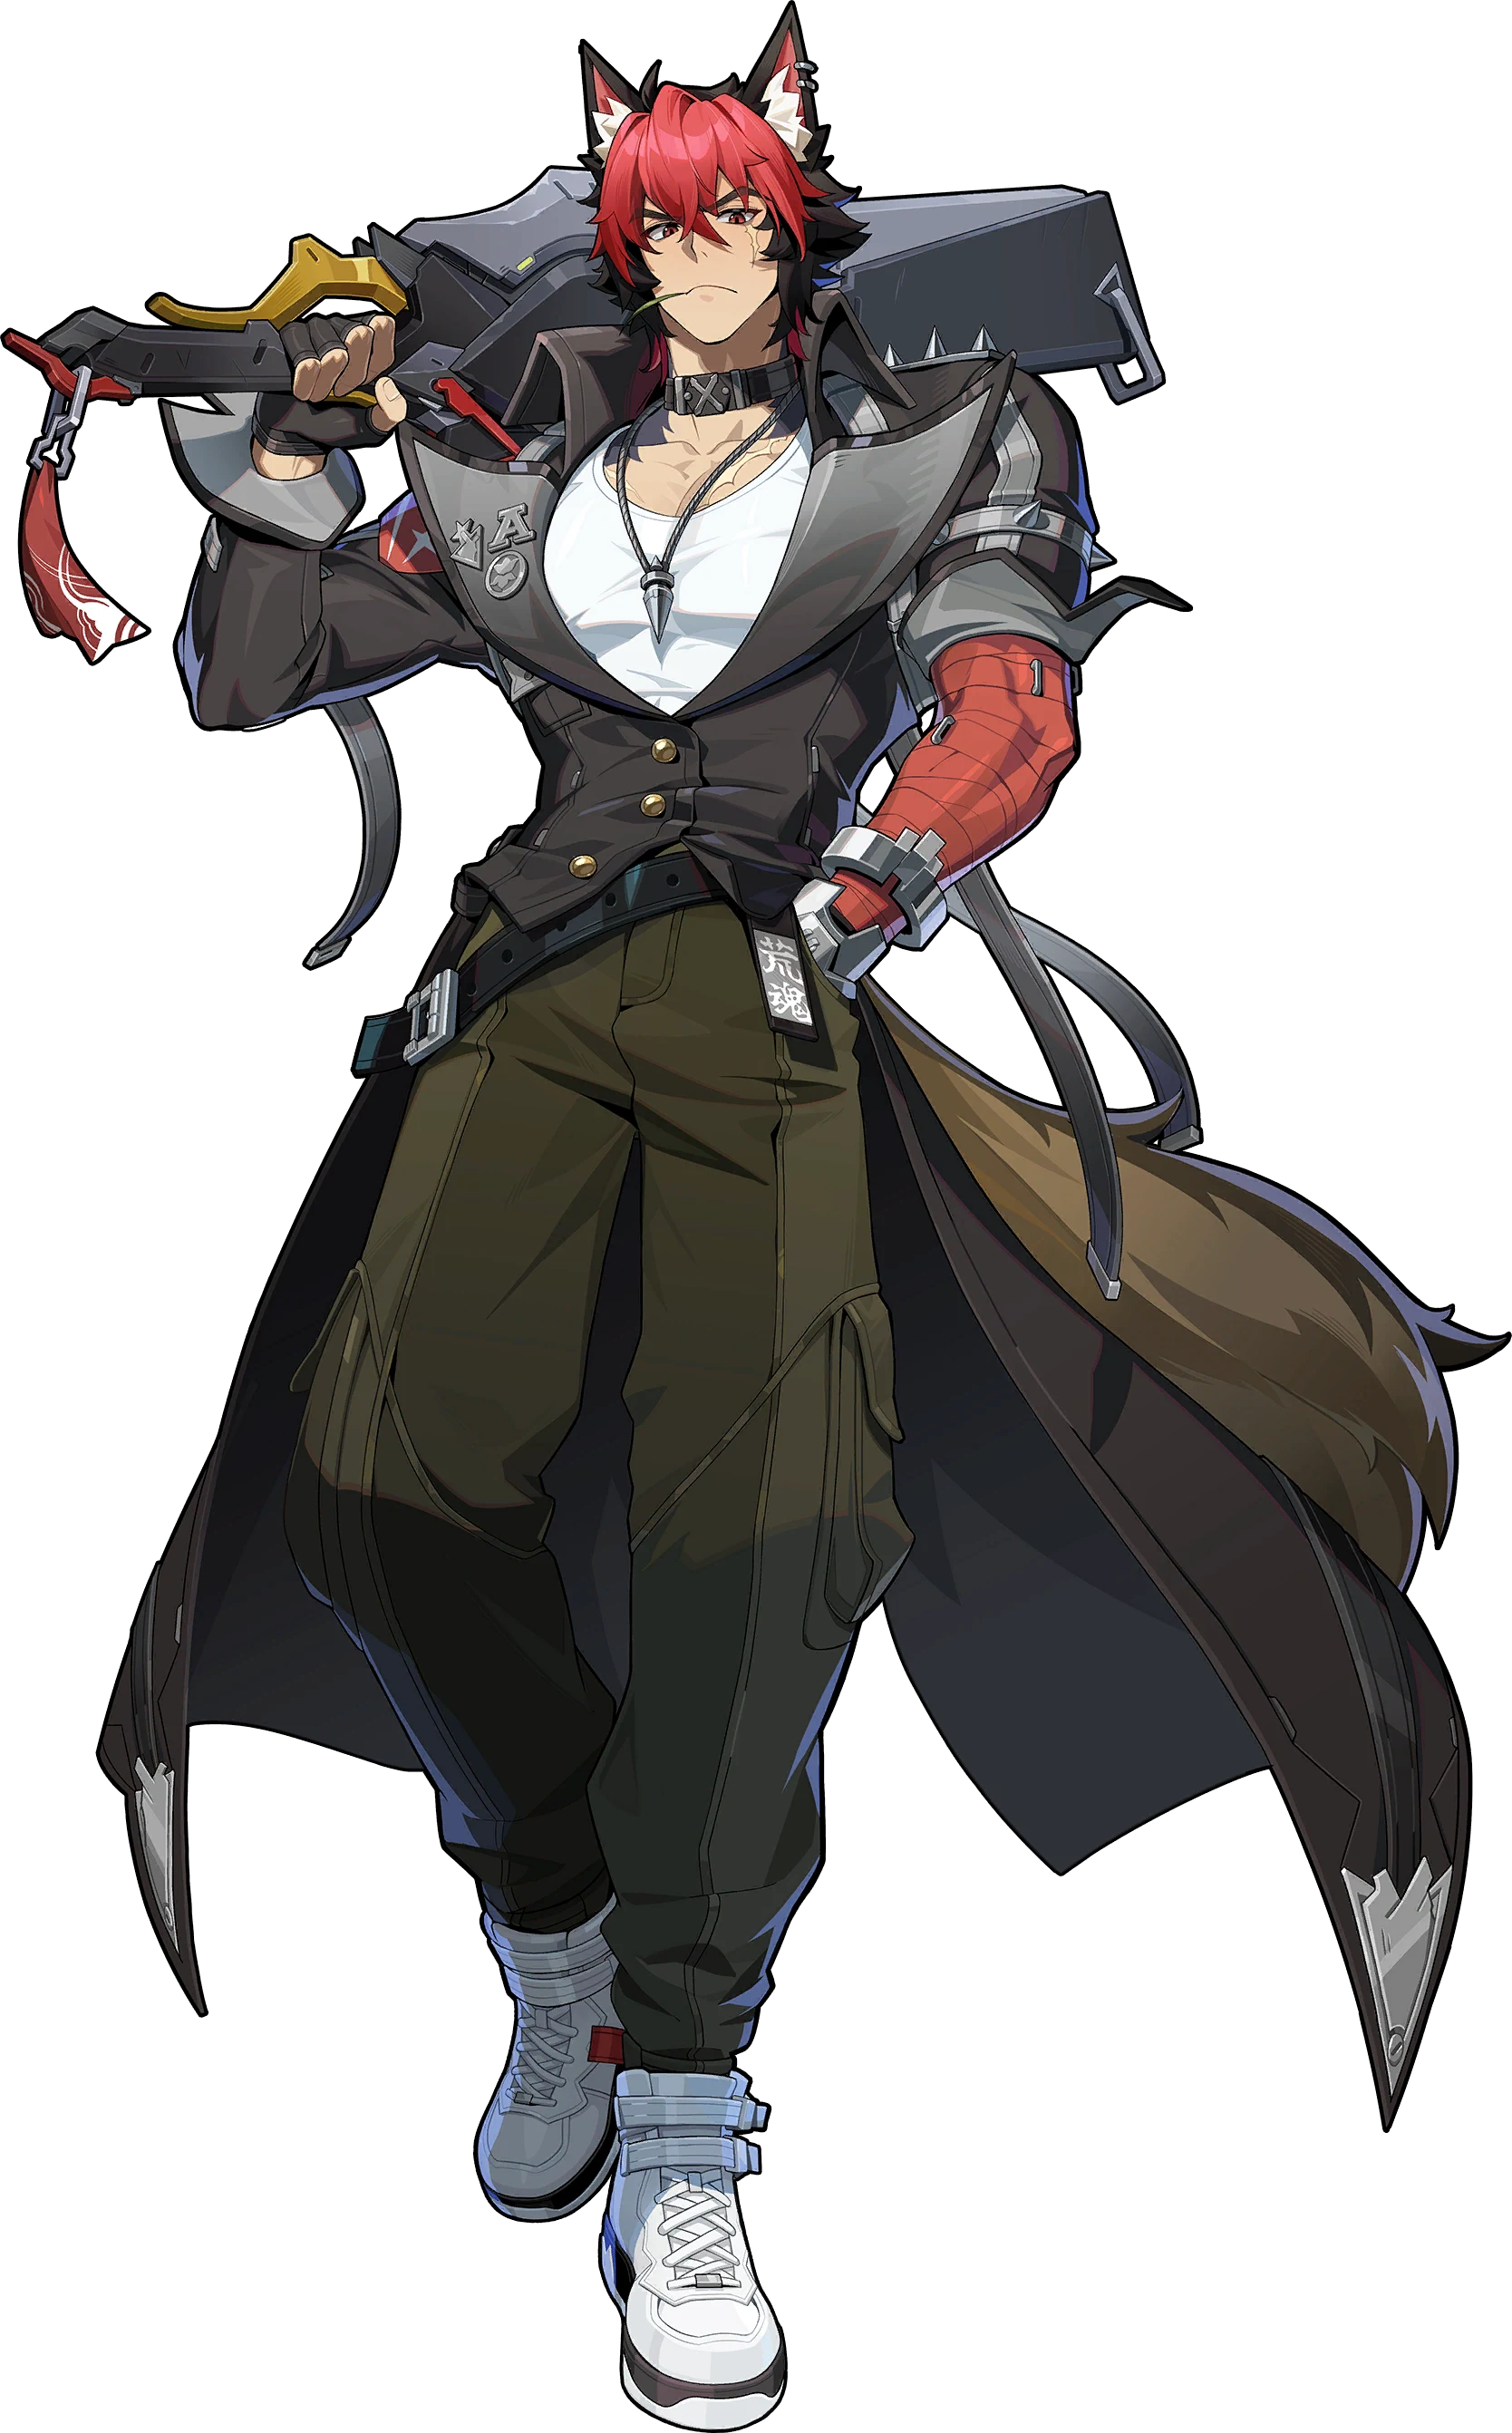
Manato
A Fire Rupture DPS who scales off Max HP: he spends HP to power up his Enhanced Basic Attacks and Assist Follow-Ups, unleashing Fire Sheer DMG.
Tier A · Rupture · Fire. BiS: Grill O'Wisp. A Fire Rupture DPS who scales off Max HP: he spends HP to power up his Enhanced Basic Attacks and Assist Follow-Ups, unleashing Fire Sheer DMG.



Base stats
Recommended build
Best W-Engines


Recommendation order by current meta — the first is strongest, the rest are alternatives in decreasing priority. (Not a simulated DPS %.)
Recommended Drive Discs
 Yunkui Tales
 Woodpecker Electro
 Branch & Blade Song
4: CRIT Rate or CRIT DMG · 5: Fire DMG or HP% · 6: HP%
HP% and CRIT Rate/CRIT DMG (aim for 100% CRIT Rate in combat), then flat HP; since Sheer DMG scales with Max HP, stack as much HP as possible.
Skill priority: Core Skill > Chain Attack > Assist > Special Attack/Basic Attack > Dodge
Recommended teams




Worth leveling for anyone wanting a fairly strong A-rank Fire Rupture DPS, especially alongside Lucia. He carries good baseline damage from a proper team, but leans heavily on HP/Stun support; solo he falls short of the S-rank Rupture units.
Role Ranking
The list below is pulled straight from the overall Tier List, keeping only the 5 agents who share the Rupture role. Order within each tier is NOT a strength ranking — it simply groups agents by their original tier.




Stat targets
Level 60 targets: HP 21,432 / Crit Rate 56.20% / Crit DMG 114.00%. The key threshold: Max HP is the backbone because Sheer Force scales directly off Max HP and all his Fire DMG is Sheer DMG (ignores DEF) — every 1 Max HP grants 0.1 Sheer Force, so stack HP as high as possible. Alongside that, aim for ~76% sheet Crit Rate to hit ~100% in combat (/gurugamer), keeping a roughly 1:2 Crit Rate : Crit DMG ratio. Substat order : Crit DMG >= Crit Rate >= HP% > ATK.
Rotation & combos
1) BUILD GAUGE: use his Special / EX to charge Blazing Heart and enter the enhanced Molten Edge state. 2) IN MOLTEN EDGE: press the Enhanced Basic to spend HP for a big block of self-buffs (Sheer Force/damage). 3) The ASSIST FOLLOW-UP is his biggest damage source: time a Parry Assist then swap in to launch the Assist Follow-Up, maximizing his on-field turns. 4) HP MANAGEMENT: when HP drops low, use his Special to heal and reset — because it's Sheer DMG he still deals full damage even on NON-broken enemies. 5) Pair a stunner (Ju Fufu / Koleda) to break -> Chain, with Lucia/Pan Yinhu buffing HP/Sheer; at M6 each break refunds gauge so the loop runs far smoother.
- All his damage is Sheer DMG that ignores DEF and scales off Max HP — extremely consistent output against high-DEF/armored foes, and it works even on NON-broken enemies (not gated behind a Stun window like most DPS).
- A near-free A-rank that reaches S-tier output by M6 — top value for F2P; his signature Grill-o'-Wisp is also A-rank (easy to get), so no S-rank W-Engine pull is needed.
- His Assist Follow-Up hits very hard and his Special self-heals → low field time, a tanky (high-HP) frame, making him a forgiving, durable quickswap DPS.
- No 4-piece disc set suits him, so he runs 2pc x 3 (Yunkui Tales / Woodpecker / Branch & Blade Song) — very flexible and cheap to farm.
- Self-inflicted HP loss is a double-edged sword: in high-pressure / timed content (Deadly Assault) he can drop dangerously low, demanding careful HP management and a healer.
- Hungry for HP AND double-crit at once (HP ~21k, CR ~56%, CD ~114%), so he's demanding on disc RNG; the Sheer/Rupture W-Engine pool is thin, so off-signature substitutes are scarce.
- M0 is only 'decent': his real power is gated behind M2/M6, and he wants the right support core (Lucia/Pan Yinhu for HP-Sheer buffs + a stunner Ju Fufu/Koleda) — solo he lags the S-rank Ruptures.
Recommended Bangboo
Endgame mode fit
Good in Shiyu Defense: single/few-target, stable nodes where HP is easy to manage — his DEF-ignoring Sheer DMG grinds down tanky bosses even outside the Stun window. Beware nodes with HP-drain/mutation modifiers, which hit his self-harm weakness (/mintparm).
Weaker in Deadly Assault: relentless enemy pressure makes his self-HP-drain risky, and the time-attack nature clashes with his gauge-charging / HP-management rhythm. Still clearable with a healer and careful HP play, but not his best stage (per mintparm).
Skills
Basic Attack2
 Basic Attack
Basic Attack: Blazing Wind Slash
Basic Attack: Blazing Wind SlashPress to activate:Perform up to three forward slashes, dealing Physical DMG.During each slash, pressing triggers Scorchwind, causing the attack todeal increased Fire DMG.
Bassic Attack: Blazing Wind - Misty Slash
While in the Molten Edge state, press to activate:Unleash up to four forward slashes, dealing Fire DMG.If Manato's HP is above 30% when the skill is activated, 3.5% of his Max HP willbe consumed.
Dodge3
 Dodge
DodgeDodge: Radiant Blade
Press to activate:A quick dash dodge. Character is invulnerable while using this skill.
Dash Attack: Radiant Blade - Zanshin
Press during a dodge to activate:Perform a shoulder slam forward, dealing Physical DMG.
Dodge Counter: Radiant Blade - Battle Sweep
Press during a Perfect Dodge to activate:Perform a slash followed by a punch at enemies ahead, dealing Fire DMG.Character is invulnerable while using this skillCharacter is invulnerable while using this skill.
Assist Attack3
 Assist Attack
Quick Assist: Lone Shadow - Regroup
When the active character is launched, press to activate:Slashes and punches enemies in front, dealing Fire DMG.Character is invulnerable while using this skill.
Defensive Assist: Lone Shadow - Mountain Stand
When the on-field character is about to be attacked, press to activate:Parries the enemy's attack, inflicting massive Daze and dealing Fire DMG.Gain 75 Blazing Heart upon activating this skill. Character is invulnerable while using this skill.
Assist Follow-Up: Lone Shadow - Breaking Fang
Press after a Defensive Assist to activate:Unleash multiple slashes at enemies ahead, dealing Fire DMG.Repeated presses allow up to 7 extra consecutive slashes. While chaining slashes, if Manato's HP is above 30%, 2% of Max HP isconsumed. Character is invulnerable while using this skill.
Special Attack3
 Special Attack
Special Attack: Return to Ashes
Press to activate:Slash forward at enemies, dealing Fire DMG.If hit by an enemy during the skill, restore 20% of missing HP whenunleashing the slash. The healing effects of Special Attack: Return to Ashesand Special Attack: Return to Ashes - Sacrifice have a shared cooldown andcan trigger once every 20s.If hit by an enemy during the skill, the slash is enhanced.DMG taken is reduced by 40% while using this skill. Anti-Interrupt level is increased while using this skill.
Special Attack: Return to Ashes - Sacrifice
Hold to activate:Enter a charging state, consuming up to 10% of Max HP and gaining 100 Blazing Heart. HP consumption will at most reduce Manato's HP to 30% ofMax HP.Release the button to activate Special Attack: Return to Ashes. If struck during the skill, the slash heals 20% of missing HP. The healing effects ofSpecial Attack: Return to Ashes and Special Attack: Return to Ashes Sacrifice have a shared cooldown and can trigger once every 20s.If hit by an enemy during the skill or if charging reaches a certain duration, the slash is enhanced.DMG taken is reduced by 40% while using this skill. Anti-Interrupt level is increased while using this skill.
EX Special Attack: Return to Ashes - Fall
While in the Molten Edge state and with sufficient Adrenaline, press toactivate:Jump up and unleash a falling slash on enemies in front, dealing massiveFire DMG.Upon activating the skill, restore 33% of Max HP.Character is invulnerable while using this skill.
Ultimate2
 Ultimate
Chain Attack: Blazing Eruption
When a Chain Attack is triggered, select the character to activate:Hurls his sword forward, then charges the enemy to trigger an explosion,dealing massive Fire DMG.Character is invulnerable while using this skill.
Ultimate: Musou Aratama
When Decibel Rating is at Maximum, press to activate:Jump into the air and deliver a falling slash at enemies in front, followed byan explosion, dealing massive Fire DMG.Character is invulnerable while using this skill.
Core Skill Enhancement2
 Core Skill Enhancement
Core Passive: Mighty Molten Edge Skill
Manato gains extra Sheer Force based on his Max HP, with every 1 point ofMax HP increasing Sheer Force by 0.1.All Fire DMG Manato deals is Sheer DMG, ignoring enemy DEF and using his Sheer Force stat as the DMG Multiplier. When Manato uses Special Attack: Return to Ashes - Sacrifice or a Defensive Assist, he accumulates Blazing Heart, up to a maximum of 100 points. At 75 Blazing Heart, Manato enters the Molten Edge state. While inthe Molten Edge state, Manato consumes 3.3 Blazing Heart per second. When Blazing Heart is fully depleted, he exits Molten Edge. While in the Molten Edge state, Manato's Basic Attacks are enhanced, and he can use EX Special Attack: Return to Ashes - Fall. When consuming HP during Basic Attack: Blazing Wind - Misty Slash or during the consecutive slashes from an Assist Follow-Up, that attack's CRIT DMGincreases by 29.2%, and the Adrenaline Generation Rate increases by 100%.While in the Molten Edge state, Manato's CRIT Rate increases by 10%, and his Fire DMG increases by 11.7%*Stats shown are at Base level.
Additional Ability: Rekindled Heart
When another character in your squad is a Support or Stun character:When Manato uses his UItimate, he gains 8 stacks of Remnant Flame, and when using a Chain Attack, he gains 4 stacks of Remnant Flame, lasting 60s,stacking up to 20 times. Repeated triggers reset the duration. While launching Basic Attack: Blazing Wind - Misty Slash or during the consecutive slashes of an Assist Follow-Up, if his HP is below 100% of Max HP, one stack of Remnant Flame is consumed to restore 2% of his Max HP.
Skill Coefficients by Level
Basic Attack2
Basic Attack: Blazing Wind Slash
| Lv | Lv. 1 | Lv. 2 | Lv. 3 | Lv. 4 | Lv. 5 | Lv. 6 | Lv. 7 | Lv. 8 | Lv. 9 | Lv. 10 | Lv. 11 | Lv. 12 | Lv. 13 | Lv. 14 | Lv. 15 | Lv. 16 |
|---|---|---|---|---|---|---|---|---|---|---|---|---|---|---|---|---|
| 1st-Hit DMG Multiplier | 28.7% | 31.4% | 34.1% | 36.8% | 39.5% | 42.2% | 44.9% | 47.6% | 50.3% | 53% | 55.7% | 58.4% | 61.1% | 63.8% | 66.5% | 69.2% |
| 2nd-Hit DMG Multiplier | 38.2%+44.5% | 41.7%+48.6% | 45.2%+52.7% | 48.7%+56.8% | 52.2%+60.9% | 55.7%+65% | 59.2%+69.1% | 62.7%+73.2% | 66.2%+77.3% | 69.7%+81.4% | 73.2%+85.5% | 120.5%+149.4% | 80.2%+93.7% | 83.7+97.8% | 87.2%+101.9% | 142.5%+176.6% |
| 3rd-Hit DMG Multiplier | 60%+74.6% | 65.5%+81.4% | 71%+88.3% | 76.5%+95% | 82%+101.8% | 87.5%+108.6% | 93%+115.4% | 98.5%+122.2% | 104%+129% | 109.5%+135.8% | 115%+142.6% | 120.5%+149.4% | 80.2%+93.7% | 83.7%+97.8% | 137%+169.8% | 142.5%+176.6% |
| 1st-Hit DMG Multiplier (Triggering Schorchwind) | 28.7%+34.4% | 31.4%+37.6% | 34.1%+40.8% | 36.8%+44% | 39.5%+47.2% | 42.2%+50.4% | 44.9%+53.6% | 47.6%+56.8% | 50.3%+60% | 53%+63.2% | 55.7%+66.4% | 58.4%+69.6% | 61.1%+72.8% | 63.8%+76% | 66.5%+79.2% | 69.2%+82.4% |
| 2nd-Hit DMG Multiplier (Triggering Schorchwind) | 38.2%+57.3% | 41.7%+62.6% | 45.2%+67.9% | 48.7%+73,2% | 52.2%+78.5% | 55.7%+83.8% | 59.2%+89.1% | 62.7%+94.4% | 66.2%+99.7% | 69.7%+105% | 73.2%+110.3% | 76.7%+115.6% | 80.2%+120.9% | 83.7%+126.2% | 86.2%+131.5% | 90.7%+136.8% |
| 3rd-Hit DMG Multiplier (Triggering Schorchwind) | 60%+83.3% | 65.5%+90.9% | 71%+98.5% | 76.5%+106.1% | 82%+113.7% | 87.5%+121.3% | 93%+128.9% | 98.5%+136.5% | 104%+144.1% | 109.5%+151.7% | 115%+159.3% | 120.5%+166.9% | 126%+174.5% | 131.5%+182.1% | 137%+189.7% | 142.5%+197.3% |
| 1st-Hit Daze Multiplier | 26.9% | 28.2% | 29.5% | 30.8% | 32.1% | 33.4% | 34.7% | 36% | 37.3% | 38.6% | 39.9% | 41.2% | 42.5% | 43.8% | 45.1% | 46.4% |
| 2nd-Hit Daze Multiplier | 36.2+43.1% | 37.9%+45.1% | 39.6%+47.1% | 42.3%+49.1% | 43%+51% | 44.7%+53.1% | 46.4%+55.1% | 48.1%+57.1% | 49.8%+59.1% | 51.5%+61.1% | 53.2%+63.1% | 54.9%+65.1% | 56.6%+67.1% | 58.3%+69.1% | 60%+71.1% | 61.7%+73.1% |
| 3rd-Hit Daze Multiplier | 59%+74.3% | 61.7%+77.7% | 64.4%+81.1% | 67.1%+84.5% | 69.8%87.9% | 72.5%+91.3% | 75.2%+94.7% | 77.9%+98.1% | 80.6%+101.5% | 83.3%+104.9% | 86%+108.3% | 88.7%+111.7% | 91.4%+115.1% | 94.1%+118.5% | 96.8%+121.9% | 99.5%+125.3% |
| 1st-Hit Daze Multiplier (Triggering Schorchwind) | 26.9%+30.5% | 28.2%+31.9% | 29.5%+33.3% | 30.8%+34.7% | 32.1%+36.1% | 33.4%+37.5% | 34.7%+38.9% | 36%+40.3% | 37.3%+41.7% | 38.6%+43.1% | 39.9%+44.5% | 41.2%+45.9% | 42.5%+47.3% | 43.8%+48.7% | 45.1%+50.1% | 46.4%+51.5% |
| 2nd-Hit Daze Multiplier (Triggering Schorchwind) | 36.2%+55.1% | 37.9%+57.7% | 39.6%+60.3% | 41.3%+62.9% | 43%+65.5% | 44.7%+68.1% | 46.4%+70.7% | 48.1%+73.3% | 49.8%+75.9% | 51.5%+78.5% | 53.2%+81.1% | 54.9%+83.7% | 56.6%+86.3% | 58.3%+88.9% | 60%+91.5% | 61.7+94.1% |
| 3rd-Hit Daze Multiplier (Triggering Schorchwind) | 59%+82.6% | 61.7%+86.4% | 64.3%+90.2% | 67.1%+94% | 69.8%+97.8% | 72.5%+101.6% | 75.2%+105.4% | 77.9%+109.2% | 80.6%+113% | 83.3%+116.8% | 86%+120.6% | 88.7%+124.4% | 91.4%+128.2% | 94.1%+132% | 96.8%+135.8% | 99.5%+139.6% |
Basic Attack: Blazing Wind -Misty Slash
| Lv | Lv. 1 | Lv. 2 | Lv. 3 | Lv. 4 | Lv. 5 | Lv. 6 | Lv. 7 | Lv. 8 | Lv. 9 | Lv. 10 | Lv. 11 | Lv. 12 | Lv. 13 | Lv. 14 | Lv. 15 | Lv. 16 |
|---|---|---|---|---|---|---|---|---|---|---|---|---|---|---|---|---|
| 1st-Hit DMG Multiplier | 53.1% | 58% | 62.9% | 67.8% | 72.7% | 77.6% | 82.5% | 87.4% | 92.3% | 97% | 102.1% | 107% | 111.9% | 116.8% | 121.7% | 126.6% |
| 2nd-Hit DMG Multiplier | 111.2% | 121.4% | 131.6% | 141.8% | 152% | 162.2% | 172.4% | 182.6% | 192.8% | 203% | 213.2% | 223.4% | 233.6% | 243.8% | 254% | 264.2% |
| 3rd-Hit DMG Multiplier | 154.5% | 168.6% | 182.7% | 196.8% | 210.9% | 225% | 239.1% | 253.2% | 267.3% | 281.4% | 295.5% | 309.6% | 323.7% | 337.8% | 351.9% | 366% |
| 4th-Hit DMG Multiplier | 237.8% | 259.5% | 281.2% | 302.9% | 324.6% | 346.3% | 368% | 389.7% | 411.4% | 433.1% | 454.8% | 476.5% | 498.2% | 519.9% | 541.6% | 563.3% |
| 1st-Hit Daze Multiplier | 38.8% | 40.6% | 42.4% | 44.2% | 46% | 47.8% | 49.6% | 51.4% | 53.2% | 55% | 56.8% | 58.6% | 60.4% | 62.2% | 64% | 65.8% |
| 2nd-Hit Daze Multiplier | 87.4% | 91.4% | 95.4% | 99.4% | 103.4% | 107.4% | 111.4% | 115.4% | 119.4% | 123.4% | 127.4% | 131.4% | 135.4% | 139.4% | 143.4% | 147.4% |
| 3rd-Hit Daze Multiplier | 141.6% | 148.1% | 154.6% | 161.1% | 167.6% | 174.1% | 180.6% | 187.1% | 193.6% | 200% | 206.6% | 213.1% | 219.6% | 226.1% | 232.6% | 239.1% |
| 4th-Hit Daze Multiplier | 217.5% | 227.4% | 237.3% | 247.2% | 257.1% | 267% | 276.9% | 286.8% | 296.7% | 306.6% | 316.5% | 326.4% | 336.3% | 346.2% | 356.1% | 366% |
Dodge2
Dash Attack: Radiant Blade - Zanshin
| Lv | Lv. 1 | Lv. 2 | Lv. 3 | Lv. 4 | Lv. 5 | Lv. 6 | Lv. 7 | Lv. 8 | Lv. 9 | Lv. 10 | Lv. 11 | Lv. 12 | Lv. 13 | Lv. 14 | Lv. 15 | Lv. 16 |
|---|---|---|---|---|---|---|---|---|---|---|---|---|---|---|---|---|
| Dmg Multiplier | 58.7% | 64.1% | 69.5% | 74.9% | 80.3% | 85.7% | 91.1% | 96.5% | 101.9% | 107.3% | 112.7% | 118.1% | 123.5% | 128.9% | 134.3% | 139.7% |
| Daze Multiplier | 36.7% | 38.4% | 40.1% | 41.8% | 43.5% | 45.2% | 46.9% | 48.6% | 50.3% | 52% | 53.7% | 55.4% | 57.1% | 58.8% | 60.5% | 62.2% |
Dodge Counter: Radiant Blade - Battle Sweep
| Lv | Lv. 1 | Lv. 2 | Lv. 3 | Lv. 4 | Lv. 5 | Lv. 6 | Lv. 7 | Lv. 8 | Lv. 9 | Lv. 10 | Lv. 11 | Lv. 12 | Lv. 13 | Lv. 14 | Lv. 15 | Lv. 16 |
|---|---|---|---|---|---|---|---|---|---|---|---|---|---|---|---|---|
| Dmg Multiplier | 198% | 216% | 234% | 252% | 270% | 288% | 306% | 324% | 342% | 360% | 378% | 396% | 414% | 432% | 450% | 468% |
| Daze Multiplier | 213.4% | 223.1% | 232.8% | 242.5% | 252.2% | 261.9% | 271.6% | 281.3% | 291% | 300.7% | 310.4% | 320.1% | 329.8% | 339.5% | 349.2% | 358.9% |
Assist Attack3
Quick Assist: Lone Shadow - Regroup
| Lv | Lv. 1 | Lv. 2 | Lv. 3 | Lv. 4 | Lv. 5 | Lv. 6 | Lv. 7 | Lv. 8 | Lv. 9 | Lv. 10 | Lv. 11 | Lv. 12 | Lv. 13 | Lv. 14 | Lv. 15 | Lv. 16 |
|---|---|---|---|---|---|---|---|---|---|---|---|---|---|---|---|---|
| DMG Multiplier | 90.7% | 99% | 107.3% | 115.6% | 123.9% | 132.2% | 140.5% | 148.8% | 157.1% | 165% | 173.7% | 182% | 190.3% | 198.6% | 206.9% | 215.2% |
| Daze Multiplier | 56.7% | 59.3% | 61.9% | 64.5% | 67.1% | 69.7% | 72.3% | 74.9% | 77.5% | 80.1% | 82.7% | 85.3% | 87.9% | 90.5% | 93.1% | 95.7% |
Defensive Assist: Lone Shadow - Mountain Stand
| Lv | Lv. 1 | Lv. 2 | Lv. 3 | Lv. 4 | Lv. 5 | Lv. 6 | Lv. 7 | Lv. 8 | Lv. 9 | Lv. 10 | Lv. 11 | Lv. 12 | Lv. 13 | Lv. 14 | Lv. 15 | Lv. 16 |
|---|---|---|---|---|---|---|---|---|---|---|---|---|---|---|---|---|
| DMG Multiplier | 40% | 43.7% | 47.4% | 51% | 54.8% | 58.5% | 62.2% | 65.9% | 69.9% | 73.3% | 77% | 80.7% | 84.4% | 88.1% | 91.8% | 95.5% |
| Light Defensive Daze Multiplier | 246.7% | 258% | 269.3% | 280.6% | 291.9% | 303.2% | 314.5% | 325.8% | 337.1% | 348.4% | 359.7% | 371% | 382.3% | 393.6% | 404.8% | 416.2% |
| Heavy Defensive Daze Multiplier | 311.7% | 325.9% | 340.1% | 354.3% | 368.5% | 382.7% | 396.9% | 411.1% | 425.3% | 439.5% | 453.7% | 467.9% | 482.1% | 496.3% | 510.5% | 524.7% |
| Chain Defensive Daze Multiplier | 151.7% | 158.6% | 165.5% | 172.4% | 179.3% | 186.2% | 193.1% | 200% | 206.9% | 213.8% | 220.7% | 227.6% | 234.5% | 241.4% | 248.3% | 255.2% |
Assist Follow-Up: Lone Shadow - Breaking Fang
| Lv | Lv. 1 | Lv. 2 | Lv. 3 | Lv. 4 | Lv. 5 | Lv. 6 | Lv. 7 | Lv. 8 | Lv. 9 | Lv. 10 | Lv. 11 | Lv. 12 | Lv. 13 | Lv. 14 | Lv. 15 | Lv. 16 |
|---|---|---|---|---|---|---|---|---|---|---|---|---|---|---|---|---|
| DMG Multiplier | 166.7% | 181.9% | 197.1% | 212.3% | 227.5% | 242.7% | 257.9% | 273.1% | 288.3% | 303.5% | 318.7% | 333.9% | 349.1% | 364.3% | 379.5% | 394.7% |
| Daze Multiplier | 270.9% | 283.3% | 295.7% | 308.1% | 320.5% | 332.9% | 345.3% | 357.7% | 370.1% | 382.5% | 394.9% | 407.3% | 419.7% | 432.1% | 444.5% | 456.9% |
| Combo Maximum DMG Multiplier | 166.7%+403.4% | 181.9%+440.1% | 197.1%+476.8% | 212.3%+513.5% | 227.5%+550.2% | 242.7%+586.9% | 257.9%+623.6% | 273.1%+660.3% | 288.3%+697% | 303.5%+733.7% | 318.7%+770.4% | 333.9%+807.1% | 349.1%+843.8% | 364.3%+880.5% | 379.5%+917.2% | 394.7%+953.9% |
| Combo Maximum Daze Multiplier | 270.9%+210% | 283.3%+219.6% | 295.7%+229.2% | 308.1%+238.8% | 320.5%+248.4% | 332.9%+258% | 345.3%+267.6% | 357.7%+277.2% | 370.1%+286.8% | 382.5%+296.4% | 394.9%+306% | 407.3%+315.6% | 419.7%+325.2% | 432.1%+334.8% | 444.5%+344.4% | 456.9%+354% |
Special Attack2
Special attack: Return to ashes
| Lv | Lv. 1 | Lv. 2 | Lv. 3 | Lv. 4 | Lv. 5 | Lv. 6 | Lv. 7 | Lv. 8 | Lv. 9 | Lv. 10 | Lv. 11 | Lv. 12 | Lv. 13 | Lv. 14 | Lv. 15 | Lv. 16 |
|---|---|---|---|---|---|---|---|---|---|---|---|---|---|---|---|---|
| DMG-Multiplier | 50.7% | 55.4% | 60.1% | 64.8% | 69.5% | 74.2% | 78.9% | 83.6% | 88.3% | 93% | 97.7% | 102.4% | 107.1% | 111.8% | 116.5% | 121.2% |
| Daze-Multiplier | 47.6% | 49.8% | 52% | 54.2% | 56.4% | 58.6% | 60.8% | 63% | 65.2% | 67.4% | 69.6% | 71.8% | 74% | 76.2% | 78.4% | 80.6% |
| DMG-Multiplier (Charged or Successful Block) | 130.7% | 142.6% | 154.5% | 166.4% | 178.3% | 190.2% | 202% | 214% | 225.9% | 237.8% | 249.7% | 261.6% | 273.5% | 285.4% | 297.3% | 309.2% |
| Daze-Multiplier (Charged or Successful Block) | 122.6% | 128.2% | 133.8% | 139.4% | 145% | 150.6% | 156.2% | 161.8% | 167.4% | 173% | 178.6% | 184.2% | 189.8% | 195.4% | 201% | 206.6% |
Special attack: Return to ashes - Fall
| Lv | Lv. 1 | Lv. 2 | Lv. 3 | Lv. 4 | Lv. 5 | Lv. 6 | Lv. 7 | Lv. 8 | Lv. 9 | Lv. 10 | Lv. 11 | Lv. 12 | Lv. 13 | Lv. 14 | Lv. 15 | Lv. 16 |
|---|---|---|---|---|---|---|---|---|---|---|---|---|---|---|---|---|
| DMG-Multiplier | 652.6% | 712% | 771.4% | 831% | 890.2% | 949.6% | 1009% | 1068.4% | 1127.8% | 1187.2% | 1246.6% | 1306% | 1365.4% | 1424.8% | 1484.2% | 1543.6% |
| Daze-Multiplier | 662.2% | 692.3% | 722.4% | 752.5% | 782.6% | 812.7% | 842.8% | 872.9% | 903% | 933.1% | 963.2% | 993.3% | 1023.4% | 1053.5% | 1083.6% | 1113.7% |
| Adrenaline Cost | 80 | 80 | 80 | 80 | 80 | 80 | 80 | 80 | 80 | 80 | 80 | 80 | 80 | 80 | 80 | 80 |
Ultimate2
Chain Attack: Blazing Eruption
| Lv | Lv. 1 | Lv. 2 | Lv. 3 | Lv. 4 | Lv. 5 | Lv. 6 | Lv. 7 | Lv. 8 | Lv. 9 | Lv. 10 | Lv. 11 | Lv. 12 | Lv. 13 | Lv. 14 | Lv. 15 | Lv. 16 |
|---|---|---|---|---|---|---|---|---|---|---|---|---|---|---|---|---|
| DMG Multiplier | 483.3% | 527.3% | 571.3% | 615.3% | 659.3% | 703.3% | 747.3% | 791.3% | 835.3% | 879.3% | 923.3% | 967.3% | 1011.3% | 1055.3% | 1099.3% | 1143.3% |
| Daze Multiplier | 205.1% | 214.5% | 223.9% | 233.3% | 242.7% | 252.1% | 261.5% | 270.9% | 280.3% | 289.7% | 299.1% | 308.5% | 317.9% | 327.3% | 336.7% | 346.1% |
Ultimate: Musou Aratama
| Lv | Lv. 1 | Lv. 2 | Lv. 3 | Lv. 4 | Lv. 5 | Lv. 6 | Lv. 7 | Lv. 8 | Lv. 9 | Lv. 10 | Lv. 11 | Lv. 12 | Lv. 13 | Lv. 14 | Lv. 15 | Lv. 16 |
|---|---|---|---|---|---|---|---|---|---|---|---|---|---|---|---|---|
| DMG Multiplier | 1562.3% | 1704.4% | 1846.5% | 1988.6% | 2130.7% | 2272.8% | 2414.9% | 2557% | 2699.1% | 2841.2% | 2983.3% | 3125.4% | 3267.5% | 3409.6% | 3551.7% | 3693.8% |
| Daze Multiplier | 348.4% | 364.3% | 380.2% | 396.1% | 412% | 427.9% | 443.8% | 459.7% | 475.6% | 491.5% | 507.4% | 523.3% | 539.2% | 555.1% | 571% | 586.9% |
Core Skill Enhancement1
Core Passive: Mighty Molten Edge
| Lv | Lv.1 | Lv.2 (A) | Lv.3 (B) | Lv.4 (C) | Lv.5 (D) | Lv.6 (E) | Lv.7 (F) |
|---|---|---|---|---|---|---|---|
| CRIT DMG Increase (on HP Consumption / Consecutive Slashes) | 25% | 29.2% | 33.3% | 37.5% | 41.7% | 45.8% | 50% |
| Fire DMG Increase (in Molten Edge) | 10% | 11.7% | 13.3% | 15% | 16.7% | 18.3% | 20% |
| Percent HP increases | - | +6% | - | +6% | - | +6% | - |
| Base ATK increases | - | - | +25 | - | +25 | - | +25 |
Mindscapes — how far is worth it?
Whenever Manato loses HP, the amount of HP lost is tallied. Each 1% of his Max HP tallied increases the Fire DMG of Assist Follow-Ups and Basic Attacks by 0.4%, up to a max of 20% Unfortunate children are all alike. The once-kind voices, the warm lights, the joyful promises... all vanished without a farewell. Being formless, even the sharpest fangs could not hold them, nor the sharpest claws grasp them. "I can eat just about anything, and I'm not too afraid of the cold - If there's a 'secret to surviving,' maybe it's just that."
While in the Molten Edge state, Manato ignores 8% of a target's Fire RES. After being hit by an enemy while using Special Attack: Return to Ashes or Special Attack: Return to Ashes - Sacrifice, press to trigger an Assist Follow-Up. Perhaps this is what a peaceful family is - Manato, A-Cing, and A-Yuet all think of themselves as the fortunate "child picked up and brought home." If there's anything left worth arguing about, it's probably just "who should eat the last bit of vegetables.' "It doesn't taste good? I'Il ask at Yum Cha sin if maybe I made a mistake somewhere...: ...Trade secret? But last time...I just stood there and the chef told me everything."
Basic Attack, Dodge, Assist, Special Attack, and Chain Attack Lv. +2 Getting established on a forum starts with a memorable nickname - everyone thinks they're bad at it, but for a dog Thiren who sometimes has to stay back for make-up exams in literature, it's especially tough. "...You already know it, don't you? It's, uh... ahem, SailumeSadLoneGhost" -You heard me!" "Damn it. One of these days, I'm changing it to 'Mention My Old Name Again and I'Il See You in the Hollow.'"
Max HP increases by 8%. During Special Attack: Return to Ashes and Special Attack: Return to Ashes - Sacrifice, when Manato takes fatal DMG, he remains in battle, with his HP not dropping below 1. This effect can trigger once every 10s. Maybe every teenager imagines themselves as a lone wolf with cold eyes... but Manato had an edge in that regard. If not for the drowned ideals, he could have gone on pretending nothing had ever happened, just like everyone else. "Like I said, that was just how I thought when I was eight-" "So this is what a 'friend' is... You didn't treat me like I was fragile, but sometimes you don't treat me like a person either."
Basic Attack, Dodge, Assist, Special Attack, and Chain Attack Lv.+2 In truth, despite the barrier his appearance put up, Manato was popular with everyone. Some made friends with him, some looked to him for protection, and some... tried to rope him into advertising. "Sorry, I'm probably not the right choice to promote your shop. "As for 'bench pressing,' I've never done it - unless you're referring to... being pinned by Ethereals and pushing up my greatsword to keep their claws off me?"
When Special Attack: Return to Ashes hits a Stunned enemy, Manato gains 75 Blazing Heart and 4 stacks of Remnant Flame, and pressing will launch an Assist Follow-Up. This Remnant Flame effect can trigger once every 20s. When his Assist Follow-Up hits an enemy, Manato's Fire DMG increases by 3% for 8s, stacking up to 5 times. Repeated triggers reset the duration. Manato set aside the dream of lone courage and embraced the friends he held dear Of course, these friends could still cause him trouble, like at Waifei Peninsula's specialty soup shop. "When I said I'd cover the rear, I didn't mean while drinking coconut chicken soup." "Then how come I'm the one on the front lines when it's scorpion soup?" ..But he charged ahead anyway.
Stats & Materials by Ascension Milestone
| Lv. | Before | After | Materials for this milestone |
|---|---|---|---|
| Lv.1 | HP: - ATK: - DEF: - Sheer force: - [Recommended] HP, CRIT Rate & CRIT DMG, Sheer Force: - |
HP: 621 ATK: 109 DEF: 36 Sheer force: 94 [Recommended] HP, CRIT Rate & CRIT DMG, Sheer Force: - |
|
| Lv.10 | HP: 1,379 ATK: 166 DEF: 79 Sheer force: 186 [Recommended] HP, CRIT Rate & CRIT DMG, Sheer Force: - |
HP: 1,805 ATK: 205 DEF: 103 Sheer force: 241 [Recommended] HP, CRIT Rate & CRIT DMG, Sheer Force: - |
Basic Rupture Certification Seal ×4
Denny ×24,000
|
| Lv.20 | HP: 2,648 ATK: 269 DEF: 151 Sheer force: 344 [Recommended] HP, CRIT Rate & CRIT DMG, Sheer Force: - |
HP: 3,074 ATK: 308 DEF: 176 Sheer force: 399 [Recommended] HP, CRIT Rate & CRIT DMG, Sheer Force: - |
Advanced Rupture Certification Seal ×12
Denny ×56,000
|
| Lv.30 | HP: 3,917 ATK: 372 DEF: 225 Sheer force: 502 [Recommended] HP, CRIT Rate & CRIT DMG, Sheer Force: - |
HP: 4,344 ATK: 410 DEF: 249 Sheer force: 557 [Recommended] HP, CRIT Rate & CRIT DMG, Sheer Force: - |
Advanced Rupture Certification Seal ×20
Denny ×120,000
|
| Lv.40 | HP: 5,187 ATK: 474 DEF: 297 Sheer force: 660 [Recommended] HP, CRIT Rate & CRIT DMG, Sheer Force: - |
HP: 5,613 ATK: 513 DEF: 322 Sheer force: 714 [Recommended] HP, CRIT Rate & CRIT DMG, Sheer Force: - |
Arbiter Certification Seal ×10
Denny ×200,000
|
| Lv.50 | HP: 6,455 ATK: 577 DEF: 371 Sheer force: 818 [Recommended] HP, CRIT Rate & CRIT DMG, Sheer Force: - |
HP: 6,881 ATK: 616 DEF: 395 Sheer force: 872 [Recommended] HP, CRIT Rate & CRIT DMG, Sheer Force: - |
Arbiter Certification Seal ×20
Denny ×400,000
|
| Lv.60 | HP: - ATK: - DEF: - Sheer force: - [Recommended] HP, CRIT Rate & CRIT DMG, Sheer Force: - |
HP: 7,724 ATK: 680 DEF: 443 Sheer force: 976 [Recommended] HP, CRIT Rate & CRIT DMG, Sheer Force: |




Total materials across the whole ascension path
Materials Needed to Lv60







Total Denny for the character alone (ascension + basic skills + core skill A→F): about 1,706,000 Denny — W-Engine and Drive Discs not included.
Official Name in Other Languages
Voice Actors & Character Info
Background & Lore
More unlocks as Trust with this character increases in-game.
How to read this build page
Every Agent build page has 4 parts: a stat table by level, W-Engine/Drive Disc suggestions, a Mindscape roadmap, and recommended teams. Read them in that order — stats tell you "what you need", gear tells you "where to get it", Mindscape tells you "is it worth pulling", teams tell you "who to pair with". The section below explains how to read each part, and it applies the same way to every character on the site.
How to read the stat table and level
The stat table shows values at the ascension breakpoints (usually the final one, e.g. Lv60) — these are BASE stats with no gear added, useful for comparing Agents or checking whether you've ascended far enough. CRIT Rate and CRIT DMG are shown separately because they set the damage ceiling once Drive Disc substats stack on top. If your real stats are lower than the table, you likely haven't fully ascended or leveled yet — it's not a build mistake.
Why the W-Engine and Drive Disc picks make sense
Most Agents have a "signature" W-Engine designed for their exact role, plus a few cheaper standard-banner substitutes. Missing the signature isn't a dead end — most Agents keep most of their power with a well-matched substitute, just short by some amount of total damage.
- Drive Disc sets (2pc + 4pc) are picked for the set effect that fits that Agent's playstyle (mono-element, Anomaly, stun, and so on).
- Substats follow a priority that changes by role: Attack-type Agents usually chase CRIT Rate/CRIT DMG before ATK%; Anomaly-type Agents add Anomaly Proficiency to that mix; Stun/Support roles often value survivability or energy stats over pure CRIT.
These weights differ per character — follow the exact substat priority table above rather than applying one formula to every role.
Is Mindscape worth chasing
General rule: M0 (no duplicates) already clears the game's hardest content, even for S-rank Agents. Mindscape is a duplicate-fueled upgrade system, and each level costs more resources for a smaller power gain. For most Agents, the best value stop is usually M1–M2 (where some key effects unlock), while M6 is almost always for players chasing the absolute ceiling, not a requirement. Check the Mindscape section in the table above for that specific Agent's numbers.
Skill priority by role
There's no single order for every Agent, but the general pattern by role is:
- Attack: level the main damage skill first (Basic or Special Attack depending on kit), Dash/Dodge last.
- Stun: prioritize whichever skill builds Daze/Stun fastest, since the stun window is where the whole team dumps damage.
- Support: prioritize buff or energy-generating skills over personal damage — this role's value comes from lifting the whole team.
- Anomaly: prioritize the skill that stacks anomaly buildup, since most of the damage comes from the triggered effect, not the direct hit.
Always level the Core Skill steadily alongside the rest — it's a baseline stat that affects the whole rotation, not just one move.
Where to dig deeper
This section only teaches you how to read the page — for deeper comparisons, use the dedicated tools:
- Tier list to see where this Agent stands against the full roster.
- Teams for full in-game comps, including Bangboo and rotation order.
- Disc score to check how your current gear scores against the benchmark.
Agents of the same attribute




Manato FAQ
What is the best W-Engine for Manato?
Manato performs best with Grill O'Wisp. See alternatives and required stats in the Gear section above.
Is Manato worth pulling?
Worth leveling for anyone wanting a fairly strong A-rank Fire Rupture DPS, especially alongside Lucia. He carries good baseline damage from a proper team, but leans heavily on HP/Stun support; solo he falls short of the S-rank Rupture units.
What is the best team for Manato?
Manato works best in the Premium Rupture team. Full members and rotation are in the Teams section.
Who voices Manato in Zenless Zone Zero?
Manato (faction Spook Shack, birthday Jan 5th) is voiced according to the official credits published on the HoYoverse Wiki. See the full English/Japanese/Korean/Chinese voice actor list in the "Voice Actors & Character Info" block above — this data is pulled directly from the official wiki, not guessed.
Which Mindscape of Manato is worth investing in?
Manato has 6 Mindscape tiers (M1-M6), each unlocking its own effect detailed in the "Mindscape" block above (official wording). Mindscapes cost Mindscape Cinema currency farmed from limited banners, so weigh it against your budget — F2P players usually stop at M0-M1 and prioritize W-Engine and Drive Discs before pushing Mindscape higher.
How much Denny and how many materials to level Manato to Lv60?
Leveling Manato to max Lv60 (ascension + basic skills to 12 + core skill A→F) costs roughly 1,706,000 Denny, plus role-specific ascension materials, attribute-specific skill chips, high-dimensional data, and weekly boss drops — see the full list with exact quantities in the "Materials Needed" block above, sourced from the game's official leveling tables.
 Understand the mechanics behind this
 Drive Disc Scorer→