
Genshin Impact Team Building Guide: Framework, Elemental Resonance & Best Comps (6.7)




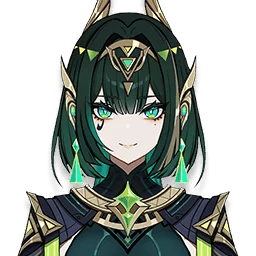

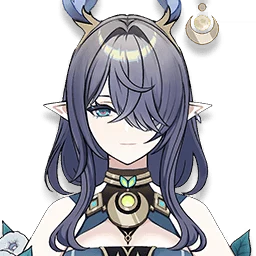





 Xiangling
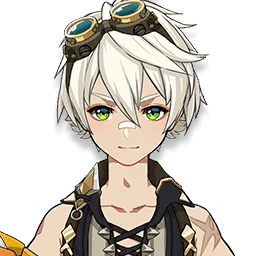 Bennett
 Xingqiu
 Mavuika
The core framework: 4 characters, 3 roles
Genshin Impact caps every team at 4 characters — 1 fights on-field at a time while the other 3 wait off-field to trigger skills and passives. That number has never changed across any patch.
- Main DPS: carries most of the damage, usually stays on-field the longest to auto-attack and spam their skill.
- Sub-DPS: jumps in for one skill or burst then swaps out, applying an element that reacts with the Main DPS's hits for bonus damage — usually 1-2 characters.
- Support: often split into two sub-jobs that many tier lists list as their own role: Buffer (raises the team's ATK/DMG%, e.g. Bennett or Furina) and Sustain/Heal (shields or heals to keep the team alive, e.g. Zhongli, Bennett, Kokomi).
 Furina
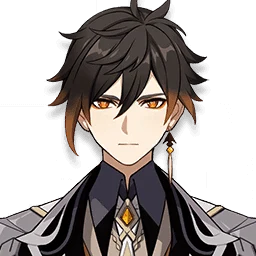 Zhongli
Bottom line: the formula never really changes — 1 Main DPS + 1-2 Sub-DPS + 1-2 Support. Skip one of these three blocks and the team loses either damage, survivability, or reaction uptime.
The Elemental Resonance chart — check this before picking characters
Before locking in characters, look at Elemental Resonance: just having 2 characters of the same element in the party auto-activates a passive team-wide bonus, no input needed:
- Pyro (Fervent Flames): +25% ATK for the whole team — the single strongest verified resonance, the backbone of most Melt/Vaporize damage-race comps.
- Cryo (Shattering Ice): +15% CRIT Rate against Frozen or Cryo-afflicted enemies — a direct crit boost for Freeze comps.
- Geo (Enduring Rock): +15% shield strength, +15% DMG dealt while shielded, and -20% enemy Geo RES — a shield+damage package built for Mono-Geo.
- Hydro (Soothing Water): +25% Max HP — confirmed by only one aggregate source so far, while some older write-ups instead describe it as a healing-effectiveness bonus, so we're flagging it as not cross-verified.
- Dendro (Sprawling Greenery): a base +50 Elemental Mastery, rising to +30 after triggering Burning/Quicken/Bloom or +20 after Aggravate/Spread/Hyperbloom/Burgeon — the conditions are messy enough that we're also flagging this one as not fully verified.
- Anemo (Impetuous Winds): -15% stamina consumption, +10% movement speed, -5% skill cooldown — more useful for exploring than for raw combat.
- Electro: no percentage in our data has cleared 2-source verification yet — functionally it speeds up particle generation for the team; check the Damage Calculator once a hard number lands.
Takeaway: Pyro and Cryo are the two most solidly verified resonances — build around either one first if you're new to team building.
Which reaction gives which multiplier — and why the order matters
Picking same-side elements isn't enough — the order you apply them in flips the multiplier:
- Vaporize: Pyro hitting existing Hydro = 1.5x; Hydro hitting existing Pyro = 2x — meaning a Hydro Sub-DPS applying water first, then a Pyro Main DPS attacking, is the stronger order.
- Melt: Pyro hitting existing Cryo = 2x; Cryo hitting existing Pyro = 1.5x — the opposite order from Vaporize, which is why Melt teams usually apply Cryo first and let a Pyro carry like Mavuika land the 2x hit.
- The rest of the classic Transformative reactions (Overloaded, Superconduct, Electro-Charged, Swirl, Crystallize, Frozen) don't multiply the triggering hit — they deal or enable their own separate damage/effect scaled by character level and Elemental Mastery instead.
Full multiplier chart and how EM changes the math: see our Elemental Reactions page; to test it against your actual stats, plug them into the Damage Calculator.
Teams by reaction archetype — and what's winning in 6.7
Instead of memorizing individual comps, remember every team revolves around one reaction archetype: Vaporize, Melt, Hyperbloom, Freeze, Aggravate/Spread, Overload, Superconduct, Burgeon, Bloom, Swirl, Crystallize, Burning, Quicken, and the newer Lunar trio — Lunar-Bloom, Lunar-Charged, Lunar-Crystallize.
Patch 6.7 (Luna VIII) leans heavily Lunar: Lunar-Bloom (built around Nefer/Lauma), Lunar-Charged (Flins/Ineffa) and Lunar-Crystallize (Zibai/Linnea) all took off once Columbina launched in 6.5 — she's the strongest Lunar-reaction support, slotting into nearly any Lunar team and instantly making the other two flex slots hit harder. Mavuika Melt sits right alongside at the top.
 Nefer
Nefer Lauma
Lauma Flins
Flins Ineffa
 Zibai
Zibai Linnea
 Columbina
Skirk Freeze is still holding a top spot even outside Lunar — mainly because Furina doesn't fit the Lunar mechanic, so she's stayed put as Freeze's anchor buffer, which has kept the archetype from getting fully swallowed by Lunar.
 Skirk
SkirkWant the full list of specific comps per archetype (232 checked comps)? Head to our Meta Teams page.
Teams by school: Mono-element, National, Double-Hydro
- Mono-Pyro / Mono-Geo / Mono-Hydro / Mono-Anemo: stack 3-4 characters of one element to lock in that element's resonance (see block 2) and dodge messy reaction interactions — simple to pilot but weak against enemies with a matching elemental shield.
- National: the most famous multi-element school, covered in detail in the next block.
- Double-Hydro: 2 Hydro characters (usually 1 on-field, 1 off-field) keep enemies constantly Wet so Pyro/Electro/Cryo Sub-DPS trigger reactions reliably every rotation instead of the effect wearing off mid-combo.
Which school fits you depends on which characters you actually own rather than a fixed formula — that's exactly where the Flex Slot idea in block 7 comes in.
The National team: still the go-to F2P formula
Genshin's most iconic free comp, and it still works fine going into 6.7: Xiangling + Bennett + Xingqiu form a fixed 3-person core, chaining Vaporize/Melt off Xiangling's AoE Pyro burst, Bennett's ATK buff, and Xingqiu's constant Hydro application.
The 4th slot is a genuine flex with no single right answer: Chongyun (extra Melt damage, physical crit) or Sucrose (grouping enemies plus an EM buff for the whole team) are the two most common picks, and some players swap in another Anemo or Cryo unit depending on their roster.
Because it's built entirely from 4-star characters, this team costs close to zero gacha investment — just level and equip what you already have — which is exactly why it remains the 'safety net' comp for new players or anyone who just lost a 50/50 (if you've felt that specific ache, you know how much National is worth in that moment).
Newer high-ceiling comps like Furina-Raiden ('Furyzhen') are pulling ahead of National for a top-end Raiden Shogun build, but as a pure F2P framework, National hasn't gone stale.
The full role chart, plus the Flex Slot philosophy
Beyond the 3 base roles from block 1, tier lists often split things further to describe exactly what a character does — but it all maps back to the same 3-4 groups:
- On-Field DPS = Main DPS (stays on-field the longest)
- Enabler = Sub-DPS focused purely on applying an element then swapping out, not on raw damage
- Shield/Buff = the buffing branch of Support (Zhongli, Bennett, Furina)
- Sustain-Heal = the survivability branch of Support (Kokomi, Barbara, Qiqi)
The Flex Slot is the core philosophy here: instead of forcing yourself to pull for one exact character from a sample comp, identify what role that character fills and swap in anyone you own that fills the same role, as long as the elemental pairing stays intact. Missing Zhongli (Geo shield)? Layla or Xinyan still cover the shield role, just with lower damage output.
Splitting by rarity, and teams built for exploration
5-star teams generally hit the highest damage and fastest clears (great for Spiral Abyss or speed-running Imaginarium Theater), while 4-star teams (National, budget Hyperbloom) save on resin/materials — same content, two different investment tracks, and you don't need every 5-star to finish the game.
For open-world exploration (as opposed to boss fights), the priorities flip entirely: bring an Anemo character to gather loose materials/enemies, a Geo character to break rocks and open chests, and a character whose skill interacts with regional mechanisms — Mondstadt (Anemo opens wind gates), Liyue (Geo/Electro opens ancient mechanisms), Inazuma (Electro powers Thunder Sakura nodes), Sumeru (Dendro triggers seeds/forest traps), Fontaine (Hydro for underwater sections) — each region has its own 'key' element.
Rotation, Energy Recharge, and picking a team per activity
A team that looks great on paper still plays badly with the wrong rotation (skill order) — the rule repeated across most guides: apply the secondary element first, let the Main DPS hit last, and use your Elemental Burst the moment it's ready rather than saving it — an early burst comes back online sooner next rotation.
Energy Recharge decides whether you actually get that burst every single rotation — running low on ER is the single most common reason a 'textbook-correct' team plays clunky in a new player's hands, because off-field characters aren't generating enough particles.
The right team also shifts with what you're playing: Spiral Abyss rewards fast, high-burst-damage comps with minimal setup, Imaginarium Theater demands flexibility to switch elements around its random per-round buffs, while open-world exploration values utility over raw damage (see block 8).
Pre-launch checklist, plus a note on Constellations
- ✅ Do you have one clear Main DPS who'll stay on-field longest and carry most of the damage?
- ✅ Is there at least one dominant reaction (Vaporize/Melt/Hyperbloom/etc.) firing consistently every rotation?
- ✅ Do you have sustain (a shield or healer) so you're not getting one-shot in harder content?
- ✅ Is there at least one buffer or one grouper (an Anemo character bunching enemies and amplifying reactions) on the team?
- ✅ Is your Energy Recharge high enough to burst every rotation, or do you need a different weapon/artifact set to fix it?
On Constellations (C0 vs C6): most 'textbook' teams in guides assume every character is at C0 and still function fine — higher Constellations (C2, C6) usually just push that same team up a tier or unlock an extra secondary role (Bennett C6, for example, doubles as a Pyro Sub-DPS), rather than being a hard requirement for the comp to work at all.
Where to go next: per-character teams, rankings, and the team builder
This guide is the skeleton for building any team yourself — for ready-made answers, jump to our more specific pages:
- Meta Teams (232 comps): the full list broken down by reaction archetype, auto-updated every patch.
- Tier List: see how strong your Main DPS actually ranks as a carry.
- Character pages: look up 'best team for [character]' for anyone specific you own.
- Damage Calculator: plug in your real stats to compare two team setups instead of guessing from theory.
If you're wondering 'should I pull this new banner just to complete this team' — always check the Tier List first, rather than rolling because of one TikTok clip.
FAQ
How many characters does a standard Genshin team have, and what roles do they need?
What's the best F2P (free-to-play) team right now?
Which team is strongest right now in patch 6.7?
Which Elemental Resonance should I prioritize?
How do I pick a substitute when I don't own the exact character in a sample comp?
Do I need Constellations for a team to actually work?
Sources: hoyolab.com
 Characters→
 Tier List→