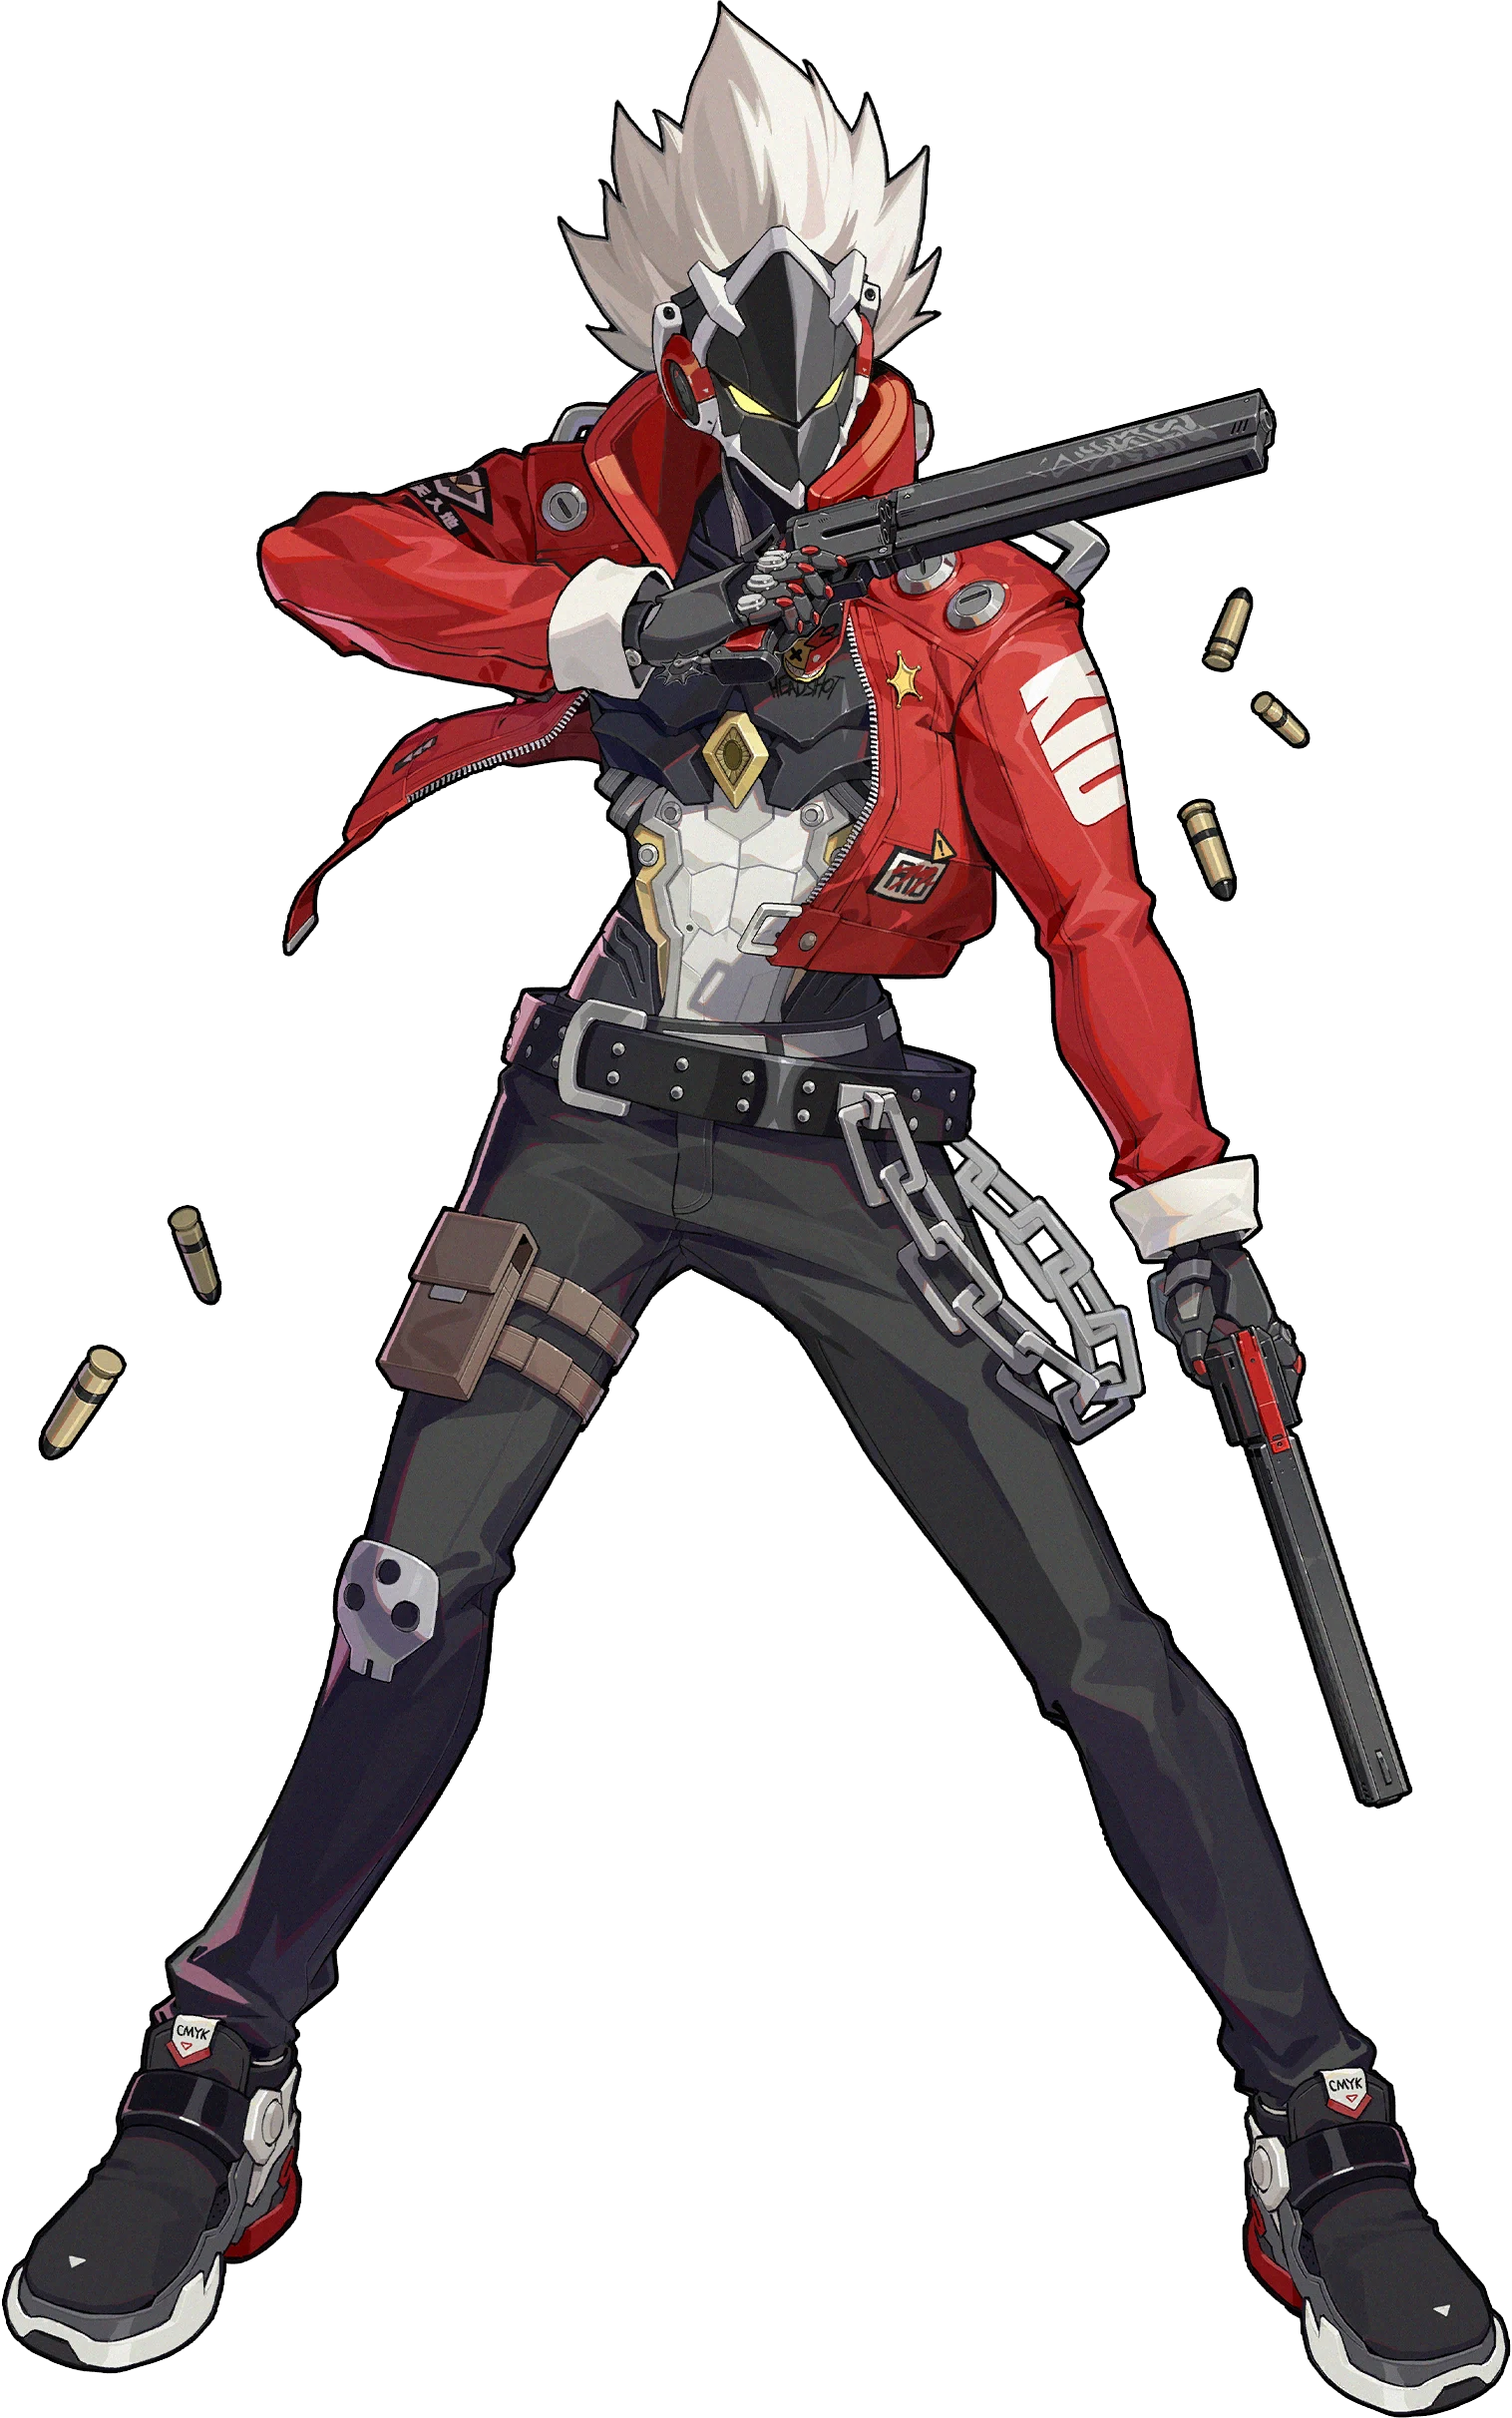
Billy
On-field ranged Physical DPS who stacks damage with Standing Shot and a 360° seated Dash Attack.
Tier B · Attack · Physical. BiS: The Brimstone. On-field ranged Physical DPS who stacks damage with Standing Shot and a 360° seated Dash Attack.



Base stats
Recommended build
Best W-Engines
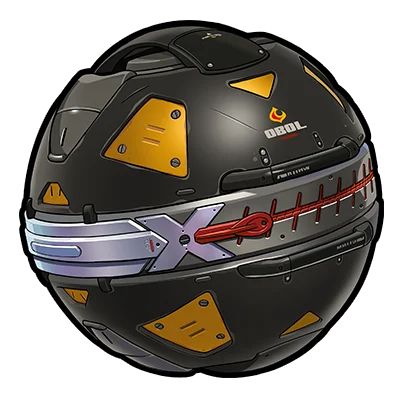
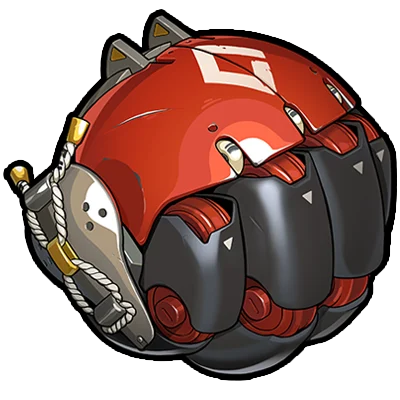

Recommendation order by current meta — the first is strongest, the rest are alternatives in decreasing priority. (Not a simulated DPS %.)
Recommended Drive Discs
4: CRIT Rate / CRIT DMG · 5: Physical DMG · 6: ATK%
CRIT Rate / CRIT DMG → ATK% → PEN → ATK
Skill priority: Basic Attack → EX Special → Assist → Dodge
Recommended teams




An early A-rank who's now clearly outdated: his damage falls far behind current S-rank DPS and he needs long on-field time to ramp. Only level him for fun or if you're short on Physical DPS; don't pour rare resources into him — treat him as a stopgap, not an endgame carry.
Stat targets
Note: Billy is an early A-rank, so there is no fresh official target table like the S-rank DPS have — this is QUALITATIVE guidance (confidence: general Physical Attacker framework, not a locked number). Disc main stats: [4] Crit Rate / Crit DMG · [5] Physical DMG · [6] ATK%. Substat priority: Crit Rate / Crit DMG (keep a balanced ~1:2 ratio) > ATK% > PEN Ratio > flat ATK. Practical attacker goal: high, stable combined Crit (lock in Crit Rate first, then stack Crit DMG) and plenty of ATK%; don't invest in PEN until Crit and ATK are already solid. Standard set: 4pc Woodpecker Electro + 2pc Fanged Metal.
Rotation & combos
1) SETUP: let a Stunner (Anby / Caesar / Qingyi) build Daze while Billy sits off-field charging Energy. 2) STUN WINDOW: swap Billy in, fire a Chain Attack then Ultimate (Starlight Knight Flying Kick) for the heaviest burst while the enemy is stunned. 3) LOOP: hold Basic (Standing Shot) for continuous ranged damage that ramps up; weave Dash Attack (360-degree spray) when surrounded. 4) With enough Energy, use EX Special for a strong damage beat; with M2, use Dodge Counter to both evade and punish. 5) When the window ends, swap out so the partner rebuilds Daze and Billy recharges, then repeat from step 2. Principle: keep Billy on field as long as it is safe — his damage needs time to ramp.
- Fully F2P: Billy is a free A-rank and the whole Cunning Hares team (Billy/Nicole/Anby) is free too — one of the best starter DPS cores, buildable very early.
- Ranged standing shooter: safe, hits targets from a distance, and steady single-target output — beginner-friendly for learning the Stun-then-burst rhythm.
- Very easy to M6: as an A-rank, his dupe shards pile up almost for free over time, so F2P can unlock his full power without spending — unlike an S-rank DPS.
- Simple loop: Chain into Ult during stun, then Standing Shot, with few complex combos — light execution, great for a relaxed playstyle.
- Clearly outdated: damage far below current S-rank DPS and can't handle high endgame floors — treat him as a filler DPS, don't sink rare resources into him.
- Needs long uninterrupted field time to ramp and is single-target focused — heavily punished by timed content and mobile or swarming enemies.
- Distance-based mechanics (M4) clash with his ranged identity, and Billy is fairly fragile if forced to keep moving to dodge.
Recommended Bangboo
Endgame mode fit
Shiyu Defense: usable on low/mid floors with a free Stun team (Anby/Nicole or Caesar/Nicole) — his single-target focus lets Billy dump all damage into a boss during the stun window. But on high floors his damage clearly falls short and his need to stand still makes the timer tight; not a reliable carry for top scores. (Confidence: low for endgame meta — Billy is an old agent with few updated guides.)
Deadly Assault: a poor fit — the mode enforces a time limit and often stacks multiple high-HP foes, hitting both of Billy's weaknesses (slow ramp, single-target). Scores tend to be low; only bring him when short on Physical DPS to plug an easy slot. (Confidence: low — inferred from kit + mode traits, no fresh meta guide for Billy.)
Skills
Basic Attack1
 Basic Attack
Basic Attack: Full Firepower
Press to activate: Unleashes a piercing attack, dealing Physical DMG. Repeatedly press or hold to enter Crouching Shot to extend the attack duration. Drag the during Crouching Shot to launch Rolling Shot and adjust the character's position, dealing Physical DMG. Stop pressing or holding during Crouching Shot to launch Finishing Shot at enemies in front, dealing Physical DMG.
Dodge3
 Dodge
DodgeDodge: Risky Business
Press to activate: A rapid dodge. Character is invulnerable while using this skill.
Dash Attack: Starlight Sanction
When dragging theduring a dodge, press : Launches a piercing attack at nearby enemies within a large area, dealing Physical DMG. When not dragging the during a dodge, press : Launches a piercing attack at enemies in a line, dealing Physical DMG.
Dodge Counter: Fair Fight
Press during a Perfect Dodge to activate: Pierces enemies in front, dealing Physical DMG. Character is invulnerable while using this skill.
Assist3
 Assist
Quick Assist: Power of Teamwork
When the on-field character is launched, press to activate: Launches a piercing attack at enemies in front, dealing Physical DMG. Character is invulnerable during the attack.
Evasive Assist: Flash Spin
When the character on field is about to be attacked, press to activate: Dodges the enemy's attack and activates Vital View. Character is invulnerable while using this skill.
Assist Follow-Up: Fatal Shot
Press after an Evasive Assist to activate: Pierces enemies in a large area in front, dealing Physical DMG. Character is invulnerable while using this skill.
Special Attack2
 Special Attack
Special Attack: Stand Still
Press to activate: Performs up to 3 piercing attacks in a line, dealing Physical DMG. Anti-Interrupt level is increased while using this skill.
EX Special Attack: Clearance Time
With enough Energy, press to activate: Launches a powerful piercing attack in a line, dealing massive Physical DMG. Character is invulnerable while using this skill.
Chain Attack2
 Chain Attack
Chain Attack: Starlight Mirage
When a Chain Attack is triggered, select the character to activate: Unleashes a powerful piercing attack at surrounding enemies in a large area, dealing massive Physical DMG. Character is invulnerable while using this skill.
Ultimate: Starlight, Shine Bright
When Decibel Rating is at Maximum, press to activate: Unleashes a powerful piercing attack at surrounding enemies in a large area, dealing massive Physical DMG. Character is invulnerable while using this skill.
Core Skill2
 Core Skill
Core Passive: Steady Shot
Billy's DMG increases by 25% when he enters Crouching Shot during his Basic Attack. The effect ends if he moves, returns to standby, or is knocked back or launched by an attack.*Stats shown are at Base level.
Additional Ability: Team Starlight
When another character in your squad shares the same Attribute or Faction: After Billy uses a Chain Attack, the DMG of his next Ultimate is increased by 50%, stacking up to 2 times. This effect resets whenever an Ultimate is activated.
Skill Coefficients by Level
Basic Attack1
Basic Attack: Full Firepower
| Lv | Lv.1 | Lv.2 | Lv.3 | Lv.4 | Lv.5 | Lv.6 | Lv.7 | Lv.8 | Lv.9 | Lv.10 | Lv.11 | Lv.12 | Lv.13 | Lv.14 | Lv.15 | Lv.16 |
|---|---|---|---|---|---|---|---|---|---|---|---|---|---|---|---|---|
| Standing Fire DMG Multiplier | 68.0% | 74.2% | 80.4% | 86.6% | 92.8% | 99.0% | 105.2% | 111.4% | 117.6% | 123.8% | 130.0% | 136.2% | 142.4% | 148.6% | 154.8% | 161.0% |
| Standing Bullet DMG Multiplier | 7.6% | 8.3% | 9.0% | 9.7% | 10.4% | 11.1% | 11.8% | 12.5% | 13.2% | 13.9% | 14.6% | 15.3% | 16.0% | 16.7% | 17.4% | 18.1% |
| Crouching Fire DMG Multiplier | 61.8% | 67.5% | 73.2% | 78.9% | 84.6% | 90.3% | 96.0% | 101.7% | 107.4% | 113.1% | 118.8% | 124.5% | 130.2% | 135.9% | 141.6% | 147.3% |
| Crouching Bullet DMG Multiplier | 12.7% | 13.9% | 15.1% | 16.3% | 17.5% | 18.7% | 19.9% | 21.1% | 22.3% | 23.5% | 24.7% | 25.9% | 27.1% | 28.3% | 29.5% | 30.7% |
| Rolling Shot DMG Multiplier | 61.8% | 67.5% | 73.2% | 78.9% | 84.6% | 90.3% | 96.0% | 101.7% | 107.4% | 113.1% | 118.8% | 124.5% | 130.2% | 135.9% | 141.6% | 147.3% |
| Finishing Shot DMG Multiplier | 49.5% | 54.0% | 58.5% | 63.0% | 67.5% | 72.0% | 76.5% | 81.0% | 85.5% | 90.0% | 94.5% | 99.0% | 103.5% | 108.0% | 112.5% | 117.0% |
| Standing Fire Daze Multiplier | 54.4% | 56.9% | 59.4% | 61.9% | 64.4% | 66.9% | 69.4% | 71.9% | 74.4% | 76.9% | 79.4% | 81.9% | 84.4% | 86.9% | 89.4% | 91.9% |
| Standing Bullet Daze Multiplier | 6.1% | 6.4% | 6.7% | 7.0% | 7.3% | 7.6% | 7.9% | 8.2% | 8.5% | 8.8% | 9.1% | 9.4% | 9.7% | 10.0% | 10.3% | 10.6% |
| Crouching Fire Daze Multiplier | 54.7% | 57.2% | 59.7% | 62.2% | 64.7% | 67.2% | 69.7% | 72.2% | 74.7% | 77.2% | 79.7% | 82.2% | 84.7% | 87.2% | 89.7% | 92.2% |
| Crouching Bullet Daze Multiplier | 8.9% | 9.4% | 9.9% | 10.4% | 10.9% | 11.4% | 11.9% | 12.4% | 12.9% | 13.4% | 13.9% | 14.4% | 14.9% | 15.4% | 15.9% | 16.4% |
| Rolling Shot Daze Multiplier | 54.7% | 57.2% | 59.7% | 62.2% | 64.7% | 67.2% | 69.7% | 72.2% | 74.7% | 77.2% | 79.7% | 82.2% | 84.7% | 87.2% | 89.7% | 92.2% |
| Finishing Shot Daze Multiplier | 55.2% | 57.8% | 60.4% | 63.0% | 65.6% | 68.2% | 70.8% | 73.4% | 76.0% | 78.6% | 81.2% | 83.8% | 86.4% | 89.0% | 91.6% | 94.2% |
Dodge2
Dash Attack: Starlight Sanction
| Lv | Lv.1 | Lv.2 | Lv.3 | Lv.4 | Lv.5 | Lv.6 | Lv.7 | Lv.8 | Lv.9 | Lv.10 | Lv.11 | Lv.12 | Lv.13 | Lv.14 | Lv.15 | Lv.16 |
|---|---|---|---|---|---|---|---|---|---|---|---|---|---|---|---|---|
| 360-degree Shot DMG Multiplier | 63.0% | 68.8% | 74.6% | 80.4% | 86.2% | 92.0% | 97.8% | 103.6% | 109.4% | 115.2% | 121.0% | 126.8% | 132.6% | 138.4% | 144.2% | 150.0% |
| Straight Shot DMG Multiplier | 39.0% | 42.6% | 46.2% | 49.8% | 53.4% | 57.0% | 60.6% | 64.2% | 67.8% | 71.4% | 75.0% | 78.6% | 82.2% | 85.8% | 89.4% | 93.0% |
| 360-degree Shot Daze Multiplier | 63.0% | 65.9% | 68.8% | 71.7% | 74.6% | 77.5% | 80.4% | 83.3% | 86.2% | 89.1% | 92.0% | 94.9% | 97.8% | 100.7% | 103.6% | 106.5% |
| Straight Shot Daze Multiplier | 19.5% | 20.4% | 21.3% | 22.2% | 23.1% | 24.0% | 24.9% | 25.8% | 26.7% | 27.6% | 28.5% | 29.4% | 30.3% | 31.2% | 32.1% | 33.0% |
Dodge Counter: Fair Fight
| Lv | Lv.1 | Lv.2 | Lv.3 | Lv.4 | Lv.5 | Lv.6 | Lv.7 | Lv.8 | Lv.9 | Lv.10 | Lv.11 | Lv.12 | Lv.13 | Lv.14 | Lv.15 | Lv.16 |
|---|---|---|---|---|---|---|---|---|---|---|---|---|---|---|---|---|
| DMG Multiplier | 221.4% | 241.6% | 261.8% | 282.0% | 302.2% | 322.4% | 342.6% | 362.8% | 383.0% | 403.2% | 423.4% | 443.6% | 463.8% | 484.0% | 504.2% | 524.4% |
| Daze Multiplier | 193.4% | 202.2% | 211.0% | 219.8% | 228.6% | 237.4% | 246.2% | 255.0% | 263.8% | 272.6% | 281.4% | 290.2% | 299.0% | 307.8% | 316.6% | 325.4% |
Assist2
Quick Assist: Power of Teamwork
| Lv | Lv.1 | Lv.2 | Lv.3 | Lv.4 | Lv.5 | Lv.6 | Lv.7 | Lv.8 | Lv.9 | Lv.10 | Lv.11 | Lv.12 | Lv.13 | Lv.14 | Lv.15 | Lv.16 |
|---|---|---|---|---|---|---|---|---|---|---|---|---|---|---|---|---|
| DMG Multiplier | 93.4% | 101.9% | 110.4% | 118.9% | 127.4% | 135.9% | 144.4% | 152.9% | 161.4% | 169.9% | 178.4% | 186.9% | 195.4% | 203.9% | 212.4% | 220.9% |
| Daze Multiplier | 93.4% | 97.7% | 102.0% | 106.3% | 110.6% | 114.9% | 119.2% | 123.5% | 127.8% | 132.1% | 136.4% | 140.7% | 145.0% | 149.3% | 153.6% | 157.9% |
Assist Follow-Up: Fatal Shot
| Lv | Lv.1 | Lv.2 | Lv.3 | Lv.4 | Lv.5 | Lv.6 | Lv.7 | Lv.8 | Lv.9 | Lv.10 | Lv.11 | Lv.12 | Lv.13 | Lv.14 | Lv.15 | Lv.16 |
|---|---|---|---|---|---|---|---|---|---|---|---|---|---|---|---|---|
| DMG Multiplier | 388.8% | 424.2% | 459.6% | 495.0% | 530.4% | 565.8% | 601.2% | 636.6% | 672.0% | 707.4% | 742.8% | 778.2% | 813.6% | 849.0% | 884.4% | 919.8% |
| Daze Multiplier | 341.2% | 356.8% | 372.4% | 388.0% | 403.5% | 419.2% | 434.8% | 450.4% | 466.0% | 481.6% | 497.2% | 512.8% | 528.4% | 544.0% | 559.6% | 575.2% |
Special Attack2
Special Attack: Stand Still
| Lv | Lv.1 | Lv.2 | Lv.3 | Lv.4 | Lv.5 | Lv.6 | Lv.7 | Lv.8 | Lv.9 | Lv.10 | Lv.11 | Lv.12 | Lv.13 | Lv.14 | Lv.15 | Lv.16 |
|---|---|---|---|---|---|---|---|---|---|---|---|---|---|---|---|---|
| 1st-Hit DMG Multiplier | 24.2% | 26.4% | 28.6% | 30.8% | 33.0% | 35.2% | 37.4% | 39.6% | 41.8% | 44.0% | 46.2% | 48.4% | 50.6% | 52.8% | 55.0% | 57.2% |
| 2nd-Hit DMG Multiplier | 51.7% | 56.4% | 61.1% | 65.8% | 70.5% | 75.2% | 79.9% | 84.6% | 89.3% | 94.0% | 98.7% | 103.4% | 108.1% | 112.8% | 117.5% | 122.2% |
| 3rd-Hit DMG Multiplier | 50.1% | 54.7% | 59.3% | 63.9% | 68.5% | 73.1% | 77.7% | 82.3% | 86.9% | 91.5% | 96.1% | 100.7% | 105.3% | 109.9% | 114.5% | 119.1% |
| 1st-Hit Daze Multiplier | 24.2% | 25.2% | 26.2% | 27.5% | 28.6% | 29.7% | 30.8% | 31.9% | 33.0% | 34.1% | 35.2% | 36.3% | 37.4% | 38.5% | 39.6% | 40.7% |
| 2nd-Hit Daze Multiplier | 51.7% | 54.1% | 56.5% | 58.9% | 61.3% | 63.7% | 66.1% | 68.5% | 70.9% | 73.3% | 75.7% | 78.1% | 80.5% | 82.9% | 85.3% | 87.7% |
| 3rd-Hit Daze Multiplier | 50.1% | 52.4% | 54.7% | 57.0% | 59.3% | 61.6% | 63.9% | 66.2% | 68.5% | 70.8% | 73.1% | 75.4% | 77.7% | 80.0% | 82.3% | 84.6% |
EX Special Attack: Clearance Time
| Lv | Lv.1 | Lv.2 | Lv.3 | Lv.4 | Lv.5 | Lv.6 | Lv.7 | Lv.8 | Lv.9 | Lv.10 | Lv.11 | Lv.12 | Lv.13 | Lv.14 | Lv.15 | Lv.16 |
|---|---|---|---|---|---|---|---|---|---|---|---|---|---|---|---|---|
| DMG Multiplier | 543.8% | 593.3% | 642.8% | 692.3% | 741.8% | 791.3% | 840.8% | 890.3% | 939.8% | 989.3% | 1038.8% | 1088.3% | 1137.8% | 1187.3% | 1236.8% | 1286.3% |
| Daze Multiplier | 439.5% | 459.5% | 479.5% | 499.5% | 519.5% | 539.5% | 559.5% | 579.5% | 599.5% | 619.5% | 639.5% | 659.5% | 679.5% | 699.5% | 719.5% | 739.5% |
| Energy Cost to Use | 60 | 60 | 60 | 60 | 60 | 60 | 60 | 60 | 60 | 60 | 60 | 60 | 60 | 60 | 60 | 60 |
Chain Attack2
Chain Attack: Starlight Mirage
| Lv | Lv.1 | Lv.2 | Lv.3 | Lv.4 | Lv.5 | Lv.6 | Lv.7 | Lv.8 | Lv.9 | Lv.10 | Lv.11 | Lv.12 | Lv.13 | Lv.14 | Lv.15 | Lv.16 |
|---|---|---|---|---|---|---|---|---|---|---|---|---|---|---|---|---|
| DMG Multiplier | 735.2% | 802.1% | 869.0% | 935.9% | 1002.8% | 1069.7% | 1136.6% | 1203.5% | 1270.4% | 1337.3% | 1404.2% | 1471.1% | 1538.0% | 1604.9% | 1671.8% | 1738.7% |
| Daze Multiplier | 196.6% | 205.6% | 214.6% | 223.6% | 232.6% | 241.6% | 250.6% | 259.6% | 268.6% | 277.6% | 286.6% | 295.6% | 304.6% | 313.6% | 322.6% | 331.6% |
Ultimate: Starlight Sparkle
| Lv | Lv.1 | Lv.2 | Lv.3 | Lv.4 | Lv.5 | Lv.6 | Lv.7 | Lv.8 | Lv.9 | Lv.10 | Lv.11 | Lv.12 | Lv.13 | Lv.14 | Lv.15 | Lv.16 |
|---|---|---|---|---|---|---|---|---|---|---|---|---|---|---|---|---|
| DMG Multiplier | 1597.7% | 1743.0% | 1888.3% | 2033.6% | 2178.9% | 2324.2% | 2469.5% | 2614.8% | 2760.1% | 2905.4% | 3050.7% | 3196.0% | 3341.3% | 3486.6% | 3631.9% | 3777.2% |
| Daze Multiplier | 190.6% | 199.3% | 208.0% | 216.7% | 225.4% | 234.1% | 242.8% | 251.5% | 260.2% | 268.9% | 277.6% | 286.3% | 295.0% | 303.7% | 312.4% | 321.1% |
Core Skill1
Core Passive: Steady Shot
| Lv | Lv.1 | Lv.2 (A) | Lv.3 (B) | Lv.4 (C) | Lv.5 (D) | Lv.6 (E) | Lv.7 (F) |
|---|---|---|---|---|---|---|---|
| Damage Increase | 25% | 29.1% | 33.3% | 37.5% | 41.6% | 45.8% | 50% |
| CRIT Rate | 4.8% | - | 4.8% | - | 4.8% | - | 4.8% |
| Base ATK | - | +25 | - | +25 | - | +25 | - |
Mindscapes — how far is worth it?
When Billy hits an enemy with a Dash Attack or Dodge Counter, he gains an additional 2.7 Energy. Can trigger once every 5s. "You guys are way too honest to be bad guys!" "All lined up, like NPCs at the shooting range!"
Billy's Dodge Counter DMG increases by 25%. Rolling Shots during his Basic Attacks count as dodges, making Billy Invulnerable during skill activation and able to trigger Perfect Dodges. When a Rolling Shot triggers a Perfect Dodge, it will automatically follow up with a Dodge Counter. "The Starlight Knights never run from danger. That's what we call tactical repositioning for better aim!" — User "Dreamgirl Monica" from the Starlight Radiance messageboards.
Basic Attack, Dodge, Assist, Special Attack, and Chain Attack Lv. +2 Never neglect your training, and never stop improving! This is the philosophy of the Starlight Knights. Billy believes in it wholeheartedly, and practices it sincerely.
When Billy hits an enemy with his EX Special Attack, the skill's CRIT Rate increases based on the distance from the enemy. The closer he is to the target, the greater the effect, up to a maximum increase of 32%. These explosive bullets of Billy's own invention are incredibly lethal at close range. Their performance far outstrips Billy's original intention of simply making them cooler.
Basic Attack, Dodge, Assist, Special Attack, and Chain Attack Lv. +2 Unknown precision components and unique structural design have given Billy performance far beyond his peers... And maintenance costs far beyond his means.
When Billy accumulates 10 hits on enemies or triggers a Perfect Dodge, his DMG increases by 6%, stacking up to 5 times. The effect resets if he is knocked back or launched by an enemy. "Hooboy~ Feelin' great! Move aside, Anby, it's my time to shine!" "Yo, Anby — can you play the Starlight Knight theme?" —excerpt from Cunning Hares' "Top 10 Forbidden Sentences," selected by Anby
Stats & Materials by Ascension Milestone
| Lv. | Before | After | Materials for this milestone |
|---|---|---|---|
| Lv.1 | HP: - ATK: - DEF: - [Recommended] ATK, CRIT Rate & CRIT DMG: - |
HP: 555 ATK: 113 DEF: 49 [Recommended] ATK, CRIT Rate & CRIT DMG: - |
|
| Lv.10 | HP: 1233 ATK: 173 DEF: 108 [Recommended] ATK, CRIT Rate & CRIT DMG: - |
HP: 1614 ATK: 213 DEF: 141 [Recommended] ATK, CRIT Rate & CRIT DMG: - |
Denny ×24,000
Basic Offense Certification Seal ×4
|
| Lv.20 | HP: 2367 ATK: 280 DEF: 207 [Recommended] ATK, CRIT Rate & CRIT DMG: - |
HP: 2748 ATK: 321 DEF: 241 [Recommended] ATK, CRIT Rate & CRIT DMG: - |
Denny ×56,000
Advanced Offense Certification Seal ×12
|
| Lv.30 | HP: 3502 ATK: 389 DEF: 307 [Recommended] ATK, CRIT Rate & CRIT DMG: - |
HP: 3883 ATK: 429 DEF: 340 [Recommended] ATK, CRIT Rate & CRIT DMG: - |
Denny ×120,000
Advanced Offense Certification Seal ×20
|
| Lv.40 | HP: 4637 ATK: 496 DEF: 407 [Recommended] ATK, CRIT Rate & CRIT DMG: - |
HP: 5018 ATK: 537 DEF: 441 [Recommended] ATK, CRIT Rate & CRIT DMG: - |
Denny ×200,000
Pioneer's Certification Seal ×10
|
| Lv.50 | HP: 5771 ATK: 604 DEF: 507 [Recommended] ATK, CRIT Rate & CRIT DMG: - |
HP: 6153 ATK: 644 DEF: 540 [Recommended] ATK, CRIT Rate & CRIT DMG: - |
Denny ×400,000
Pioneer's Certification Seal ×20
|
| Lv.60 | HP: - ATK: - DEF: - [Recommended] ATK, CRIT Rate & CRIT DMG: - |
HP: 6907 ATK: 712 DEF: 606 [Recommended] ATK, CRIT Rate & CRIT DMG: - |



Total materials across the whole ascension path
Materials Needed to Lv60





Total Denny for the character alone (ascension + basic skills + core skill A→F): about 1,706,000 Denny — W-Engine and Drive Discs not included.
Voice Actors & Character Info
Background & Lore
More unlocks as Trust with this character increases in-game.
How to read this build page
Every Agent build page has 4 parts: a stat table by level, W-Engine/Drive Disc suggestions, a Mindscape roadmap, and recommended teams. Read them in that order — stats tell you "what you need", gear tells you "where to get it", Mindscape tells you "is it worth pulling", teams tell you "who to pair with". The section below explains how to read each part, and it applies the same way to every character on the site.
How to read the stat table and level
The stat table shows values at the ascension breakpoints (usually the final one, e.g. Lv60) — these are BASE stats with no gear added, useful for comparing Agents or checking whether you've ascended far enough. CRIT Rate and CRIT DMG are shown separately because they set the damage ceiling once Drive Disc substats stack on top. If your real stats are lower than the table, you likely haven't fully ascended or leveled yet — it's not a build mistake.
Why the W-Engine and Drive Disc picks make sense
Most Agents have a "signature" W-Engine designed for their exact role, plus a few cheaper standard-banner substitutes. Missing the signature isn't a dead end — most Agents keep most of their power with a well-matched substitute, just short by some amount of total damage.
- Drive Disc sets (2pc + 4pc) are picked for the set effect that fits that Agent's playstyle (mono-element, Anomaly, stun, and so on).
- Substats follow a priority that changes by role: Attack-type Agents usually chase CRIT Rate/CRIT DMG before ATK%; Anomaly-type Agents add Anomaly Proficiency to that mix; Stun/Support roles often value survivability or energy stats over pure CRIT.
These weights differ per character — follow the exact substat priority table above rather than applying one formula to every role.
Is Mindscape worth chasing
General rule: M0 (no duplicates) already clears the game's hardest content, even for S-rank Agents. Mindscape is a duplicate-fueled upgrade system, and each level costs more resources for a smaller power gain. For most Agents, the best value stop is usually M1–M2 (where some key effects unlock), while M6 is almost always for players chasing the absolute ceiling, not a requirement. Check the Mindscape section in the table above for that specific Agent's numbers.
Skill priority by role
There's no single order for every Agent, but the general pattern by role is:
- Attack: level the main damage skill first (Basic or Special Attack depending on kit), Dash/Dodge last.
- Stun: prioritize whichever skill builds Daze/Stun fastest, since the stun window is where the whole team dumps damage.
- Support: prioritize buff or energy-generating skills over personal damage — this role's value comes from lifting the whole team.
- Anomaly: prioritize the skill that stacks anomaly buildup, since most of the damage comes from the triggered effect, not the direct hit.
Always level the Core Skill steadily alongside the rest — it's a baseline stat that affects the whole rotation, not just one move.
Where to dig deeper
This section only teaches you how to read the page — for deeper comparisons, use the dedicated tools:
- Tier list to see where this Agent stands against the full roster.
- Teams for full in-game comps, including Bangboo and rotation order.
- Disc score to check how your current gear scores against the benchmark.
Agents of the same attribute






Billy FAQ
What is the best W-Engine for Billy?
Billy performs best with The Brimstone. See alternatives and required stats in the Gear section above.
Is Billy worth pulling?
An early A-rank who's now clearly outdated: his damage falls far behind current S-rank DPS and he needs long on-field time to ramp. Only level him for fun or if you're short on Physical DPS; don't pour rare resources into him — treat him as a stopgap, not an endgame carry.
What is the best team for Billy?
Billy works best in the Physical Stun team. Full members and rotation are in the Teams section.
Who voices Billy in Zenless Zone Zero?
Billy (faction Cunning Hares, birthday Nov 25) is voiced according to the official credits published on the HoYoverse Wiki. See the full English/Japanese/Korean/Chinese voice actor list in the "Voice Actors & Character Info" block above — this data is pulled directly from the official wiki, not guessed.
Which Mindscape of Billy is worth investing in?
Billy has 6 Mindscape tiers (M1-M6), each unlocking its own effect detailed in the "Mindscape" block above (official wording). Mindscapes cost Mindscape Cinema currency farmed from limited banners, so weigh it against your budget — F2P players usually stop at M0-M1 and prioritize W-Engine and Drive Discs before pushing Mindscape higher.
How much Denny and how many materials to level Billy to Lv60?
Leveling Billy to max Lv60 (ascension + basic skills to 12 + core skill A→F) costs roughly 1,706,000 Denny, plus role-specific ascension materials, attribute-specific skill chips, high-dimensional data, and weekly boss drops — see the full list with exact quantities in the "Materials Needed" block above, sourced from the game's official leveling tables.
 Understand the mechanics behind this
 Drive Disc Scorer→