
Nicole
A cheap but incredibly valuable Ether Support: she shreds enemy DEF, pulls mobs into a tight cluster, and feeds the team energy.
Tier S+ · Support · Ether. BiS: The Vault. A cheap but incredibly valuable Ether Support: she shreds enemy DEF, pulls mobs into a tight cluster, and feeds the team energy.



Base stats
Recommended build
Best W-Engines
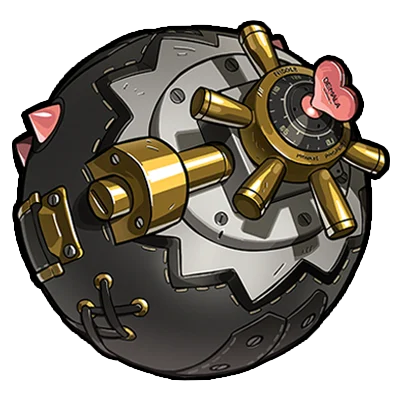
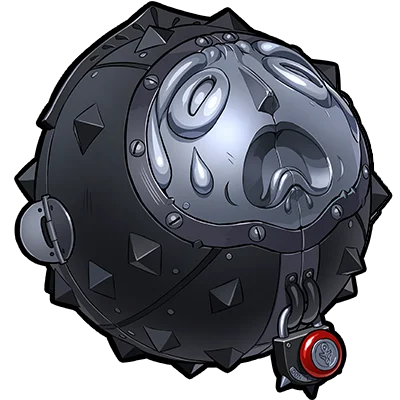

Recommendation order by current meta — the first is strongest, the rest are alternatives in decreasing priority. (Not a simulated DPS %.)
Recommended Drive Discs
 Swing Jazz
 Chaotic Metal
 Freedom Blues
4: ATK% · 5: Ether DMG · 6: Energy Regen / ATK%
Prioritize Energy Regen > ATK% > CRIT Rate
Skill priority: Special/EX > Chain & Assist > Basic Attack > Dodge
Recommended teams





Nicole is one of the most cost-effective budget supports in the game: DEF shred, enemy grouping, and energy generation, all from a free A-rank. She still shows up regularly in Ether teams and any comp that wants tight clustering in the 3.0 meta. Well worth leveling her Core and Mindscapes—a high priority for new and veteran players alike.
Stat targets
Nicole is a SUPPORT, not a damage source — she has no 'hard' ATK/Crit number targets like an Attacker, and the sources all give qualitative guidance rather than a fixed Level-60 stat table. Recommended main stats: disc 4 ATK% · disc 5 Ether DMG · disc 6 Energy Regen (or ATK% if the team already has enough energy). Substat priority : Energy Regen > ATK% > Crit Rate. The most important principle: stack enough Energy Regen to fire her EX Special on rhythm every time she taps in (keeping the -40% DEF-down and grouping loop unbroken); ATK% only adds a little baseline damage and isn't the main goal. Anomaly-build users can shift the focus to Anomaly Proficiency + a Freedom Blues set.
Rotation & combos
1) Bring Nicole in, use EX Special (HOLD to charge) to drop the energy field into the middle of the pack — it groups enemies AND applies her DEF-down (Core Passive Mechanical Case, up to -40% DEF with Enhancement F). 2) Her enhanced Basic and Dash Attack also shred DEF; use them to top up if needed. 3) IMMEDIATELY after the EX, quick-swap to your main Attacker/DPS to hit inside the DEF-down window. 4) Note: the debuff only lasts ~3.5s, so keep the rotation tight and tap Nicole back in just before it expires to refresh it (this is her trickiest point). 5) Use Nicole's Chain/Ultimate to place a large field for hard grouping or to open a burst; at M6 these fields are exactly what stacks the +Crit Rate for the whole team.
- One-of-a-kind DEF shred: plenty of supports add ATK, but Nicole is essentially the only support who SLASHES enemy DEF (up to -40%) — a damage multiplier for the whole team that nobody else replaces, especially strong for DEF-based DPS.
- Superb grouping: her energy field vacuums a whole pack into one spot, turning multi-enemy fights into one clump for AoE to shred — invaluable in mob-heavy content.
- Free and ultra-budget: a free A-rank with low investment yet top-tier support value — a backbone for beginners and always relevant in Ether teams / grouping comps in the 3.0 meta.
- Multi-role: doubles as a battery (feeds team energy), grants Ether DMG via her Additional Ability with an Ether ally, and at M6 hands the whole squad +15% Crit Rate.
- The DEF-down only lasts ~3.5s — a short window that demands a tight, well-timed rotation; sloppy play means your DPS hits outside the shred and loses most of her value.
- Almost no personal damage: Nicole is a pure enabler with no self-carry — her worth depends entirely on whether the team's DPS can exploit the DEF shred.
- Grouping barely matters in single-target fights (big bosses) — in single-target content she's left with only the DEF shred, so she shines most on mob-dense stages.
Recommended Bangboo
Endgame mode fit
In Shiyu Defense most fights are bosses/single-target, so her grouping is largely unused, but the -40% DEF-down still directly multiplies DPS damage in the stun window — Nicole stays a valuable support in Ether burst teams (Ether Zhu Yuan, Yixuan) or any DEF-scaling DPS. Bottom line: bring her for the DEF shred, not the grouping.
In Deadly Assault Nicole shines most: multiple high-HP enemies let her group AND shred DEF at once for an AoE DPS (and Anomaly/Ether comps) to clear fast — high support/utility value, especially on mob-plus-boss stages.
Skills
Basic Attack2
 Basic Attack
Basic Attack: Cunning Combo
Press to activate: Unleashes up to 3 strikes, dealing Physical DMG.
Basic Attack: Do As I Please
After using a Special Attack, EX Special Attack, Chain Attack, or Ultimate, Nicole can reload, and her Basic Attack and Dash Attack are enhanced, increasing the power of her bullets.
Dodge3
 Dodge
DodgeDodge: Speed Demon
Press to activate: A rapid dodge. Character is invulnerable while using this skill. Drag the to dodge, then hold to reload while dodging, enhancing Basic Attacks and Dash Attacks up to 8 times.
Dash Attack: Jack in the Box
When dragging the during a dodge, press : Dashes in the target direction and strikes nearby enemies, dealing Physical DMG. When not dragging the during a dodge, press : Vaults backward and launches a ranged strike against enemies in front, dealing Physical DMG. Automatically reloads after the attack to enhance her Basic Attack and Dash Attack, up to 8 times.
Dodge Counter: Diverted Bombard
Press during a Perfect Dodge to activate: Dodge backwards and send a ranged strike at enemies in front, dealing Ether DMG. Character is invulnerable while using this skill. Automatically reloads after the attack to enhance Basic Attack and Dash Attack up to 8 times.
Assist3
 Assist
Quick Assist: Emergency Bombard
When the on-field character is launched, press to activate: Dodge backwards and send a ranged strike at enemies in front, dealing Ether DMG.Character is invulnerable while using this skill. Automatically reloads after the attack to enhance Basic Attack and Dash Attack up to 8 times.
Defensive Assist: The Hare Strikes Back!
When the character on field is about to be attacked, press to activate: Parries the enemy's attack, dealing massive Daze. Character is invulnerable while using this skill.
Assist Follow-Up: Window of Opportunity
Press after a Defensive Assist to activate: Charge forward and bombard enemies, dealing Ether DMG. Character is invulnerable while using this skill.
Special Attack2
 Special Attack
Special Attack: Sugarcoated Bullet
Press to activate: Unleashes a ranged strike against enemies in front, dealing Ether DMG. Anti-Interrupt level is increased while using this skill. Automatically reloads after the attack to enhance Basic Attack and Dash Attack up to 8 times.
EX Special Attack: Stuffed Sugarcoated Bullet
With enough Energy, press to activate: A powerful ranged strike, generating an energy field that pulls enemies towards its center to deal Ether DMG. Hold down to charge up this attack, during which a small energy field is generated at the muzzle as Energy is consumed, dealing bonus DMG to enemies nearby. Character is invulnerable while using this skill. A Quick Assist is triggered when this skill hits an enemy. Automatically reloads after the attack to enhance Basic Attack and Dash Attack up to 8 times.
Chain Attack2
 Chain Attack
Chain Attack: Ether Shellacking
When a Chain Attack is triggered, select the character to activate: Unleashes a powerful ranged strike at enemies in a small area, generating an energy field that pulls enemies towards its center to deal Ether DMG. Character is invulnerable while using this skill. A Quick Assist is triggered when this skill hits an enemy. Automatically reloads after the attack to enhance Basic Attack and Dash Attack up to 8 times.
Ultimate: Ether Grenade
When Decibel Rating is at Maximum, press to activate: Unleashes a powerful ranged strike at enemies in a small area, generating an energy field that pulls enemies towards its center to deal Ether DMG. When using this skill, other squad members recover 10 Energy. The next character to switch in gains an additional 20 Energy. Character is invulnerable while using this skill. A Quick Assist is triggered when this skill hits an enemy. Automatically reloads after the attack to enhance Basic Attack and Dash Attack up to 8 times.
Core Skill2
 Core Skill
Core Passive: Mechanical Case
After hitting an enemy with a Special Attack, EX Special Attack, Chain Attack, or Ultimate, Nicole can reload, enhancing her Basic Attack and Dash Attack. When her enhanced bullets or Energy Field hits an enemy, the target's DEF is reduced by 20% for 3.5s.*Stats shown are at Base level.
Additional Ability: Hare of Many Burrows
When another character in your squad shares the same Attribute or Faction: When Nicole's Core Passive: Mechanical Case applies a debuff to an enemy, all squad members deal 25% more Ether DMG to the target for 3.5s.
Skill Coefficients by Level
Basic Attack2
Basic Attack: Cunning Combo
| Lv | Lv.1 | Lv.2 | Lv.3 | Lv.4 | Lv.5 | Lv.6 | Lv.7 | Lv.8 | Lv.9 | Lv.10 | Lv.11 | Lv.12 | Lv.13 | Lv.14 | Lv.15 | Lv.16 |
|---|---|---|---|---|---|---|---|---|---|---|---|---|---|---|---|---|
| 1st-Hit DMG Multiplier | 38.9% + 9%*3 | 42.5% +9.8%*3 | 46.1% + 10.7%*3 | 49.7% + 11.5%*3 | 53.3% + 12.3%*3 | 56.9% + 13.2%*3 | 60.5% + 14%*3 | 64.1% + 14.8%*3 | 67.7% + 15.7%*3 | 71.3% + 16.5%*3 | 74.9% + 17.3%*3 | 78.5% + 18.2%*3 | 82.1% + 19%*3 | 85.7% + 19.8%*3 | 89.3% + 20.7%*3 | 92.9% + 21.5%*3 |
| 2nd-Hit DMG Multiplier | 35.3% + 9%*4 | 38.6% + 9.8%*4 | 41.9% + 10.6%*4 | 45.2% + 11.5%*4 | 48.5% + 12.3%*4 | 51.8% + 13.1%*4 | 55.1% + 13.9%*4 | 58.4% + 14.8%*4 | 61.7% + 15.6%*4 | 65% + 16.4%*4 | 68.3% + 17.2%*4 | 71.6% + 18.1%*4 | 74.9% + 18.9%*4 | 78.2% + 19.7%*4 | 81.5% + 20.5%*4 | 84.8% + 21.4%*4 |
| 3rd-Hit DMG Multiplier | 124.3% + 9%*20 | 135.6 + 9.8%*20 | 146.9% + 10.6%20 | 158.2% + 11.4%*20 | 169.5% + 12.3%*20 | 180.8% + 13.1%*20 | 192.1% + 13.9%*20 | 203.3% + 14.7%*20 | 214.7% + 15.5%*20 | 226% + 16.4%*20 | 237.3% + 17.2%*20 | 248.6% + 18%*20 | 259.9% + 18.8%*20 | 271.2% + 19.6%*20 | 282.5% + 20.5%*20 | 293.8% + 21.3%*20 |
| 1st-Hit Daze Multiplier | 19.5% + 6.9%*3 | 20.4% + 7.3%*3 | 21.3% + 7.6%*3 | 22.2% + 7.9%*3 | 23.1% + 8.3%*3 | 24% + 8.6%*3 | 24.9% + 8.9%*3 | 25.8% + 9.3%*3 | 26.7% + 9.6%*3 | 27.6% + 9.9%*3 | 28.5% + 10.3%*3 | 29.4% + 10.6%*3 | 30.3% + 10.9%*3 | 31.2% + 11.3%*3 | 32.1% + 11.6%*3 | 33% + 11.9%*3 |
| 2nd-Hit Daze Multiplier | 29% + 6.9%*4 | 30.4% + 7.2%*4 | 31.8% + 7.6%*4 | 33.2% + 7.9%*4 | 34.6% + 8.2%*4 | 36% + 8.5%*4 | 37.4% + 8.9%*4 | 38.8% + 9.2%*4 | 40.2% + 9.5%*4 | 41.6% + 9.8%*4 | 43% + 10.2%*4 | 44.4% + 10.5%*4 | 45.8% + 10.8%*4 | 47.2% + 11.1%*4 | 48.6% + 11.5%*4 | 50% + 11.8%*4 |
| 3rd-Hit Daze Multiplier | 104.3% + 6.9%*20 | 109.1% + 7.2%*20 | 113.9% + 7.5%*20 | 118.7% + 7.9%*20 | 123.5% + 8.2%*20 | 128.3% + 8.5%*20 | 133.1% + 8.8%*20 | 137.9% + 9.1%*20 | 142.7% + 9.5%*20 | 147.5% + 9.8%*20 | 152.3% + 10.1%*20 | 157.1% + 10.4%*20 | 161.9% + 10.7%*20 | 166.7% + 11.1%*20 | 171.5% + 11.4%*20 | 176.3% + 11.7%*20 |
Basic Attack: Do As I Please
| Lv | Lv.1 | Lv.2 | Lv.3 | Lv.4 | Lv.5 | Lv.6 | Lv.7 | Lv.8 | Lv.9 | Lv.10 | Lv.11 | Lv.12 | Lv.13 | Lv.14 | Lv.15 | Lv.16 |
|---|---|---|---|---|---|---|---|---|---|---|---|---|---|---|---|---|
| 1st-Hit DMG Multiplier | 38.9% + 16.4%*3 | 42.5% +17.9%*3 | 46.1% + 19.4%*3 | 49.7% + 20.9%*3 | 53.3% + 22.4%*3 | 56.9% + 23.9%*3 | 60.5% + 25.4%*3 | 64.1% + 26.9%*3 | 67.7% + 28.4%*3 | 71.3% + 16.5%*3 | 74.9% + 31.4%*3 | 78.5% + 32.9%*3 | 82.1% + 34.4%*3 | 85.7% + 35.9%*3 | 89.3% + 37.4%*3 | 92.9% + 38.9%*3 |
| 2nd-Hit DMG Multiplier | 35.3% + 16.4%*4 | 38.6% + 17.9%*4 | 41.9% + 19.4%*4 | 45.2% + 20.9%*4 | 48.5% + 22.4%*4 | 51.8% + 23.9%*4 | 55.1% + 25.4%*4 | 58.4% + 26.9%*4 | 61.7% + 28.4%*4 | 65% + 16.4%*4 | 68.3% + 31.4%*4 | 71.6% + 32.9%*4 | 74.9% + 34.4%*4 | 78.2% + 35.9%*4 | 81.5% + 37.4%*4 | 84.8% + 38.9%*4 |
| 3rd-Hit DMG Multiplier | 124.3% + 16.4%*20 | 135.6 + 17.9%*20 | 146.9% + 19.4%20 | 158.2% + 20.9%*20 | 169.5% + 22.4%*20 | 180.8% + 23.9%*20 | 192.1% + 25.4%*20 | 203.3% + 26.9%*20 | 214.7% + 28.4%*20 | 226% + 16.4%*20 | 237.3% + 31.4%*20 | 248.6% + 32.9%*20 | 259.9% + 34.4%*20 | 271.2% + 35.9%*20 | 282.5% + 37.4%*20 | 293.8% + 38.9%*20 |
| 1st-Hit Daze Multiplier | 19.5% + 6.9%*3 | 20.4% + 7.3%*3 | 21.3% + 7.6%*3 | 22.2% + 7.9%*3 | 23.1% + 8.3%*3 | 24% + 8.6%*3 | 24.9% + 8.9%*3 | 25.8% + 9.3%*3 | 26.7% + 9.6%*3 | 27.6% + 9.9%*3 | 28.5% + 10.3%*3 | 29.4% + 10.6%*3 | 30.3% + 10.9%*3 | 31.2% + 11.3%*3 | 32.1% + 11.6%*3 | 33% + 11.9%*3 |
| 2nd-Hit Daze Multiplier | 29% + 6.9%*4 | 30.4% + 7.2%*4 | 31.8% + 7.6%*4 | 33.2% + 7.9%*4 | 34.6% + 8.2%*4 | 36% + 8.5%*4 | 37.4% + 8.9%*4 | 38.8% + 9.2%*4 | 40.2% + 9.5%*4 | 41.6% + 9.8%*4 | 43% + 10.2%*4 | 44.4% + 10.5%*4 | 45.8% + 10.8%*4 | 47.2% + 11.1%*4 | 48.6% + 11.5%*4 | 50% + 11.8%*4 |
| 3rd-Hit Daze Multiplier | 104.3% + 6.9%*20 | 109.1% + 7.2%*20 | 113.9% + 7.5%*20 | 118.7% + 7.9%*20 | 123.5% + 8.2%*20 | 128.3% + 8.5%*20 | 133.1% + 8.8%*20 | 137.9% + 9.1%*20 | 142.7% + 9.5%*20 | 147.5% + 9.8%*20 | 152.3% + 10.1%*20 | 157.1% + 10.4%*20 | 161.9% + 10.7%*20 | 166.7% + 11.1%*20 | 171.5% + 11.4%*20 | 176.3% + 11.7%*20 |
Dodge3
Dash Attack: Jack in the Box
| Lv | Lv.1 | Lv.2 | Lv.3 | Lv.4 | Lv.5 | Lv.6 | Lv.7 | Lv.8 | Lv.9 | Lv.10 | Lv.11 | Lv.12 | Lv.13 | Lv.14 | Lv.15 | Lv.16 |
|---|---|---|---|---|---|---|---|---|---|---|---|---|---|---|---|---|
| Forward Dash DMG Multiplier | 41.2% + 9%*13 | 45% + 9.8%*13 | 48.8% + 10.6%*13 | 52.6% + 11.4%*13 | 56.4% + 12.3%*13 | 60.2% + 13.1%*13 | 64% + 13.9%*13 | 67.8% + 14.7%*13 | 71.6% + 15.6%*13 | 75.4% + 16.4%*13 | 79.2% + 17.2%*13 | 83% + 18%*13 | 86.8% + 18.9%*13 | 90.6% + 19.7%*13 | 94.4% + 20.5%*13 | 98.2% + 21.3%*13 |
| Backward Dash DMG Multiplier | 60% | 65.5% | 71% | 76.5% | 82% | 87.5% | 93% | 98.5% | 104% | 109.5% | 115% | 120.5% | 126% | 131.5% | 137% | 142.5% |
| Forward Dash DMG Multiplier | 29% + 3.4%*13 | 30.4% + 3.6%*13% | 31.8% + 3.7%*13 | 33.2% + 3.9%*13 | 34.6% + 4.1%*13 | 36% + 4.2%*13 | 37.4% + 4.4%*13 | 38.8% + 4.6%*13 | 40.2% + 4.7%*13 | 41.6% + 4.9%*13 | 43% + 5%*13 | 44.4% + 5.2%*13 | 45.8% + 5.4%*13 | 47.2% + 5.5%*13 | 48.6% + 5.7%*13 | 50% + 5.8%*13 |
| Backward Dash Daze Multiplier | 60% | 62.8% | 65.6% | 68.4% | 71.2% | 74% | 76.8% | 79.6% | 82.4% | 85.2% | 88% | 90.8% | 93.6% | 96.4% | 99.2% | 102% |
Dash Attack: Do As I Please
| Lv | Lv.1 | Lv.2 | Lv.3 | Lv.4 | Lv.5 | Lv.6 | Lv.7 | Lv.8 | Lv.9 | Lv.10 | Lv.11 | Lv.12 | Lv.13 | Lv.14 | Lv.15 | Lv.16 |
|---|---|---|---|---|---|---|---|---|---|---|---|---|---|---|---|---|
| Forward Dash DMG Multiplier | 41.2% + 9%*13 | 45% + 9.8%*13 | 48.8% + 10.6%*13 | 52.6% + 11.4%*13 | 56.4% + 12.3%*13 | 60.2% + 13.1%*13 | 64% + 13.9%*13 | 67.8% + 14.7%*13 | 71.6% + 15.6%*13 | 75.4% + 16.4%*13 | 79.2% + 17.2%*13 | 83% + 18%*13 | 86.8% + 18.9%*13 | 90.6% + 19.7%*13 | 94.4% + 20.5%*13 | 98.2% + 21.3%*13 |
| Forward Dash DMG Multiplier | 29% + 3.4%*13 | 30.4% + 3.6%*13 | 31.8% + 3.7%*13 | 33.2% + 3.9%*13 | 34.6% + 4.1%*13 | 36% + 4.2%*13 | 37.4% + 4.4%*13 | 38.8% + 4.6%*13 | 40.2% + 4.7%*13 | 41.6% + 4.9%*13 | 43% + 5%*13 | 44.4% + 5.2%*13 | 45.8% + 5.4%*13 | 47.2% + 5.5%*13 | 48.6% + 5.7%*13 | 50% + 5.8%*13 |
Dodge Counter: Diverted Bombard
| Lv | Lv.1 | Lv.2 | Lv.3 | Lv.4 | Lv.5 | Lv.6 | Lv.7 | Lv.8 | Lv.9 | Lv.10 | Lv.11 | Lv.12 | Lv.13 | Lv.14 | Lv.15 | Lv.16 |
|---|---|---|---|---|---|---|---|---|---|---|---|---|---|---|---|---|
| DMG Multiplier | 182.4% | 199% | 215.6% | 232.2% | 248.8% | 265.4% | 282% | 298.6% | 315.2% | 331.8% | 348.4% | 365% | 381.6% | 398.2% | 414.8% | 431.4% |
| Daze Multiplier | 163.4% | 171% | 178.6% | 186.2% | 193.8% | 201.4% | 209% | 216.6% | 224.2% | 231.8% | 239.4% | 247% | 254.6% | 262.2% | 269.8% | 277.4% |
Assist3
Quick Assist: Emergency Bombard
| Lv | Lv.1 | Lv.2 | Lv.3 | Lv.4 | Lv.5 | Lv.6 | Lv.7 | Lv.8 | Lv.9 | Lv.10 | Lv.11 | Lv.12 | Lv.13 | Lv.14 | Lv.15 | Lv.16 |
|---|---|---|---|---|---|---|---|---|---|---|---|---|---|---|---|---|
| DMG Multiplier | 63.4% | 69.2% | 75% | 80.8% | 86.6% | 92.4% | 98.2% | 104% | 109.8% | 115.6% | 121.4% | 127.2% | 133% | 138.8% | 144.6% | 150.4% |
| Daze Multiplier | 63.4% | 66.4% | 69.4% | 72.4% | 75.4% | 78.4% | 81.4% | 84.4% | 87.4% | 90.4% | 93.4% | 96.4% | 99.4% | 102.4% | 105.4% | 108.4% |
Defensive Assist: The Hare Strikes Back!
| Lv | Lv.1 | Lv.2 | Lv.3 | Lv.4 | Lv.5 | Lv.6 | Lv.7 | Lv.8 | Lv.9 | Lv.10 | Lv.11 | Lv.12 | Lv.13 | Lv.14 | Lv.15 | Lv.16 |
|---|---|---|---|---|---|---|---|---|---|---|---|---|---|---|---|---|
| Light Defensive Daze Multiplier | 246.7% | 258.0% | 269.3% | 280.6% | 291.9% | 303.2% | 314.5% | 325.8% | 337.1% | 348.4% | 359.7% | 371.0% | 382.3% | 393.6% | 404.9% | 416.2% |
| Heavy Defensive Daze Multiplier | 311.7% | 325.9% | 340.1% | 354.3% | 368.5% | 382.7% | 396.9% | 411.1% | 425.3% | 439.5% | 453.7% | 467.9% | 482.1% | 496.3% | 510.5% | 524.7% |
| Chain Defensive Daze Multiplier | 151.7% | 158.6% | 165.5% | 172.4% | 179.3% | 186.2% | 193.1% | 200.0% | 206.9% | 213.8% | 220.7% | 227.6% | 234.5% | 241.4% | 248.3% | 255.2% |
Assist Follow-Up: Window of Opportunity
| Lv | Lv.1 | Lv.2 | Lv.3 | Lv.4 | Lv.5 | Lv.6 | Lv.7 | Lv.8 | Lv.9 | Lv.10 | Lv.11 | Lv.12 | Lv.13 | Lv.14 | Lv.15 | Lv.16 |
|---|---|---|---|---|---|---|---|---|---|---|---|---|---|---|---|---|
| DMG Multiplier | 377.1% | 411.4% | 445.7% | 480.0% | 514.3% | 548.6% | 582.9% | 617.2% | 651.5% | 685.8% | 720.1% | 754.4% | 788.7% | 823.0% | 857.3% | 891.6% |
| Daze Multiplier | 330.3% | 345.4% | 360.5% | 375.6% | 390.7% | 405.8% | 420.9% | 436.0% | 451.1% | 466.2% | 481.3% | 496.4% | 511.5% | 526.6% | 541.7% | 556.8% |
Special Attack2
Special Attack: Sugarcoated Bullet
| Lv | Lv.1 | Lv.2 | Lv.3 | Lv.4 | Lv.5 | Lv.6 | Lv.7 | Lv.8 | Lv.9 | Lv.10 | Lv.11 | Lv.12 | Lv.13 | Lv.14 | Lv.15 | Lv.16 |
|---|---|---|---|---|---|---|---|---|---|---|---|---|---|---|---|---|
| DMG Multiplier | 52.6% | 57.4% | 62.2% | 67.0% | 71.8% | 76.6% | 81.4% | 86.2% | 91.0% | 95.8% | 100.6% | 105.4% | 110.2% | 115.0% | 119.8% | 124.6% |
| Daze Multiplier | 50.0% | 52.4% | 54.8% | 57.2% | 59.6% | 62.0% | 64.4% | 66.8% | 69.2% | 71.6% | 74.0% | 76.4% | 78.8% | 81.2% | 83.6% | 86.0% |
EX Special Attack: Stuffed Sugarcoated Bullet
| Lv | Lv.1 | Lv.2 | Lv.3 | Lv.4 | Lv.5 | Lv.6 | Lv.7 | Lv.8 | Lv.9 | Lv.10 | Lv.11 | Lv.12 | Lv.13 | Lv.14 | Lv.15 | Lv.16 |
|---|---|---|---|---|---|---|---|---|---|---|---|---|---|---|---|---|
| Charged Attack DMG Multiplier | 215.0% | 234.6% | 254.2% | 273.8% | 293.4% | 313.0% | 332.6% | 352.2% | 371.8% | 391.4% | 411.0% | 430.6% | 450.2% | 469.8% | 489.4% | 509.0% |
| Bombard DMG Multiplier | 215.0% | 234.6% | 254.2% | 273.8% | 293.4% | 313.0% | 332.6% | 352.2% | 371.8% | 391.4% | 411.0% | 430.6% | 450.2% | 469.8% | 489.4% | 509.0% |
| Energy Field DMG Multiplier | 387.0% | 422.2% | 457.4% | 492.6% | 527.8% | 563.0% | 598.2% | 633.4% | 668.6% | 703.8% | 739.0% | 774.2% | 809.4% | 844.6% | 879.8% | 915.0% |
| Charged Daze Multiplier | 179.8% | 188.0% | 196.2% | 204.3% | 212.6% | 220.8% | 229.0% | 237.2% | 245.4% | 253.6% | 261.8% | 270.0% | 278.2% | 286.4% | 294.6% | 302.8% |
| Bombard Daze Multiplier | 179.8% | 188.0% | 196.2% | 204.3% | 212.6% | 220.8% | 229.0% | 237.2% | 245.4% | 253.6% | 261.8% | 270.0% | 278.2% | 286.4% | 294.6% | 302.8% |
| Energy Field Daze Multiplier | 323.6% | 338.4% | 353.2% | 368.0% | 382.8% | 397.6% | 412.4% | 427.2% | 442.0% | 456.8% | 471.6% | 486.4% | 501.2% | 516.0% | 530.8% | 545.6% |
| Charged Attack Energy Cost | 20 Energy/sec | |||||||||||||||
| Bombard Energy Cost | 60 |
Chain Attack2
Chain Attack: Ether Shellacking
| Lv | Lv.1 | Lv.2 | Lv.3 | Lv.4 | Lv.5 | Lv.6 | Lv.7 | Lv.8 | Lv.9 | Lv.10 | Lv.11 | Lv.12 | Lv.13 | Lv.14 | Lv.15 | Lv.16 |
|---|---|---|---|---|---|---|---|---|---|---|---|---|---|---|---|---|
| Bombard DMG Multiplier | 209.6% | 228.8% | 248.0% | 267.2% | 286.4% | 305.6% | 324.8% | 344.0% | 363.2% | 382.4% | 401.6% | 420.8% | 440.0% | 459.2% | 478.4% | 497.6% |
| Energy Field DMG Multiplier | 283.0% | 308.8% | 334.6% | 360.4% | 386.2% | 412.0% | 437.8% | 463.6% | 489.4% | 515.2% | 541.0% | 566.8% | 592.6% | 618.4% | 644.2% | 670.0% |
| Bombard Daze Multiplier | 50.0% | 52.4% | 54.8% | 57.2% | 59.6% | 62.0% | 64.4% | 66.8% | 69.2% | 71.6% | 74.0% | 76.4% | 78.8% | 81.2% | 83.6% | 86.0% |
| Energy Field Daze Multiplier | 67.5% | 70.6% | 73.7% | 76.8% | 79.9% | 83.0% | 86.1% | 89.2% | 92.3% | 95.4% | 98.5% | 101.6% | 104.7% | 107.8% | 110.9% | 114.0% |
Ultimate: Ether Grenade
| Lv | Lv.1 | Lv.2 | Lv.3 | Lv.4 | Lv.5 | Lv.6 | Lv.7 | Lv.8 | Lv.9 | Lv.10 | Lv.11 | Lv.12 | Lv.13 | Lv.14 | Lv.15 | Lv.16 |
|---|---|---|---|---|---|---|---|---|---|---|---|---|---|---|---|---|
| Bombard DMG Multiplier | 646.8% | 705.6% | 764.4% | 823.2% | 882.0% | 940.8% | 999.6% | 1058.4% | 1117.2% | 1176.0% | 1234.8% | 1293.6% | 1352.4% | 1411.2% | 1470.0% | 1528.8% |
| Energy Field DMG Multiplier | 873.2% | 952.6% | 1032.0% | 1111.4% | 1190.8% | 1270.2% | 1349.6% | 1429.0% | 1508.4% | 1587.8% | 1667.2% | 1746.6% | 1826.0% | 1905.4% | 1984.8% | 2064.2% |
| Bombard Daze Multiplier | 36.0% | 37.7% | 39.4% | 41.1% | 42.8% | 44.5% | 46.2% | 47.9% | 49.6% | 51.3% | 53.0% | 54.7% | 56.4% | 58.1% | 59.8% | 61.5% |
| Energy Field Daze Multiplier | 48.6% | 50.9% | 53.2% | 55.5% | 57.8% | 60.1% | 62.4% | 64.7% | 67.0% | 69.3% | 71.6% | 73.9% | 76.2% | 78.5% | 80.8% | 83.1% |
Core Skill1
Core Passive: Mechanical Case
| Lv | Lv.1 | Lv.2 (A) | Lv.3 (B) | Lv.4 (C) | Lv.5 (D) | Lv.6 (E) | Lv.7 (F) |
|---|---|---|---|---|---|---|---|
| Target's DEF reduced | 20% | 25% | 30% | 34% | 36% | 38% | 40% |
| Energy Regen | - | +0.12/s | - | +0.12/s | - | +0.12/s | - |
| Base ATK | - | - | +25 | - | +25 | - | +25 |
Mindscapes — how far is worth it?
The DMG and the Anomaly Buildup inflicted by Nicole's EX Special Attack increases by 16%. For each additional 0.1s of charging when Nicole activates her EX Special Attack, the duration of the energy field created at the target location increases by 0.15s "I've juiced you all up! Go get 'em!" "Huh? I-I wasn't slacking off, I swear — I just needed a break!"
Nicole recovers 5 Energy when Core Passive: Mechanical Case's debuff is triggered. This effect can trigger once every [ ]s. "Never underestimate the value of a single second!" "Do you have any idea how much extra I can squeeze out of just one second? It's unfathomable!" "So, can I get a productivity bonus? How about 10%, huh?"
Basic Attack, Dodge, Assist, Special Attack, and Chain Attack Lv. +2 Without overpowering might or abundant resources, Nicole depended on her own sharp mind to bring the Cunning Hares to where they are today.
When Nicole uses her EX Special Attack, Chain Attack, or Ultimate, the diameter of the energy field generated at the target location is increased by 3m. "This, and this too — all of this will soon become the Cunning Hares' territory. Do you hear me!" "W—What? How soon?" "Uh... in about ten thousand years, based on current revenue projections."
Basic Attack, Dodge, Assist, Special Attack, and Chain Attack Lv. +2 Though they have plenty of enemies in the industry, Nicole has led her team out of many impossible situations, and so their reputation and experience steadily grew.
When Nicole's energy fields deal DMG to an enemy, all squad member's CRIT Rate against that enemy increases by 1.5%, stacking up to 10 times, and lasting 12s. The duration of each stack is calculated separately. A switch to higher quality ammo with better firepower and increased compressed Etheric Matter leads to higher damage, longer use duration... and higher costs.
Stats & Materials by Ascension Milestone
| Lv. | Before | After | Materials for this milestone |
|---|---|---|---|
| Lv.1 | HP: - ATK: - DEF: - [Recommended] Energy Regen: - |
HP: 655 ATK: 93 DEF: 50 [Recommended] Energy Regen: - |
|
| Lv.10 | HP: 1454 ATK: 140 DEF: 111 [Recommended] Energy Regen: - |
HP: 1903 ATK: 173 DEF: 145 [Recommended] Energy Regen: - |
Denny ×24,000
Basic Support Certification Seal ×4
|
| Lv.20 | HP: 2792 ATK: 227 DEF: 213 [Recommended] Energy Regen: - |
HP: 3242 ATK: 261 DEF: 248 [Recommended] Energy Regen: - |
Denny ×56,000
Advanced Support Certification Seal ×12
|
| Lv.30 | HP: 4131 ATK: 314 DEF: 315 [Recommended] Energy Regen: - |
HP: 4580 ATK: 347 DEF: 349 [Recommended] Energy Regen: - |
Denny ×120,000
Advanced Support Certification Seal ×20
|
| Lv.40 | HP: 5469 ATK: 400 DEF: 417 [Recommended] Energy Regen: - |
HP: 5919 ATK: 433 DEF: 451 [Recommended] Energy Regen: - |
Denny ×200,000
Ruler Certification Seal ×10
|
| Lv.50 | HP: 6808 ATK: 486 DEF: 519 [Recommended] Energy Regen: - |
HP: 7257 ATK: 520 DEF: 554 [Recommended] Energy Regen: - |
Denny ×400,000
Ruler Certification Seal ×20
|
| Lv.60 | HP: - ATK: - DEF: - [Recommended] Energy Regen: - |
HP: 8145 ATK: 574 DEF: 622 [Recommended] Energy Regen: - |




Total materials across the whole ascension path
Materials Needed to Lv60








Total Denny for the character alone (ascension + basic skills + core skill A→F): about 1,706,000 Denny — W-Engine and Drive Discs not included.
Voice Actors & Character Info
Background & Lore
More unlocks as Trust with this character increases in-game.
How to read this build page
Every Agent build page has 4 parts: a stat table by level, W-Engine/Drive Disc suggestions, a Mindscape roadmap, and recommended teams. Read them in that order — stats tell you "what you need", gear tells you "where to get it", Mindscape tells you "is it worth pulling", teams tell you "who to pair with". The section below explains how to read each part, and it applies the same way to every character on the site.
How to read the stat table and level
The stat table shows values at the ascension breakpoints (usually the final one, e.g. Lv60) — these are BASE stats with no gear added, useful for comparing Agents or checking whether you've ascended far enough. CRIT Rate and CRIT DMG are shown separately because they set the damage ceiling once Drive Disc substats stack on top. If your real stats are lower than the table, you likely haven't fully ascended or leveled yet — it's not a build mistake.
Why the W-Engine and Drive Disc picks make sense
Most Agents have a "signature" W-Engine designed for their exact role, plus a few cheaper standard-banner substitutes. Missing the signature isn't a dead end — most Agents keep most of their power with a well-matched substitute, just short by some amount of total damage.
- Drive Disc sets (2pc + 4pc) are picked for the set effect that fits that Agent's playstyle (mono-element, Anomaly, stun, and so on).
- Substats follow a priority that changes by role: Attack-type Agents usually chase CRIT Rate/CRIT DMG before ATK%; Anomaly-type Agents add Anomaly Proficiency to that mix; Stun/Support roles often value survivability or energy stats over pure CRIT.
These weights differ per character — follow the exact substat priority table above rather than applying one formula to every role.
Is Mindscape worth chasing
General rule: M0 (no duplicates) already clears the game's hardest content, even for S-rank Agents. Mindscape is a duplicate-fueled upgrade system, and each level costs more resources for a smaller power gain. For most Agents, the best value stop is usually M1–M2 (where some key effects unlock), while M6 is almost always for players chasing the absolute ceiling, not a requirement. Check the Mindscape section in the table above for that specific Agent's numbers.
Skill priority by role
There's no single order for every Agent, but the general pattern by role is:
- Attack: level the main damage skill first (Basic or Special Attack depending on kit), Dash/Dodge last.
- Stun: prioritize whichever skill builds Daze/Stun fastest, since the stun window is where the whole team dumps damage.
- Support: prioritize buff or energy-generating skills over personal damage — this role's value comes from lifting the whole team.
- Anomaly: prioritize the skill that stacks anomaly buildup, since most of the damage comes from the triggered effect, not the direct hit.
Always level the Core Skill steadily alongside the rest — it's a baseline stat that affects the whole rotation, not just one move.
Where to dig deeper
This section only teaches you how to read the page — for deeper comparisons, use the dedicated tools:
- Tier list to see where this Agent stands against the full roster.
- Teams for full in-game comps, including Bangboo and rotation order.
- Disc score to check how your current gear scores against the benchmark.
Agents of the same attribute





Nicole FAQ
What is the best W-Engine for Nicole?
Nicole performs best with The Vault. See alternatives and required stats in the Gear section above.
Is Nicole worth pulling?
Nicole is one of the most cost-effective budget supports in the game: DEF shred, enemy grouping, and energy generation, all from a free A-rank. She still shows up regularly in Ether teams and any comp that wants tight clustering in the 3.0 meta. Well worth leveling her Core and Mindscapes—a high priority for new and veteran players alike.
What is the best team for Nicole?
Nicole works best in the Sly Bunny Squad team. Full members and rotation are in the Teams section.
Who voices Nicole in Zenless Zone Zero?
Nicole (faction Cunning Hares, birthday Nov 11) is voiced according to the official credits published on the HoYoverse Wiki. See the full English/Japanese/Korean/Chinese voice actor list in the "Voice Actors & Character Info" block above — this data is pulled directly from the official wiki, not guessed.
Which Mindscape of Nicole is worth investing in?
Nicole has 6 Mindscape tiers (M1-M6), each unlocking its own effect detailed in the "Mindscape" block above (official wording). Mindscapes cost Mindscape Cinema currency farmed from limited banners, so weigh it against your budget — F2P players usually stop at M0-M1 and prioritize W-Engine and Drive Discs before pushing Mindscape higher.
How much Denny and how many materials to level Nicole to Lv60?
Leveling Nicole to max Lv60 (ascension + basic skills to 12 + core skill A→F) costs roughly 1,706,000 Denny, plus role-specific ascension materials, attribute-specific skill chips, high-dimensional data, and weekly boss drops — see the full list with exact quantities in the "Materials Needed" block above, sourced from the game's official leveling tables.
 Understand the mechanics behind this
 Drive Disc Scorer→