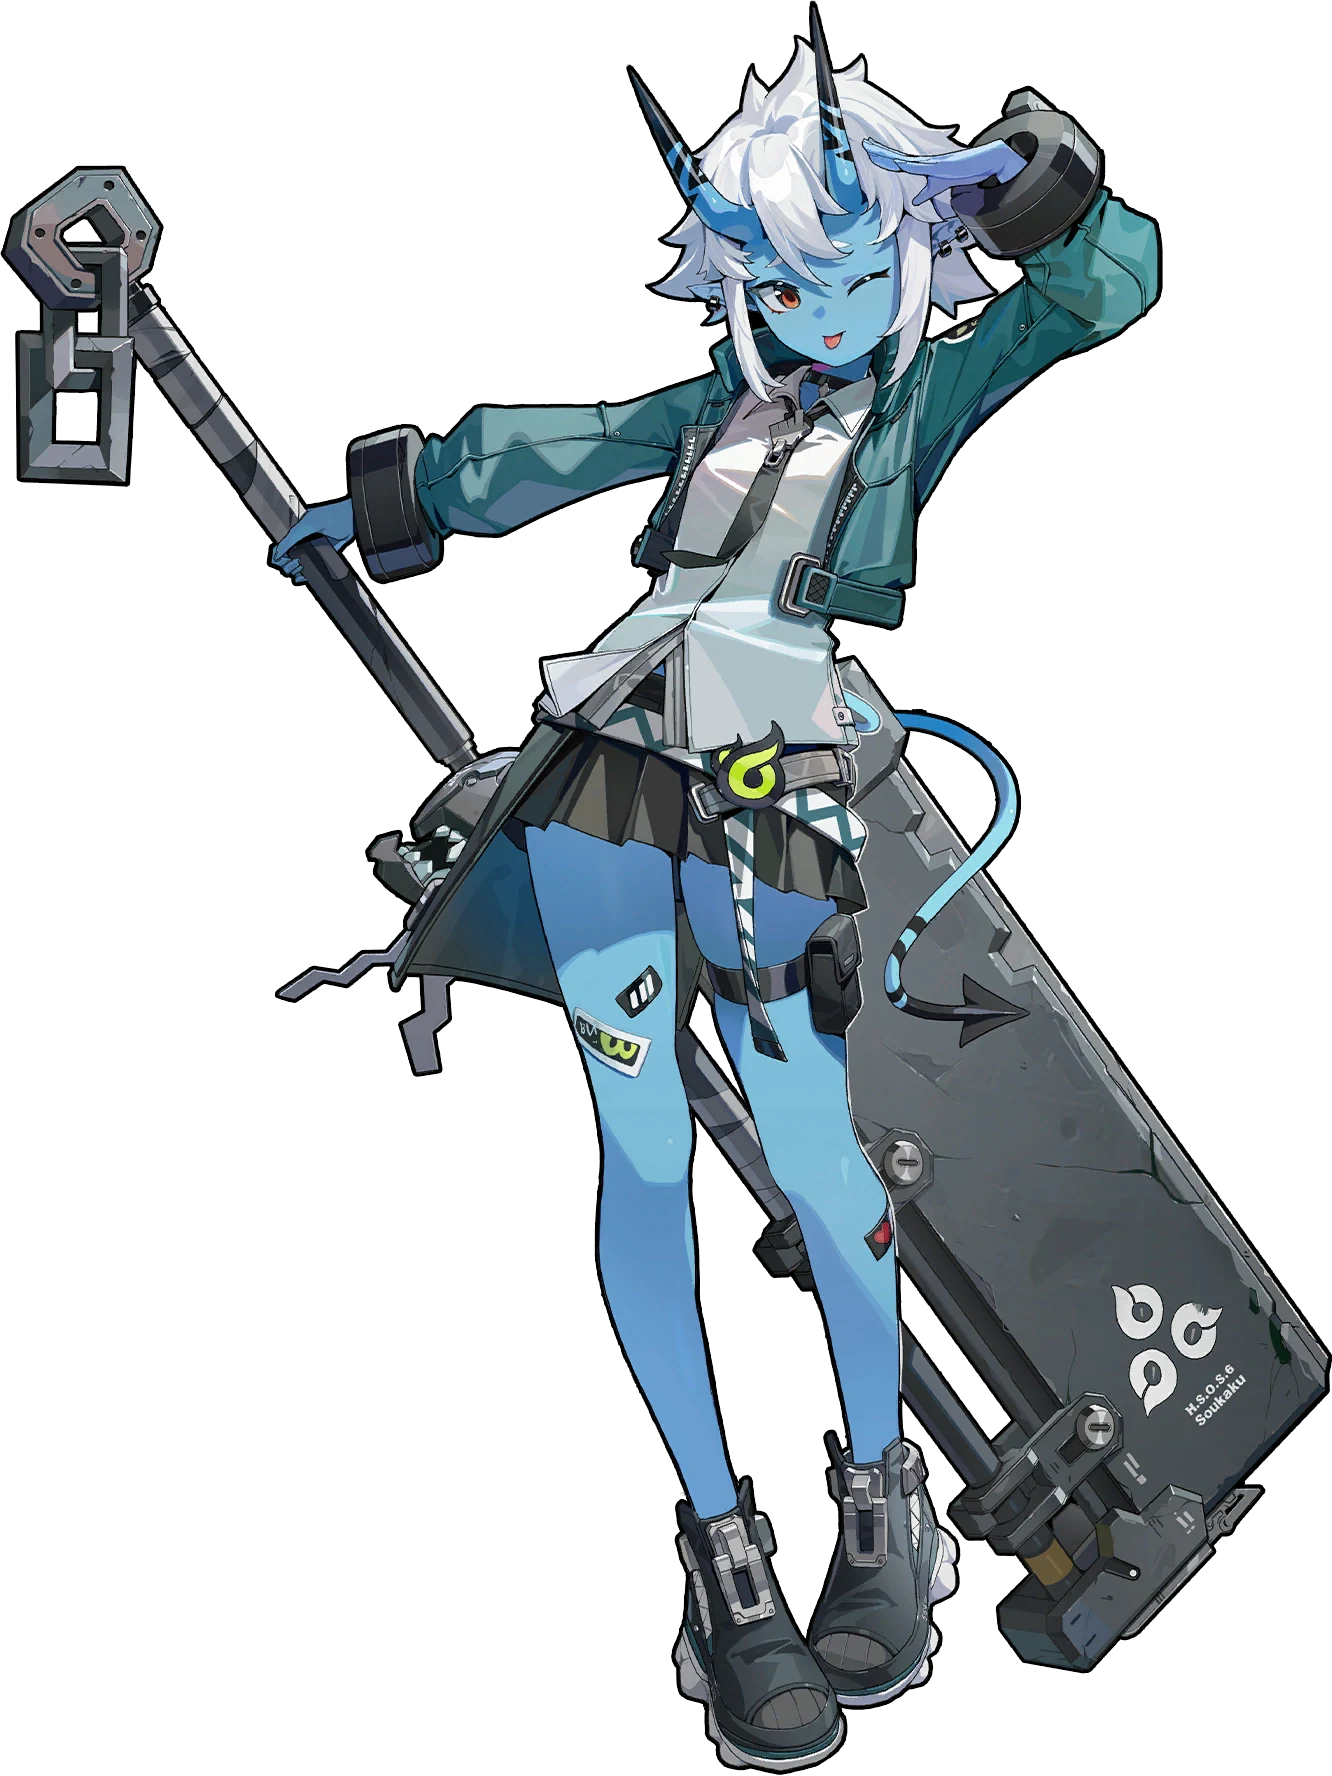
Soukaku
An off-field Ice Support: buffs team-wide ATK% and adds Ice DMG, feeding energy so the Ice DPS can go off.
Tier A · Support · Ice. BiS: Bashful Demon. An off-field Ice Support: buffs team-wide ATK% and adds Ice DMG, feeding energy so the Ice DPS can go off.



Base stats
Recommended build
Best W-Engines

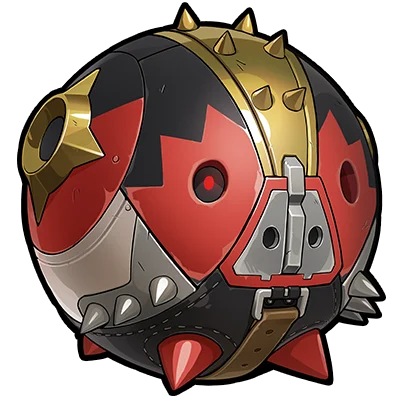
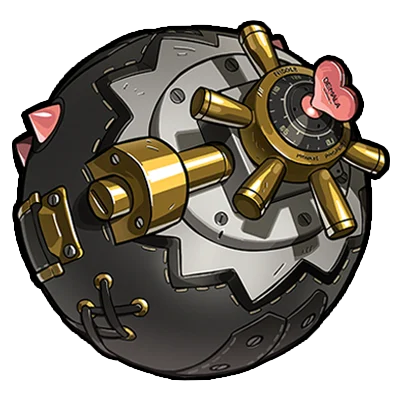
Recommendation order by current meta — the first is strongest, the rest are alternatives in decreasing priority. (Not a simulated DPS %.)
Recommended Drive Discs
 Swing Jazz
 Astral Voice
 Freedom Blues
 Polar Metal
4: ATK% · 5: ATK% · 6: ATK% (or Energy Regen if starved for energy)
Prioritize ATK% > Energy Regen > CRIT (her Core buff scales with her ATK)
Skill priority: Core Skill > Special Attack > Assist (Basic/Dodge last)
Recommended teams




 Astra Yao
Stat targets
ATK targets (+): beginner ~2,000 ATK; with OR without her signature aim ~2,500 ATK — because her Core Passive REQUIRES 2,500+ ATK to deliver the full flat ATK buff (~1,000 ATK) it passes to the DPS. If leveling Core to Lv4 the ideal is ~2,777 ATK, at Lv6 ~2,500. Main stats: slot 4 ATK% · slot 5 ATK% · slot 6 ATK% (swap to Energy Regen if energy-starved). Substat priority: ATK% > Energy Regen (her buffs scale off HER OWN ATK, so CRIT is unnecessary for pure support; only add CRIT for a hybrid M6/on-field build).
Rotation & combos
1) BUILD VORTEX: enter and use Basic / EX Special to stack Vortex. 2) RAISE THE FLAG: HOLD EX Special (long-press) to consume 3 Vortex → Fly the Flag → enter Frosted Banner state (45s): grants a flat ATK buff (passed to the next on-field ally) + team-wide Ice DMG. 3) SWAP TO DPS: quick-swap to your main Ice DPS (Ellen/Miyabi) to soak the full buff window. 4) REFRESH: before the buff expires (M1 adds +8s), swap back to Soukaku and repeat the chain. Tip: use Chain/Assist to fold the Vortex-build + Fly-the-Flag steps into one, cutting her field time.
- FREE Ice support, obtained early: grants a huge flat ATK buff (up to ~1,000 ATK) passed straight to the on-field DPS — a rock-solid F2P team backbone.
- Double buff for Ice teams: after consuming 3 Vortex she also grants +20% team-wide Ice DMG — ATK + Ice DMG together, a perfect fit for Ellen/Miyabi.
- Very cheap to build: only needs ATK% + Energy Regen, NO CRIT or premium discs; her A-rank signature Bashful Demon is craftable, no gacha needed.
- Long buff window (Frosted Banner 45s, +8s with M1) → low field time, very high buff uptime, letting the DPS hog the field.
- Clunky flag upkeep: you must keep swapping back to re-do the Vortex→Fly-the-Flag chain to refresh — a fussier rotation than modern plug-and-play supports (Astra Yao).
- Value locked to Ice: her strongest buffs (Ice DMG, M4 RES shred) only shine with Ice DPS; in off-element teams she gives only the ATK buff, wasting half her kit.
- Needs 2,500+ ATK to unlock the Core Passive's full flat ATK buff — a real gating threshold; under-mocked discs below the line noticeably shortchange the buff.
Recommended Bangboo
Endgame mode fit
Great in Shiyu Defense: as support for single-target Ice burst teams (Ellen/Lycaon or Miyabi) — her flat ATK buff + Ice DMG + M4 RES shred let the Ice DPS dump huge damage in the stun window. She scores nothing herself but pushes the carry's ceiling; downside is timing flag refreshes between phases.
Also solid in Deadly Assault: an ATK/Ice engine for Ice or Ice-Disorder teams (Miyabi + Yanagi/Burnice) — M1 (+8s) helps hold buffs across multiple high-HP waves so the main DPS tops the score. She's a support backbone, not a damage source, so her impact scales with the DPS she's paired with.
Skills
Basic Attack2
 Basic Attack
Basic Attack: Making Rice Cakes
Press to activate:Unleashes up to 3 attacks, dealing Physical DMG.
Basic Attack: Making Rice Cakes (Frosted Banner)
When Frosted Banner is active, press to activate:Unleashes up to 3 faster attacks in front, dealing Ice DMG.
Dodge4
 Dodge
DodgeDodge: Grab a Bite
Press to activate:A quick dash dodge. Character is invulnerable while using this skill.
Dash Attack: 50/50
Press during a dodge to activate:Slashes enemies in front, dealing Physical DMG.
Dash Attack: 50/50 (Frosted Banner)
When Frosted Banner is active, press during a Dodge to activate:Slashes enemies in front, dealing Ice DMG.
Dodge Counter: Away From My Snacks
Press during a Perfect Dodge to activate:Slashes enemies in front, dealing Ice DMG.Character is invulnerable while using this skill.
Assist3
 Assist
Quick Assist: A Set for Two
When the on-field character is launched, press to activate:Slashes enemies in front, dealing Ice DMG.Character is invulnerable while using this skill.
Defensive Assist: Guarding Tactics
When the character on field is about to be attacked, press to activate:Parries the enemy's attack, dealing massive Daze. This skill excels at parrying enemy attacks and reduces the consumption of Assist Points when the character is under intense attacks. Character is invulnerable while using this skill.
Assist Follow-Up: Sweeping Strike
Press after a Defensive Assist to activate:Charges and strikes enemies in front, dealing Ice DMG.Character is invulnerable while using this skill. Holding while using this skill allows for a quick transition to Fly the Flag.
Special Attack3
 Special Attack
Special Attack: Cooling Bento
Press to activate:Soukaku releases a wind current in front of her and unleashes her finishing move, dealing Ice DMG.During skill activation, Anti-Interrupt level increases, and DMG taken is reduced by 40%.Holding while using this skill allows for a quick transition to Fly the Flag.
EX Special Attack: Fanning Mosquitoes
With enough Energy, press to activate:Releases wind currents of extended range in front of her, dealing massive Ice DMG.This skill can be triggered consecutively by pressing repeatedly. Each use consumes a specified amount of Energy. When Soukaku's Energy is depleted, or you stop pressing the button, she unleashes a powerful finishing move that deals massive Ice DMG.During skill activation, Anti-Interrupt level increases, and DMG taken is reduced by 40%.Holding while using this skill allows for a quick transition to Fly the Flag.
Special Attack: Rally!
Hold to activate:Soukaku plunges her weapon into the ground, morphs it into a flag, and launches Fly the Flag, dealing Ice DMG. Hitting an enemy with Fly the Flag triggers a Quick Assist. Pressing or after Fly the Flag activates a Special Attack as she retracts the flag, dealing Ice DMG.If Soukaku owns 3 stacks of Vortex on using Fly the Flag, she consumes all 3 stacks and enters the Frosted Banner state. In the Frosted Banner state, she can unleash an enhanced Basic Attack or an enhanced Dash Attack, dealing massive Ice DMG. This effect can last up to 45s or stack up to 6 times. Soukaku's weapon gains Vortexes in the following circumstances:Gains 1 stack of Vortex when launching an EX Special Attack,Gains 1 stack of Vortex when launching a Chain Attack,Gains 3 stacks of Vortex when launching an Ultimate. Soukaku can accumulate a maximum of 3 stacks of Vortex.
Chain Attack2
 Chain Attack
Chain Attack: Pudding Slash
When a Chain Attack is triggered, select the character to activate:Soukaku quickly unleashes a series of strikes at enemies in front of her and follows up with Fly the Flag, dealing massive Ice DMG.Character is invulnerable while using this skill.
Ultimate: Jumbo Pudding Slash
When Decibel Rating is at Maximum, press to activate:Soukaku quickly unleashes an extended series of strikes at enemies in front of her and follows up with Fly the Flag, dealing massive Ice DMG.Upon activating this skill, Soukaku enters the Masked state, increasing her CRIT Rate by 15% for 15s.Upon activating this skill, other squad members recover 10 Energy. The next character to switch in gains an additional 20 Energy. Character is invulnerable while using this skill.
Core Skill2
 Core Skill
Core Passive: Blade Banner
When Soukaku launches Fly the Flag, her ATK is increased by 10%/12.5%/15%/17%/18%/19%/20% of her initial ATK up to 500, for 22s. When consuming Vortex during Fly the Flag, the ATK increase is doubled, up to a max of 1,000. This buff can be passed along to characters switching in via Quick Assists or Chain Attacks triggered by Fly the Flag, and it refreshes the duration of the buff.
Additional Ability: Group Set Meal
When another character in your squad shares the same Attribute or Faction:When Soukaku consumes Vortex to activate Fly the Flag, the Ice DMG of all squad members is increased by 20% for 22s.
Skill Coefficients by Level
Basic Attack2
Basic Attack: Making Rice Cakes
| Lv | Lv.1 | Lv.2 | Lv.3 | Lv.4 | Lv.5 | Lv.6 | Lv.7 | Lv.8 | Lv.9 | Lv.10 | Lv.11 | Lv.12 | Lv.13 | Lv.14 | Lv.15 | Lv.16 |
|---|---|---|---|---|---|---|---|---|---|---|---|---|---|---|---|---|
| 1st-Hit DMG Multiplier | 66.2% | 72.3% | 78.4% | 84.5% | 90.6% | 96.7% | 102.8% | 108.9% | 115% | 121.1% | 127.2% | 133.3% | 139.4% | 145.5% | 151.6% | 157.7% |
| 2nd-Hit DMG Multiplier | 216.3% | 236% | 255.7% | 275.4% | 295.1% | 314.8% | 334.5% | 354.2% | 373.9% | 393.6% | 413.3% | 433% | 452.7% | 472.4% | 492.1% | 511.8% |
| 3rd-Hit DMG Multiplier | 293.1% | 319.8% | 346.5% | 373.2% | 399.9% | 426.6% | 453.3% | 480% | 506.7% | 533.4% | 560.1% | 586.8% | 613.5% | 640.2% | 666.9% | 693.6% |
| 1st-Hit Daze Multiplier | 33.1% | 34.7% | 36.3% | 37.9% | 39.5% | 41.1% | 42.7% | 44.3% | 45.9% | 47.5% | 49.1% | 50.7% | 52.3% | 53.9% | 55.5% | 57.1% |
| 2nd-Hit Daze Multiplier | 188% | 196.6% | 205.2% | 213.8% | 222.4% | 231% | 239.6% | 248.2% | 256.8% | 265.4% | 274% | 282.6% | 291.2% | 299.8% | 308.4% | 317% |
| 3rd-Hit Daze Multiplier | 221.7% | 231.8% | 241.9% | 252% | 262.1% | 272.2% | 282.3% | 292.4% | 302.5% | 312.6% | 322.7% | 332.8% | 342.9% | 353% | 363.1% | 373.2% |
Basic Attack: Making Rice Cakes (Frosted Banner)
| Lv | Lv.1 | Lv.2 | Lv.3 | Lv.4 | Lv.5 | Lv.6 | Lv.7 | Lv.8 | Lv.9 | Lv.10 | Lv.11 | Lv.12 | Lv.13 | Lv.14 | Lv.15 | Lv.16 |
|---|---|---|---|---|---|---|---|---|---|---|---|---|---|---|---|---|
| 1st-Hit DMG Multiplier | 76.6% | 83.6% | 90.6% | 97.6% | 104.6% | 111.6% | 118.6% | 125.6% | 132.6% | 139.6% | 146.6% | 153.6% | 160.6% | 167.6% | 174.6% | 181.6% |
| 2nd-Hit DMG Multiplier | 228.5% | 249.3% | 270.1% | 290.9% | 311.7% | 332.5% | 353.3% | 374.1% | 394.9% | 415.7% | 436.5% | 457.3% | 478.1% | 498.9% | 519.7% | 540.5% |
| 3rd-Hit DMG Multiplier | 511.4% | 557.9% | 604.4% | 650.9% | 697.4% | 743.9% | 790.4% | 836.9% | 883.4% | 929.9% | 976.4% | 1022.9% | 1069.4% | 1115.9% | 1162.4% | 1208.9% |
| 1st-Hit Daze Multiplier | 46.6% | 48.8% | 51% | 53.2% | 55.4% | 57.6% | 59.8% | 62% | 64.2% | 66.4% | 68.6% | 70.8% | 73% | 75.2% | 77.4% | 79.6% |
| 2nd-Hit Daze Multiplier | 127.5% | 133.3% | 139.1% | 144.9% | 150.7% | 156.5% | 162.3% | 168.1% | 173.9% | 179.7% | 185.5% | 191.3% | 197.1% | 202.9% | 208.7% | 214.5% |
| 3rd-Hit Daze Multiplier | 263.3% | 275.3% | 287.3% | 299.3% | 311.3% | 323.3% | 335.3% | 347.3% | 359.3% | 371.3% | 383.3% | 395.3% | 407.3% | 419.3% | 431.3% | 443.3% |
Dodge3
Dash Attack: 50/50
| Lv | Lv.1 | Lv.2 | Lv.3 | Lv.4 | Lv.5 | Lv.6 | Lv.7 | Lv.8 | Lv.9 | Lv.10 | Lv.11 | Lv.12 | Lv.13 | Lv.14 | Lv.15 | Lv.16 |
|---|---|---|---|---|---|---|---|---|---|---|---|---|---|---|---|---|
| DMG Multiplier | 76.7% | 83.7% | 90.7% | 97.7% | 104.7% | 111.7% | 118.7% | 125.7% | 132.7% | 139.7% | 146.7% | 153.7% | 160.7% | 167.7% | 174.7% | 181.7% |
| Daze Multiplier | 38.4% | 40.2% | 42% | 43.8% | 45.6% | 47.4% | 49.2% | 51% | 52.8% | 54.6% | 56.4% | 58.2% | 60% | 61.8% | 63.6% | 65.4% |
Dash Attack: 50/50 (Frosted Banner)
| Lv | Lv.1 | Lv.2 | Lv.3 | Lv.4 | Lv.5 | Lv.6 | Lv.7 | Lv.8 | Lv.9 | Lv.10 | Lv.11 | Lv.12 | Lv.13 | Lv.14 | Lv.15 | Lv.16 |
|---|---|---|---|---|---|---|---|---|---|---|---|---|---|---|---|---|
| DMG Multiplier | 131.5% | 143.5% | 155.5% | 167.5% | 179.5% | 191.5% | 203.5% | 215.5% | 227.5% | 239.5% | 251.5% | 263.5% | 275.5% | 287.5% | 299.5% | 311.5% |
| Daze Multiplier | 80.1% | 83.8% | 87.5% | 91.2% | 94.9% | 98.6% | 102.3% | 106% | 109.7% | 113.4% | 117.1% | 120.8% | 124.5% | 128.2% | 131.9% | 135.6% |
Dodge Counter: Away From My Snacks
| Lv | Lv.1 | Lv.2 | Lv.3 | Lv.4 | Lv.5 | Lv.6 | Lv.7 | Lv.8 | Lv.9 | Lv.10 | Lv.11 | Lv.12 | Lv.13 | Lv.14 | Lv.15 | Lv.16 |
|---|---|---|---|---|---|---|---|---|---|---|---|---|---|---|---|---|
| DMG Multiplier | 247.3% | 269.8% | 292.3% | 314.8% | 337.3% | 359.8% | 382.3% | 404.7% | 427.3% | 449.8% | 472.3% | 494.8% | 517.3% | 539.8% | 562.3% | 584.8% |
| Daze Multiplier | 213.4% | 223.1% | 232.8% | 242.5% | 252.2% | 261.9% | 271.6% | 281.3% | 291% | 300.7% | 310.4% | 320.1% | 329.8% | 339.5% | 349.2% | 358.9% |
Assist3
Quick Assist: A Set for Two
| Lv | Lv.1 | Lv.2 | Lv.3 | Lv.4 | Lv.5 | Lv.6 | Lv.7 | Lv.8 | Lv.9 | Lv.10 | Lv.11 | Lv.12 | Lv.13 | Lv.14 | Lv.15 | Lv.16 | |
|---|---|---|---|---|---|---|---|---|---|---|---|---|---|---|---|---|---|
| DMG Multiplier | 113.4% | 123.8% | 134.2% | 144.6% | 155% | 165.4% | 175.8% | 186.2% | 196.6% | 207% | 217.4% | 227.8% | 238.2% | 248.6% | 259% | 269.4% | |
| Daze Multiplier | 113.4% | 118.6% | 123.8% | 129% | 134.2% | 139.4% | 144.6% | 149.8% | 155% | 160.2% | 165.4% | 170.6% | 175.8% | 181% | 186.2% | 191.4% |
Defensive Assist: Guarding Tactics
| Lv | Lv.1 | Lv.2 | Lv.3 | Lv.4 | Lv.5 | Lv.6 | Lv.7 | Lv.8 | Lv.9 | Lv.10 | Lv.11 | Lv.12 | Lv.13 | Lv.14 | Lv.15 | Lv.16 | |
|---|---|---|---|---|---|---|---|---|---|---|---|---|---|---|---|---|---|
| Light Defensive Daze Multiplier | 246.7% | 258% | 269.3% | 280.6% | 291.9% | 303.2% | 314.5% | 325.8% | 337.1% | 348.4% | 359.7% | 371% | 382.3% | 393.6% | 404.9% | 416.2% | |
| Heavy Defense Daze Multiplier | 311.7% | 325.9% | 340.1% | 354.3% | 368.5% | 382.7% | 396.9% | 411.1% | 425.3% | 439.5% | 453.7% | 467.9% | 482.1% | 496.3% | 510.5% | 524.7% | |
| Chain Defensive Daze Multiplier | 151.7% | 158.6% | 165.5% | 172.4% | 179.3% | 186.2% | 193.1% | 200% | 206.9% | 213.8% | 220.7% | 227.6% | 234.5% | 241.4% | 248.3% | 255.2% |
Assist Follow-Up: Sweeping Strike
| Lv | Lv.1 | Lv.2 | Lv.3 | Lv.4 | Lv.5 | Lv.6 | Lv.7 | Lv.8 | Lv.9 | Lv.10 | Lv.11 | Lv.12 | Lv.13 | Lv.14 | Lv.15 | Lv.16 | |
|---|---|---|---|---|---|---|---|---|---|---|---|---|---|---|---|---|---|
| DMG Multiplier | 377.2% | 411.5% | 445.8% | 480.1% | 514.4% | 548.7% | 583% | 617.3% | 651.6% | 685.9% | 720.2% | 754.5% | 788.8% | 823.1% | 857.4% | 891.7% | |
| Daze Multiplier | 330.4% | 345.6% | 360.8% | 376% | 391.2% | 406.4% | 421.6% | 436.8% | 452% | 467.2% | 482.4% | 497.6% | 512.8% | 528% | 543.2% | 558.4% |
Special Attack3
Special Attack: Cooling Bento
| Lv | Lv.1 | Lv.2 | Lv.3 | Lv.4 | Lv.5 | Lv.6 | Lv.7 | Lv.8 | Lv.9 | Lv.10 | Lv.11 | Lv.12 | Lv.13 | Lv.14 | Lv.15 | Lv.16 |
|---|---|---|---|---|---|---|---|---|---|---|---|---|---|---|---|---|
| 1st-Hit DMG Multiplier | 28.4% | 31% | 33.6% | 36.2% | 38.8% | 41.4% | 44% | 46.6% | 49.2% | 51.8% | 54.4% | 57% | 59.6% | 62.2% | 64.8% | 67.4% |
| Finishing Move DMG Multiplier | 100.1% | 109.2% | 118.3% | 127.4% | 136.5% | 145.6% | 154.7% | 163.8% | 172.9% | 182% | 191.1% | 200.2% | 209.3% | 218.4% | 227.5% | 236.6% |
| 1st-Hit Daze Multiplier | 28.4% | 29.7% | 31% | 32.3% | 33.6% | 34.9% | 36.2% | 37.5% | 38.8% | 40.1% | 41.4% | 42.7% | 44% | 45.3% | 46.6% | 47.9% |
| Finishing Move Daze Multiplier | 100.1% | 104.7% | 109.3% | 113.9% | 118.5% | 123.1% | 127.7% | 132.3% | 136.9% | 141.5% | 146.1% | 150.7% | 155.3% | 159.9% | 164.5% | 169.1% |
EX Special Attack: Fanning Mosquitoes
| Lv | Lv.1 | Lv.2 | Lv.3 | Lv.4 | Lv.5 | Lv.6 | Lv.7 | Lv.8 | Lv.9 | Lv.10 | Lv.11 | Lv.12 | Lv.13 | Lv.14 | Lv.15 | Lv.16 |
|---|---|---|---|---|---|---|---|---|---|---|---|---|---|---|---|---|
| Consecutive Attack DMG Multiplier | 131.2% | 143.1% | 155.1% | 167% | 179% | 190.9% | 202.9% | 214.8% | 226.8% | 238.7% | 250.7% | 262.6% | 274.6% | 286.5% | 298.5% | 310.4% |
| Wind Current DMG Multiplier | 102.1% | 111.4% | 120.7% | 130% | 139.3% | 148.6% | 157.9% | 167.2% | 176.5% | 185.8% | 195.1% | 204.3% | 213.7% | 223% | 232.3% | 241.6% |
| Consecutive Attack Daze Multiplier | 112.9% | 118% | 123.2% | 128.3% | 133.5% | 138.6% | 143.8% | 148.9% | 154.1% | 159.2% | 164.4% | 169.5% | 174.7% | 179.8% | 185% | 190.1% |
| Wind Current Daze Multiplier | 87.9% | 91.9% | 95.9% | 99.9% | 103.9% | 107.9% | 111.9% | 115.9% | 119.9% | 123.9% | 127.9% | 131.9% | 135.9% | 139.9% | 143.9% | 147.9% |
| Energy Cost to Use | 60 | 60 | 60 | 60 | 60 | 60 | 60 | 60 | 60 | 60 | 60 | 60 | 60 | 60 | 60 | 60 |
| Energy Cost of Each Attack | 30 | 30 | 30 | 30 | 30 | 30 | 30 | 30 | 30 | 30 | 30 | 30 | 30 | 30 | 30 | 30 |
Special Attack: Rally!
| Lv | Lv.1 | Lv.2 | Lv.3 | Lv.4 | Lv.5 | Lv.6 | Lv.7 | Lv.8 | Lv.9 | Lv.10 | Lv.11 | Lv.12 | Lv.13 | Lv.14 | Lv.15 | Lv.16 |
|---|---|---|---|---|---|---|---|---|---|---|---|---|---|---|---|---|
| Fly the Flag DMG Multiplier | 250.1% | 272.9% | 295.7% | 318.5% | 341.3% | 364.1% | 386.9% | 409.7% | 432.5% | 455.3% | 478.1% | 500.9% | 523.7% | 546.5% | 569.3% | 592.1% |
| Quick Fly the Flag DMG Multiplier | 140.1% | 152.9% | 165.7% | 178.5% | 191.3% | 204% | 216.9% | 229.7% | 242.5% | 255.3% | 268.1% | 280.9% | 293.7% | 306.5% | 319.3% | 332.1% |
| Lowering the Flag DMG Multiplier | 245% | 267.3% | 289.6% | 311.9% | 334.2% | 356.5% | 378.8% | 401.1% | 423.4% | 445.7% | 468% | 490.3% | 512.6% | 534.9% | 557.2% | 579.5% |
| Fly the Flag Daze Multiplier | 275.1% | 287.7% | 300.3% | 312.9% | 325.5% | 338.1% | 350.7% | 363.3% | 375.9% | 388.5% | 401.1% | 413.7% | 426.3% | 438.9% | 451.5% | 464.1% |
| Quick Fly the Flag Daze Multiplier | 140.1% | 146.5% | 152.9% | 159.3% | 165.7% | 172.1% | 178.5% | 184.9% | 191.3% | 197.7% | 204.1% | 210.5% | 216.9% | 223.3% | 229.7% | 236.1% |
| Lowering the Flag Daze Multiplier | 245% | 256.2% | 267.4% | 278.6% | 289.8% | 301% | 312.2% | 323.4% | 334.6% | 345.8% | 357% | 368.2% | 379.4% | 390.6% | 401.8% | 413% |
Chain Attack2
Chain Attack: Pudding Slash
| Lv | Lv.1 | Lv.2 | Lv.3 | Lv.4 | Lv.5 | Lv.6 | Lv.7 | Lv.8 | Lv.9 | Lv.10 | Lv.11 | Lv.12 | Lv.13 | Lv.14 | Lv.15 | Lv.16 |
|---|---|---|---|---|---|---|---|---|---|---|---|---|---|---|---|---|
| DMG Multiplier | 745.8% | 813.5% | 881.4% | 949.2% | 1017% | 1084.8% | 1152.6% | 1220.4% | 1288.2% | 1356% | 1423.8% | 1491.6% | 1559% | 1627% | 1695% | 1762.8% |
| Daze Multiplier | 346.8% | 362.6% | 378.4% | 394.2% | 410% | 425.8% | 441.6% | 457.4% | 473.2% | 489% | 504.8% | 520.6% | 536.4% | 552.2% | 568% | 583.8% |
Ultimate: Jumbo Pudding Slash
| Lv | Lv.1 | Lv.2 | Lv.3 | Lv.4 | Lv.5 | Lv.6 | Lv.7 | Lv.8 | Lv.9 | Lv.10 | Lv.11 | Lv.12 | Lv.13 | Lv.14 | Lv.15 | Lv.16 |
|---|---|---|---|---|---|---|---|---|---|---|---|---|---|---|---|---|
| DMG Multiplier | 1989.8% | 2170.7% | 2351.6% | 2532.5% | 2713.4% | 2894.3% | 3075.2% | 3256.1% | 3437% | 3617.9% | 3798.8% | 3979.7% | 4160.6% | 4341.5% | 4522.4% | 4703.3% |
| Daze Multiplier | 376.8% | 394% | 411.2% | 428.4% | 445.6% | 462.8% | 480% | 497.2% | 514.4% | 531.6% | 548.8% | 566% | 583.2% | 600.4% | 617.6% | 634.8% |
Core Skill1
Core Passive: Blade Banner
| Lv | Lv.1 | Lv.2 (A) | Lv.3 (B) | Lv.4 (C) | Lv.5 (D) | Lv.6 (E) | Lv.7 (F) |
|---|---|---|---|---|---|---|---|
| ATK Increase | 10% | 12.5% | 15% | 17% | 18% | 19% | 20% |
| Energy Regen | - | +0.12/s | - | +0.12/s | - | +0.12/s | - |
| Base ATK | - | - | +25 | - | +25 | - | +25 |
Mindscapes — how far is worth it?
When Soukaku triggers Core Passive: Blade Banner or Additional Ability: Group Set Meal, the buff duration is increased by 8s. When charged, the special charging module can generate a wind current of Ether energy to charge surrounding Ether devices. To Soukaku, it's just like having a buffet with friends. "Guys~ It's all-you-can-eat time!"
When Soukaku's Basic Attack, Dash Attack, Dodge Counter, or Quick Assist hits an enemy, there's a 15% chance she gains 1 stack of Vortex, triggering up to once per second. When Vortex reaches max stacks, any additional stacks grant Soukaku 1.2 Energy instead. A charging module is able to continuously accumulate energy during battle. Therefore, it is regarded as an era-defining conceptual tactical weapon by the R&D department. But for Soukaku, fully charging it simply means it's time to eat.
Basic Attack, Dodge, Assist, Special Attack, and Chain Attack Lv. +2 The best way to motivate Soukaku to train harder is simple: just increase her attendance meal allowance.
If an enemy is hit by Fly the Flag, the target's Ice RES is reduced by 10% for 8s. The custom-made weapon Oni Banner features a powerful built-in cooling system. Its Ether-infused catalyst generates cold air, dealing significant DMG to enemies it hits.
Basic Attack, Dodge, Assist, Special Attack, and Chain Attack Lv. +2 To further incentivize Soukaku to train is simple: just add a late-night snack top of the attendance meal allowance.
While in the Frosted Banner state, the number of usable enhanced Basic Attacks and enhanced Dash Attacks are increased to 12, and also deal 45% more DMG. Unlocking the safety device within the blade banner allows it to operate at full capacity. It's not just for combat... it's also handy for cooling down a meal.
Stats & Materials by Ascension Milestone
| Lv. | Before | After | Materials for this milestone |
|---|---|---|---|
| Lv.1 | HP: - ATK: - DEF: - [Recommended] ATK: - |
HP: 645 ATK: 96 DEF: 48 [Recommended] ATK: - |
|
| Lv.10 | HP: 1433 ATK: 145 DEF: 106 [Recommended] ATK: - |
HP: 1876 ATK: 179 DEF: 139 [Recommended] ATK: - |
Denny ×24,000
Basic Support Certification Seal ×4
|
| Lv.20 | HP: 2751 ATK: 234 DEF: 204 [Recommended] ATK: - |
HP: 3194 ATK: 268 DEF: 237 [Recommended] ATK: - |
Denny ×56,000
Advanced Support Certification Seal ×12
|
| Lv.30 | HP: 4070 ATK: 323 DEF: 303 [Recommended] ATK: - |
HP: 4513 ATK: 358 DEF: 336 [Recommended] ATK: - |
Denny ×120,000
Advanced Support Certification Seal ×20
|
| Lv.40 | HP: 5389 ATK: 413 DEF: 401 [Recommended] ATK: - |
HP: 5832 ATK: 447 DEF: 434 [Recommended] ATK: - |
Denny ×200,000
Ruler Certification Seal ×10
|
| Lv.50 | HP: 6708 ATK: 501 DEF: 499 [Recommended] ATK: - |
HP: 7150 ATK: 535 DEF: 532 [Recommended] ATK: - |
Denny ×400,000
Ruler Certification Seal ×20
|
| Lv.60 | HP: - ATK: - DEF: - [Recommended] ATK: - |
HP: 8025 ATK: 590 DEF: 597 [Recommended] ATK: - |




Total materials across the whole ascension path
Materials Needed to Lv60






Total Denny for the character alone (ascension + basic skills + core skill A→F): about 1,706,000 Denny — W-Engine and Drive Discs not included.
Voice Actors & Character Info
Background & Lore
More unlocks as Trust with this character increases in-game.
How to read this build page
Every Agent build page has 4 parts: a stat table by level, W-Engine/Drive Disc suggestions, a Mindscape roadmap, and recommended teams. Read them in that order — stats tell you "what you need", gear tells you "where to get it", Mindscape tells you "is it worth pulling", teams tell you "who to pair with". The section below explains how to read each part, and it applies the same way to every character on the site.
How to read the stat table and level
The stat table shows values at the ascension breakpoints (usually the final one, e.g. Lv60) — these are BASE stats with no gear added, useful for comparing Agents or checking whether you've ascended far enough. CRIT Rate and CRIT DMG are shown separately because they set the damage ceiling once Drive Disc substats stack on top. If your real stats are lower than the table, you likely haven't fully ascended or leveled yet — it's not a build mistake.
Why the W-Engine and Drive Disc picks make sense
Most Agents have a "signature" W-Engine designed for their exact role, plus a few cheaper standard-banner substitutes. Missing the signature isn't a dead end — most Agents keep most of their power with a well-matched substitute, just short by some amount of total damage.
- Drive Disc sets (2pc + 4pc) are picked for the set effect that fits that Agent's playstyle (mono-element, Anomaly, stun, and so on).
- Substats follow a priority that changes by role: Attack-type Agents usually chase CRIT Rate/CRIT DMG before ATK%; Anomaly-type Agents add Anomaly Proficiency to that mix; Stun/Support roles often value survivability or energy stats over pure CRIT.
These weights differ per character — follow the exact substat priority table above rather than applying one formula to every role.
Is Mindscape worth chasing
General rule: M0 (no duplicates) already clears the game's hardest content, even for S-rank Agents. Mindscape is a duplicate-fueled upgrade system, and each level costs more resources for a smaller power gain. For most Agents, the best value stop is usually M1–M2 (where some key effects unlock), while M6 is almost always for players chasing the absolute ceiling, not a requirement. Check the Mindscape section in the table above for that specific Agent's numbers.
Skill priority by role
There's no single order for every Agent, but the general pattern by role is:
- Attack: level the main damage skill first (Basic or Special Attack depending on kit), Dash/Dodge last.
- Stun: prioritize whichever skill builds Daze/Stun fastest, since the stun window is where the whole team dumps damage.
- Support: prioritize buff or energy-generating skills over personal damage — this role's value comes from lifting the whole team.
- Anomaly: prioritize the skill that stacks anomaly buildup, since most of the damage comes from the triggered effect, not the direct hit.
Always level the Core Skill steadily alongside the rest — it's a baseline stat that affects the whole rotation, not just one move.
Where to dig deeper
This section only teaches you how to read the page — for deeper comparisons, use the dedicated tools:
- Tier list to see where this Agent stands against the full roster.
- Teams for full in-game comps, including Bangboo and rotation order.
- Disc score to check how your current gear scores against the benchmark.
Agents of the same attribute




Soukaku FAQ
What is the best W-Engine for Soukaku?
Soukaku performs best with Bashful Demon. See alternatives and required stats in the Gear section above.
Is Soukaku worth pulling?
A cheap Ice support, worth leveling if you run Ellen or Miyabi and don't have a premium support yet. Her team-wide ATK buff is rock-solid, but the flag-holding maneuver is a bit clunky, and she's gradually being outclassed on smoothness by Astra Yao and newer supports.
What is the best team for Soukaku?
Soukaku works best in the Mono-Ice team. Full members and rotation are in the Teams section.
Who voices Soukaku in Zenless Zone Zero?
Soukaku (faction Hollow Special Operations Section 6, birthday Jan 23) is voiced according to the official credits published on the HoYoverse Wiki. See the full English/Japanese/Korean/Chinese voice actor list in the "Voice Actors & Character Info" block above — this data is pulled directly from the official wiki, not guessed.
Which Mindscape of Soukaku is worth investing in?
Soukaku has 6 Mindscape tiers (M1-M6), each unlocking its own effect detailed in the "Mindscape" block above (official wording). Mindscapes cost Mindscape Cinema currency farmed from limited banners, so weigh it against your budget — F2P players usually stop at M0-M1 and prioritize W-Engine and Drive Discs before pushing Mindscape higher.
How much Denny and how many materials to level Soukaku to Lv60?
Leveling Soukaku to max Lv60 (ascension + basic skills to 12 + core skill A→F) costs roughly 1,706,000 Denny, plus role-specific ascension materials, attribute-specific skill chips, high-dimensional data, and weekly boss drops — see the full list with exact quantities in the "Materials Needed" block above, sourced from the game's official leveling tables.
 Understand the mechanics behind this
 Drive Disc Scorer→