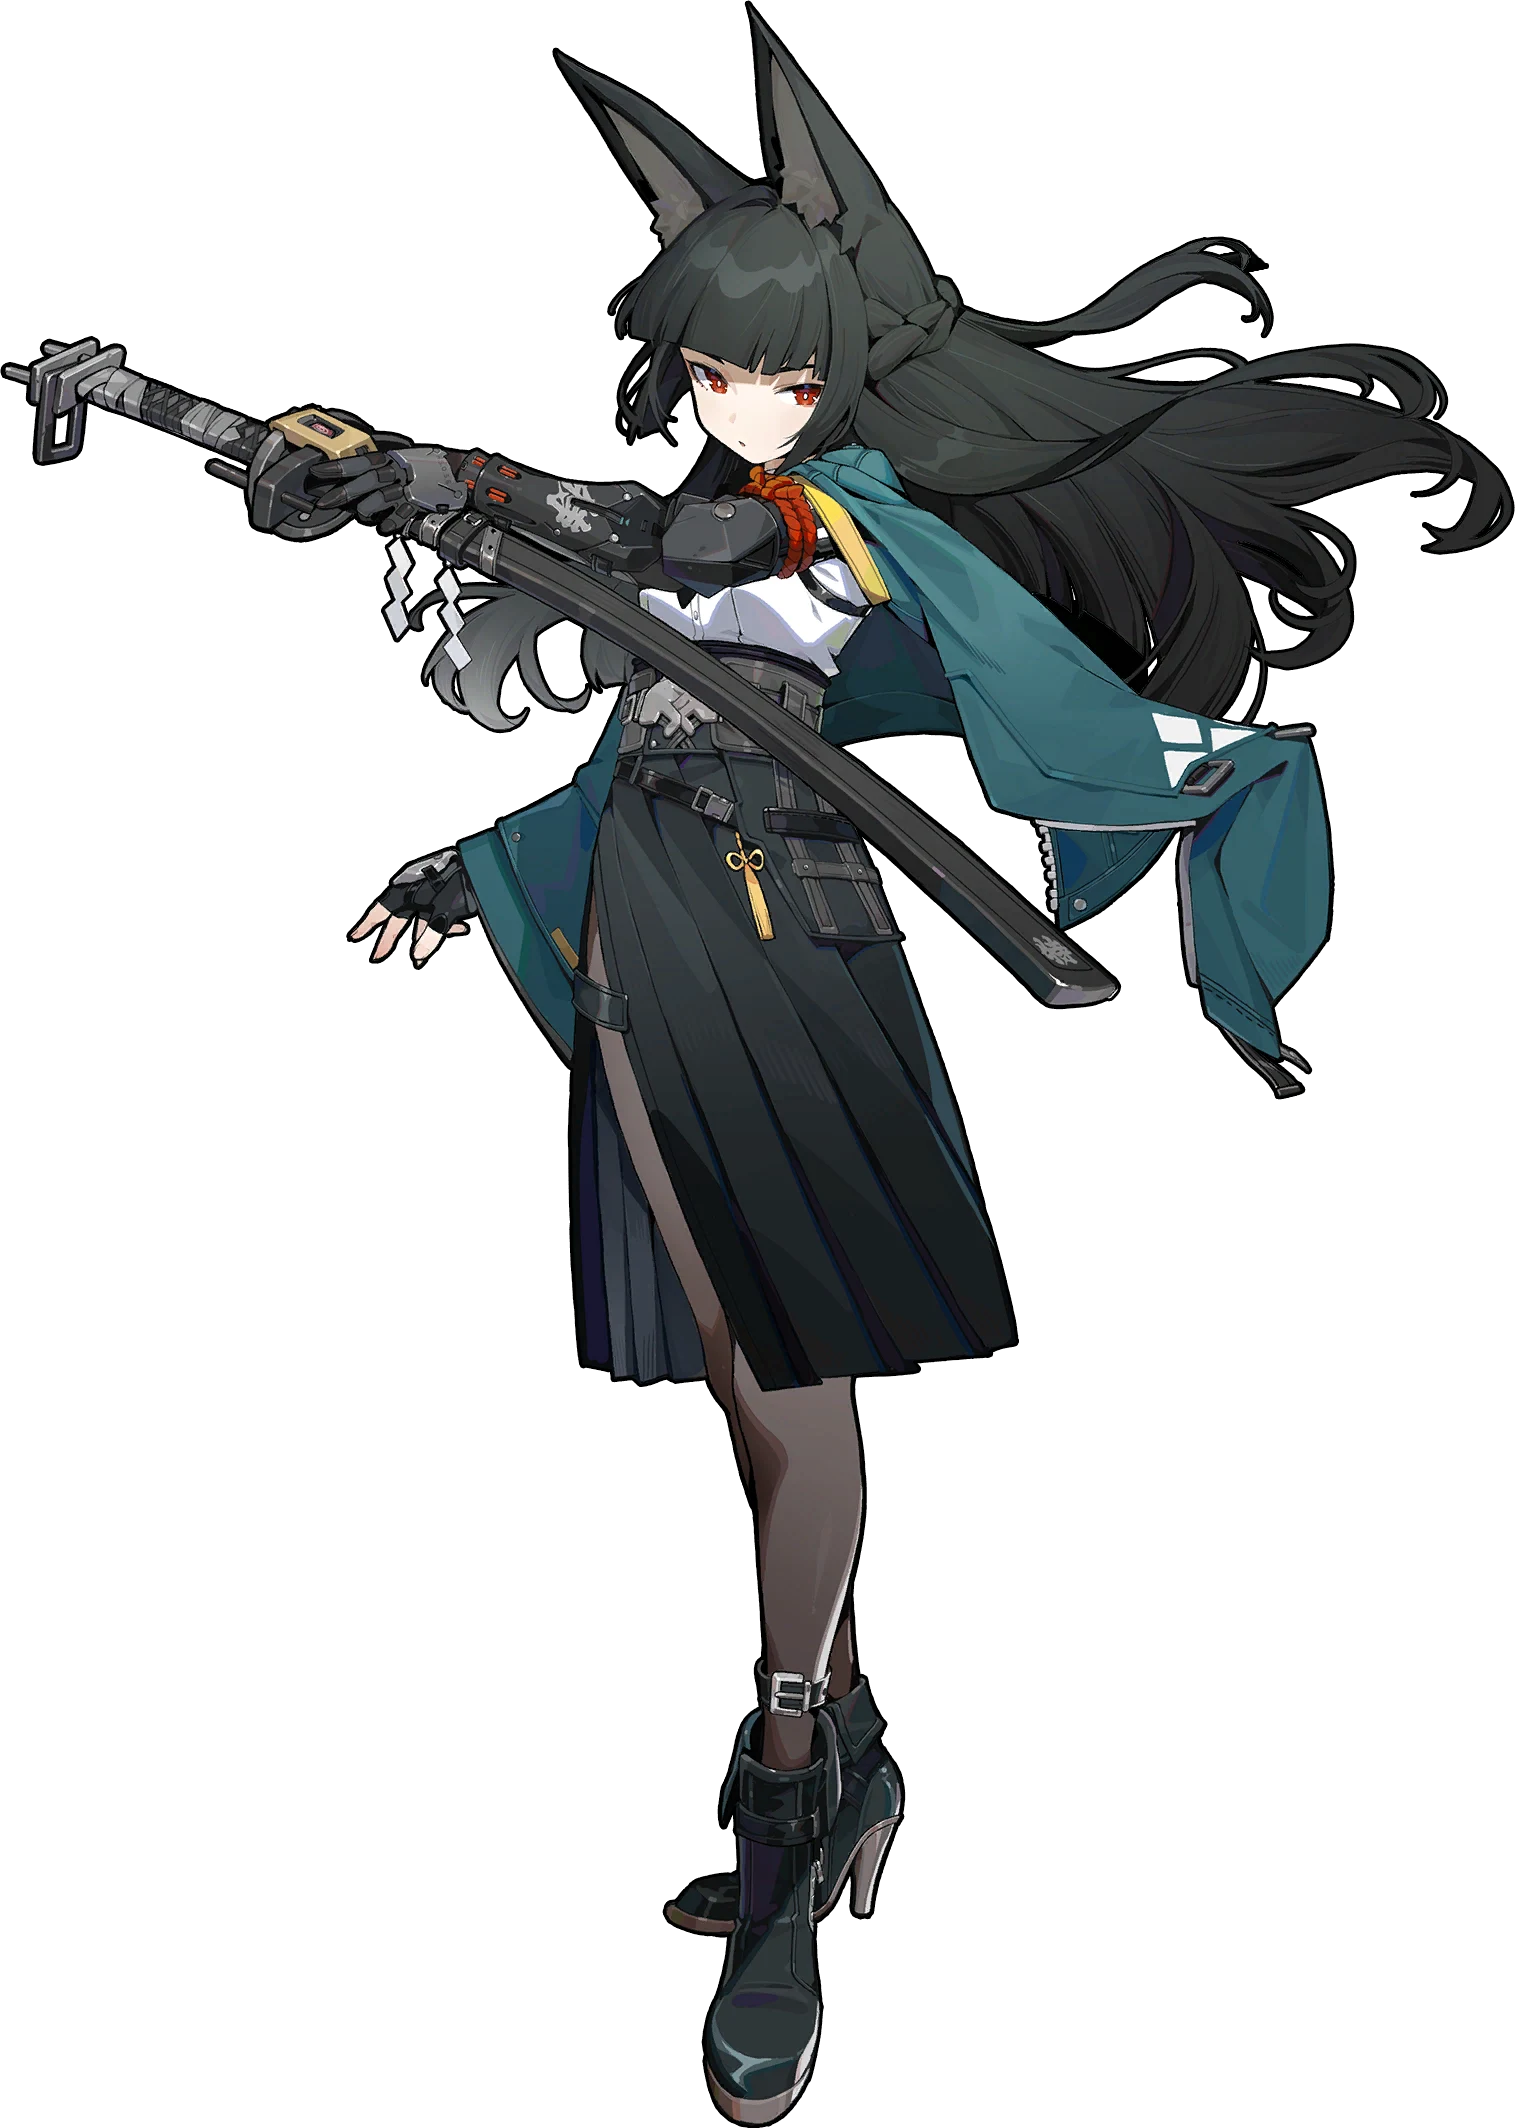
Miyabi
A main Ice Anomaly (Frostbite) DPS who crits extremely hard — she inflicts anomaly while bursting damage like a pure Attack unit.
Tier S+ · Anomaly · Frost. BiS: Hailstorm Shrine. A main Ice Anomaly (Frostbite) DPS who crits extremely hard — she inflicts anomaly while bursting damage like a pure Attack unit.



Base stats
Recommended build
Best W-Engines
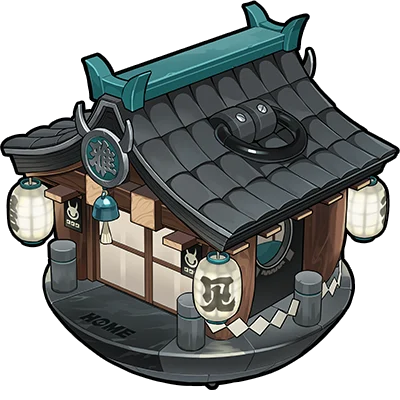
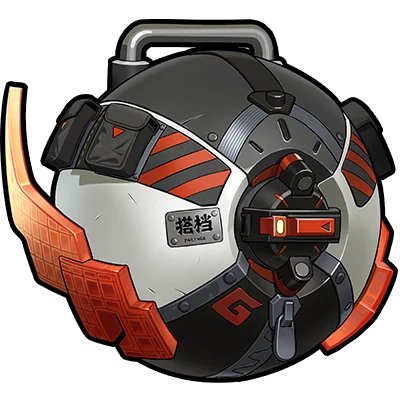
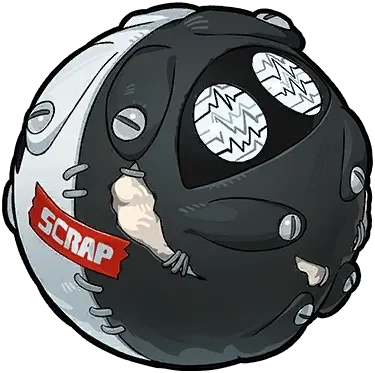
Recommendation order by current meta — the first is strongest, the rest are alternatives in decreasing priority. (Not a simulated DPS %.)
Recommended Drive Discs
 Branch & Blade Song
 Woodpecker Electro
 Polar Metal
4: CRIT Rate / CRIT DMG · 5: Ice DMG · 6: ATK%
CRIT Rate > CRIT DMG > ATK% > Anomaly Proficiency > flat ATK/PEN
Skill priority: Basic Attack = Special Attack (EX) > Assist > Chain Attack > Dodge
Recommended teams




Worth pulling and maxing out: Miyabi is one of the strongest DPS in the game, blending Anomaly and CRIT so she's both easy to play and high-ceiling. Her only weakness is a heavy reliance on her signature Hailstorm Shrine and the need for solid CRIT investment to hit full power; with her own engine she's nearly unrivaled in the Ice role.
Stat targets
Level 60 targets: beginner ATK 2,400 / Crit Rate 40% / Crit DMG 80%; M0 WITH signature ATK 2,800 / CR 68% / CD 120%; M0 WITHOUT signature ATK 2,800 / CR 68% / CD 150%; M2 with signature ATK 3,000+ / CR 53% / CD 150%. The key threshold: aim for ~80% Crit Rate IN COMBAT (after Soukaku/Astra buffs) because her Core's Anomaly Buildup scales with Crit Rate up to a 100% cap. Substat priority: Crit Rate > Crit DMG > ATK% > Anomaly Proficiency.
Rotation & combos
1) OPENER: enter with 3 Fallen Frost, use Basic / EX Special to apply Frostbite. 2) Swap to an Anomaly partner (Burnice/Soukaku…) to trigger Disorder → Miyabi refunds Fallen Frost. 3) LOOP: swap back, and once at 6 Fallen Frost HOLD Basic to charge the 3-stage Shimotsuki → detonate Frostburn-Break, then quick-swap on the break. 4) If Fallen Frost is <=5, fire enhanced EX Special twice in a row (each stage grants 2 Fallen Frost) for both damage and refill. 5) ULTIMATE: grants 3 Fallen Frost + 30% Ice DMG for ~12s; use it to open a burst window, then repeat from step 3.
- Anomaly + CRIT hybrid: her anomalies can CRIT, so she stacks Frostbite/Disorder while bursting like a pure Attacker.
- Long invincibility frames while charging — very hard to interrupt or punish.
- Self-sufficient Fallen Frost economy via Disorder → high uptime, and charged attacks make up 60%+ of her damage for very consistent output.
- Flexible teams: works from F2P mono-ice (Soukaku/Lycaon) up to premium comps with Astra Yao.
- Very stat-hungry: needs ~80% in-combat Crit Rate to max anomaly buildup plus high Crit DMG — demanding disc RNG and farming.
- Heavily reliant on her signature Hailstorm Shrine (the only Anomaly engine giving CRIT); off-signature she performs at only ~70%.
- Complex rotation with long combos and quick-swaps — higher execution skill than a plain point-and-shoot Attacker.
Recommended Bangboo
Endgame mode fit
Excellent in Shiyu Defense: single-target burst teams (mono-ice with Lycaon/Soukaku, or with Astra) — her charged bursts melt bosses in the stun window, making her a top single-side clearer; the strongest attacker.
Also strong in Deadly Assault: shines most with Disorder teams (Ice-Electric with Yanagi, Ice-Fire with Burnice, or Ice-Physical with Piper) to pile anomaly damage on multiple high-HP foes — regularly a top scorer.
Skills
Basic Attack2
 Basic Attack
Basic Attack: Kazahana
Press to activate: Unleashes up to five slashes ahead, the first two deal Physical DMG, and the last three deal Frost DMG. Block enemy attacks during the 5th hit of the Basic Attack.
Basic Attack: Shimotsuki
With at least 2 points of Fallen Frost, hold to activate: Hoshimi Miyabi sheaths her blade, enters Shimotsuki Stance and starts to charge up. Every level of charge will consume 2 points of Fallen Frost, up to a maximum of three levels of charge. When releasing , or when Fallen Frost is completely depleted, Hoshimi Miyabi will draw her blade and unleash a powerful slash ahead based on the current charge level, dealing massive Frost DMG. She then exits Shimotsuki Stance. Character is invulnerable during Shimotsuki Stance. Hoshimi Miyabi can have up to 6 points of Fallen Frost. Upon entering the battlefield, Hoshimi Miyabi immediately obtains 3 points of Fallen Frost.
Dodge3
 Dodge
DodgeDodge: Mizutori
Press to activate: A quick dash dodge. Character is invulnerable while using this skill. While dodging, repeatedly press or hold to activate: A dash dodge that covers a lot of ground. Character is invulnerable while using this skill.
Dash Attack: Fuyubachi
Press during a dodge to activate: Slashes enemies in front, dealing Physical DMG.
Dodge Counter: Kan Suzume
Press during a Perfect Dodge to activate: Slashes enemies in front, dealing Frost DMG. Character is invulnerable while using this skill.
Assist3
 Assist
Quick Assist: Dancing Petals
When the on-field character is launched, press to activate: Slashes enemies in front, dealing Frost DMG. Character is invulnerable while using this skill.
Defensive Assist: Drifting Petals
When the on-field character is about to be attacked, press to activate: Parries the enemy's attack, dealing massive Daze. Character is invulnerable while using this skill.
Assist Follow-Up: Falling Petals
Press after a Defensive Assist to activate: Charges and slashes enemies in front, dealing Frost DMG. Character is invulnerable while using this skill.
Special Attack2
 Special Attack
Special Attack: Miyuki
Press to activate: Quickly draws her blade and slashes ahead, dealing Frost DMG. Anti-Interrupt level is increased while using this skill.
EX Special Attack: Hisetsu
With enough Energy, press to activate: Rush forward, unleashing powerful slashes against enemies along the way, dealing massive Frost DMG. Upon activating this skill, gain 2 points of Fallen Frost. Character is invulnerable while using this skill. After using this skill, with enough Energy, press again to activate: Consume extra Energy and unleash a powerful follow-up attack against enemies in front, dealing massive Frost DMG. Upon activating this skill, gain 2 points of Fallen Frost. Character is invulnerable while using this skill
Chain Attack2
 Chain Attack
Chain Attack: Spring's Call
When a Chain Attack is triggered, select the character to activate: Unleashes a powerful slash at enemies in front in a large area, dealing massive Frost DMG. Character is invulnerable while using this skill.
Ultimate: Lingering Snow
When Decibel Rating is at Maximum, press to activate: Unleashes powerful slashes at enemies ahead in a large area then pauses, before unleashing a Finishing Move, dealing massive Frost DMG. Upon activating this skill, gain 3 points of Fallen Frost and increase Ice DMG by 30% for 12s. Character is invulnerable while using this skill.
Core Skill2
 Core Skill
Core Passive: Searing Cold
When Hoshimi Miyabi deals Frost DMG, she applies Icefire to the target, lasting 30s. When accumulating Frost Anomaly Buildup against targets with Icefire, increases Frost Anomaly Buildup Rate by 100% of Hoshimi Miyabi's CRIT Rate, up to a maximum increase of 80%. As Hoshimi Miyabi accumulates Frost Anomaly Buildup, it has its own independent Attribute Anomaly Buildup gauge and triggers Freeze, Shatter, and Frostbite that can react with other Attribute Anomalies, including Ice Attribute Anomaly, to trigger Disorder. When Hoshimi Miyabi applies Frostbite to enemies with Icefire, it will consume the Icefire to trigger Frostburn - Break, dealing Frost DMG equal to 750% of Hoshimi Miyabi's ATK and causing the target to enter the Frostburn state. All squad members accumulate 14% more Anomaly Buildup against enemies under the Frostburn state, but Hoshimi Miyabi cannot reapply Icefire to these enemies. The Frostburn state ends when Frostbite expires. While this state remains active, triggering another Attribute Anomaly will overwrite Frostbite and remove Frostburn. Upon triggering Frostburn - Break, Hoshimi Miyabi obtains 1 point of Fallen Frost. This effect can trigger once every 10s.
Additional Ability: Bask in Frost
When another character in your squad is a Support character or shares the same Faction: Basic Attack: Shimotsuki DMG increases by 60%. When any squad member triggers Disorder, Hoshimi Miyabi obtains 2 points of Fallen Frost and Basic Attack: Shimotsuki during the next Shimotsuki Stance will ignore 30% of the target's Ice RES.
Skill Coefficients by Level
Basic Attack2
Basic Attack: Kazahana
| Lv | Lv.1 | Lv.2 | Lv.3 | Lv.4 | Lv.5 | Lv.6 | Lv.7 | Lv.8 | Lv.9 | Lv.10 | Lv.11 | Lv.12 | Lv.13 | Lv.14 | Lv.15 | Lv.16 |
|---|---|---|---|---|---|---|---|---|---|---|---|---|---|---|---|---|
| 1st-Hit DMG Multiplier | 26.9% | 29.4% | 31.9% | 34.4% | 36.9% | 39.4% | 41.9% | 44.4% | 46.9% | 49.4% | 51.9% | 54.4% | 56.9% | 59.4% | 61.9% | 64.4% |
| 2nd-Hit DMG Multiplier | 29.6% | 32.3% | 35% | 37.7% | 40.4% | 43.1% | 45.8% | 48.5% | 51.2% | 53.9% | 56.6% | 59.3% | 62% | 64.7% | 67.4% | 70.1% |
| 3rd-Hit DMG Multiplier | 62.8% | 68.6% | 74.4% | 80.2% | 86% | 91.8% | 97.6% | 103.4% | 109.2% | 115% | 120.8% | 126.6% | 132.4% | 138.2% | 144% | 149.8% |
| 4th-Hit DMG Multiplier | 96.5% | 105.3% | 114.1% | 122.9% | 131.7% | 140.5% | 149.3% | 158.1% | 166.9% | 175.7% | 184.5% | 193.3% | 202% | 210.9% | 219.7% | 228.5% |
| 5th-Hit DMG Multiplier | 129% | 140.8% | 152.6% | 164.4% | 176.2% | 188% | 199.8% | 211.6% | 223.4% | 235.2% | 247% | 258.8% | 270.6% | 282.4% | 294.2% | 306% |
| 1st-Hit Daze Multiplier | 13.5% | 14.2% | 14.9% | 15.6% | 16.3% | 17% | 17.7% | 18.4% | 19.1% | 19.8% | 20.5% | 21.2% | 21.9% | 22.6% | 23.3% | 24% |
| 2nd-Hit Daze Multiplier | 26.9% | 28.2% | 29.5% | 30.8% | 32.1% | 33.4% | 34.7% | 36% | 37.3% | 38.6% | 39.9% | 41.2% | 42.5% | 43.8% | 45.1% | 46.4% |
| 3rd-Hit Daze Multiplier | 46.4% | 48.6% | 50.8% | 53% | 55.2% | 57.4% | 59.6% | 61.8% | 64% | 66.2% | 68.4% | 70.6% | 72.8% | 75% | 77.2% | 79.4% |
| 4th-Hit Daze Multiplier | 82.1% | 85.9% | 89.7% | 93.5% | 97.3% | 101.1% | 104.9% | 108.7% | 112.5% | 116.3% | 120.1% | 123.9% | 127.7% | 131.5% | 135.3% | 139.1% |
| 5th-Hit Daze Multiplier | 131% | 137% | 143% | 149% | 155% | 161% | 167% | 173% | 179% | 185% | 191% | 197% | 203% | 209% | 215% | 221% |
Basic Attack: Shimotsuki
| Lv | Lv.1 | Lv.2 | Lv.3 | Lv.4 | Lv.5 | Lv.6 | Lv.7 | Lv.8 | Lv.9 | Lv.10 | Lv.11 | Lv.12 | Lv.13 | Lv.14 | Lv.15 | Lv.16 |
|---|---|---|---|---|---|---|---|---|---|---|---|---|---|---|---|---|
| Charge Level One Slash DMG Multiplier | 454.7% | 496.1% | 537.5% | 578.9% | 620.3% | 661.7% | 703.1% | 744.5% | 785.9% | 827.3% | 868.7% | 910.1% | 951.5% | 992.9% | 1034.3% | 1075.7% |
| Charge Level Two Slash DMG Multiplier | 858.1% | 936.2% | 1014.3% | 1092.4% | 1170.5% | 1248.6% | 1326.7% | 1404.8% | 1482.9% | 1561% | 1639.1% | 1717.2% | 1795.3% | 1873.4% | 1951.5% | 2029.6% |
| Charge Level Three Slash DMG Multiplier | 2141.1% | 2335.8% | 2530.5% | 2725.2% | 2919.9% | 3114.6% | 3309.3% | 3504% | 3698.7% | 3893.4% | 4088.1% | 4282.8% | 4477.5% | 4672.2% | 4866.9% | 5061.6% |
| Charge Level One Slash Daze Multiplier | 44% | 46% | 48% | 50% | 52% | 54% | 56% | 58% | 60% | 62% | 64% | 66% | 68% | 70% | 72% | 74% |
| Charge Level Two Slash Daze Multiplier | 62.4% | 65.3% | 68.2% | 71.1% | 74% | 76.9% | 79.8% | 82.7% | 85.6% | 88.5% | 91.4% | 94.3% | 97.2% | 100.1% | 103% | 105.9% |
| Charge Level Three Slash Daze Multiplier | 377.8% | 395% | 412.2% | 429.4% | 446.6% | 463.8% | 481% | 498.2% | 515.4% | 532.6% | 549.8% | 567% | 584.2% | 601.4% | 618.6% | 635.8% |
Dodge2
Dash Attack: Fuyubachi
| Lv | Lv.1 | Lv.2 | Lv.3 | Lv.4 | Lv.5 | Lv.6 | Lv.7 | Lv.8 | Lv.9 | Lv.10 | Lv.11 | Lv.12 | Lv.13 | Lv.14 | Lv.15 | Lv.16 |
|---|---|---|---|---|---|---|---|---|---|---|---|---|---|---|---|---|
| DMG Multiplier | 25.8% | 28.2% | 30.6% | 33% | 35.4% | 37.8% | 40.2% | 42.6% | 45% | 47.4% | 49.8% | 52.2% | 54.6% | 57% | 59.4% | 61.8% |
| Daze Multiplier | 12.9% | 13.5% | 14.1% | 14.7% | 15.3% | 15.9% | 16.5% | 17.1% | 17.7% | 18.3% | 18.9% | 19.5% | 20.1% | 20.7% | 21.3% | 21.9% |
Dodge Counter: Kan Suzume
| Lv | Lv.1 | Lv.2 | Lv.3 | Lv.4 | Lv.5 | Lv.6 | Lv.7 | Lv.8 | Lv.9 | Lv.10 | Lv.11 | Lv.12 | Lv.13 | Lv.14 | Lv.15 | Lv.16 |
|---|---|---|---|---|---|---|---|---|---|---|---|---|---|---|---|---|
| DMG Multiplier | 245.9% | 268.3% | 290.7% | 313.1% | 335.5% | 357.9% | 380.3% | 402.7% | 425.1% | 447.5% | 469.9% | 492.3% | 514.7% | 537.1% | 559.5% | 581.9% |
| Daze Multiplier | 214.5% | 224.3% | 234.1% | 243.9% | 253.7% | 263.5% | 273.3% | 283.1% | 292.9% | 302.7% | 312.5% | 322.3% | 332.1% | 341.9% | 351.7% | 361.5% |
Assist3
Quick Assist: Dancing Petals
| Lv | Lv.1 | Lv.2 | Lv.3 | Lv.4 | Lv.5 | Lv.6 | Lv.7 | Lv.8 | Lv.9 | Lv.10 | Lv.11 | Lv.12 | Lv.13 | Lv.14 | Lv.15 | Lv.16 |
|---|---|---|---|---|---|---|---|---|---|---|---|---|---|---|---|---|
| DMG Multiplier | 104.5% | 114% | 123.5% | 133% | 142.5% | 152% | 161.5% | 171% | 180.5% | 190% | 199.5% | 209% | 218.5% | 228% | 237.5% | 247% |
| Daze Multiplier | 104.5% | 109.3% | 114.1% | 118.9% | 123.7% | 128.5% | 133.3% | 138.1% | 142.9% | 147.7% | 152.5% | 157.3% | 162.1% | 166.9% | 171.7% | 176.5% |
Defensive Assist: Drifting Petals
| Lv | Lv.1 | Lv.2 | Lv.3 | Lv.4 | Lv.5 | Lv.6 | Lv.7 | Lv.8 | Lv.9 | Lv.10 | Lv.11 | Lv.12 | Lv.13 | Lv.14 | Lv.15 | Lv.16 |
|---|---|---|---|---|---|---|---|---|---|---|---|---|---|---|---|---|
| Light Defensive Daze Multiplier | 271.3% | 283.7% | 296.1% | 308.5% | 320.9% | 333.3% | 345.7% | 358.1% | 370.5% | 382.9% | 395.3% | 407.7% | 420.1% | 432.5% | 444.9% | 457.3% |
| Heavy Defensive Daze Multiplier | 342.8% | 358.4% | 374% | 389.6% | 405.2% | 420.8% | 436.4% | 452% | 467.6% | 483.2% | 498.8% | 514.4% | 530% | 545.6% | 561.2% | 576.8% |
| Chain Defensive Daze Multiplier | 128.3% | 134.2% | 140.1% | 146% | 151.9% | 157.8% | 163.7% | 169.6% | 175.5% | 181.4% | 187.3% | 193.2% | 199.1% | 205% | 210.9% | 216.8% |
Assist Follow-Up: Falling Petals
| Lv | Lv.1 | Lv.2 | Lv.3 | Lv.4 | Lv.5 | Lv.6 | Lv.7 | Lv.8 | Lv.9 | Lv.10 | Lv.11 | Lv.12 | Lv.13 | Lv.14 | Lv.15 | Lv.16 |
|---|---|---|---|---|---|---|---|---|---|---|---|---|---|---|---|---|
| DMG Multiplier | 337.8% | 368.6% | 399.4% | 430.2% | 461% | 491.8% | 522.6% | 553.4% | 584.2% | 615% | 645.8% | 676.6% | 707.4% | 738.2% | 769% | 799.8% |
| Daze Multiplier | 291.9% | 305.2% | 318.5% | 331.8% | 345.1% | 358.4% | 371.7% | 385% | 398.3% | 411.6% | 424.9% | 438.2% | 451.5% | 464.8% | 478.1% | 491.4% |
Special Attack2
Special Attack: Miyuki
| Lv | Lv.1 | Lv.2 | Lv.3 | Lv.4 | Lv.5 | Lv.6 | Lv.7 | Lv.8 | Lv.9 | Lv.10 | Lv.11 | Lv.12 | Lv.13 | Lv.14 | Lv.15 | Lv.16 |
|---|---|---|---|---|---|---|---|---|---|---|---|---|---|---|---|---|
| DMG Multiplier | 35.8% | 39.1% | 42.4% | 45.7% | 49% | 52.3% | 55.6% | 58.9% | 62.2% | 65.5% | 68.8% | 72.1% | 75.4% | 78.7% | 82% | 85.3% |
| Daze Multiplier | 35.8% | 37.5% | 39.2% | 40.9% | 42.6% | 44.3% | 46% | 47.7% | 49.4% | 51% | 52.8% | 54.5% | 56.2% | 57.9% | 59.6% | 61.3% |
EX Special Attack: Hisetsu
| Lv | Lv.1 | Lv.2 | Lv.3 | Lv.4 | Lv.5 | Lv.6 | Lv.7 | Lv.8 | Lv.9 | Lv.10 | Lv.11 | Lv.12 | Lv.13 | Lv.14 | Lv.15 | Lv.16 |
|---|---|---|---|---|---|---|---|---|---|---|---|---|---|---|---|---|
| Slash DMG Multiplier | 393.4% | 429.3% | 465.2% | 501.1% | 537% | 572.9% | 608.8% | 644.7% | 680.6% | 716.5% | 752.4% | 788.3% | 824.2% | 860.1% | 896% | 931.9% |
| Follow-Up DMG Multiplier | 483.2% | 527.2% | 571.2% | 615.2% | 659.2% | 703.2% | 747.2% | 791.2% | 835.2% | 879.2% | 923.2% | 967.2% | 1011.2% | 1055.2% | 1099.2% | 1143.2% |
| Slash Daze Multiplier | 321.7% | 336.4% | 351.1% | 365.8% | 380.5% | 395.2% | 409.9% | 424.6% | 439.3% | 454% | 468.7% | 483.4% | 498.1% | 512.8% | 527.5% | 542.2% |
| Follow-Up Daze Multiplier | 405% | 423.5% | 442% | 460.5% | 479% | 497.5% | 516% | 534.5% | 553% | 571.5% | 590% | 608.5% | 627% | 645.5% | 664% | 682.5% |
| Slash Energy Cost | 40 | 40 | 40 | 40 | 40 | 40 | 40 | 40 | 40 | 40 | 40 | 40 | 40 | 40 | 40 | 40 |
| Follow-Up Energy Cost | 40 | 40 | 40 | 40 | 40 | 40 | 40 | 40 | 40 | 40 | 40 | 40 | 40 | 40 | 40 | 40 |
Chain Attack2
Chain Attack: Spring’s Call
| Lv | Lv.1 | Lv.2 | Lv.3 | Lv.4 | Lv.5 | Lv.6 | Lv.7 | Lv.8 | Lv.9 | Lv.10 | Lv.11 | Lv.12 | Lv.13 | Lv.14 | Lv.15 | Lv.16 |
|---|---|---|---|---|---|---|---|---|---|---|---|---|---|---|---|---|
| DMG Multiplier | 628% | 685.3% | 742.6% | 799.9% | 857.2% | 914.5% | 971.8% | 1029.1% | 1086.4% | 1143.7% | 1201% | 1258.3% | 1315.6% | 1372.9% | 1430.2% | 1487.5% |
| Daze Multiplier | 189% | 197.7% | 206.4% | 215.1% | 223.8% | 232.5% | 241.2% | 249.9% | 258.6% | 267.3% | 276% | 284.7% | 293.4% | 302.1% | 310.8% | 319.5% |
Ultimate: Lingering Snow
| Lv | Lv.1 | Lv.2 | Lv.3 | Lv.4 | Lv.5 | Lv.6 | Lv.7 | Lv.8 | Lv.9 | Lv.10 | Lv.11 | Lv.12 | Lv.13 | Lv.14 | Lv.15 | Lv.16 |
|---|---|---|---|---|---|---|---|---|---|---|---|---|---|---|---|---|
| DMG Multiplier | 2388% | 2605.1% | 2882.2% | 3039.3% | 3256.4% | 3473.5% | 3690.6% | 3907.7% | 4124.8% | 4341.9% | 4559% | 4776.1% | 4993.2% | 5210.3% | 5427.4% | 5644.5% |
| Daze Multiplier | 370.4% | 387.3% | 404.1% | 421.1% | 438% | 454.9% | 471.8% | 488.7% | 505.6% | 522.5% | 539.4% | 556.3% | 573.2% | 590.1% | 607% | 623.9% |
Core Skill1
Core Passive: Searing Cold
| Lv | Lv.1 | Lv.2 (A) | Lv.3 (B) | Lv.4 (C) | Lv.5 (D) | Lv.6 (E) | Lv.7 (F) |
|---|---|---|---|---|---|---|---|
| Frostburn - Break ATK Scaling | 750% | 875% | 1000% | 1125% | 1250% | 1375% | 1500% |
| Squad Anomaly Buildup Increase Against Frostburn | 14% | 15% | 16% | 17% | 18% | 19% | 20% |
| Anomaly Proficiency | - | +30 | - | +30 | - | +30 | - |
| Base ATK | - | - | +25 | - | +25 | - | +25 |
Mindscapes — how far is worth it?
While in Shimotsuki Stance, every 1 point of Fallen Frost consumed will allow Basic Attack: Shimotsuki to ignore 6% of DEF, stacking up to 6 times and lasting until Shimotsuki Stance ends. When the slash for charge level three of Basic Attack: Shimotsuki hits an enemy under Frostburn, it will immediately remove the Frostburn state and increase all squad members' Anomaly Buildup Rate by 20% for 10s. Miyabi has loved reciting poems about the cold since she was a child. She might not understand them completely, but she still does it every day. Before long, she came to realize their true meaning. She found clarity not on a still and snowy night, but rather upon the battlefield.
Basic Attack: Kazahana and Dodge Counter DMG increases by 30%. Hoshimi Miyabi gains 1 point of Fallen Frost when the final move of the 5th hit of Basic Attack: Kazahana hits an enemy. Upon entering the battlefield, Hoshimi Miyabi immediately obtains 6 points of Fallen Frost and her CRIT Rate increases by 15%. "As goes the sword, so goes the heart." This is a key disciplinary concept of the Hoshimi school of swordsmanship. Defeating the enemy is but the first step on the path to victory. Maintaining constant vigilance at all times is the true way of a warrior.
Basic Attack, Dodge, Assist, Special Attack, and Chain Attack Lv. +2. Miyabi, whose family has a tradition of martial arts, has excellent training habits. Her commitment to swordsmanship practice is unwavering. What? A meeting? She won't be going.
Frostburn - Break DMG increases by 30%. Upon triggering Frostburn - Break, Hoshimi Miyabi generates 250 more Decibels. Reciting poems during the heat of battle can regulate one's respiratory rhythm. Whether it's her mindset or breathing, Miyabi always keeps calm.
Basic Attack, Dodge, Assist, Special Attack, and Chain Attack Lv. +2. The girl arrives at that all too familiar place with flowers, her breath misting and then vanishing into the cold air. Her fingers ghost over that name on the monument. Everything is quiet, like that most silence observer.
During Shimotsuki Stance, Hoshimi Miyabi obtains Polar, which increases Basic Attack: Shimotsuki DMG by 30%. After obtaining Polar, Hoshimi Miyabi will automatically draw her blade and unleash powerful slashes based on the current charge level upon consuming Fallen Frost. Before Fallen Frost is completely depleted, the draw and slashes will not interrupt charging under Shimotsuki Stance. Each occurrence of Shimotsuki Stance can perform up to 3 draws and slashes. The more she battles, the more it becomes evident to outsiders: If there is a god of swordsmanship, it must greatly favor Hoshimi Miyabi.
Stats & Materials by Ascension Milestone
| Lv. | Before | After | Materials for this milestone |
|---|---|---|---|
| Lv.1 | HP: - ATK: - DEF: - [Recommended] ATK, CRIT Rate & CRIT DMG: - |
HP: 617 ATK: 127 DEF: 49 [Recommended] ATK, CRIT Rate & CRIT DMG: - |
|
| Lv.10 | HP: 1370 ATK: 196 DEF: 108 [Recommended] ATK, CRIT Rate & CRIT DMG: - |
HP: 1793 ATK: 241 DEF: 141 [Recommended] ATK, CRIT Rate & CRIT DMG: - |
Denny ×24,000
Basic Anomaly Certification Seal ×4
|
| Lv.20 | HP: 2630 ATK: 317 DEF: 207 [Recommended] ATK, CRIT Rate & CRIT DMG: - |
HP: 3054 ATK: 362 DEF: 241 [Recommended] ATK, CRIT Rate & CRIT DMG: - |
Denny ×56,000
Advanced Anomaly Certification Seal ×12
|
| Lv.30 | HP: 3891 ATK: 439 DEF: 307 [Recommended] ATK, CRIT Rate & CRIT DMG: - |
HP: 4314 ATK: 485 DEF: 340 [Recommended] ATK, CRIT Rate & CRIT DMG: - |
Denny ×120,000
Advanced Anomaly Certification Seal ×20
|
| Lv.40 | HP: 5152 ATK: 562 DEF: 407 [Recommended] ATK, CRIT Rate & CRIT DMG: - |
HP: 5576 ATK: 607 DEF: 441 [Recommended] ATK, CRIT Rate & CRIT DMG: - |
Denny ×200,000
Specialized Anomaly Component ×10
|
| Lv.50 | HP: 6413 ATK: 683 DEF: 507 [Recommended] ATK, CRIT Rate & CRIT DMG: - |
HP: 6836 ATK: 728 DEF: 540 [Recommended] ATK, CRIT Rate & CRIT DMG: - |
Denny ×400,000
Specialized Anomaly Component ×20
|
| Lv.60 | HP: - ATK: - DEF: - [Recommended] ATK, CRIT Rate & CRIT DMG: - |
HP: 7673 ATK: 805 DEF: 606 [Recommended] ATK, CRIT Rate & CRIT DMG: - |




Total materials across the whole ascension path
Materials Needed to Lv60



Total Denny for the character alone (ascension + basic skills + core skill A→F): about 1,706,000 Denny — W-Engine and Drive Discs not included.
Voice Actors & Character Info
Background & Lore
More unlocks as Trust with this character increases in-game.
How to read this build page
Every Agent build page has 4 parts: a stat table by level, W-Engine/Drive Disc suggestions, a Mindscape roadmap, and recommended teams. Read them in that order — stats tell you "what you need", gear tells you "where to get it", Mindscape tells you "is it worth pulling", teams tell you "who to pair with". The section below explains how to read each part, and it applies the same way to every character on the site.
How to read the stat table and level
The stat table shows values at the ascension breakpoints (usually the final one, e.g. Lv60) — these are BASE stats with no gear added, useful for comparing Agents or checking whether you've ascended far enough. CRIT Rate and CRIT DMG are shown separately because they set the damage ceiling once Drive Disc substats stack on top. If your real stats are lower than the table, you likely haven't fully ascended or leveled yet — it's not a build mistake.
Why the W-Engine and Drive Disc picks make sense
Most Agents have a "signature" W-Engine designed for their exact role, plus a few cheaper standard-banner substitutes. Missing the signature isn't a dead end — most Agents keep most of their power with a well-matched substitute, just short by some amount of total damage.
- Drive Disc sets (2pc + 4pc) are picked for the set effect that fits that Agent's playstyle (mono-element, Anomaly, stun, and so on).
- Substats follow a priority that changes by role: Attack-type Agents usually chase CRIT Rate/CRIT DMG before ATK%; Anomaly-type Agents add Anomaly Proficiency to that mix; Stun/Support roles often value survivability or energy stats over pure CRIT.
These weights differ per character — follow the exact substat priority table above rather than applying one formula to every role.
Is Mindscape worth chasing
General rule: M0 (no duplicates) already clears the game's hardest content, even for S-rank Agents. Mindscape is a duplicate-fueled upgrade system, and each level costs more resources for a smaller power gain. For most Agents, the best value stop is usually M1–M2 (where some key effects unlock), while M6 is almost always for players chasing the absolute ceiling, not a requirement. Check the Mindscape section in the table above for that specific Agent's numbers.
Skill priority by role
There's no single order for every Agent, but the general pattern by role is:
- Attack: level the main damage skill first (Basic or Special Attack depending on kit), Dash/Dodge last.
- Stun: prioritize whichever skill builds Daze/Stun fastest, since the stun window is where the whole team dumps damage.
- Support: prioritize buff or energy-generating skills over personal damage — this role's value comes from lifting the whole team.
- Anomaly: prioritize the skill that stacks anomaly buildup, since most of the damage comes from the triggered effect, not the direct hit.
Always level the Core Skill steadily alongside the rest — it's a baseline stat that affects the whole rotation, not just one move.
Where to dig deeper
This section only teaches you how to read the page — for deeper comparisons, use the dedicated tools:
- Tier list to see where this Agent stands against the full roster.
- Teams for full in-game comps, including Bangboo and rotation order.
- Disc score to check how your current gear scores against the benchmark.
Miyabi FAQ
What is the best W-Engine for Miyabi?
Miyabi performs best with Hailstorm Shrine. See alternatives and required stats in the Gear section above.
Is Miyabi worth pulling?
Worth pulling and maxing out: Miyabi is one of the strongest DPS in the game, blending Anomaly and CRIT so she's both easy to play and high-ceiling. Her only weakness is a heavy reliance on her signature Hailstorm Shrine and the need for solid CRIT investment to hit full power; with her own engine she's nearly unrivaled in the Ice role.
What is the best team for Miyabi?
Miyabi works best in the Standard Mono Ice team. Full members and rotation are in the Teams section.
Who voices Miyabi in Zenless Zone Zero?
Miyabi (faction Hollow Special Operations Section 6, birthday Jun 19) is voiced according to the official credits published on the HoYoverse Wiki. See the full English/Japanese/Korean/Chinese voice actor list in the "Voice Actors & Character Info" block above — this data is pulled directly from the official wiki, not guessed.
Which Mindscape of Miyabi is worth investing in?
Miyabi has 6 Mindscape tiers (M1-M6), each unlocking its own effect detailed in the "Mindscape" block above (official wording). Mindscapes cost Mindscape Cinema currency farmed from limited banners, so weigh it against your budget — F2P players usually stop at M0-M1 and prioritize W-Engine and Drive Discs before pushing Mindscape higher.
How much Denny and how many materials to level Miyabi to Lv60?
Leveling Miyabi to max Lv60 (ascension + basic skills to 12 + core skill A→F) costs roughly 1,706,000 Denny, plus role-specific ascension materials, attribute-specific skill chips, high-dimensional data, and weekly boss drops — see the full list with exact quantities in the "Materials Needed" block above, sourced from the game's official leveling tables.
 Understand the mechanics behind this
 Drive Disc Scorer→